


1. Volley简介
我们平时在开发Android应用的时候不可避免地都需要用到网络技术,而多数情况下应用程序都会使用HTTP协议来发送和接收网络数据。Android系统中主要提供了两种方式来进行HTTP通信,HttpURLConnection和HttpClient,几乎在任何项目的代码中我们都能看到这两个类的身影,使用率非常高。
不过HttpURLConnection和HttpClient的用法还是稍微有些复杂的,如果不进行适当封装的话,很容易就会写出不少重复代码。于是乎,一些Android网络通信框架也就应运而生,比如说AsyncHttpClient,它把HTTP所有的通信细节全部封装在了内部,我们只需要简单调用几行代码就可以完成通信操作了。再比如Universal-Image-Loader,它使得在界面上显示网络图片的操作变得极度简单,开发者不用关心如何从网络上获取图片,也不用关心开启线程、回收图片资源等细节,Universal-Image-Loader已经把一切都做好了。
Android开发团队也是意识到了有必要将HTTP的通信操作再进行简单化,于是在2013年Google I/O大会上推出了一个新的网络通信框架——Volley。Volley可是说是把AsyncHttpClient和Universal-Image-Loader的优点集于了一身,既可以像AsyncHttpClient一样非常简单地进行HTTP通信,也可以像Universal-Image-Loader一样轻松加载网络上的图片。除了简单易用之外,Volley在性能方面也进行了大幅度的调整,它的设计目标就是非常适合去进行数据量不大,但通信频繁的网络操作,而对于大数据量的网络操作,比如说下载文件等,Volley的表现就会非常糟糕。
下图所示的这些应用都是属于数据量不大,但网络通信频繁的,因此非常适合使用Volley。

2. 下载Volley
介绍了这么多理论的东西,下面我们就准备开始进行实战了,首先需要将Volley的jar包准备好,如果你的电脑上装有Git,可以使用如下命令下载Volley的源码:
- git clone https://android.googlesource.com/platform/frameworks/volley
新建一个Android项目,将volley.jar文件复制到libs目录下,这样准备工作就算是做好了。
3. StringRequest的用法
前面已经说过,Volley的用法非常简单,那么我们就从最基本的HTTP通信开始学习吧,即发起一条HTTP请求,然后接收HTTP响应。首先需要获取到一个RequestQueue对象,可以调用如下方法获取到:
- RequestQueue mQueue = Volley.newRequestQueue(context);
接下来为了要发出一条HTTP请求,我们还需要创建一个StringRequest对象,如下所示:
- StringRequest stringRequest = new StringRequest("http://www.baidu.com",
- new Response.Listener<String>() {
- @Override
- public void onResponse(String response) {
- Log.d("TAG", response);
- }
- }, new Response.ErrorListener() {
- @Override
- public void onErrorResponse(VolleyError error) {
- Log.e("TAG", error.getMessage(), error);
- }
- });
最后,将这个StringRequest对象添加到RequestQueue里面就可以了,如下所示:
- mQueue.add(stringRequest);
另外,由于Volley是要访问网络的,因此不要忘记在你的AndroidManifest.xml中添加如下权限:
- <uses-permission android:name="android.permission.INTERNET" />
好了,就是这么简单,如果你现在运行一下程序,并发出这样一条HTTP请求,就会看到LogCat中会打印出如下图所示的数据。
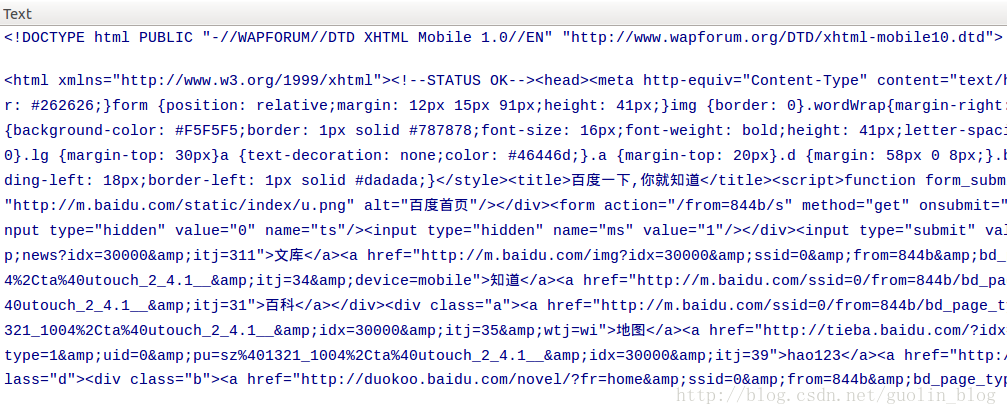
没错,百度返回给我们的就是这样一长串的HTML代码,虽然我们看起来会有些吃力,但是浏览器却可以轻松地对这段HTML代码进行解析,然后将百度的首页展现出来。
这样的话,一个最基本的HTTP发送与响应的功能就完成了。你会发现根本还没写几行代码就轻易实现了这个功能,主要就是进行了以下三步操作:
1. 创建一个RequestQueue对象。
2. 创建一个StringRequest对象。
3. 将StringRequest对象添加到RequestQueue里面。
不过大家都知道,HTTP的请求类型通常有两种,GET和POST,刚才我们使用的明显是一个GET请求,那么如果想要发出一条POST请求应该怎么做呢?StringRequest中还提供了另外一种四个参数的构造函数,其中第一个参数就是指定请求类型的,我们可以使用如下方式进行指定:
- StringRequest stringRequest = new StringRequest(Method.POST, url, listener, errorListener);
- StringRequest stringRequest = new StringRequest(Method.POST, url, listener, errorListener) {
- @Override
- protected Map<String, String> getParams() throws AuthFailureError {
- Map<String, String> map = new HashMap<String, String>();
- map.put("params1", "value1");
- map.put("params2", "value2");
- return map;
- }
- };
4. JsonRequest的用法
学完了最基本的StringRequest的用法,我们再来进阶学习一下JsonRequest的用法。类似于StringRequest,JsonRequest也是继承自Request类的,不过由于JsonRequest是一个抽象类,因此我们无法直接创建它的实例,那么只能从它的子类入手了。JsonRequest有两个直接的子类,JsonObjectRequest和JsonArrayRequest,从名字上你应该能就看出它们的区别了吧?一个是用于请求一段JSON数据的,一个是用于请求一段JSON数组的。
至于它们的用法也基本上没有什么特殊之处,先new出一个JsonObjectRequest对象,如下所示:
- JsonObjectRequest jsonObjectRequest = new JsonObjectRequest("http://m.weather.com.cn/data/101010100.html", null,
- new Response.Listener<JSONObject>() {
- @Override
- public void onResponse(JSONObject response) {
- Log.d("TAG", response.toString());
- }
- }, new Response.ErrorListener() {
- @Override
- public void onErrorResponse(VolleyError error) {
- Log.e("TAG", error.getMessage(), error);
- }
- });
最后再将这个JsonObjectRequest对象添加到RequestQueue里就可以了,如下所示:
- mQueue.add(jsonObjectRequest);
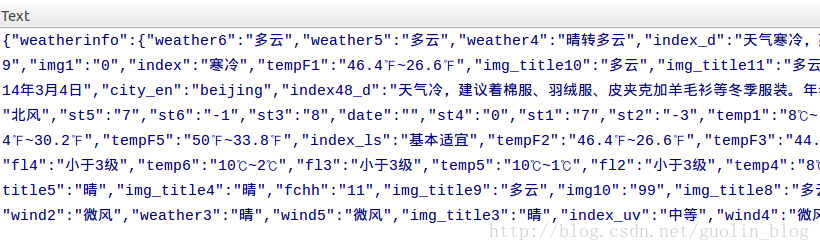
由此可以看出,服务器返回给我们的数据确实是JSON格式的,并且onResponse()方法中携带的参数也正是一个JSONObject对象,之后只需要从JSONObject对象取出我们想要得到的那部分数据就可以了。
你应该发现了吧,JsonObjectRequest的用法和StringRequest的用法基本上是完全一样的,Volley的易用之处也在这里体现出来了,会了一种就可以让你举一反三,因此关于JsonArrayRequest的用法相信已经不需要我再去讲解了吧。
本篇的代码如下:
- package com.ustc.volley;
- import org.json.JSONObject;
- import com.android.volley.RequestQueue;
- import com.android.volley.Response;
- import com.android.volley.VolleyError;
- import com.android.volley.toolbox.JsonObjectRequest;
- import com.android.volley.toolbox.StringRequest;
- import com.android.volley.toolbox.Volley;
- import android.app.Activity;
- import android.os.Bundle;
- import android.util.Log;
- public class MainActivity extends Activity {
- protected static final String TAG = "MainActivity";
- @Override
- protected void onCreate(Bundle savedInstanceState) {
- super.onCreate(savedInstanceState);
- setContentView(R.layout.activity_main);
- // 创建一个RequestQueue对象
- RequestQueue requestQueue = Volley.newRequestQueue(this);
- // 创建一个StringRequest对象
- StringRequest stringRequest = new StringRequest(
- "http://blog.csdn.net/chenfuduo_loveit/article/details/41483265",
- new Response.Listener<String>() {
- @Override
- public void onResponse(String response) {
- Log.i(TAG, response);
- }
- }, new Response.ErrorListener() {
- @Override
- public void onErrorResponse(VolleyError error) {
- Log.e(TAG, error.getMessage(), error);
- }
- });
- // 将StringRequest对象添加到RequestQueue里面
- requestQueue.add(stringRequest);
- // ==================================================================
- JsonObjectRequest jsonObjectRequest = new JsonObjectRequest(
- "http://www.weather.com.cn/data/cityinfo/101010100.html", null,
- new Response.Listener<JSONObject>() {
- @Override
- public void onResponse(JSONObject response) {
- Log.d(TAG, response.toString());
- }
- }, new Response.ErrorListener() {
- @Override
- public void onErrorResponse(VolleyError error) {
- Log.e(TAG, error.getMessage(), error);
- }
- });
- requestQueue.add(jsonObjectRequest);
- }
- }
Volley是将AsyncHttpClient和Universal-Image-Loader的优点集成于一身的一个框架。我们都知道,Universal-Image-Loader具备非常强大的加载网络图片的功能,而使用Volley,我们也可以实现基本类似的效果,并且在性能上也豪不逊色于Universal-Image-Loader,下面我们就来具体学习一下吧。
1. ImageRequest的用法
前面我们已经学习过了StringRequest和JsonRequest的用法,并且总结出了它们的用法都是非常类似的,基本就是进行以下三步操作即可:
1. 创建一个RequestQueue对象。
2. 创建一个Request对象。
3. 将Request对象添加到RequestQueue里面。
其中,StringRequest和JsonRequest都是继承自Request的,所以它们的用法才会如此类似。那么不用多说,今天我们要学习的ImageRequest,相信你从名字上就已经猜出来了,它也是继承自Request的,因此它的用法也是基本相同的,首先需要获取到一个RequestQueue对象,可以调用如下方法获取到:
- RequestQueue mQueue = Volley.newRequestQueue(context);
- ImageRequest imageRequest = new ImageRequest(
- "http://developer.android.com/images/home/aw_dac.png",
- new Response.Listener<Bitmap>() {
- @Override
- public void onResponse(Bitmap response) {
- imageView.setImageBitmap(response);
- }
- }, 0, 0, Config.RGB_565, new Response.ErrorListener() {
- @Override
- public void onErrorResponse(VolleyError error) {
- imageView.setImageResource(R.drawable.default_image);
- }
- });
最后将这个ImageRequest对象添加到RequestQueue里就可以了,如下所示:
- mQueue.add(imageRequest);
2. ImageLoader的用法
如果你觉得ImageRequest已经非常好用了,那我只能说你太容易满足了 ^_^。实际上,Volley在请求网络图片方面可以做到的还远远不止这些,而ImageLoader就是一个很好的例子。ImageLoader也可以用于加载网络上的图片,并且它的内部也是使用ImageRequest来实现的,不过ImageLoader明显要比ImageRequest更加高效,因为它不仅可以帮我们对图片进行缓存,还可以过滤掉重复的链接,避免重复发送请求。
由于ImageLoader已经不是继承自Request的了,所以它的用法也和我们之前学到的内容有所不同,总结起来大致可以分为以下四步:
1. 创建一个RequestQueue对象。
2. 创建一个ImageLoader对象。
3. 获取一个ImageListener对象。
4. 调用ImageLoader的get()方法加载网络上的图片。
下面我们就来按照这个步骤,学习一下ImageLoader的用法吧。首先第一步的创建RequestQueue对象我们已经写过很多遍了,相信已经不用再重复介绍了,那么就从第二步开始学习吧,新建一个ImageLoader对象,代码如下所示:
- ImageLoader imageLoader = new ImageLoader(mQueue, new ImageCache() {
- @Override
- public void putBitmap(String url, Bitmap bitmap) {
- }
- @Override
- public Bitmap getBitmap(String url) {
- return null;
- }
- });
接下来需要获取一个ImageListener对象,代码如下所示:
- ImageListener listener = ImageLoader.getImageListener(imageView,
- R.drawable.default_image, R.drawable.failed_image);
最后,调用ImageLoader的get()方法来加载图片,代码如下所示:
- imageLoader.get("https://img-my.csdn.net/uploads/201404/13/1397393290_5765.jpeg", listener);
get()方法接收两个参数,第一个参数就是图片的URL地址,第二个参数则是刚刚获取到的ImageListener对象。当然,如果你想对图片的大小进行限制,也可以使用get()方法的重载,指定图片允许的最大宽度和高度,如下所示:
- imageLoader.get("https://img-my.csdn.net/uploads/201404/13/1397393290_5765.jpeg",
- listener, 200, 200);
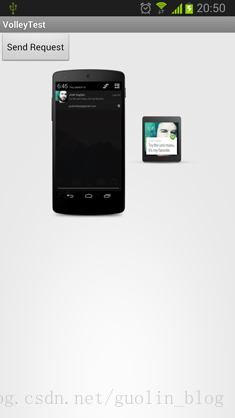
现在运行一下程序并开始加载图片,你将看到ImageView中会先显示一张默认的图片,等到网络上的图片加载完成后,ImageView则会自动显示该图,效果如下图所示。
虽然现在我们已经掌握了ImageLoader的用法,但是刚才介绍的ImageLoader的优点却还没有使用到。为什么呢?因为这里创建的ImageCache对象是一个空的实现,完全没能起到图片缓存的作用。其实写一个ImageCache也非常简单,但是如果想要写一个性能非常好的ImageCache,最好就要借助Android提供的LruCache功能了,如果你对LruCache还不了解,可以参考我之前的一篇博客Android高效加载大图、多图解决方案,有效避免程序OOM。
这里我们新建一个BitmapCache并实现了ImageCache接口,如下所示:
- public class BitmapCache implements ImageCache {
- private LruCache<String, Bitmap> mCache;
- public BitmapCache() {
- int maxSize = 10 * 1024 * 1024;
- mCache = new LruCache<String, Bitmap>(maxSize) {
- @Override
- protected int sizeOf(String key, Bitmap bitmap) {
- return bitmap.getRowBytes() * bitmap.getHeight();
- }
- };
- }
- @Override
- public Bitmap getBitmap(String url) {
- return mCache.get(url);
- }
- @Override
- public void putBitmap(String url, Bitmap bitmap) {
- mCache.put(url, bitmap);
- }
- }
- ImageLoader imageLoader = new ImageLoader(mQueue, new BitmapCache());
3. NetworkImageView的用法
除了以上两种方式之外,Volley还提供了第三种方式来加载网络图片,即使用NetworkImageView。不同于以上两种方式,NetworkImageView是一个自定义控制,它是继承自ImageView的,具备ImageView控件的所有功能,并且在原生的基础之上加入了加载网络图片的功能。NetworkImageView控件的用法要比前两种方式更加简单,大致可以分为以下五步:
1. 创建一个RequestQueue对象。
2. 创建一个ImageLoader对象。
3. 在布局文件中添加一个NetworkImageView控件。4. 在代码中获取该控件的实例。
5. 设置要加载的图片地址。
其中,第一第二步和ImageLoader的用法是完全一样的,因此这里我们就从第三步开始学习了。首先修改布局文件中的代码,在里面加入NetworkImageView控件,如下所示:
- <LinearLayout xmlns:android="http://schemas.android.com/apk/res/android"
- android:layout_width="fill_parent"
- android:layout_height="fill_parent"
- android:orientation="vertical" >
- <Button
- android:id="@+id/button"
- android:layout_width="wrap_content"
- android:layout_height="wrap_content"
- android:text="Send Request" />
- <com.android.volley.toolbox.NetworkImageView
- android:id="@+id/network_image_view"
- android:layout_width="200dp"
- android:layout_height="200dp"
- android:layout_gravity="center_horizontal"
- />
- </LinearLayout>
- networkImageView = (NetworkImageView) findViewById(R.id.network_image_view);
- networkImageView.setDefaultImageResId(R.drawable.default_image);
- networkImageView.setErrorImageResId(R.drawable.failed_image);
- networkImageView.setImageUrl("https://img-my.csdn.net/uploads/201404/13/1397393290_5765.jpeg",
- imageLoader);
好了,就是这么简单,现在重新运行一下程序,你将看到和使用ImageLoader来加载图片一模一样的效果,这里我就不再截图了。
这时有的朋友可能就会问了,使用ImageRequest和ImageLoader这两种方式来加载网络图片,都可以传入一个最大宽度和高度的参数来对图片进行压缩,而NetworkImageView中则完全没有提供设置最大宽度和高度的方法,那么是不是使用NetworkImageView来加载的图片都不会进行压缩呢?
其实并不是这样的,NetworkImageView并不需要提供任何设置最大宽高的方法也能够对加载的图片进行压缩。这是由于NetworkImageView是一个控件,在加载图片的时候它会自动获取自身的宽高,然后对比网络图片的宽度,再决定是否需要对图片进行压缩。也就是说,压缩过程是在内部完全自动化的,并不需要我们关心,NetworkImageView会始终呈现给我们一张大小刚刚好的网络图片,不会多占用任何一点内存,这也是NetworkImageView最简单好用的一点吧。
当然了,如果你不想对图片进行压缩的话,其实也很简单,只需要在布局文件中把NetworkImageView的layout_width和layout_height都设置成wrap_content就可以了,这样NetworkImageView就会将该图片的原始大小展示出来,不会进行任何压缩。
本节的代码(延续上一节的代码如下):
- package com.ustc.volley;
- import org.json.JSONObject;
- import com.android.volley.RequestQueue;
- import com.android.volley.Response;
- import com.android.volley.VolleyError;
- import com.android.volley.toolbox.ImageLoader;
- import com.android.volley.toolbox.ImageLoader.ImageCache;
- import com.android.volley.toolbox.ImageLoader.ImageListener;
- import com.android.volley.toolbox.ImageRequest;
- import com.android.volley.toolbox.JsonObjectRequest;
- import com.android.volley.toolbox.NetworkImageView;
- import com.android.volley.toolbox.StringRequest;
- import com.android.volley.toolbox.Volley;
- import android.app.Activity;
- import android.graphics.Bitmap;
- import android.graphics.Bitmap.Config;
- import android.os.Bundle;
- import android.util.Log;
- import android.widget.ImageView;
- public class MainActivity extends Activity {
- protected static final String TAG = "MainActivity";
- private ImageView logo;
- private ImageView logo1;
- private NetworkImageView logo3;
- @Override
- protected void onCreate(Bundle savedInstanceState) {
- super.onCreate(savedInstanceState);
- setContentView(R.layout.activity_main);
- logo = (ImageView) findViewById(R.id.logo);
- logo1 = (ImageView) findViewById(R.id.logo1);
- logo3 = (NetworkImageView) findViewById(R.id.logo3);
- // 创建一个RequestQueue对象
- RequestQueue requestQueue = Volley.newRequestQueue(this);
- // 创建一个StringRequest对象
- StringRequest stringRequest = new StringRequest(
- "http://blog.csdn.net/chenfuduo_loveit/article/details/41483265",
- new Response.Listener<String>() {
- @Override
- public void onResponse(String response) {
- Log.i(TAG, response);
- }
- }, new Response.ErrorListener() {
- @Override
- public void onErrorResponse(VolleyError error) {
- Log.e(TAG, error.getMessage(), error);
- }
- });
- // 将StringRequest对象添加到RequestQueue里面
- requestQueue.add(stringRequest);
- // ==================================================================
- JsonObjectRequest jsonObjectRequest = new JsonObjectRequest(
- "http://www.weather.com.cn/data/cityinfo/101010100.html", null,
- new Response.Listener<JSONObject>() {
- @Override
- public void onResponse(JSONObject response) {
- Log.d(TAG, response.toString());
- }
- }, new Response.ErrorListener() {
- @Override
- public void onErrorResponse(VolleyError error) {
- Log.e(TAG, error.getMessage(), error);
- }
- });
- requestQueue.add(jsonObjectRequest);
- ImageRequest imageRequest = new ImageRequest(
- "http://www.aiofm.cas.cn/xwzx/rdxw/201411/W020141113546490631941.jpg",
- new Response.Listener<Bitmap>() {
- @Override
- public void onResponse(Bitmap response) {
- logo.setImageBitmap(response);
- }
- }, 0, 0, Config.RGB_565, new Response.ErrorListener() {
- @Override
- public void onErrorResponse(VolleyError error) {
- logo.setImageResource(R.drawable.emoji030);
- }
- });
- requestQueue.add(imageRequest);
- // ===========================================================================
- ImageLoader imageLoader = new ImageLoader(requestQueue, new BitmapCache());
- ImageListener listener= ImageLoader.getImageListener(logo, R.drawable.emoji030, R.drawable.emoji031);
- imageLoader.get("http://www.aiofm.cas.cn/xwzx/rdxw/201411/W020141113546490625243.jpg", listener);
- //==========================================================================
- logo3.setDefaultImageResId(R.drawable.emoji033);
- logo3.setErrorImageResId(R.drawable.emoji032);
- logo3.setImageUrl("http://www.aiofm.cas.cn/xwzx/rdxw/201411/W020141120404518379643.jpg", imageLoader);
- }
- }
- <com.android.volley.toolbox.NetworkImageView
- android:id="@+id/logo3"
- android:layout_width="wrap_content"
- android:layout_height="200dip"
- />
Transmitting Network Data Using Volley(使用Volley框架传输网络数据)
前面看了某大神关于Volley框架的文章,难怪说不要国内的技术文章,看了Google的官方文档,我才知道,心目中的大神还是有很多不足的地方。所以,对着英文,自己学习下。
Volley is an HTTP library that makes networking for Android apps easier and most importantly, faster. Volley is available through the open AOSP repository.
Volley框架是http的library,并且开源在Android Open Source Project上,它使得网络对于Android的app更加的容易、重要和迅速。
Volley offers the following benefits:
- Automatic scheduling of network requests.自动调度网络请求
- Multiple concurrent network connections.多个并发的网络连接
- Transparent disk and memory response caching with standard HTTP cache coherence.使用标准的高速缓存一致性的透明的硬盘和内存响应缓存。(翻译的不知道对不对,不理解这句话)
- Support for request prioritization.支持请求的优先级
- Cancellation request API. You can cancel a single request, or you can set blocks or scopes of requests to cancel.取消请求API。你可以取消一个请求,也可以设置请求取消的块或范围。
- Ease of customization, for example, for retry and backoff.易于定制
- Strong ordering that makes it easy to correctly populate your UI with data fetched asynchronously from the network.强序使得很容易的通过异步方式从网络正确的得到数据,填充到UI界面上。
- Debugging and tracing tools.debug和跟踪的工具。
Volley excels at RPC-type operations used to populate a UI, such as fetching a page of search results as structured data. It integrates easily with any protocol and comes out of the box with support for raw strings, images, and JSON. By providing built-in support for the features you need, Volley frees you from writing boilerplate code and allows you to concentrate on the logic that is specific to your app.
Volley框架擅长于RPC类型(RPC(Remote Procedure Call Protocol)——远程过程调用协议)的操作,这些操作用于填充UI,例如抓取搜索的结果数据。
他可以与任何的协议结合,并且支持原始的字符串,图片,和JSON。通过提供内置的支持,可以让你免去写模板代码,专注于app的逻辑。
Volley is not suitable for large download or streaming operations, since Volley holds all responses in memory during parsing. For large download operations, consider using an alternative like DownloadManager.
Volley框架不适用于大型的下载或者流操作。因为Volley框架在解析的过程中在内存中保持着所有的连接。对于大型的下载操作,建议适用DownloadManager类。
The core Volley library is developed in the open AOSP repository at frameworks/volley and contains the main request dispatch pipeline as well as a set of commonly applicable utilities, available in the Volley "toolbox." The easiest way to add Volley to your project is to clone the Volley repository and set it as a library project.
把Volley的jar包直接导入即可。
Sending a Simple Request
At a high level, you use Volley by creating a RequestQueue and passing it Request objects. The RequestQueue manages worker threads for running the network operations, reading from and writing to the cache, and parsing responses. Requests do the parsing of raw responses and Volley takes care of dispatching the parsed response back to the main thread for delivery.
很大程度上,我们在使用Volley框架的时候,创建一个RequestQueue 对象并把Request 对象传给他。RequestQueue 管理网络操作的线程,这些线程用于从缓存中读取,写入到缓存中,解析请求。Volley调度已解析的请求并交付给主线程。
This lesson describes how to send a request using theVolley.newRequestQueue convenience method, which sets up aRequestQueue for you. See the next lesson, Setting Up a RequestQueue, for information on how to set up a RequestQueueyourself.
第一步:Add the INTERNET Permission
添加权限,使用Volley的第一步是在清单文件中配置权限。
第二步:Use newRequestQueue
Volley provides a convenience method Volley.newRequestQueue that sets up a RequestQueue for you, using default values, and starts the queue. For example:
通过Volley.newRequestQueuesets up a RequestQueue。
- package com.dy.ustc.volley;
- import com.android.volley.Request;
- import com.android.volley.RequestQueue;
- import com.android.volley.Response;
- import com.android.volley.VolleyError;
- import com.android.volley.toolbox.StringRequest;
- import com.android.volley.toolbox.Volley;
- import android.app.Activity;
- import android.os.Bundle;
- import android.widget.TextView;
- public class MainActivity extends Activity {
- private TextView tv_display;
- @Override
- protected void onCreate(Bundle savedInstanceState) {
- super.onCreate(savedInstanceState);
- setContentView(R.layout.activity_main);
- tv_display = (TextView) findViewById(R.id.tv_display);
- // Instantiate the RequestQueue.
- RequestQueue queue = Volley.newRequestQueue(this);
- String url = "http://www.baidu.com";
- StringRequest stringRequest = new StringRequest(Request.Method.GET,
- url, new Response.Listener<String>() {
- @Override
- public void onResponse(String response) {
- tv_display.setText("Response is:" + response);
- }
- }, new Response.ErrorListener() {
- @Override
- public void onErrorResponse(VolleyError error) {
- tv_display.setText("That did not work");
- }
- });
- queue.add(stringRequest);
- }
- }<span style="color:#006600;">
- </span>
得到下面的结果:

Volley always delivers parsed responses on the main thread. Running on the main thread is convenient for populating UI controls with received data, as you can freely modify UI controls directly from your response handler, but it's especially critical to many of the important semantics provided by the library, particularly related to canceling requests.
Volley将已解析的响应提交给主线程。运行在主线程上对于使用接收到的数据来填充UI很方便。你可以直接通过响应自由的修改UI,同时很多重要的语义也是很重要的,特别是与取消请求相关的。
第三步:Send a Request
To send a request, you simply construct one and add it to the RequestQueue with add(), as shown above. Once you add the request it moves through the pipeline, gets serviced, and has its raw response parsed and delivered.
发送一个请求只需要将他构造出来,然后扔进请求队列中即可。如上面的代码。
When you call add(), Volley runs one cache processing thread and a pool of network dispatch threads. When you add a request to the queue, it is picked up by the cache thread and triaged: if the request can be serviced from cache, the cached response is parsed on the cache thread and the parsed response is delivered on the main thread. If the request cannot be serviced from cache, it is placed on the network queue. The first available network thread takes the request from the queue, performs the HTTP transaction, parsse the response on the worker thread, writes the response to cache, and posts the parsed response back to the main thread for delivery.
Note that expensive operations like blocking I/O and parsing/decoding are done on worker threads. You can add a request from any thread, but responses are always delivered on the main thread.
当使用add()方法的时候,Volley runs一个缓存过程的线程和一个网络调度的线程池。当把请求扔进请求队列的时候,通过缓存线程得到,并被触发。
request的生命周期如下:

第四步;Cancel a Request
To cancel a request, call cancel() on your Request object. Once cancelled, Volley guarantees that your response handler will never be called. What this means in practice is that you can cancel all of your pending requests in your activity's onStop() method and you don't have to litter your response handlers with checks forgetActivity() == null, whether onSaveInstanceState() has been called already, or other defensive boilerplate.
To take advantage of this behavior, you would typically have to track all in-flight requests in order to be able to cancel them at the appropriate time. There is an easier way: you can associate a tag object with each request. You can then use this tag to provide a scope of requests to cancel. For example, you can tag all of your requests with the Activity they are being made on behalf of, and call requestQueue.cancelAll(this) from onStop(). Similarly, you could tag all thumbnail image requests in a ViewPager tab with their respective tabs and cancel on swipe to make sure that the new tab isn't being held up by requests from another one.
- <span style="font-size:10px;">package com.dy.ustc.volley;
- import com.android.volley.Request;
- import com.android.volley.RequestQueue;
- import com.android.volley.Response;
- import com.android.volley.VolleyError;
- import com.android.volley.toolbox.StringRequest;
- import com.android.volley.toolbox.Volley;
- import android.app.Activity;
- import android.os.Bundle;
- import android.widget.TextView;
- public class MainActivity extends Activity {
- public static final Object TAG = "MainActivity";
- private TextView tv_display;
- RequestQueue queue;
- @Override
- protected void onCreate(Bundle savedInstanceState) {
- super.onCreate(savedInstanceState);
- setContentView(R.layout.activity_main);
- tv_display = (TextView) findViewById(R.id.tv_display);
- // Instantiate the RequestQueue.
- queue = Volley.newRequestQueue(this);
- String url = "http://www.baidu.com";
- StringRequest stringRequest = new StringRequest(Request.Method.GET,
- url, new Response.Listener<String>() {
- @Override
- public void onResponse(String response) {
- tv_display.setText("Response is:" + response);
- }
- }, new Response.ErrorListener() {
- @Override
- public void onErrorResponse(VolleyError error) {
- tv_display.setText("That did not work");
- }
- });
- stringRequest.setTag(TAG);
- queue.add(stringRequest);
- }
- @Override
- protected void onStop() {
- super.onStop();
- if (queue != null) {
- queue.cancelAll(TAG);
- }
- }
- }</span><span style="font-size:24px;">
- </span>
Setting Up a RequestQueue
The previous lesson showed you how to use the convenience method Volley.newRequestQueue to set up a RequestQueue, taking advantage of Volley's default behaviors. This lesson walks you through the explicit steps of creating a RequestQueue, to allow you to supply your own custom behavior.
This lesson also describes the recommended practice of creating a RequestQueue as a singleton, which makes theRequestQueue last the lifetime of your app.
Volley.newRequestQueue
to set up a
RequestQueue,This lesson通过将RequestQueue作为单例创建。通过这样使得RequestQueue持续应用程序的整个的生命周期。
第一步:
Set Up a Network and Cache
A RequestQueue needs two things to do its job: a network to perform transport of the requests, and a cache to handle caching. There are standard implementations of these available in the Volley toolbox: DiskBasedCache provides a one-file-per-response cache with an in-memory index, and BasicNetwork provides a network transport based on your choice of AndroidHttpClient or HttpURLConnection.
BasicNetwork is Volley's default network implementation. A BasicNetwork must be initialized with the HTTP client your app is using to connect to the network. Typically this is AndroidHttpClient or HttpURLConnection:
- Use
AndroidHttpClientfor apps targeting Android API levels lower than API Level 9 (Gingerbread). Prior to Gingerbread,HttpURLConnectionwas unreliable. For more discussion of this topic, see Android's HTTP Clients. - Use
HttpURLConnectionfor apps targeting Android API Level 9 (Gingerbread) and higher.
DiskBasedCache 提供了在内存索引上的单文件单响应缓存,BasicNetwork 提供了网络传输的需求。基于 AndroidHttpClient or HttpURLConnection.。HttpURLConnection 高于API 9使用。To create an app that runs on all versions of Android, you can check the version of Android the device is running and choose the appropriate HTTP client, for example:
- HttpStack stack;
- ...
- // If the device is running a version >= Gingerbread...
- if (Build.VERSION.SDK_INT >= Build.VERSION_CODES.GINGERBREAD) {
- // ...use HttpURLConnection for stack.
- } else {
- // ...use AndroidHttpClient for stack.
- }
- Network network = new BasicNetwork(stack);
This snippet shows you the steps involved in setting up a
RequestQueue
:
- package com.dy.ustc.volley;
- import com.android.volley.Cache;
- import com.android.volley.Network;
- import com.android.volley.Request;
- import com.android.volley.RequestQueue;
- import com.android.volley.Response;
- import com.android.volley.VolleyError;
- import com.android.volley.toolbox.BasicNetwork;
- import com.android.volley.toolbox.DiskBasedCache;
- import com.android.volley.toolbox.HurlStack;
- import com.android.volley.toolbox.StringRequest;
- import com.android.volley.toolbox.Volley;
- import android.app.Activity;
- import android.os.Bundle;
- import android.widget.TextView;
- public class MainActivity1 extends Activity {
- private TextView tv_display;
- RequestQueue mRequestQueue;
- Cache cache;
- @Override
- protected void onCreate(Bundle savedInstanceState) {
- super.onCreate(savedInstanceState);
- setContentView(R.layout.activity_main);
- tv_display = (TextView) findViewById(R.id.tv_display);
- String url = "http://www.baidu.com";
- // Instantiate the cache
- cache = new DiskBasedCache(getCacheDir(), 1024*1024);
- // Set up the network to use HttpURLConnection as the HTTP client.
- Network network = new BasicNetwork(new HurlStack());
- // Instantiate the RequestQueue with the cache and network.
- mRequestQueue = new RequestQueue(cache, network);
- // Start the queue
- mRequestQueue.start();
- StringRequest stringRequest = new StringRequest(Request.Method.GET,
- url, new Response.Listener<String>() {
- @Override
- public void onResponse(String response) {
- tv_display.setText("Response is:" + response);
- }
- }, new Response.ErrorListener() {
- @Override
- public void onErrorResponse(VolleyError error) {
- tv_display.setText("That did not work");
- }
- });
- mRequestQueue.add(stringRequest);
- }
- }
If you just need to make a one-time request and don't want to leave the thread pool around, you can create the
RequestQueue
wherever you need it and call
stop()
on the
RequestQueue
once your response or error has come back, using the
Volley.newRequestQueue()
method described in
Sending a Simple Request
. But the more common use case is to create the
RequestQueue
as a singleton to keep it running for the lifetime of your app, as described in the next section.
If your application makes constant use of the network, it's probably most efficient to set up a single instance ofRequestQueue that will last the lifetime of your app. You can achieve this in various ways. The recommended approach is to implement a singleton class that encapsulates RequestQueue and other Volley functionality. Another approach is to subclass Application and set up the RequestQueue in Application.onCreate(). But this approach is discouraged; a static singleton can provide the same functionality in a more modular way.
单例类封装了需要的方法,如下的代码。不需要再Application的onCreate()方法中创建请求队列对象了。
A key concept is that the RequestQueue must be instantiated with the Application context, not an Activitycontext. This ensures that the RequestQueue will last for the lifetime of your app, instead of being recreated every time the activity is recreated (for example, when the user rotates the device).
一个关键点:需要使用getApplicationContext,而不是Activity的context,因为getApplicationContext的生命周期和app的生命周期一样,但是Activity的Context生命周期会随着Activity的死亡和终结,随着Activity的重建而重建。比如当用户旋转了屏幕(此时Activity的生命周期会发生改变)
Here is an example of a singleton class that provides RequestQueue and ImageLoader functionality:
- package com.dy.ustc.volley;
- import android.content.Context;
- import android.graphics.Bitmap;
- import android.support.v4.util.LruCache;
- import com.android.volley.Request;
- import com.android.volley.RequestQueue;
- import com.android.volley.toolbox.ImageLoader;
- import com.android.volley.toolbox.ImageLoader.ImageCache;
- import com.android.volley.toolbox.Volley;
- public class MySingleton {
- private static MySingleton mInstance;
- private ImageLoader mImageLoader;
- private RequestQueue mRequestQueue;
- private static Context mCtx;
- private MySingleton(Context context) {
- mCtx = context;
- mRequestQueue = getRequestQueue();
- mImageLoader = new ImageLoader(mRequestQueue, new ImageCache() {
- private final LruCache<String, Bitmap> cache = new LruCache<String, Bitmap>(
- 20);
- @Override
- public void putBitmap(String url, Bitmap bitmap) {
- cache.put(url, bitmap);
- }
- @Override
- public Bitmap getBitmap(String url) {
- return cache.get(url);
- }
- });
- }
- public static synchronized MySingleton getInstance(Context context) {
- if (mInstance == null) {
- mInstance = new MySingleton(context);
- }
- return mInstance;
- }
- public RequestQueue getRequestQueue() {
- if (mRequestQueue == null) {
- mRequestQueue = Volley
- .newRequestQueue(mCtx.getApplicationContext());
- }
- return mRequestQueue;
- }
- public <T> void addToRequestQueue(Request<T> req) {
- getRequestQueue().add(req);
- }
- public ImageLoader getImageLoader() {
- return mImageLoader;
- }
- }
使用:
- package com.dy.ustc.volley;
- import com.android.volley.Request;
- import com.android.volley.RequestQueue;
- import com.android.volley.Response;
- import com.android.volley.VolleyError;
- import com.android.volley.toolbox.StringRequest;
- import android.app.Activity;
- import android.os.Bundle;
- import android.widget.TextView;
- public class MainActivity2 extends Activity {
- private TextView tv_display;
- @Override
- protected void onCreate(Bundle savedInstanceState) {
- super.onCreate(savedInstanceState);
- setContentView(R.layout.activity_main);
- tv_display = (TextView) findViewById(R.id.tv_display);
- String url = "http://www.baidu.com";
- RequestQueue queue = MySingleton.getInstance(
- this.getApplicationContext()).getRequestQueue();
- StringRequest stringRequest = new StringRequest(Request.Method.GET,
- url, new Response.Listener<String>() {
- @Override
- public void onResponse(String response) {
- tv_display.setText("Response is:" + response);
- }
- }, new Response.ErrorListener() {
- @Override
- public void onErrorResponse(VolleyError error) {
- tv_display.setText("That did not work");
- }
- });
- MySingleton.getInstance(this).addToRequestQueue(stringRequest);
- }
- }
Making a Standard Request
This lesson describes how to use the common request types that Volley supports:
StringRequest. Specify a URL and receive a raw string in response. See Setting Up a Request Queue for an example.ImageRequest. Specify a URL and receive an image in response.JsonObjectRequestandJsonArrayRequest(both subclasses ofJsonRequest). Specify a URL and get a JSON object or array (respectively) in response.
Volley offers the following classes for requesting images. These classes layer on top of each other to offer different levels of support for processing images:
ImageRequest—a canned request for getting an image at a given URL and calling back with a decoded bitmap. It also provides convenience features like specifying a size to resize to. Its main benefit is that Volley's thread scheduling ensures that expensive image operations (decoding, resizing) automatically happen on a worker thread.ImageLoader—a helper class that handles loading and caching images from remote URLs.ImageLoaderis a an orchestrator for large numbers ofImageRequests, for example when putting multiple thumbnails in aListView.ImageLoaderprovides an in-memory cache to sit in front of the normal Volley cache, which is important to prevent flickering. This makes it possible to achieve a cache hit without blocking or deferring off the main thread, which is impossible when using disk I/O.ImageLoaderalso does response coalescing, without which almost every response handler would set a bitmap on a view and cause a layout pass per image. Coalescing makes it possible to deliver multiple responses simultaneously, which improves performance.NetworkImageView—builds onImageLoaderand effectively replacesImageViewfor situations where your image is being fetched over the network via URL.NetworkImageViewalso manages canceling pending requests if the view is detached from the hierarchy.
1.ImageRequest---通过给定的URL获取images,调用后返回一个已解码的bitmap。他提供了一些方便的特性,比如重新调整图片的大小。他最好的在于线程调度保证了一些昂贵的操作(比如解码,重调整大小)自动发生在worker thread上。
2.ImageLoader---ImageLoader是一个辅助类,用来处理从远程URL加载和缓存图像的功能。ImageLoader 是一个协调器,用于处理大量数量的ImageRequests.例如将多个缩略图加载到ListView中。ImageLoader provides an in-memory cache(存储器缓存) to sit in front of the normal Volley cache, which is important to prevent flickering(闪烁).这使得在不阻塞或延迟关闭主线程的前提下实现cache hit。ImageLoader 同时有凝聚式的响应,如果没有这些凝聚式的响应,几乎每个响应请求会在view上加载一个bitmap,并且会导致每个图像的布局传递。凝聚式的响应使得同时处理多响应成为可能,这也提高了性能。
3.NetworkImageView---建立在ImageLoader之上,可以有效的替换ImageView,在这种场合下使用:image is being fetched over the network via URL。如果View从层次上分离开来,NetworkImageView还管理取消挂起的请求。
Use ImageRequest
Here is an example of using ImageRequest. It retrieves the image specified by the URL and displays it in the app. Note that this snippet interacts with the RequestQueue through a singleton class
- package com.dy.ustc.volley;
- import com.android.volley.Response;
- import com.android.volley.VolleyError;
- import com.android.volley.toolbox.ImageRequest;
- import android.app.Activity;
- import android.graphics.Bitmap;
- import android.os.Bundle;
- import android.view.Window;
- import android.widget.ImageView;
- import android.widget.Toast;
- public class MainActivity3 extends Activity {
- private ImageView mImageView;
- @Override
- protected void onCreate(Bundle savedInstanceState) {
- super.onCreate(savedInstanceState);
- requestWindowFeature(Window.FEATURE_NO_TITLE);
- setContentView(R.layout.activity_main);
- mImageView = (ImageView) findViewById(R.id.tv_display);
- String url = "http://g.hiphotos.baidu.com/album/w=2048;q=75/sign=566d52a4bd3eb13544c7b0bb922693a2/6f061d950a7b0208ad9341ad63d9f2d3572cc820.jpg";
- // Retrieves an image specified by the URL, displays it in the UI.
- ImageRequest request = new ImageRequest(url,
- new Response.Listener<Bitmap>() {
- @Override
- public void onResponse(Bitmap bitmap) {
- mImageView.setImageBitmap(bitmap);
- }
- }, 0, 0, null, new Response.ErrorListener() {
- @Override
- public void onErrorResponse(VolleyError error) {
- Toast.makeText(MainActivity3.this, "err", 0).show();
- }
- });
- // Access the RequestQueue through your singleton class.
- MySingleton.getInstance(this).addToRequestQueue(request);
- }
- }

Use ImageLoader and NetworkImageView
You can use ImageLoader and NetworkImageView in concert to efficiently manage the display of multiple images, such as in a ListView. In your layout XML file, you use NetworkImageView in much the same way you would useImageView, for example:
- <com.android.volley.toolbox.NetworkImageView
- android:id="@+id/networkImageView"
- android:layout_width="150dp"
- android:layout_height="170dp"
- android:layout_centerHorizontal="true" />
- package com.dy.ustc.volley;
- import com.android.volley.toolbox.ImageLoader;
- import android.app.Activity;
- import android.os.Bundle;
- import android.view.Window;
- import android.widget.ImageView;
- public class MainActivity3 extends Activity {
- private ImageView mImageView;
- private ImageLoader mImageLoader;
- private static final String IMAGE_URL = "http://g.hiphotos.baidu.com/album/w=2048;q=75/sign=35f2f91a500fd9f9a01752691115ef5b/71cf3bc79f3df8dc0f0a59f7cc11728b471028a5.jpg";
- @Override
- protected void onCreate(Bundle savedInstanceState) {
- super.onCreate(savedInstanceState);
- requestWindowFeature(Window.FEATURE_NO_TITLE);
- setContentView(R.layout.activity_main);
- mImageView = (ImageView) findViewById(R.id.tv_display);
- mImageLoader = MySingleton.getInstance(this).getImageLoader();
- mImageLoader.get(IMAGE_URL, ImageLoader.getImageListener(mImageView, R.drawable.ic_launcher, R.drawable.ic_launcher));
- }
- }

However, NetworkImageView can do this for you if all you're doing is populating an ImageView. For example:
- package com.dy.ustc.volley;
- import com.android.volley.toolbox.ImageLoader;
- import com.android.volley.toolbox.NetworkImageView;
- import android.app.Activity;
- import android.os.Bundle;
- import android.view.Window;
- public class MainActivity5 extends Activity {
- private NetworkImageView mImageView;
- private ImageLoader mImageLoader;
- private static final String IMAGE_URL = "http://d.hiphotos.baidu.com/album/w=2048;q=75/sign=c6e0240a113853438ccf8021a72b8b0f/d31b0ef41bd5ad6e2e0eb38c80cb39dbb7fd3ce5.jpg";
- @Override
- protected void onCreate(Bundle savedInstanceState) {
- super.onCreate(savedInstanceState);
- requestWindowFeature(Window.FEATURE_NO_TITLE);
- setContentView(R.layout.activity_main);
- mImageView = (NetworkImageView) findViewById(R.id.tv_display);
- // Get the ImageLoader through your singleton class.
- mImageLoader = MySingleton.getInstance(this).getImageLoader();
- // Set the URL of the image that should be loaded into this view, and
- // specify the ImageLoader that will be used to make the request.
- mImageView.setImageUrl(IMAGE_URL, mImageLoader);
- }
- }

RequestQueue
and the
ImageLoader
through a singleton class, as described in
Setting Up a RequestQueue
. This approach ensures that your app creates single instances of these classes that last the lifetime of your app. The reason that this is important for
ImageLoader
(the helper class that handles loading and caching images) is that the main function of the in-memory cache is to allow for flickerless rotation. Using a singleton pattern allows the bitmap cache to outlive the activity. If instead you create the
ImageLoader
in an activity, the
ImageLoader
would be recreated along with the activity every time the user rotates the device. This would cause flickering.
Example LRU cache
The Volley toolbox provides a standard cache implementation via the DiskBasedCache class. This class caches files directly onto the hard disk in the specified directory. But to use ImageLoader, you should provide a custom in-memory LRU bitmap cache that implements the ImageLoader.ImageCache interface. You may want to set up your cache as a singleton; for more discussion of this topic, see Setting Up a RequestQueue.
Here is a sample implementation for an in-memory LruBitmapCache class. It extends the LruCache class and implements the ImageLoader.ImageCache interface:
- package com.dy.ustc.volley;
- import android.content.Context;
- import android.graphics.Bitmap;
- import android.support.v4.util.LruCache;
- import android.util.DisplayMetrics;
- import com.android.volley.toolbox.ImageLoader.ImageCache;
- public class LruBitmapCache extends LruCache<String, Bitmap> implements ImageCache {
- public LruBitmapCache(int maxSize) {
- super(maxSize);
- }
- public LruBitmapCache(Context ctx) {
- this(getCacheSize(ctx));
- }
- @Override
- protected int sizeOf(String key, Bitmap value) {
- return value.getRowBytes() * value.getHeight();
- }
- @Override
- public Bitmap getBitmap(String url) {
- return get(url);
- }
- @Override
- public void putBitmap(String url, Bitmap bitmap) {
- put(url, bitmap);
- }
- // Returns a cache size equal to approximately three screens worth of images.
- public static int getCacheSize(Context ctx){
- DisplayMetrics displayMetrics = ctx.getResources().getDisplayMetrics();
- int screenWidth = displayMetrics.widthPixels;
- int screenHeight = displayMetrics.heightPixels;
- // 4 bytes per pixel
- int screenBytes = screenWidth * screenHeight * 4;
- return screenBytes * 3;
- }
- }
调用:
- package com.dy.ustc.volley;
- import com.android.volley.RequestQueue;
- import com.android.volley.toolbox.ImageLoader;
- import com.android.volley.toolbox.NetworkImageView;
- import android.app.Activity;
- import android.os.Bundle;
- import android.view.Window;
- import android.widget.ImageView;
- public class MainActivity6 extends Activity {
- private NetworkImageView mImageView;
- private ImageLoader mImageLoader;
- private RequestQueue queue;
- public static final String IMAGE_URL = "http://g.hiphotos.baidu.com/album/w=2048;q=75/sign=22f2aaadfaedab6474724ac0c30e94b2/9213b07eca8065388a2a707596dda144ac348290.jpg";
- @Override
- protected void onCreate(Bundle savedInstanceState) {
- super.onCreate(savedInstanceState);
- requestWindowFeature(Window.FEATURE_NO_TITLE);
- setContentView(R.layout.activity_main);
- queue = MySingleton.getInstance(
- this.getApplicationContext()).getRequestQueue();
- mImageView = (NetworkImageView) findViewById(R.id.tv_display);
- mImageLoader = new ImageLoader(queue, new LruBitmapCache(LruBitmapCache.getCacheSize(getApplicationContext())));
- // Set the URL of the image that should be loaded into this view, and
- // specify the ImageLoader that will be used to make the request.
- mImageView.setImageUrl(IMAGE_URL, mImageLoader);
- }
- }
RequestQueue要通过单例类实例化,否则会NPE异常。

Request JSON
Volley provides the following classes for JSON requests:
JsonArrayRequest—A request for retrieving aJSONArrayresponse body at a given URL.JsonObjectRequest—A request for retrieving aJSONObjectresponse body at a given URL, allowing for an optionalJSONObjectto be passed in as part of the request body.
Both classes are based on the common base class JsonRequest. You use them following the same basic pattern you use for other types of requests. For example, this snippet fetches a JSON feed and displays it as text in the UI:
- package com.dy.ustc.volley;
- import org.json.JSONObject;
- import com.android.volley.Request;
- import com.android.volley.Response;
- import com.android.volley.VolleyError;
- import com.android.volley.toolbox.JsonObjectRequest;
- import android.app.Activity;
- import android.os.Bundle;
- import android.view.Window;
- import android.widget.TextView;
- public class MainActivity7 extends Activity {
- private TextView tv_display;
- String url = "http://www.weather.com.cn/data/cityinfo/101010100.html";
- @Override
- protected void onCreate(Bundle savedInstanceState) {
- super.onCreate(savedInstanceState);
- requestWindowFeature(Window.FEATURE_NO_TITLE);
- setContentView(R.layout.activity_main);
- tv_display = (TextView) findViewById(R.id.tv_display);
- JsonObjectRequest jsonObjectRequest = new JsonObjectRequest(
- Request.Method.GET, url, null,
- new Response.Listener<JSONObject>() {
- @Override
- public void onResponse(JSONObject response) {
- tv_display.setText(response.toString());
- }
- }, new Response.ErrorListener() {
- @Override
- public void onErrorResponse(VolleyError error) {
- tv_display.setText("错误");
- }
- });
- MySingleton.getInstance(this).addToRequestQueue(jsonObjectRequest);
- }
- }

Implementing a Custom Request
Write a Custom Request
Most requests have ready-to-use implementations in the toolbox; if your response is a string, image, or JSON, you probably won't need to implement a custom
Request
.
For cases where you do need to implement a custom request, this is all you need to do:
- Extend the
Request<T>class, where<T>represents the type of parsed response the request expects. So if your parsed response is a string, for example, create your custom request by extendingRequest<String>. See the Volley toolbox classesStringRequestandImageRequestfor examples of extendingRequest<T>. - Implement the abstract methods
parseNetworkResponse()anddeliverResponse(), described in more detail below.
Request<T> 类,T可以是String,等等;
parseNetworkResponse() and deliverResponse()
parseNetworkResponse
A Response encapsulates a parsed response for delivery, for a given type (such as string, image, or JSON). Here is a sample implementation of parseNetworkResponse():
- @Override
- protected Response<T> parseNetworkResponse(
- NetworkResponse response) {
- try {
- String json = new String(response.data,
- HttpHeaderParser.parseCharset(response.headers));
- return Response.success(gson.fromJson(json, clazz),
- HttpHeaderParser.parseCacheHeaders(response));
- }
- // handle errors
- ...
- }
Note the following:
parseNetworkResponse()takes as its parameter aNetworkResponse, which contains the response payload as a byte[], HTTP status code, and response headers.- Your implementation must return a
Response<T>, which contains your typed response object and cache metadata or an error, such as in the case of a parse failure.
If your protocol has non-standard cache semantics, you can build a Cache.Entry yourself, but most requests are fine with something like this:
- return Response.success(myDecodedObject,
- HttpHeaderParser.parseCacheHeaders(response));
parseNetworkResponse()
from a worker thread. This ensures that expensive parsing operations, such as decoding a JPEG into a Bitmap, don't block the UI thread.
deliverResponse
Volley calls you back on the main thread with the object you returned in parseNetworkResponse(). Most requests invoke a callback interface here, for example:
- protected void deliverResponse(T response) {
- listener.onResponse(response);
Example: GsonRequest
Gson is a library for converting Java objects to and from JSON using reflection. You can define Java objects that have the same names as their corresponding JSON keys, pass Gson the class object, and Gson will fill in the fields for you. Here's a complete implementation of a Volley request that uses Gson for parsing:
本案例实现天气预报。- {"weatherinfo":{"city":"厦门","city_en":"xiamen","date_y":"2014年12月6日","date":"十月十五","week":"星期六","fchh":"11","cityid":"101230201","temp1":"19℃~12℃","temp2":"20℃~13℃","temp3":"21℃~13℃","temp4":"19℃~14℃","temp5":"20℃~15℃","temp6":"21℃~15℃","tempF1":"66.2℉~53.6℉","tempF2":"68℉~55.4℉","tempF3":"69.8℉~55.4℉","tempF4":"66.2℉~57.2℉","tempF5":"68℉~59℉","tempF6":"69.8℉~59℉","weather1":"多云","weather2":"多云","weather3":"多云","weather4":"多云","weather5":"多云","weather6":"多云","img1":"1","img2":"99","img3":"1","img4":"99","img5":"1","img6":"99","img7":"1","img8":"99","img9":"1","img10":"99","img11":"1","img12":"99","img_single":"1","img_title1":"多云","img_title2":"多云","img_title3":"多云","img_title4":"多云","img_title5":"多云","img_title6":"多云","img_title7":"多云","img_title8":"多云","img_title9":"多云","img_title10":"多云","img_title11":"多云","img_title12":"多云","img_title_single":"多云","wind1":"微风","wind2":"微风","wind3":"微风","wind4":"微风","wind5":"微风","wind6":"微风","fx1":"微风","fx2":"微风","fl1":"小于3级","fl2":"小于3级","fl3":"小于3级","fl4":"小于3级","fl5":"小于3级","fl6":"小于3级","index":"较舒适","index_d":"建议着薄外套、开衫牛仔衫裤等服装。年老体弱者应适当添加衣物,宜着夹克衫、薄毛衣等。","index48":"","index48_d":"","index_uv":"弱","index48_uv":"","index_xc":"较适宜","index_tr":"适宜","index_co":"舒适","st1":"19","st2":"12","st3":"20","st4":"13","st5":"21","st6":"13","index_cl":"较适宜","index_ls":"适宜","index_ag":"极不易发"}}
定义java bean类:
- package com.dy.ustc.volley;
- public class WeatherInfo {
- private String city;
- private String temp1;
- private String date_y;
- public String getCity() {
- return city;
- }
- public void setCity(String city) {
- this.city = city;
- }
- public String getTemp1() {
- return temp1;
- }
- public void setTemp1(String temp1) {
- this.temp1 = temp1;
- }
- public String getDate_y() {
- return date_y;
- }
- public void setDate_y(String date_y) {
- this.date_y = date_y;
- }
- }
- package com.dy.ustc.volley;
- public class Weather {
- private WeatherInfo weatherinfo;
- public WeatherInfo getWeatherinfo() {
- return weatherinfo;
- }
- public void setWeatherinfo(WeatherInfo weatherinfo) {
- this.weatherinfo = weatherinfo;
- }
- }
布局:
- <RelativeLayout xmlns:android="http://schemas.android.com/apk/res/android"
- xmlns:tools="http://schemas.android.com/tools"
- android:layout_width="match_parent"
- android:layout_height="match_parent"
- android:background="@drawable/txt_theme36" >
- <TextView
- android:id="@+id/tv_city"
- android:layout_width="wrap_content"
- android:layout_height="wrap_content"
- android:layout_marginTop="150dp"
- android:layout_centerInParent="true"
- android:text="合肥"
- android:textSize="30dp" />
- <TextView
- android:id="@+id/tv_temp"
- android:layout_width="wrap_content"
- android:layout_height="wrap_content"
- android:layout_below="@+id/tv_city"
- android:gravity="center"
- android:text="温度"
- android:textSize="30dp" />
- <TextView
- android:id="@+id/tv_time"
- android:layout_width="wrap_content"
- android:layout_height="wrap_content"
- android:layout_below="@+id/tv_temp"
- android:gravity="center"
- android:text="时间"
- android:textSize="30dp" />
- </RelativeLayout>
自定义的GsonRequest:
- package com.dy.ustc.volley;
- import com.android.volley.RequestQueue;
- import com.android.volley.Response;
- import com.android.volley.VolleyError;
- import android.app.Activity;
- import android.os.Bundle;
- import android.util.Log;
- import android.view.Window;
- import android.widget.TextView;
- public class MainActivity8 extends Activity {
- private TextView tv_city;
- private TextView tv_temp;
- private TextView tv_time;
- RequestQueue queue;
- @Override
- protected void onCreate(Bundle savedInstanceState) {
- super.onCreate(savedInstanceState);
- requestWindowFeature(Window.FEATURE_NO_TITLE);
- setContentView(R.layout.activity_main);
- tv_city = (TextView) findViewById(R.id.tv_city);
- tv_temp = (TextView) findViewById(R.id.tv_temp);
- tv_time = (TextView) findViewById(R.id.tv_time);
- GsonRequest<Weather> gsonRequest = new GsonRequest<Weather>(
- "http://m.weather.com.cn/atad/101220101.html",
- Weather.class, new Response.Listener<Weather>() {
- @Override
- public void onResponse(Weather weather) {
- WeatherInfo weatherInfo = weather.getWeatherinfo();
- tv_city.setText("城市:" + weatherInfo.getCity());
- tv_temp.setText("温度:" + weatherInfo.getTemp1());
- tv_time.setText("日期:" + weatherInfo.getDate_y());
- }
- }, new Response.ErrorListener() {
- @Override
- public void onErrorResponse(VolleyError error) {
- Log.e("TAG", error.getMessage(), error);
- }
- });
- MySingleton.getInstance(this).addToRequestQueue(gsonRequest);
- }
- }
效果图:


 148
148

 被折叠的 条评论
为什么被折叠?
被折叠的 条评论
为什么被折叠?
 到【灌水乐园】发言


