


转载请标明出处:http://www.jianshu.com/p/ba562173187e
本文出自:【江清清博客-代号独狼】
(一).前言:
前面我们已经对于AndroidAnnotations注入框架的基本介绍项目配置和运行原理做了讲解,今天我们开始具体学习怎么样使用这个框架。
FastDev4Android框架项目地址:https://github.com/jiangqqlmj/FastDev4Android
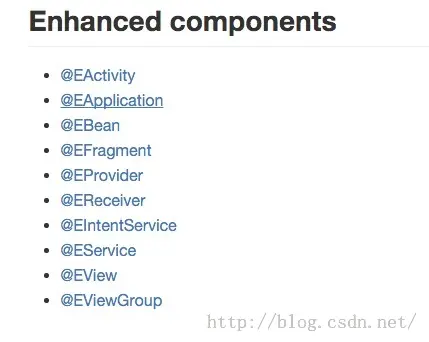
本博客已完成下面相关注解方式更新:
(二).@EActivity:
当Activity被使用AndroidAnnotations进行注入的时候,我们需要使用@EActivity这个注入标签。这个标签的参数值必须是一个正确的layout ID(布局ID),该作为Activity的布局(Content View)。当然你也可以设置该参数值为空,这表示不设置content view。但是在绑定完成之前我们必须自己在onCreate()方法中设置布局(content view)
使用方式如下:
@EActivity(R.layout.dragger_inject_layout)
Public class AnnotationsTestActivity extends BaseActivity{}
不使用布局ID的方法如下:
@EActivity
Public class MainActvityextends BaseActivity{
@Override
protected voidon Create(Bundle savedInstanceState){
super.onCreate(savedInstanceState);
setContentView(R.layout.activity_main);
}
(三).@Application:
3.1.基本使用
自AndroidAnnotations 2.2开始
你可以使用@Application来对你的AndroidApplication类进行注解
@EApplication
public class FDApplication extends Application{}
除了相关联的views和extras之外,我们可以使用绝大多数AA注解。
@EApplication
public class MyApplication extends Application {
  public void onCreate() {
    super.onCreate();
    initSomeStuff();
  }
  @SystemService
  NotificationManager notificationManager;
  @Bean
  MyEnhancedDatastore datastore;
  @RestService
  MyService myService;
  @OrmLiteDao(helper = DatabaseHelper.class,model = User.class)
  UserDao userDao;
  @Background
  void initSomeStuff() {
    // init some stuff in background
  }
}
3.2.注入Application类
自AndroidAnnotations 2.1开始
你可以使用@App来进行注入Application类
@EActivity
public class MyActivity extends Activity {
  @App
  MyApplication application;
}
该同样在任何类型注入组件中进行使用,例如:@EBBean
@EBean
public class MyBean{
  @App
  MyApplication application;
}
(四).@EBean:
4.1.注解自定义类
我们可以对于非Android组件(例如:Activity,Service..)的类使用annotations,只需要使用@EBean来进行注解
@EBean
public class MyClass{
}
【注】:使用@EBean注解的类必须只有一个构造函数,而且这个构造函数必须没有参数。或者在AndroidAnnotations2.7版本上面,该构造函数可以只有一个Context上下文引用类型的参数。
4.2.注入类
在另一个注解类或者Android组件中使用这个注解类,我们可以使用@Bean;
@EBean
public class MyOtherClass {
  @Bean
  MyClass myClass;
}
同时你可以实现继承依赖关系
@EActivity
public class MyActivity extends Activity {
  @Bean
  MyOtherClass myOtherClass;
}
【注】当你在属性声明的地方使用@Bean注入,你总会得到一个新的实例,除非那个类是一个单例。
值得我们注意的是,注解生成的子类是final类型的,也就是说我们不能在继承生成的类。但是我们可以扩展原始的类。扩展出来的类同样可以使用注解。如下:
@EActivity
public class MyChildActivity extends MyActivity {
}
4.3.注入实现类
如果你想在代码中使用父类或者接口,那么你可以在@Bean注入的时候把实现类(implementation class)作为注入的参数值。
@EActivity
public class MyActivity extends Activity {
    /* A MyImplementation instance will beinjected.
     * MyImplementation must be annotated with@EBean and implement MyInterface.
     */
    @Bean(MyImplementation.class)
    MyInterface myInterface;
}
4.4.支持的Annotations
在被@Ebean注解的类中,我们可以使用绝大多数AA(Android平台)的Annotations;
@EBean
public class MyClass{
  @SystemService
  NotificationManager notificationManager;
  @UiThread
  void updateUI() {
  }
}
4.5.支持的和View相关的Annotations
在被@EBean注解的类中,我们可以使用和View相关的Annotations(例如:@View,@Click…)
@EBean
public class MyClass{
  @ViewById
  TextView myTextView;
  @Click(R.id.myButton)
  void handleButtonClick() {
  }
}
4.6.依赖注入之后回调执行相关代码
当我们@EBean注解的类的构造函数被执行的时候,它的属性还没有被注入(初始化),如果在构建的时候,想在依赖注入之后执行相关代码,你可以在一些方法上面使用@AfterInject Annotation,如下所示
@EBean
public class MyClass{
  @SystemService
  NotificationManager notificationManager;
  @Bean
  MyOtherClass dependency;
  public MyClass() {
    // notificationManager and dependency arenull
  }
  @AfterInject
  public void doSomethingAfterInjection() {
    // notificationManager and dependency areset
  }
}
4.7.作用域
AndroidAnnotations现在提供两种作用域实例
①:默认的作用域:每次创建都会创建一个新的实例对象
②:单一作用域:第一次创建使用的时候会生成一个新实例,然后该实例会保持,其他都会使用同样的实例。
@EBean(scope =Scope.Singleton)
public classMySingleton {
}
(五).@EFragment:
5.1.支持FragmentActivity注解
从AndroidAnnotations2.1版本开始
在AndroidAnnotations2.6版本之前,这是不支持Fragment注解,但是可以使用FragmentActivity来代替Activity.
@EActivity(R.id.main)
public class DetailsActivity extends FragmentActivity {
}
5.2.Fragment支持
从AndroidAnnotations2.6版本开始
AndroidAnnotations同时支持android.app.Fragment和android.support.v4.app.Fragment.并且它可以根据Fragment类型选择使用正确的APIs
5.3.Fragment注解
我们可以使用@EFragment来对Fragment进行注解.
@EFragment
public class MyFragment extends Fragment {
}
AndroidAnnotations将会生成带有一个下划线的子类,例如:MyFragment_。当我们创建一个新的fragmetns实例的时候,你应该在xml布局文件中使用生成的子类,如下:
<LinearLayoutxmlns:android="http://schemas.android.com/apk/res/android"
   android:layout_width="fill_parent"
   android:layout_height="fill_parent"
    android:orientation="horizontal">
    <fragment
        android:id="@+id/myFragment"
       android:name="com.company.MyFragment_"
       android:layout_width="fill_parent"
       android:layout_height="fill_parent" />
</LinearLayout>
创建如下:
MyFragmentfragment=new MyFragment_();
或者你可以使用构建器
MyFragmentfragmeng=MyFragment_.builder().build();
你同时可以在Fragment中使用各种其他类型的注解(annotations)
@EFragment
public class MyFragment extends Fragment {
    @Bean
    SomeBean someBean;
    @ViewById
    TextView myTextView;
    @App
    MyApplication customApplication;
    @SystemService
    ActivityManager activityManager;
    @OrmLiteDao(helper = DatabaseHelper.class,model = User.class)
    UserDao userDao;
    @Click
    void myButton() {
    }
    @UiThread
    void uiThread() {
    }
    @AfterInject
    void calledAfterInjection() {
    }
    @AfterViews
    void calledAfterViewInjection() {
    }
    @Receiver(actions ="org.androidannotations.ACTION_1")
    protected void onAction1() {
    }
}
5.4.Fragment布局
Fragment获取view的标准的方法是重写onCreateView()方法
@EFragment
public class MyFragment extends Fragment {
    public View onCreateView(LayoutInflaterinflater, ViewGroup container, Bundle savedInstanceState) {
        View view =inflater.inflate(R.layout.my_fragment_layout, container, false);
        return view;
    }
}
你可以设置@EFragment的参数值,来让AndroidAnnotations来进行处理布局
@EFragment(R.layout.my_fragment_layout)
public class MyFragment extends Fragment {
}
如果你需要重写onCreateView()方法,例如因为你需要访问savedInstanceState,此时你仍然可以让AndroidAnnotations来处理布局创建,并且return null
@EFragment(R.layout.my_fragment_layout)
public class MyFragment extends Fragment {
    public View onCreateView(LayoutInflater inflater, ViewGroup container, Bundle savedInstanceState) {
        return null;
    }
}
5.5.注入Fragments
我们可以在类中使用@EActivity,@EFragment,@Eview,@EViewGroup,@EBean,使用@FragmentById或者@FragmentByTag来进行注入fragments。
【注】推荐使用哪个@FragmentById而不是@FragmentByTag,因为后者没有编译时候的验证。
请注意@FragmentById和@FragmentByTag仅仅能注入fragments而不是创建它们。所以它们只能存在于Activity中
@EActivity(R.layout.fragments)
public class MyFragmentActivity extends FragmentActivity {
  @FragmentById
  MyFragment myFragment;

  @FragmentById(R.id.myFragment)
  MyFragment myFragment2;

  @FragmentByTag
  MyFragment myFragmentTag;

  @FragmentByTag("myFragmentTag")
  MyFragment myFragmentTag2;
}
5.6.DialogFragments
非常可惜的是,如果你使用@EFragment进行注入,你无法通过onCreteDialog()方法来创建一个Dialog新的实例。你应该调用super.onCreateDialog(),该该会返回一个Dialog实例。然后你可以一个@AfterViews注入的方法中设置views。
(六).@EProvider
自AndroidAnnotations2.4开始
你可以使用@EProvider来对Android内容提供者进行注解。
@EProvider
public class MyContentProvider extends ContentProvider {

}
除了相关views和extras注解标签以外,我们还可以使用绝大多数注解。
@EProvider
public class MyContentProvider extends ContentProvider {

  @SystemService
  NotificationManager notificationManager;

  @Bean
  MyEnhancedDatastore datastore;

  @OrmLiteDao(helper = DatabaseHelper.class,model = User.class)
  UserDao userDao;

  @UiThread
  void showToast() {
   Toast.makeText(getContext().getApplicationContext(), "HelloWorld!", Toast.LENGTH_LONG).show();
  }

  // ...
}
(七).@EReceiver
7.1.注解广播接收者
自AndroidAnnotations2.4开始
我们可以使用@EReceiver来对Android广播接受者进行注解
@EReceiver
public class MyReceiver extends BroadcastReceiver {

}
除了相关views和extras以外,还可以使用绝大多数AA注解
@EReceiver
public class MyReceiver extends BroadcastReceiver {

  @SystemService
  NotificationManager notificationManager;

  @Bean
  SomeObject someObject;

}
7.2.注解广播(Action)
自AndroidAnnotations3.2开始
使用@ReceiverAction可以在一个被注解的广播接受者中简单处理广播
一般情况下默认方法onReceive()来进行处理广播,但是我们可以通过@RecevierAction加入参数值来传递另外一个广播。
使用@ReceiverAction注解的方法可能存在以下这种参数类型:
在onReceiver(Contenxt context,Intent intent)中的context上下文引用
在onReceiver(Context context,Intent intent)中的intent
如果我们设置@ReceiverAction.Extra的值,任何被@ReceiverAction.Extra注解的本地android.os.Parcelable或者java.io.Serializable类型的参数。这些参数将会加入到intent得extra中。加入intent.extra中的key的为@ReceiverAction.Extra中参数值。
看如下例子:
@EReceiver
public class MyIntentService extends BroadcastReceiver {

   @ReceiverAction("BROADCAST_ACTION_NAME")
    void mySimpleAction(Intent intent) {
        // ...
    }

    @ReceiverAction
    void myAction(@ReceiverAction.Extra StringvalueString, Context context) {
        // ...
    }

    @ReceiverAction
    voidanotherAction(@ReceiverAction.Extra("specialExtraName") StringvalueString, @ReceiverAction.Extra long valueLong) {
        // ...
    }

    @Override
    public void onReceive(Context context,Intent intent) {
        // empty, will be overridden ingenerated subclass
    }
}
【注】因为BroadcastReceiver的onRecevier是一个抽象方法,所以你不得不添加一个空方法的实现。为了方便起见,AndroidAnnotations框架已经提供AbstractBroadcastReceiver,该类已经实现了onReceiver()方法,所以你在使用的时候,可以不实现该方法。
【注】现在我们可以在@ReceiverAction参数中加入多个广播并进行处理,如下:
@ReceiverAction({"MULTI_BROADCAST_ACTION1","MULTI_BROADCAST_ACTION2"})
 void multiAction(Intent intent) {
     // ...
 }
7.3.数据结构(Data Schemes)
我们可以使用dataSchemes参数来设置一个或者多个数据来让Receiver进行处理
@EReceiver
public class MyIntentService extends BroadcastReceiver {

  @ReceiverAction(actions =android.content.Intent.VIEW, dataSchemes = "http")
  protected void onHttp() {
    // Will be called when an App wants to opena http website but not for https.
  }

  @ReceiverAction(actions =android.content.Intent.VIEW, dataSchemes = {"http","https"})
  protected void onHttps() {
    // Will be called when an App wants to opena http or https website.
  }

}
7.4.@Receiver注解说明
在Activity.Fragment,Service,我们可以使用@Receiver注解,而不是直接声明一个BroadcastReceiver
@EActivity
public class MyActivity extends Activity {

  @Receiver(actions ="org.androidannotations.ACTION_1")
  protected void onAction1() {

  }

}
(八).@EIntentService
自AndroidAnnotations3.0开始
我们可以使用@EIntentService注解的Android IntentService来处理@ServiceAction注解的方法中的Actions。对于此注解我们同样可以使用除views和extras以外的很多AA注解
@EIntentService
public class MyIntentService extends IntentService {

    public MyIntentService() {
        super("MyIntentService");
    }

    @ServiceAction
    void mySimpleAction() {
        // ...
    }

    @ServiceAction
    void myAction(String param) {
        // ...
    }

    @Override
    protected void onHandleIntent(Intentintent) {
        // Do nothing here
    }
}
我们可以使用内部构建器来启动IntentService
MyIntentService_.intent(getApplication())//
    .myAction("test") //
    .start();
如果在构建器重调用了多个Actions,那么只有最后一个action会被执行。
自AndroidAnnotations3.3开始
【注】因为IntentService的onHandleIntent是一个抽象方法,所以你这边不得不添加一个空方法实现。为了方便起见这边提供了AbstractIntentService,该类实现了抽象方法。当你使用该类的时候,如果不需要你可以不用实现onHandleIntent。
(九).@EService
自AndroidAnnotations2.4起
你可以使用@EService来进行注册Android Service
@EService
public class MyService extends Service {
}
除了相关的views和extras之外,同样可以使用绝大多数AA注解
@EService
public class MyService extends IntentService {

  @SystemService
  NotificationManager notificationManager;

  @Bean
  MyEnhancedDatastore datastore;

  @RestService
  MyRestClient myRestClient;

  @OrmLiteDao(helper = DatabaseHelper.class,model = User.class)
  UserDao userDao;

  public MyService() {
      super(MyService.class.getSimpleName());
  }

  @Override
  protected void onHandleIntent(Intent intent){
    // Do some stuff...

    showToast();
  }

  @UiThread
  void showToast() {
    Toast.makeText(getApplicationContext(),"Hello World!", Toast.LENGTH_LONG).show();
  }
}
我们可以通过内部构建器来进行打开这个Service
MyService_.intent(getApplication()).start();自AndroidAnnotations3.0起
同时内部构建器也提供stop()方法来进行停止该Service
MyService_.intent(getApplication()).stop();
(十).@EView
10.1.注入自定义views
如果你想要创建自定义组件,我们可以使用@EView和@EViewGroup来进行注解
10.2.为什么要使用自定义组件?
在我们的APP中很多地方我们可能会复制同样的布局代码,并且我复制和调用相同的代码来控制这些布局。基于前面这些原因
,我们可以使用自定义组件来解决这些问题,让我们的工作变得更加轻松。
10.3.使用@EView来注解自定义views
自AndroidAnnotations2.4起
我们只需要创建一个继承与View的新类,然后在这个View中就可以使用annotations了。
@EView
public class CustomButton extends Button {

        @App
        MyApplication application;

        @StringRes
        String someStringResource;

    public CustomButton(Context context,AttributeSet attrs) {
        super(context, attrs);
    }
}
现在你就可以在布局文件中使用这个View了(【注】不要忘记"_")
<?xmlversion="1.0" encoding="utf-8"?>
<LinearLayoutxmlns:android="http://schemas.android.com/apk/res/android"
   android:layout_width="match_parent"
   android:layout_height="match_parent"
    android:orientation="vertical">

   <com.androidannotations.view.CustomButton_
       android:layout_width="match_parent"
       android:layout_height="wrap_content" />

    <!-- ... -->

</LinearLayout>
你也可以使用程序化创建方式
CustomButton button= CustomButton_.build(context);10.4.使用@EViewGroup来注解自定义ViewGroups
自AndroidAnnotations2.2起
①.How to create it?
首先我们需要为这个组件创建一个布局文件
<?xmlversion="1.0" encoding="utf-8"?>
<mergexmlns:android="http://schemas.android.com/apk/res/android" >

    <ImageView
        android:id="@+id/image"
       android:layout_alignParentRight="true"
       android:layout_alignBottom="@+id/title"
       android:layout_width="wrap_content"
       android:layout_height="wrap_content"
        android:src="@drawable/check"/>

    <TextView
        android:id="@+id/title"
       android:layout_toLeftOf="@+id/image"
       android:layout_width="match_parent"
       android:layout_height="wrap_content"
       android:textColor="@android:color/white"
        android:textSize="12pt" />

    <TextView
        android:id="@+id/subtitle"
       android:layout_width="match_parent"
       android:layout_height="wrap_content"
       android:layout_below="@+id/title"
        android:textColor="#FFdedede"
        android:textSize="10pt" />

</merge>
【注】你有没有发现上面的merge标签?当这个布局被进行加载的时候,子节点会被直接加入到父节点中,这样就可以减少布局层级关系。
正如你看到是这般使用了很多RelativeLayout特殊布局属性(layout_alignParentRight,layout_alignBottom,layout_toLeftOf,etc..),这是因为我知道这个布局会被加载到RelativeLayout中。
@EViewGroup(R.layout.title_with_subtitle)
public class TitleWithSubtitle extends RelativeLayout {

    @ViewById
    protected TextView title, subtitle;

    public TitleWithSubtitle(Context context,AttributeSet attrs) {
        super(context, attrs);
    }

    public void setTexts(String titleText,String subTitleText) {
        title.setText(titleText);
        subtitle.setText(subTitleText);
    }

}
就这样使用即可,是不是很简单呢?
现在让我们来看一下该怎么样使用这个自定义组件
②.How to use it?
自定义组件和其他View控件一样,在布局文件中进行声明(【注】不要忘记控件名称最后的"_")
<pre name="code" class="html"><?xmlversion="1.0" encoding="utf-8"?>
<LinearLayoutxmlns:android="http://schemas.android.com/apk/res/android"
   android:layout_width="match_parent"
   android:layout_height="match_parent"
    android:gravity="center"
    android:orientation="vertical">

   <com.androidannotations.viewgroup.TitleWithSubtitle_
        android:id="@+id/firstTitle"
       android:layout_width="match_parent"
       android:layout_height="wrap_content" />

   <com.androidannotations.viewgroup.TitleWithSubtitle_
        android:id="@+id/secondTitle"
       android:layout_width="match_parent"
       android:layout_height="wrap_content" />

   <com.androidannotations.viewgroup.TitleWithSubtitle_
        android:id="@+id/thirdTitle"
       android:layout_width="match_parent"
       android:layout_height="wrap_content" />

</LinearLayout>
因为我们使用AA框架,所以我们会非常容易在Activity中得到这些注入的自定义组件并且去使用它。
@EActivity(R.layout.main)
public class Mainextends Activity {

    @ViewById
    protected TitleWithSubtitle firstTitle,secondTitle, thirdTitle;

    @AfterViews
    protected void init() {

        firstTitle.setTexts("decouple yourcode",
                "Hide the component logicfrom the code using it.");

        secondTitle.setTexts("write once,reuse anywhere",
                "Declare you component inmultiple " +
                "places, just as easily asyou " +
                "would put a single basicView.");

        thirdTitle.setTexts("Let's getstated!",
                "Let's see howAndroidAnnotations can make it easier!");
    }
}
在@EViewGroup注解的类中也同时支持绝大多数AndroidAnnotations注解方式,赶快去尝试使用吧。
到此位置关于AndroidAnnotations注解组件的方式和使用方法已经全部讲解完成了。
FastDev4Android项目已经添加配置了AndroidAnnotations框架,后期的框架项目中也会主要使用这个DI框架,.欢迎大家去Github站点进行clone或者下载浏览.
https://github.com/jiangqqlmj/FastDev4Android
同时欢迎大家star和fork整个开源快速开发框架项目~如果有什么意见和反馈,欢迎留言,必定第一时间回复。也欢迎有同样兴趣的童鞋加入到该项目中来,一起维护该项目。


 481
481

 被折叠的 条评论
为什么被折叠?
被折叠的 条评论
为什么被折叠?
 到【灌水乐园】发言


