


使用hibernate时,不可避免的要关注到iD,hibernate有自己的ID生成策略
1.配置文件方式的ID生成策略,还是以之前写的Student为例
package com.baosight.model;

/**
 * <p>Title: </p>
 * <p>Description:Student </p>
 * <p>Company: </p>
 * @author yuan
 * @date 2016-4-10 下午12:32:46*/
public class Student {
 private String id;
 private String name;
 private int age;
 public String getId() {
  return id;
 }
 public void setId(String id) {
  this.id = id;
 }
 public String getName() {
  return name;
 }
 public void setName(String name) {
  this.name = name;
 }
 public int getAge() {
  return age;
 }
 public void setAge(int age) {
  this.age = age;
 }

}
Student.hbm.xml如下:
<?xml version="1.0"?>
<!DOCTYPE hibernate-mapping PUBLIC
        "-//Hibernate/Hibernate Mapping DTD 3.0//EN"
        "http://hibernate.sourceforge.net/hibernate-mapping-3.0.dtd">

<hibernate-mapping package="com.baosight.model">
<class name="Student">
<id name="id" >
<generator class="uuid"></generator>
</id>
<property name="name"></property>
<property name="age"></property>
</class>
</hibernate-mapping>
上面指定ID的生成策略为uuid,为一个唯一的32位的编码,具有通用性,值得注意的是使用uuid时需要类中的id为String类型
类外,其它的额选择还有native、sequence、identity等,其中,native在mysql中的实现是anto-increment,在oracle中的实现是使用sequence
hibernate.cfg.xml如下:
<?xml version='1.0' encoding='utf-8'?>
<!DOCTYPE hibernate-configuration PUBLIC
        "-//Hibernate/Hibernate Configuration DTD 3.0//EN"
        "http://hibernate.sourceforge.net/hibernate-configuration-3.0.dtd">

<hibernate-configuration>

    <session-factory>

        <!-- Database connection settings -->
        <property name="connection.driver_class">oracle.jdbc.driver.OracleDriver</property>
        <property name="connection.url">jdbc:oracle:thin:@127.0.0.1:1521:orcl</property>
        <property name="connection.username">scott</property>
        <property name="connection.password">tiger</property>

        <!-- JDBC connection pool (use the built-in) -->
        <!-- <property name="connection.pool_size">1</property> -->

        <!-- SQL dialect -->
        <property name="dialect">org.hibernate.dialect.Oracle9iDialect</property>

        <!-- Enable Hibernate's automatic session context management -->
       <!--  <property name="current_session_context_class">thread</property> -->

        <!-- Disable the second-level cache  -->
        <property name="cache.provider_class">org.hibernate.cache.NoCacheProvider</property>

        <!-- Echo all executed SQL to stdout -->
        <property name="show_sql">true</property>

        <!-- Drop and re-create the database schema on startup -->
        <property name="hbm2ddl.auto">update</property>

        <mapping resource="com/baosight/model/Student.hbm.xml"/>
		<mapping class="com.baosight.model.Teacher"/>
    </session-factory>

</hibernate-configuration>
测试的JUnit如下:
package com.baosight.model;

import static org.junit.Assert.*;

import org.hibernate.Session;
import org.hibernate.SessionFactory;
import org.hibernate.cfg.AnnotationConfiguration;
import org.hibernate.cfg.Configuration;
import org.junit.AfterClass;
import org.junit.BeforeClass;
import org.junit.Test;

/**
 * <p>Title:HibernateIDTest </p>
 * <p>Description:TODO </p>
 * <p>Company: </p>
 * @author yuan
 * @date 2016-4-14 下午9:11:00*/
public class HibernateIDTest {

 private static SessionFactory sf = null;
 @BeforeClass
 public static void beforeClass(){
  // 读取配置文件
  Configuration cfg = new AnnotationConfiguration();
  // 得到session工厂
  sf = cfg.configure().buildSessionFactory();
 }
 @Test
 public void testStudent() {
  // 学生测试类
  Student s = new Student();
  s.setName("s1");
  s.setAge(20);

  // 得到session
  Session session = sf.openSession();
  // 开启事务
  session.beginTransaction();
  // session执行save
  session.save(s);
  // 事务提交
  session.getTransaction().commit();
  // 关闭session
  session.close();
 }
 @Test
 public void testTeacher() {
  // 教师测试类
  Teacher t = new Teacher();
  t.setName("t1");
  t.setTitle("中级");


  // 得到session
  Session session = sf.openSession();
  // 开启事务
  session.beginTransaction();
  // session执行save
  session.save(t);
  // 事务提交
  session.getTransaction().commit();
  // 关闭session
  session.close();
 }
 @AfterClass
 public static void afterClass(){
  // 关闭session工厂
  sf.close();
 }

}
执行testStudent进行JUnit测试,结果如下:


2.hibernate使用annotation的ID生成策略
仍然使用之前的Teacher
package com.baosight.model;
import javax.persistence.Entity;
import javax.persistence.GeneratedValue;
import javax.persistence.GenerationType;
import javax.persistence.Id;
import javax.persistence.SequenceGenerator;
import javax.persistence.TableGenerator;
/**
* <p>Title: </p>
* <p>Description:Teacher </p>
* <p>Company: </p>
* @author yuan
* @date 2016-4-10 下午12:32:46*/
@Entity
@TableGenerator(name="tableGEN",table="table_gen",pkColumnName="pk_key",valueColumnName="pk_value",pkColumnValue="teacher",allocationSize=1)
@SequenceGenerator(name="teacherSEQ",sequenceName="teacherSEQ_DB")
public class Teacher {
private int id;
private String name;
private String title;
@Id
// @GeneratedValue//auto
// @GeneratedValue(strategy=GenerationType.TABLE,generator="tableGEN")
@GeneratedValue(strategy=GenerationType.SEQUENCE,generator="teacherSEQ")
public String getId() {
return id;
}
public void setId(String id) {
this.id = id;
}
public String getName() {
return name;
}
public void setName(String name) {
this.name = name;
}
public String getTitle() {
return title;
}
public void setTitle(String title) {
this.title = title;
}
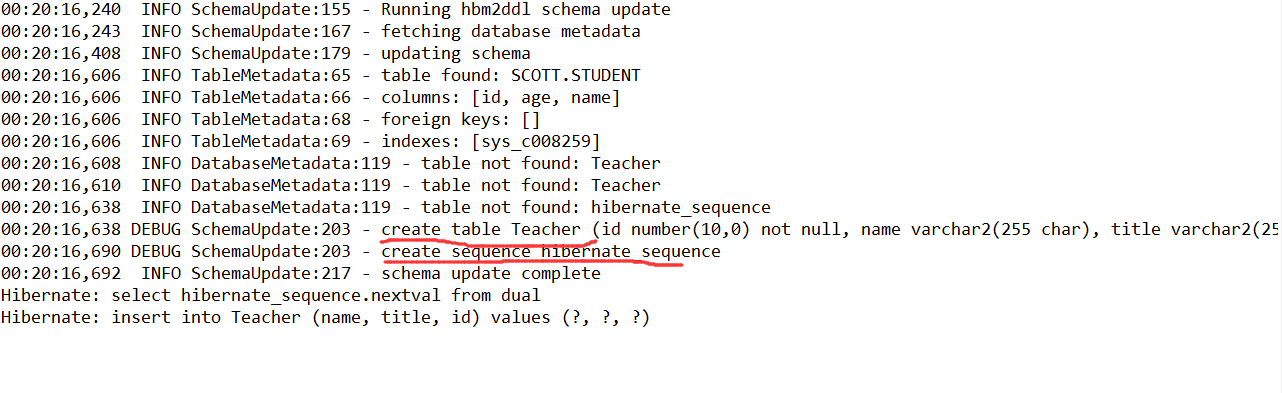
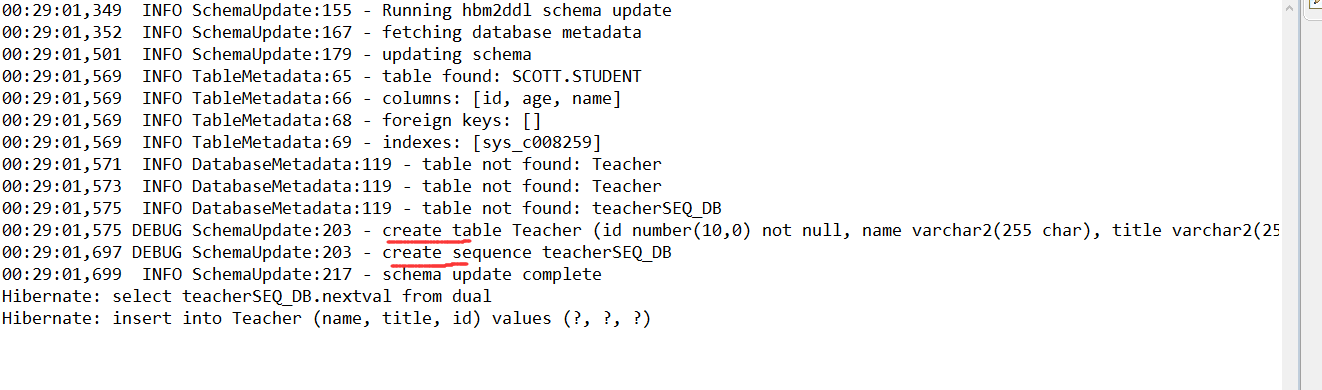
}使用方法为在注解id使用@Id的下面使用@GeneratedValue,可以单独使用,相当于指定参数时的GenerationType.AUTO,经过实际测试,在oracle中使用的是sequence,会自动创建一个名为HIBERNATE_SEQUENCE的sequence。如果想使用自定义的sequence,需要在类的声明@Entity下方使用@SequenceGenerator进行自定义,共有2个参数,第一个参数name定义此SequenceGenerator的名字,第二个参数sequenceName指定生成的sequence的名字,之后在@GeneratedValue中使用参数strategy=GenerationType.SEQUENCE,generator="xx",其中xx即为上面@SequenceGenerator第一个参数指定的name值。
当然,也可以使用更外复杂的@TableGenerator,使用方法与@SequenceGenerator类似,在类之前声明@TableGenerator,并添加参数,例如:name="tableGEN",table="table_gen",pkColumnName="pk_key",valueColumnName="pk_value",pkColumnValue="teacher",allocationSize=1
其中name指的是此TableGenerator的名称,table指的是要在数据库生成的表的名称,pkColumnName和valueColumnName分别代表数据库表的2个字段,可以指定其名称,pkColumnValue和initialValue组成1条记录,每次使用时会取得initialValue的值作为ID,使用完毕后initialValue自动增加allocationSize(步长)。使用@TableGenerator需要在@GeneratedValue中使用参数strategy=GenerationType.TABLE,generator="xx",其中xx即为上面@TableGenerator第一个参数指定的name值。
3.运行结果
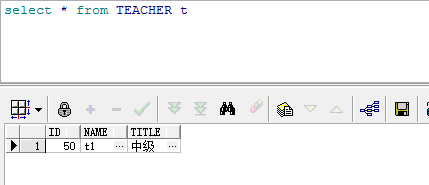
使用@GeneratedValue时

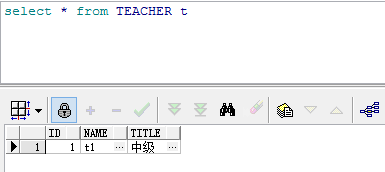
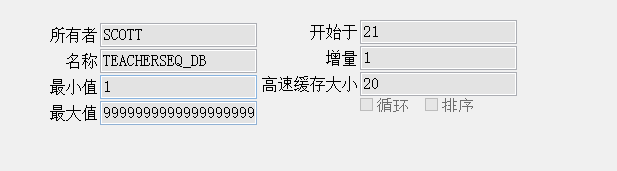
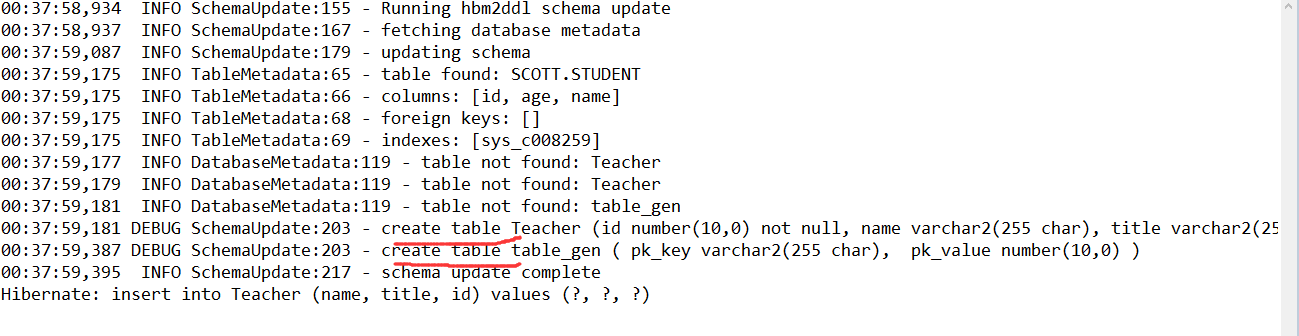
使用@SequenceGenerator时
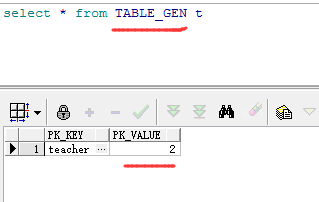
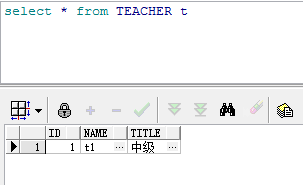
使用@TableGenerator时
以上即为hibernate的ID生成策略的大致内容,一般而言,@TableGenerator只在数据库跨平台时使用,常用的还是@GeneratedValue和@GeneratedValue。


 1万+
1万+


 被折叠的 条评论
为什么被折叠?
被折叠的 条评论
为什么被折叠?
 到【灌水乐园】发言


