


串口通信
我以自己刚做的功能做为核心记录这篇博客
①. 是基于modbus通信协议之间的通信
②. 是十六进制进行通信的
③. 可选波特率,数据位 停止位
④采用CRC校验
功能和代码的实现
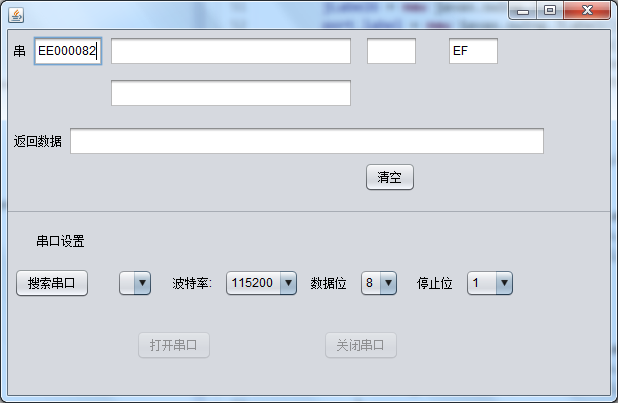
界面是用窗体表现的
界面的实现就不过多的贴代码和说怎么去实现了,有个很好用的工具 NETBean,可以直接拖控件,跟C#做winfrom很像,但是eclipse没有 要自己布局的话比较耗时。ok,先说窗体下半部分的实现
需要用到的jar包:comm.jar ,可以在网上搜下如何配置
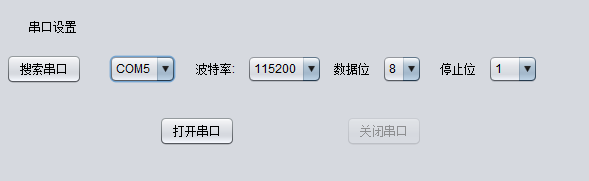
一. 首先搜索串口
    void listPort() {
        CommPortIdentifier portId; //这个类在comm.jar中
        Enumeration a = CommPortIdentifier.getPortIdentifiers();
        while (a.hasMoreElements()) {
        portId = (CommPortIdentifier) a.nextElement();
            if (portId.getPortType() == CommPortIdentifier.PORT_SERIAL) {
                list.add(portId.getName()); //这里的list是个成员变量,add之后再下拉框中刷新进去
            }
        }
    }
波特率,数据位这些可以直接事先放在数组里面,界面一启动就加 载进去了
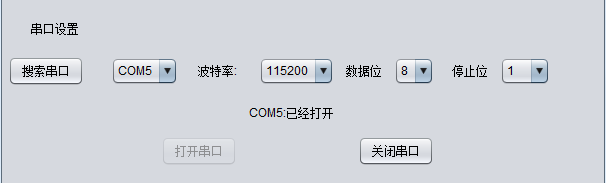
二.打开串口
public void selectPort(String portName, int rate, int databit, int stopbit,int parity) {
        System.out.println("selectPort()");
        this.commPort = null;
        CommPortIdentifier cpid;
        Enumeration en = CommPortIdentifier.getPortIdentifiers(); // 枚举出所  有的串口
        while (en.hasMoreElements()) {
            cpid = (CommPortIdentifier) en.nextElement();
            if (cpid.getPortType() == CommPortIdentifier.PORT_SERIAL&&       cpid.getName().equals(portName)) {
                this.commPort = cpid;
                break;
            }
        }
        openPort(rate, databit, stopbit, parity);
    }
/**
* @功能:打开串口
**
**/
private void openPort(int rate, int databit, int stopbit, int parity) {
System.out.println("openPort()");
// TODO Auto-generated method stub
if (commPort == null)
//无法找到这个端口
else {
//成功找到
try {
serialPort = (SerialPort) commPort.open(appName, timeout);
try {
serialPort.setSerialPortParams(rate, SerialPort.DATABITS_8,
SerialPort.STOPBITS_1, SerialPort.PARITY_NONE);//这里过来参数是int,要转成16进制,为了方便看代码我就不转化,直接用他的变量了
} catch (UnsupportedCommOperationException e) {
// TODO Auto-generated catch block
e.printStackTrace();
}
log("实例SerialPort成功");
} catch (PortInUseException e) {
throw new RuntimeException(String.format("端口为'%1$s'的串口正在被使用!",
commPort.getName()));
}
}
}
到这里串口就成功打开了
在写上部分如何实现前,先说说扫描枪的工作
相当于最后的字符带了回车的键盘输入 ,就这样,
三.如何将信息写另一个互相通信的端口
将接收到的字符串转换成16进制:

public static byte[] HexStringBytes(String src) {
    if (null == src || 0 == src.length()) {
        return null;
    }
    byte[] ret = new byte[src.length()/2];
    byte[] tmp = src.getBytes();
    // System.out.println("tmp="+Arrays.toString(tmp));
    /*
     * int length = 0; if (tmp.length % 2 != 0) { length=(tmp.length+1)/2; }
     * length=tmp.length;
     */
    for (int i = 0; i < (tmp.length / 2); i++) {
        ret[i] = uniteBytes(tmp[i * 2], tmp[i * 2 + 1]);

    }

    return ret;
}
/*
 * 以字节的形式写进去
*/
  public void write(byte[] message) {
    System.out.println("write()");
    checkPort();
    try {
        outputStream = new BufferedOutputStream(
                serialPort.getOutputStream());
    } catch (IOException e) {
        throw new RuntimeException("获取端口的输出流出错");
    }
    try {
        outputStream.write(message);
        log("信息发送成功");
    } catch (IOException e) {
        throw new RuntimeException("向端口发送信息失败");
    } finally {
        try {
            outputStream.close();
        } catch (Exception e) {
        }
    }
    }
由于之后我引用了rxtx来实现,这里附上demo链接 http://download.csdn.net/download/u011809209/9810590


 1116
1116

 被折叠的 条评论
为什么被折叠?
被折叠的 条评论
为什么被折叠?
 到【灌水乐园】发言


