


本篇文章我们讲解Python最基础语法,包含:数据类型、注释、变量、类型转换、命名规范、运算符、字符串拼接、字符串格式化、if条件判断、while循环、for循环、函数、读取文件、写入文件、异常捕获、包导入等。通过讲解语法+注意事项+实例代码详解,希望能帮到大家。
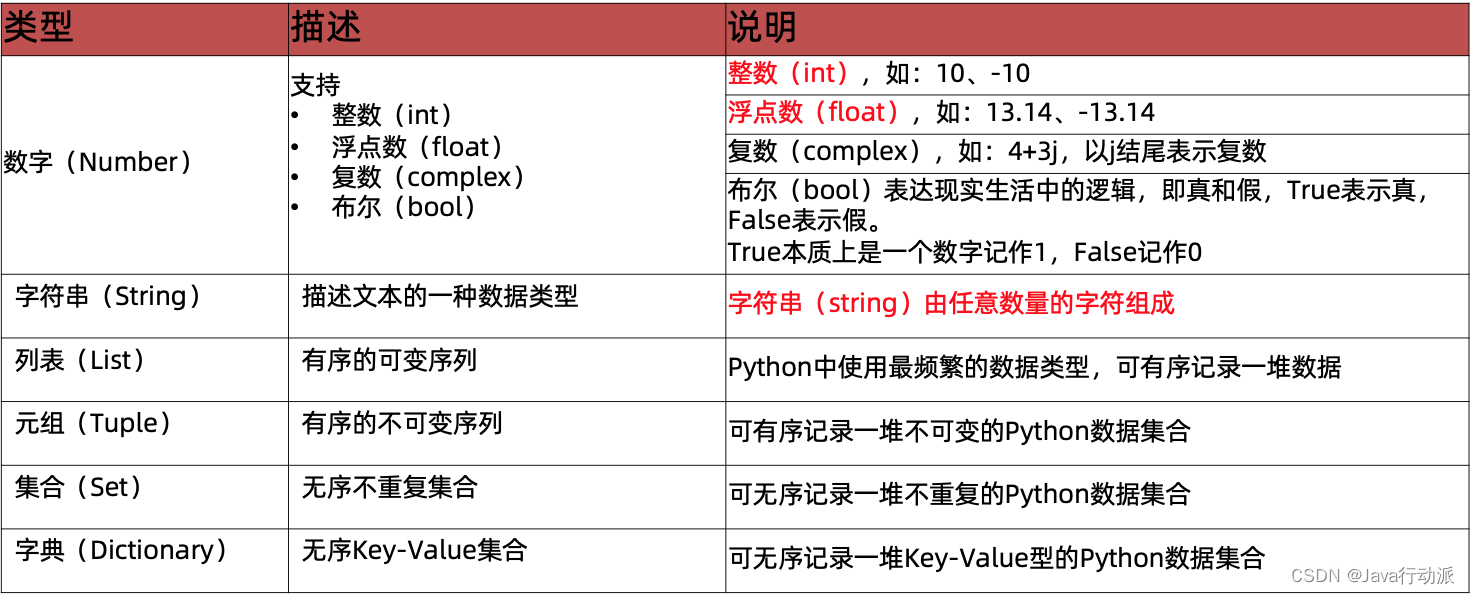
1、Python中6种常用的数据类型
实例代码:
# 整数
num1 = 10
num2: int = 20
print(num1)
print(num2)

# float
float1 = 10.0
float2: float = 11.0
print(float1)
print(float2)

# boolean
bo1 = True
bo2: bool = False
print(bo1)
print(bo2)

# 字符串
str1 = "字符串"
str2 = '字符串2'
str3: str = '字符串3'
print(str1)
print(str2)
print(str3)

# List
list_1 = [1, 2, 3, 4, 5]
print(type(list_1))
list_2: list = [1, 2, 3, 4]
print(list_1)
print(list_2)

# tuple
t_1 = (1, 2, 3, 4, 5)
print(type(t_1))
t_2: tuple = (1, 2, 3, 4)
print(t_1)
print(t_2)

# set
s_1 = {1, 2, 3, 4}
print(type(s_1))
s_2: set = {1, 2, 34}
print(s_1)
print(s_2)

# dict
d_1 = {"key": 1, "name": "张三"}
print(type(d_1))
d_2: dict = {"key": 2, "name": "李四"}
2、Python中的注释使用
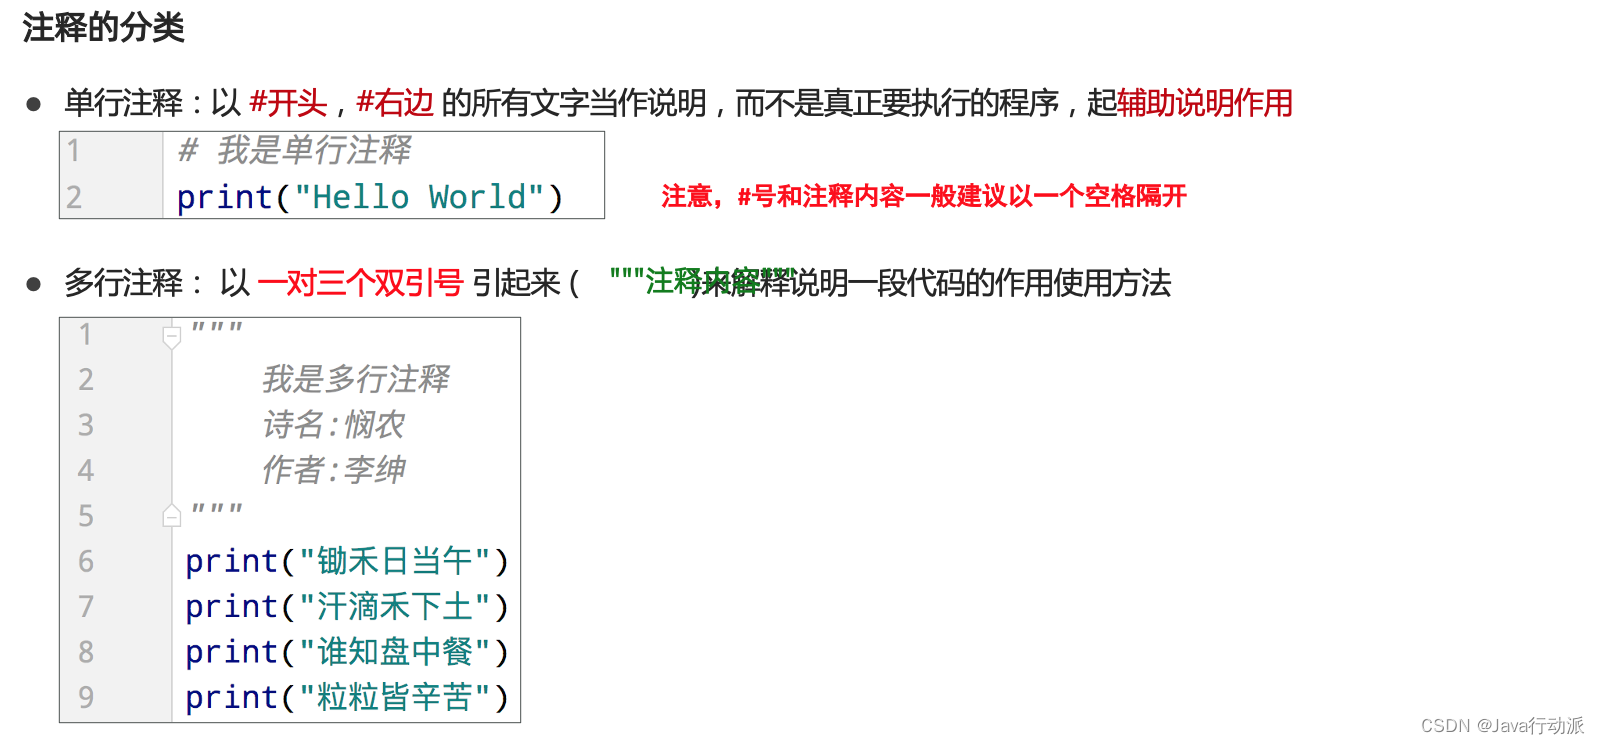
代码实例:
# 单行注释
"""
多行注释
多行注释
"""
3、Python中查看变量类型
python中使用type()查询变量类型
实例:
# dict
d_1 = {"key": 1, "name": "张三"}
print(type(d_1))
d_2: dict = {"key": 2, "name": "李四"}
效果

4、Python中常用类型转换
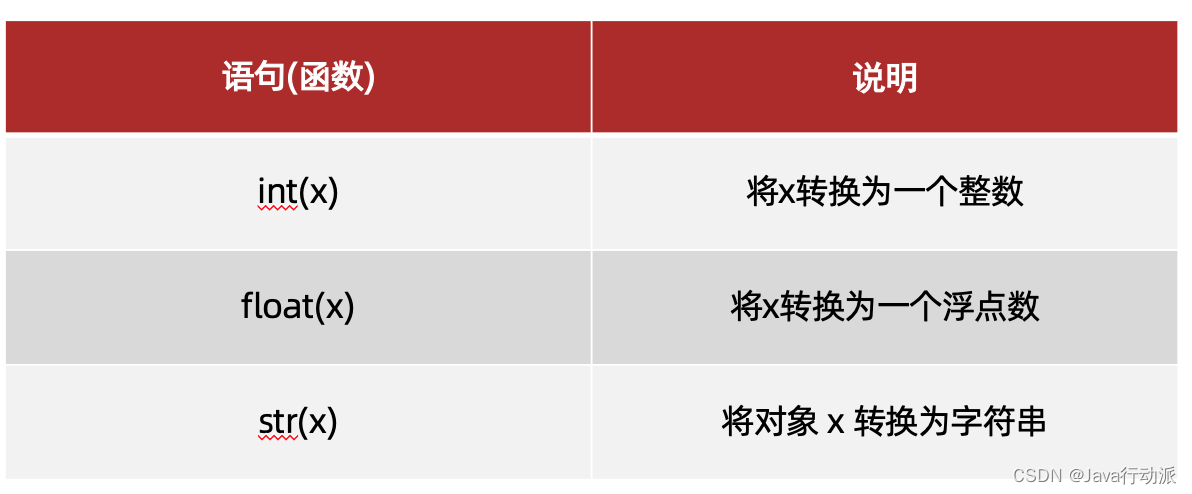
实例:
str: str = "1"
print(type(str))
# 将字符串str转换为int类型
num: int = int(str)
print(type(num))

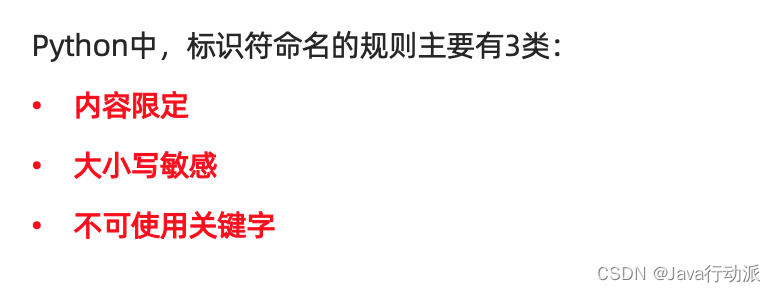
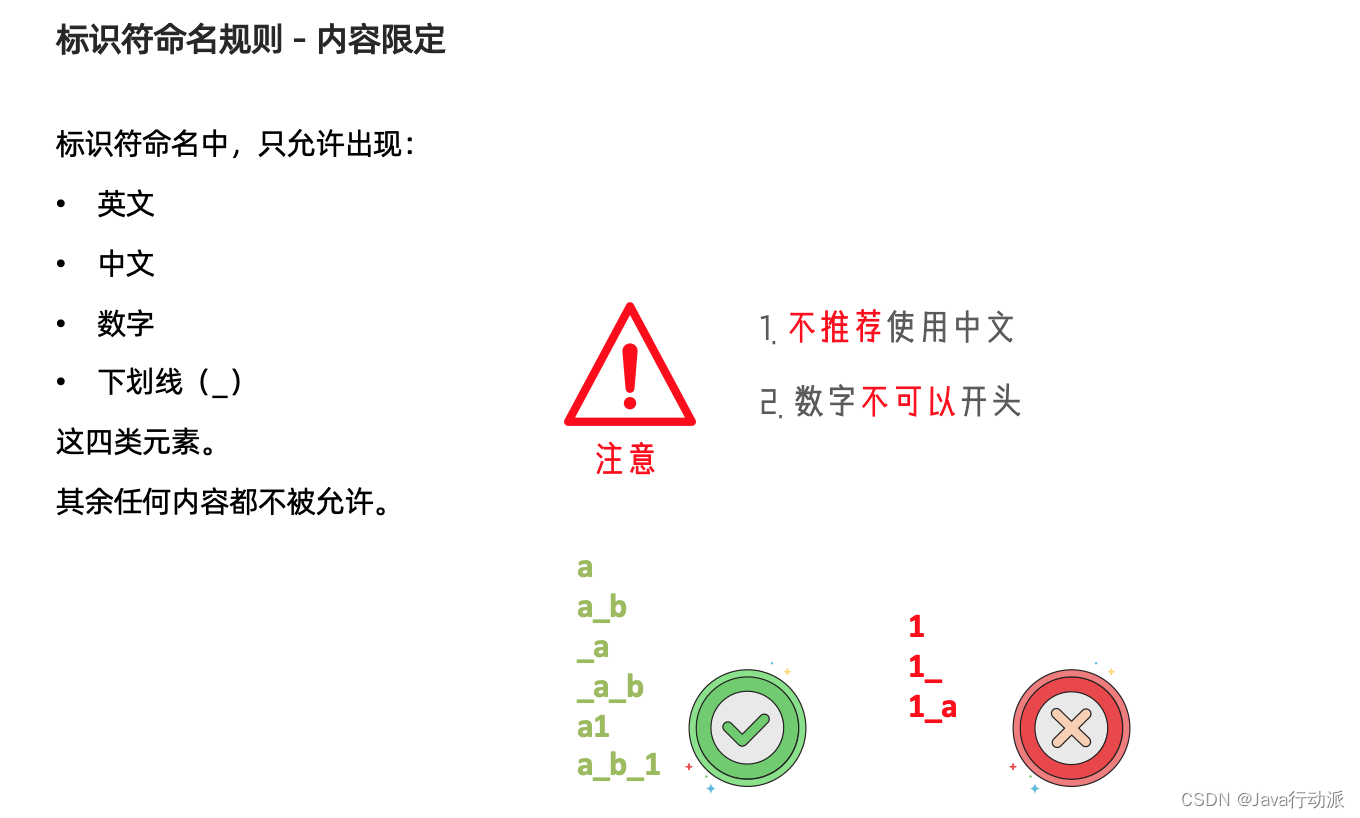
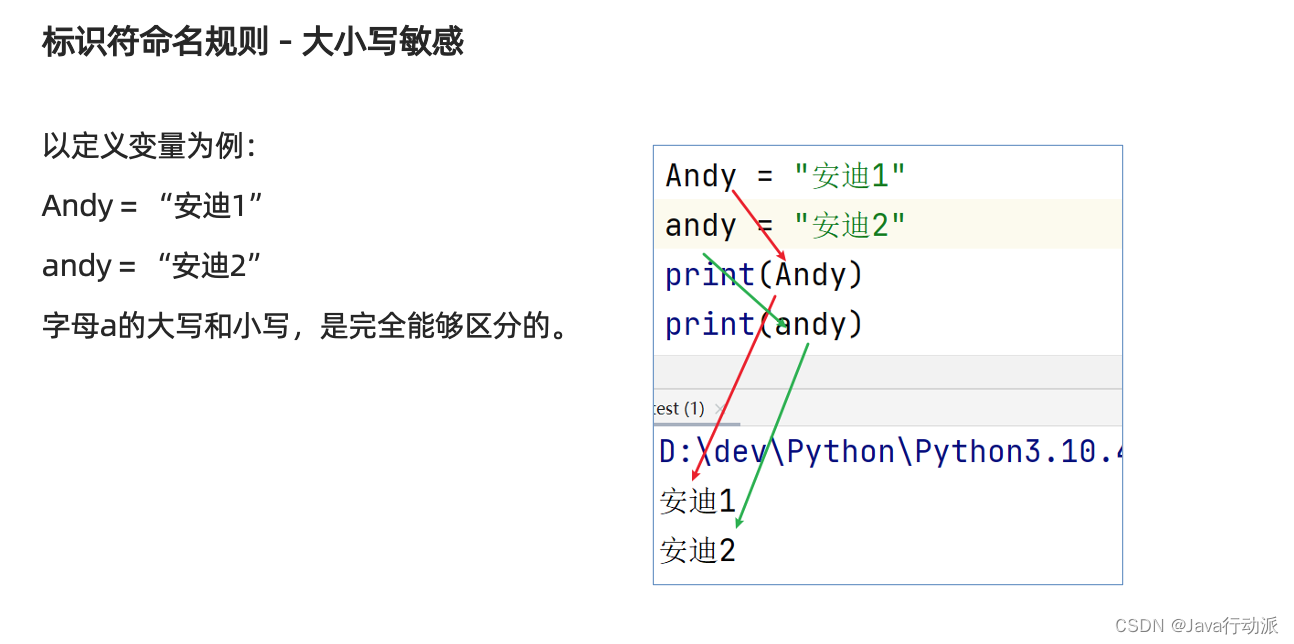
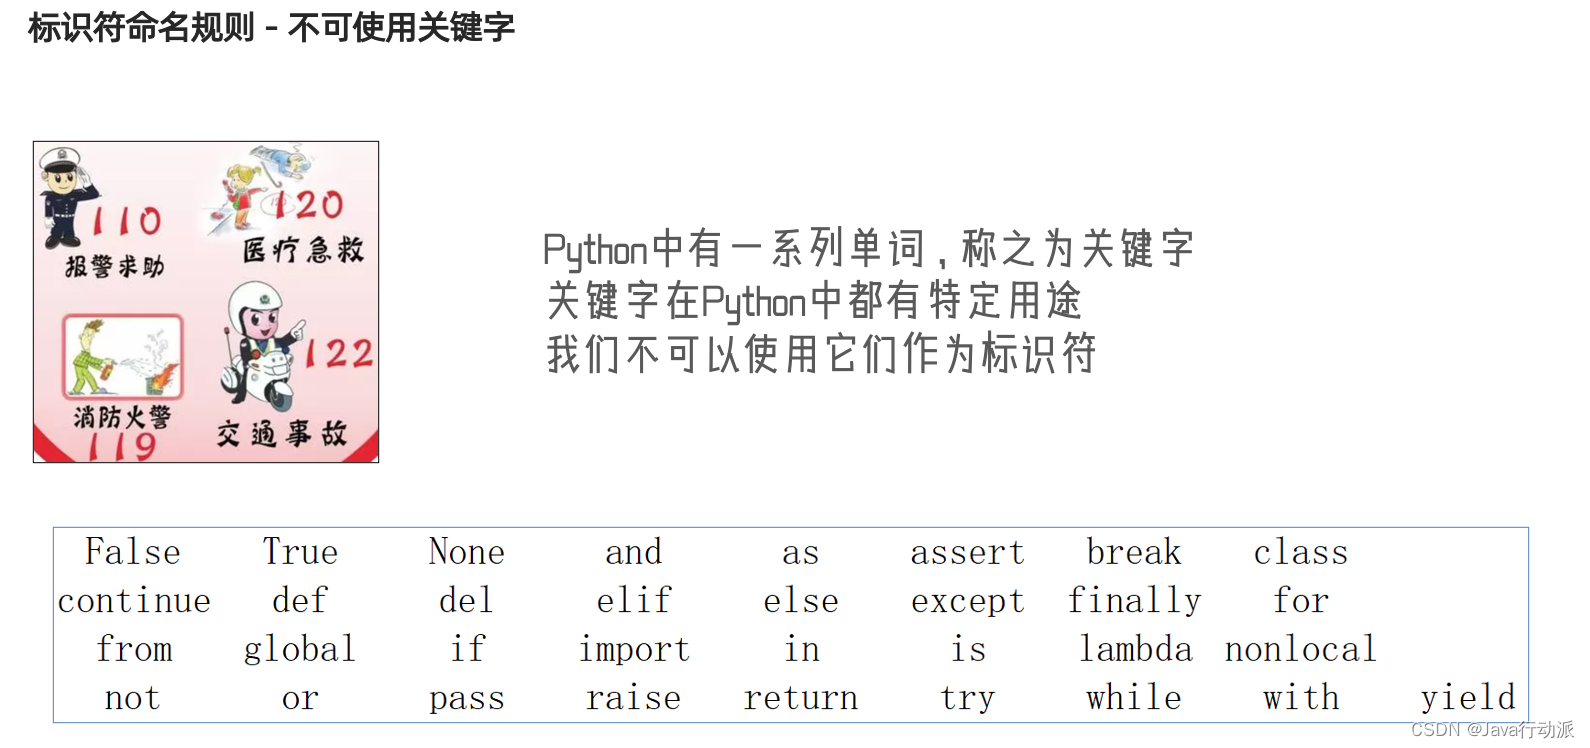
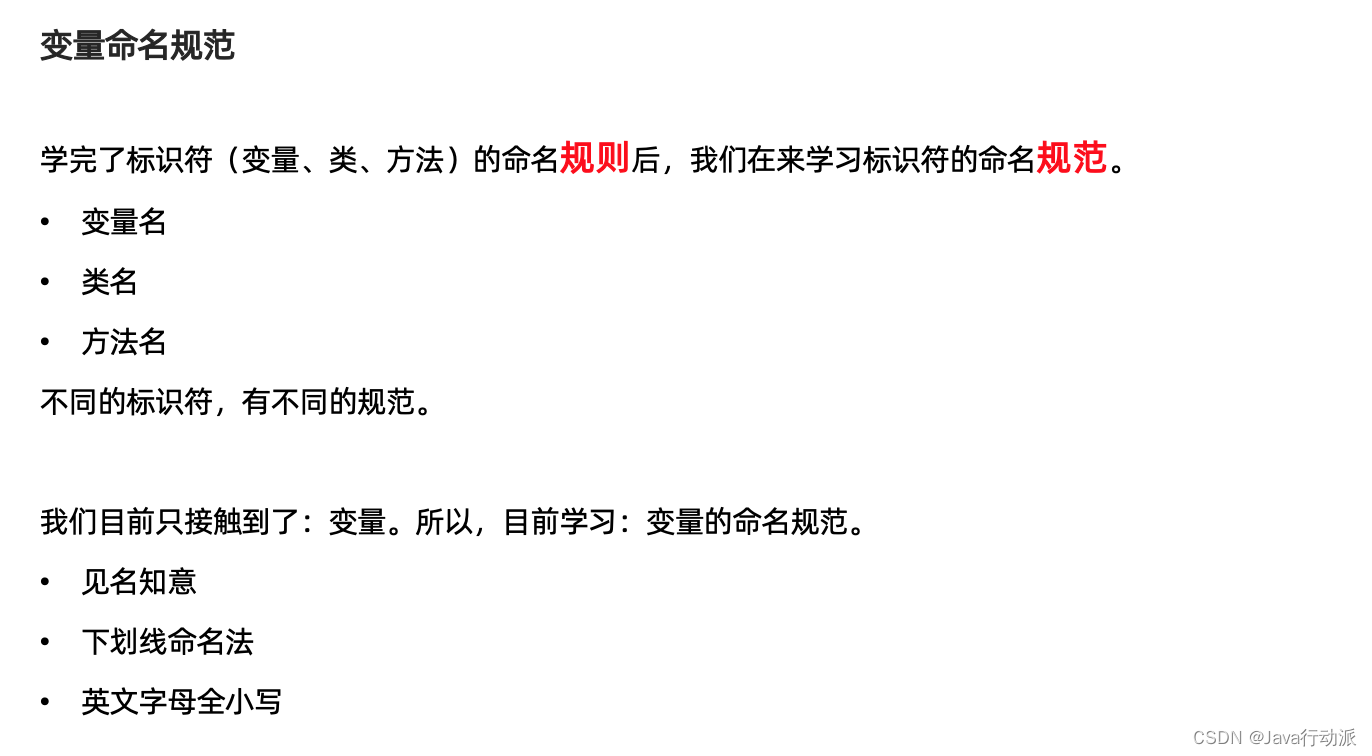
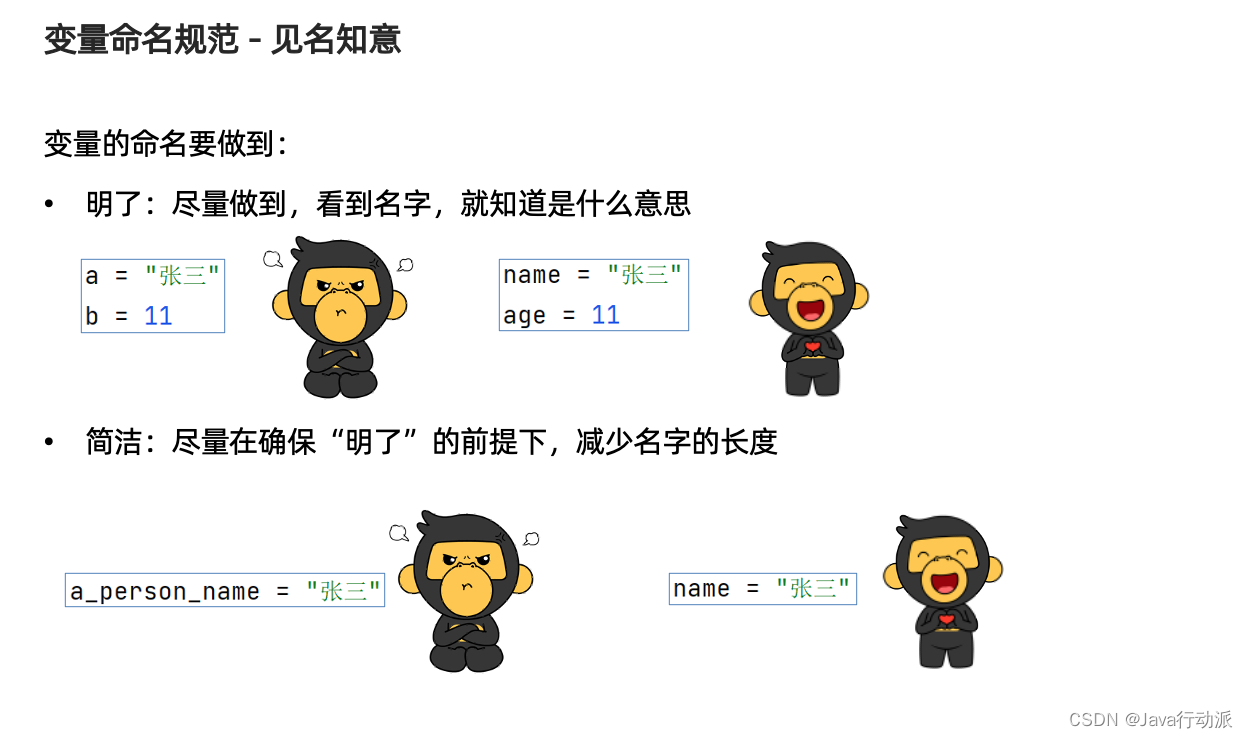
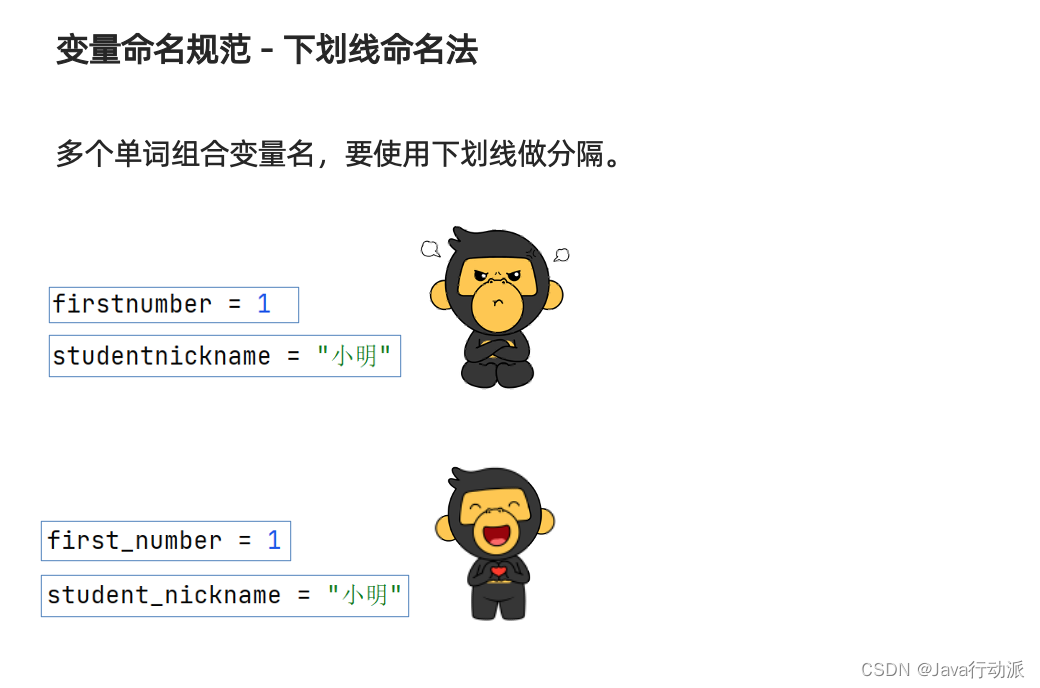
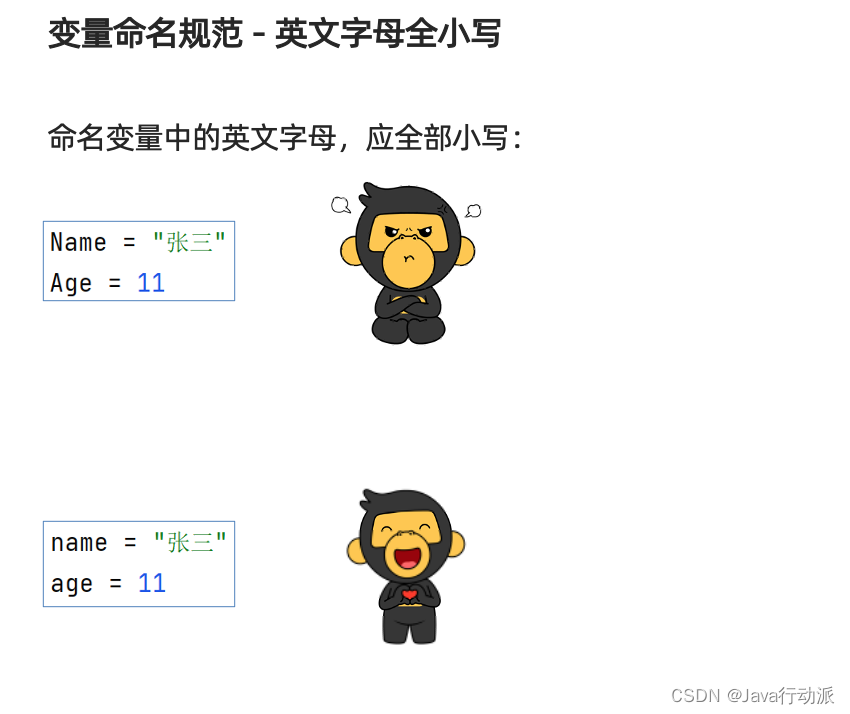
5、Python中命名规范
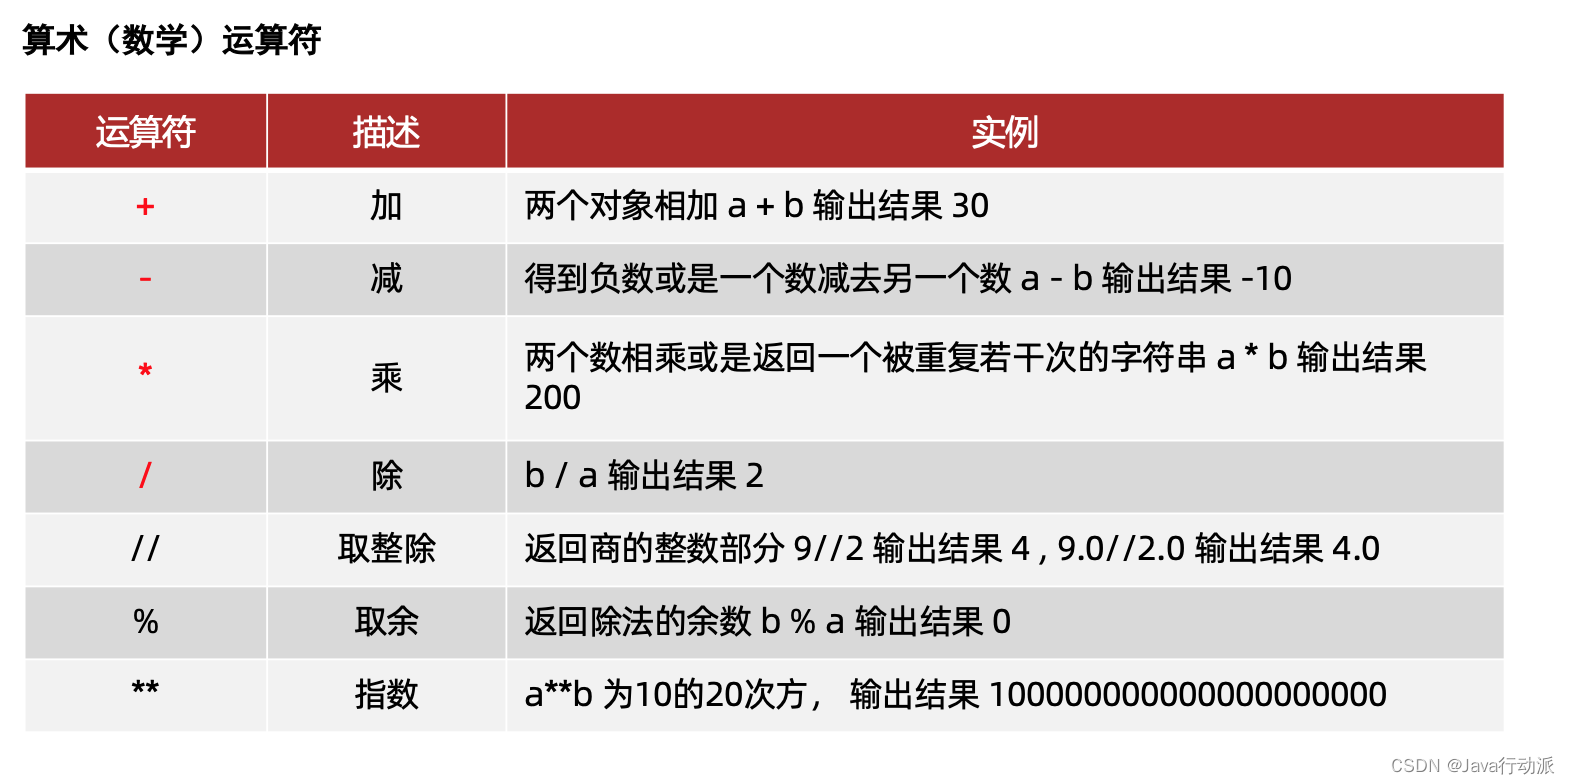
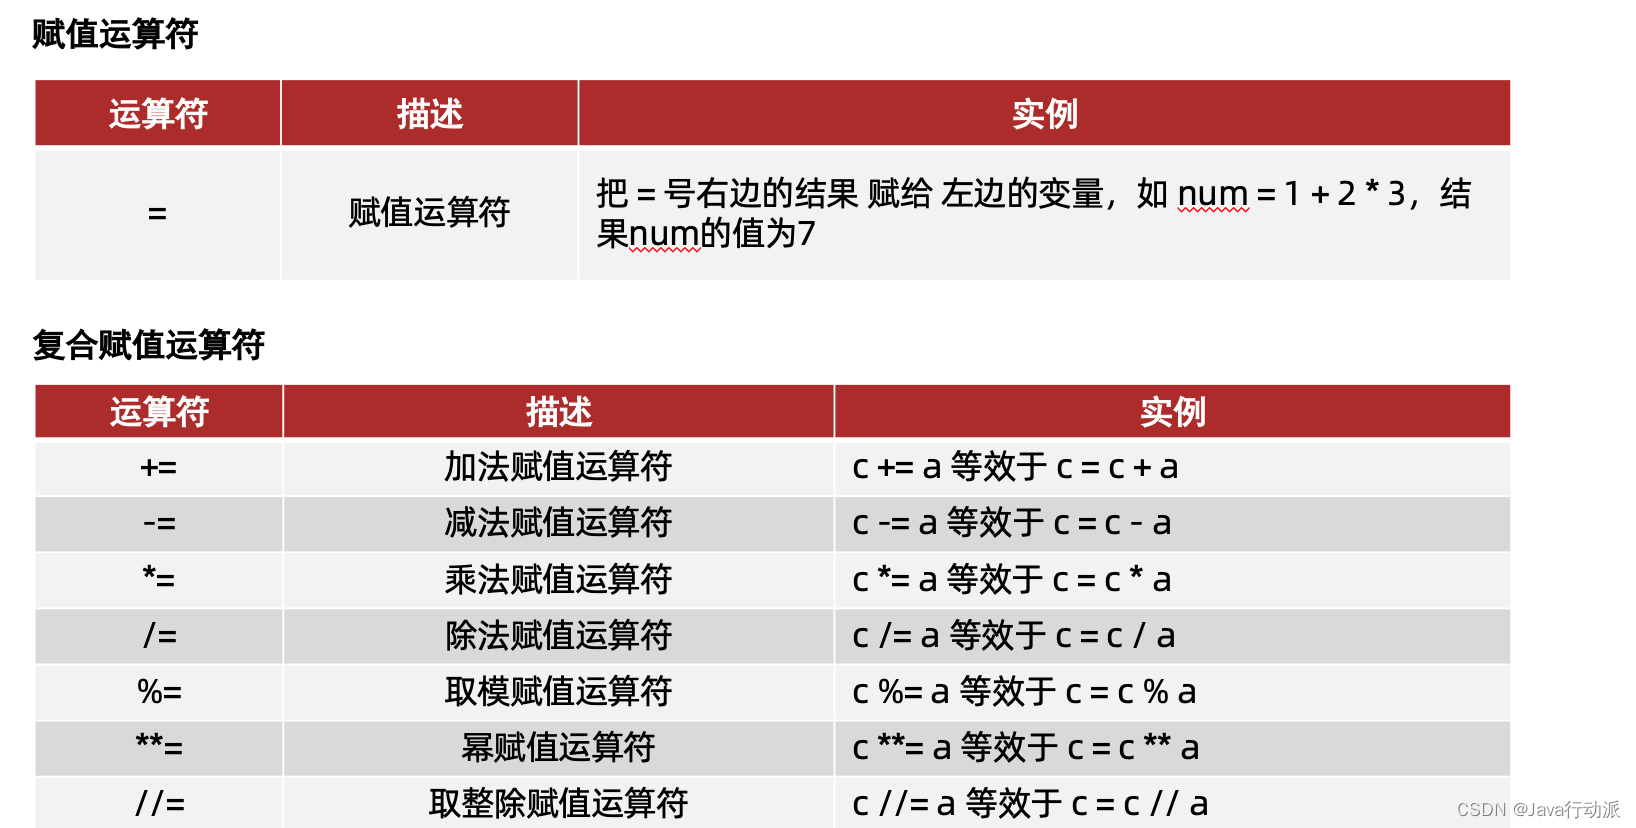
6、Python中的运算符
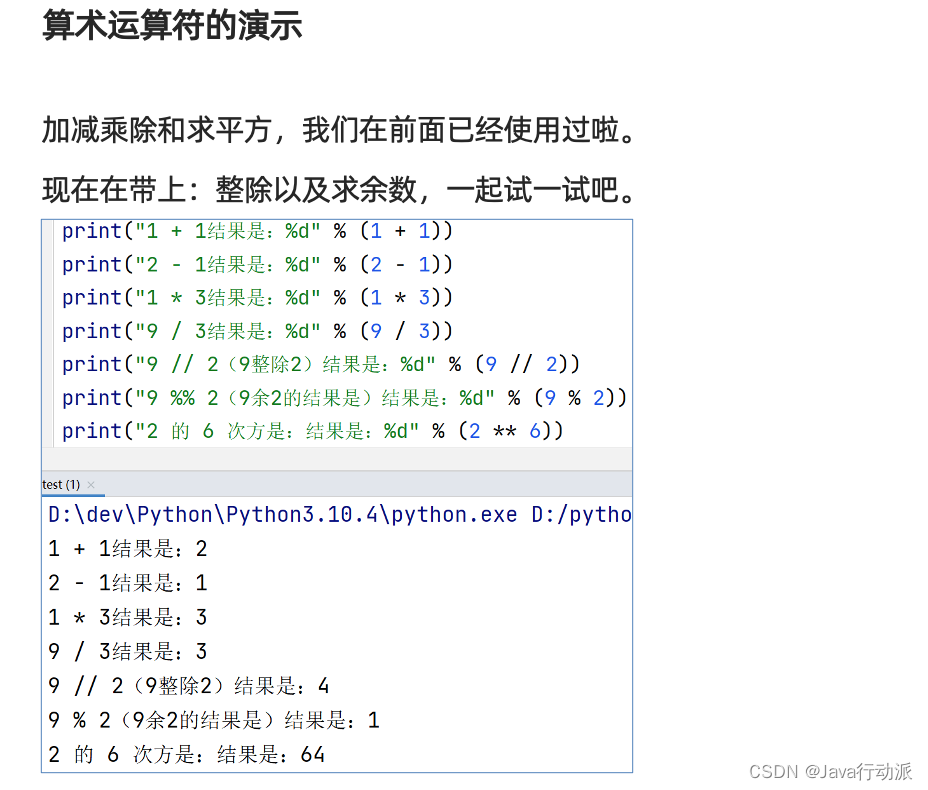
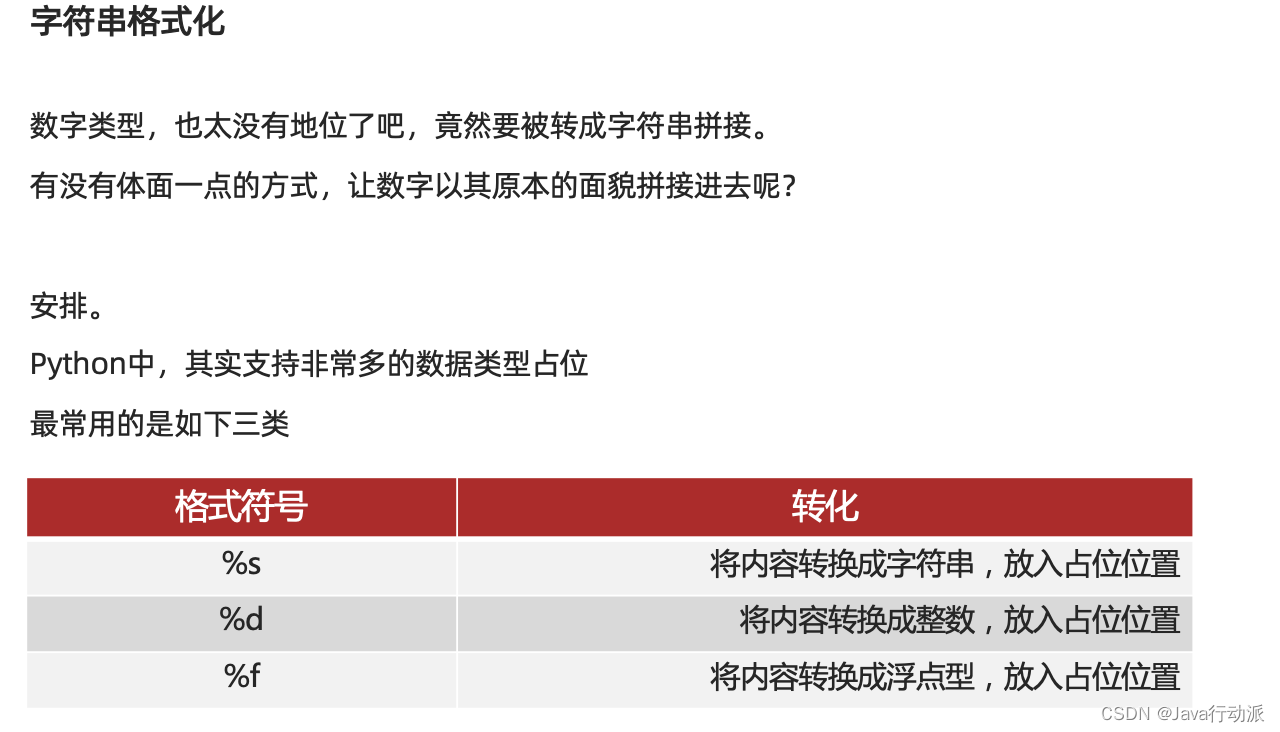
7、Python中字符串拼接、格式化
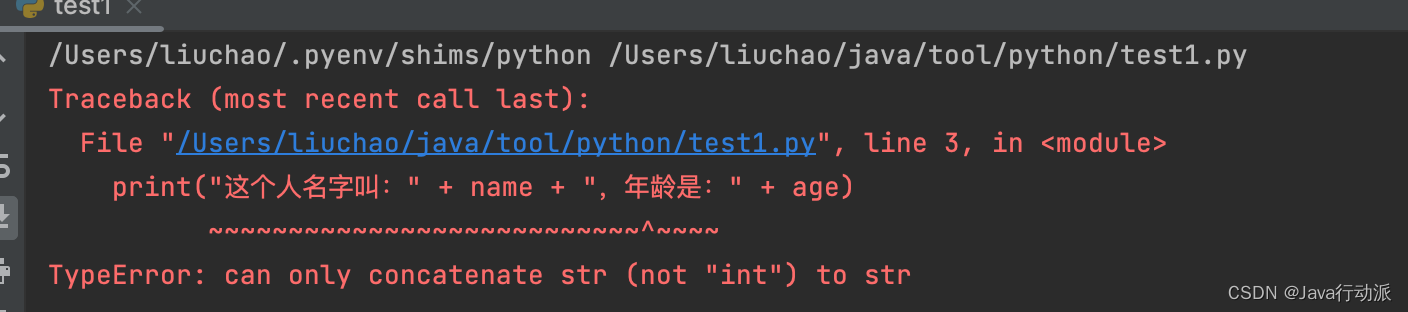
注意:Python非字符串类型不能和字符串一起拼接
name = "张三"
age = 23
print("这个人名字叫:" + name + ",年龄是:" + age)
报错:
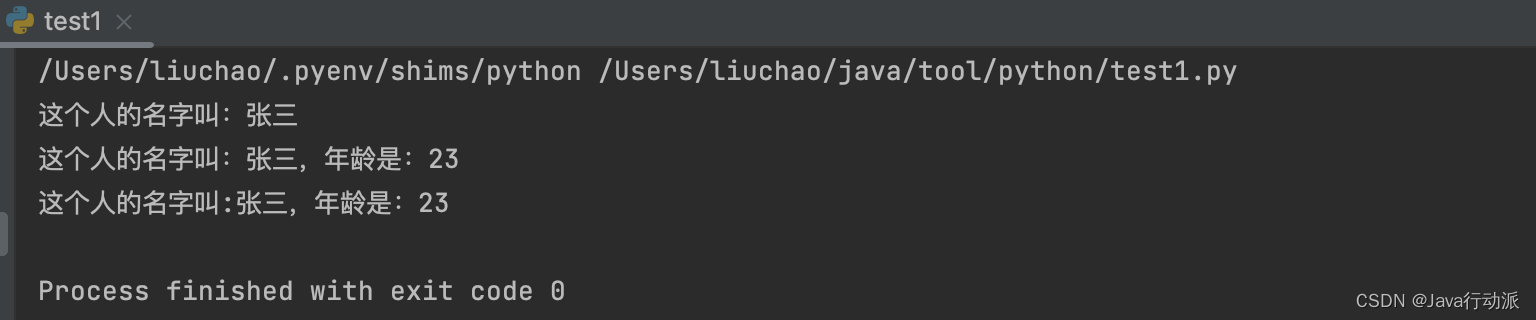
7.1、字符串格式化的两种方式
name = "张三"
age = 23
# print("这个人名字叫:" + name + ",年龄是:" + age)

"""
    方式一
"""

# 单条变量
print("这个人的名字叫:%s" % name)

# 多条变量
print("这个人的名字叫:%s,年龄是:%s" % (name, age))

"""
    方式二
    格式: f"xxx{变量},xxx{变量2},xxx{变量3}"
"""
print(f"这个人的名字叫:{name},年龄是:{age}")
执行效果

8、Python中的if语句
格式:
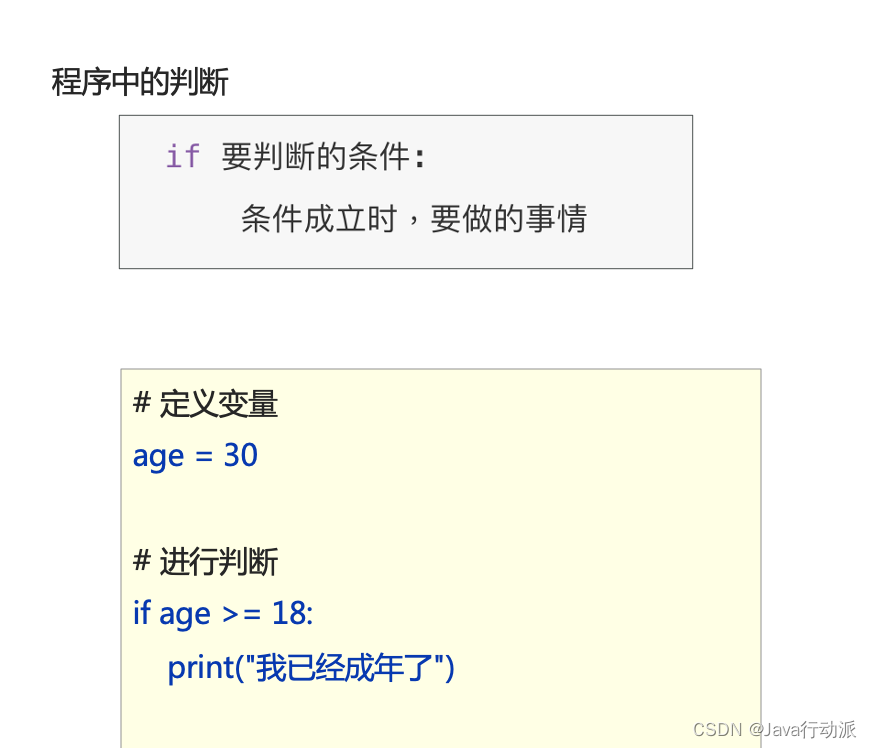
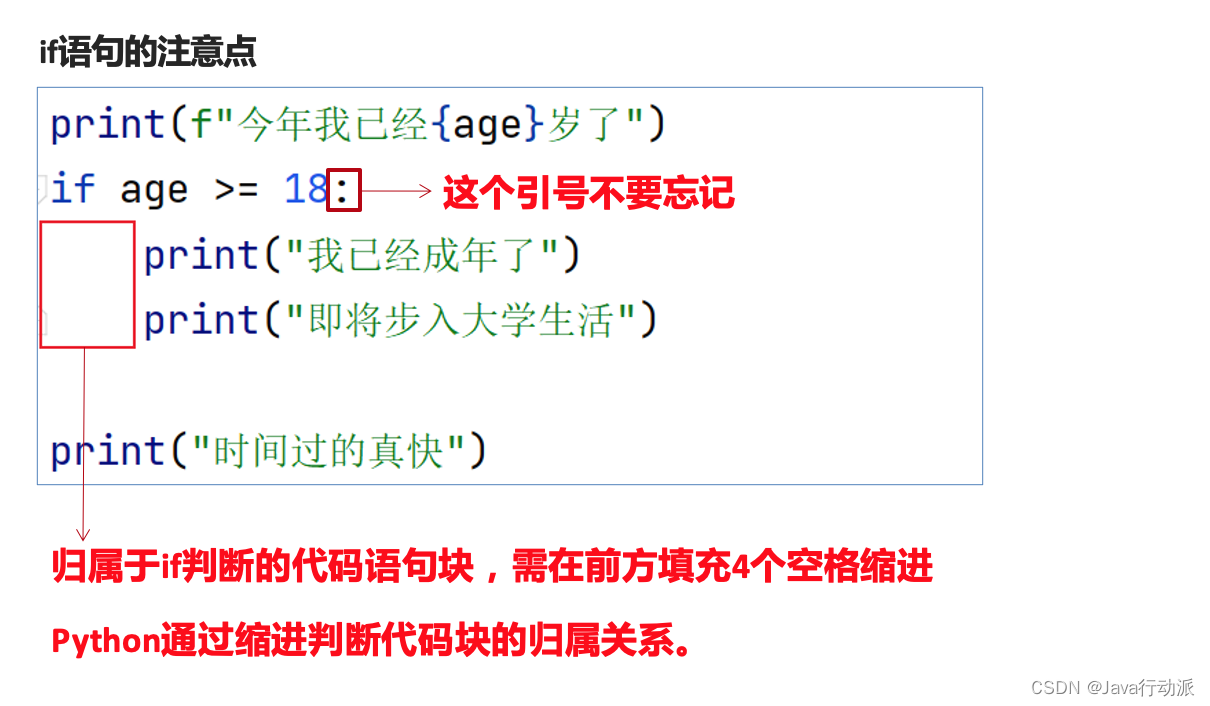
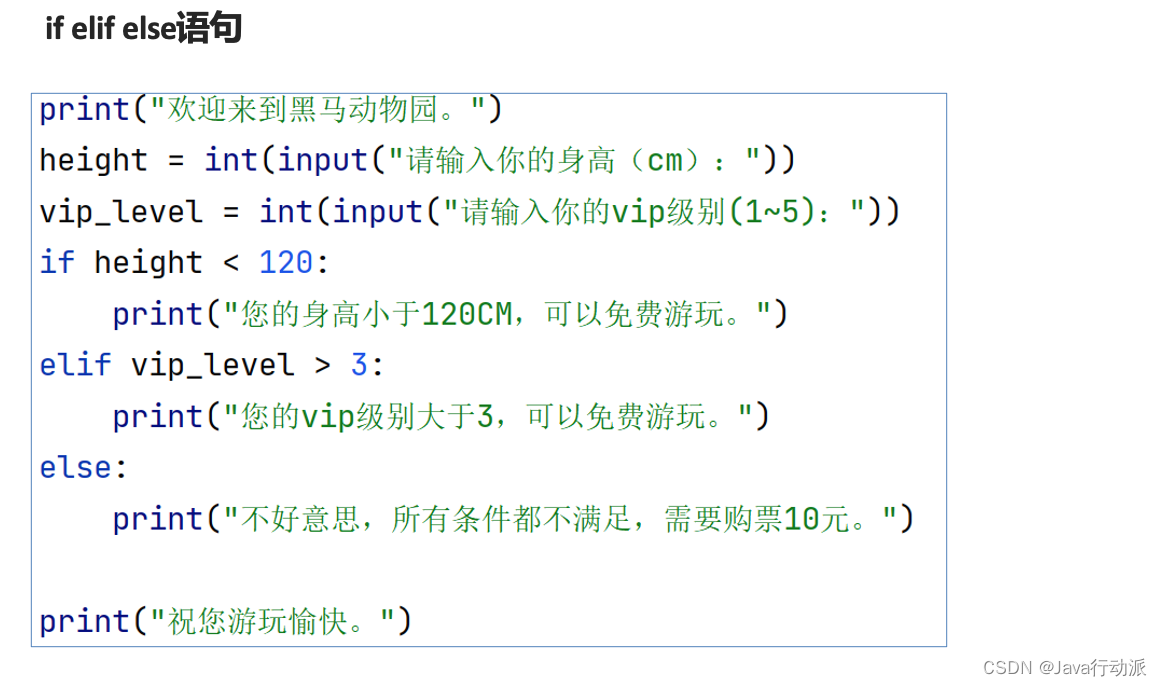
实例代码:
age = 20
# if
if age > 20:
print("你已经成年了")
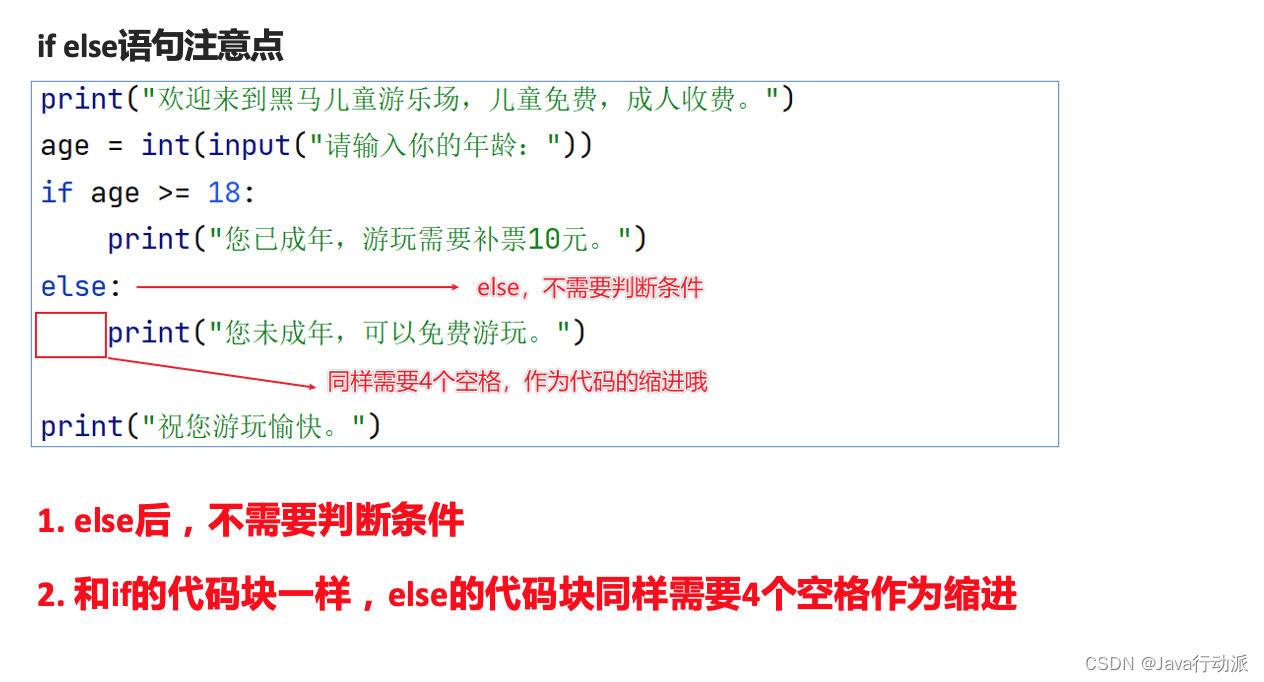
# if else
if age > 20:
print("成年了烦恼多")
else:
print("儿童的时光让人怀念")
# if elif else
if age > 20:
print("成年了烦恼多")
elif age == 5:
print("马上要上幼儿园了")
else:
print("不知道怎么说了")
9、Python中的循环
9.1、While
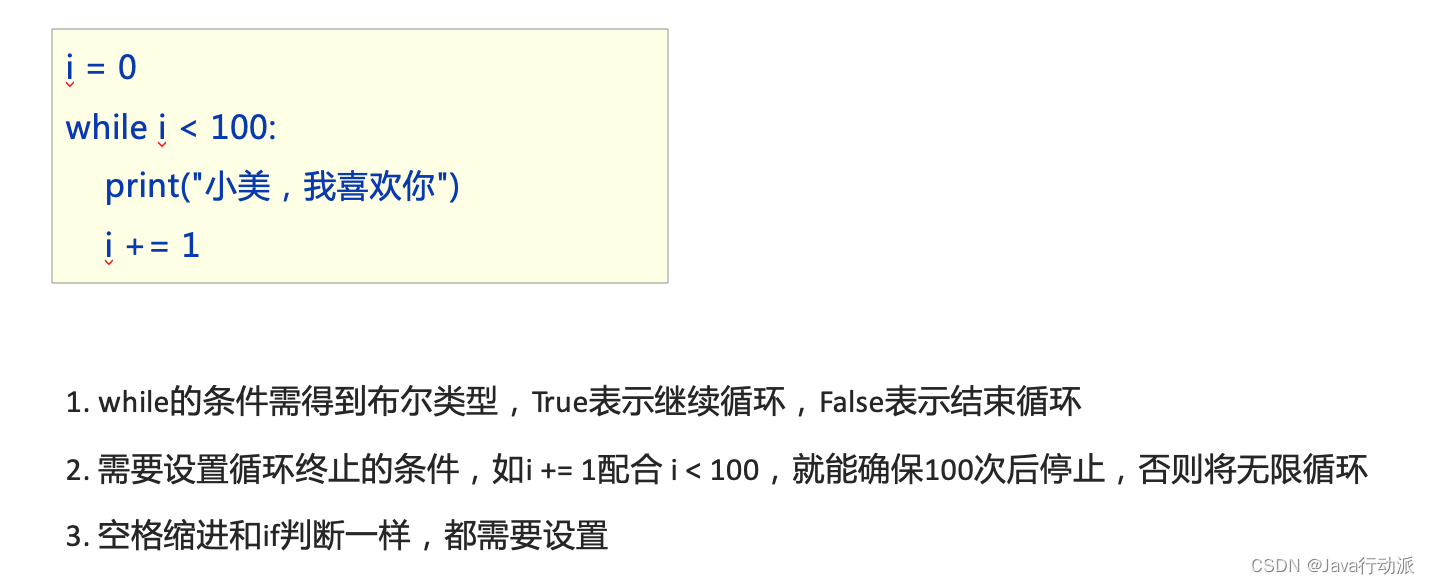
实例:
i = 10
while i > 1:
    i -= 1
    print(f"当前I值是:{i}")

# 九九乘法表

y = 1
while y <= 9:
    x = 1
    while x <= y:
        print(f"{x}*{y}={x * y}", end=' ')
        x += 1

    print("")
    y += 1
9.2、For
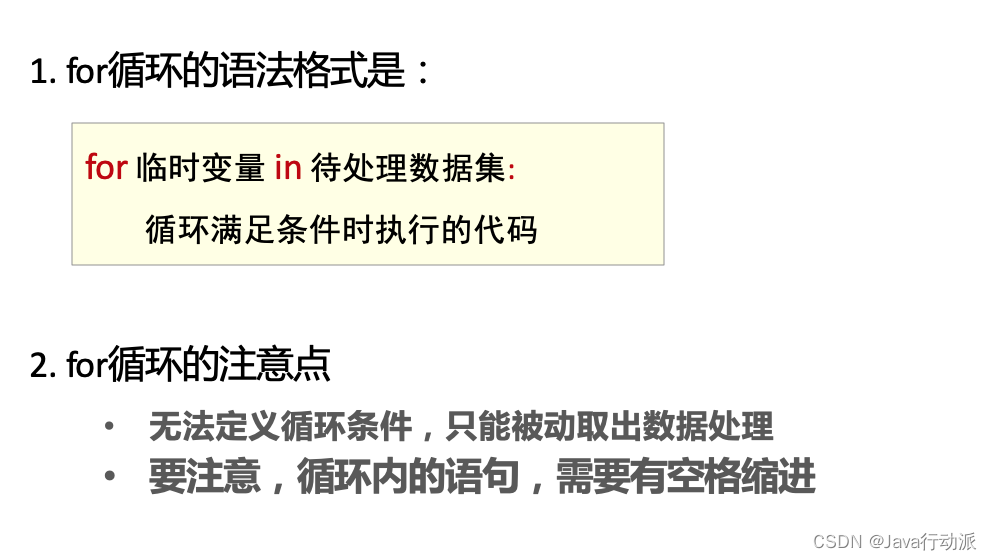
实例:
name = "abcdef"
for c in name:
    print(c)

# range(num) 获取一个从0开始,到num结束的数字序列(不含num本身)
# 例如 range(5)取得的数据是:[0, 1, 2, 3, 4]
for i in range(5):
    print(i)

# 获得一个从num1开始,到num2结束的数字序列(不含num2本身)
# 如,range(5, 10)取得的数据是:[5, 6, 7, 8, 9]
for i in range(5, 10):
    print(i)

# 获得一个从num1开始,到num2结束的数字序列(不含num2本身)
# 数字之间的步长,以step为准(step默认为1)
# 如,range(5, 10, 2)取得的数据是:[5, 7, 9]
for i in range(5, 10, 2):
    print(i)

# for 打印九九乘法表
for y in range(1, 9):
    for x in range(1, y):
        print(f"{x}*{y}={x * y}", end=' ')
    print('')
9.3、break、continue
# break
y = 1
while True:
if y > 10:
break
print(f"当前Y值:{y}")
y += 1
# continue
for c in ["a", "b", "c", "d"]:
if c == 'c':
print("不打印c")
continue
print(c)
# 综合练习
money = 10000
for num in range(1, 20):
tempNum = random.randint(1, 10)
if tempNum < 5:
print(f"员工:{num},绩效分:{tempNum},低于5,不发工资")
continue
if money <= 0:
print(f"账户没钱了,下次再发")
break
money -= 1000
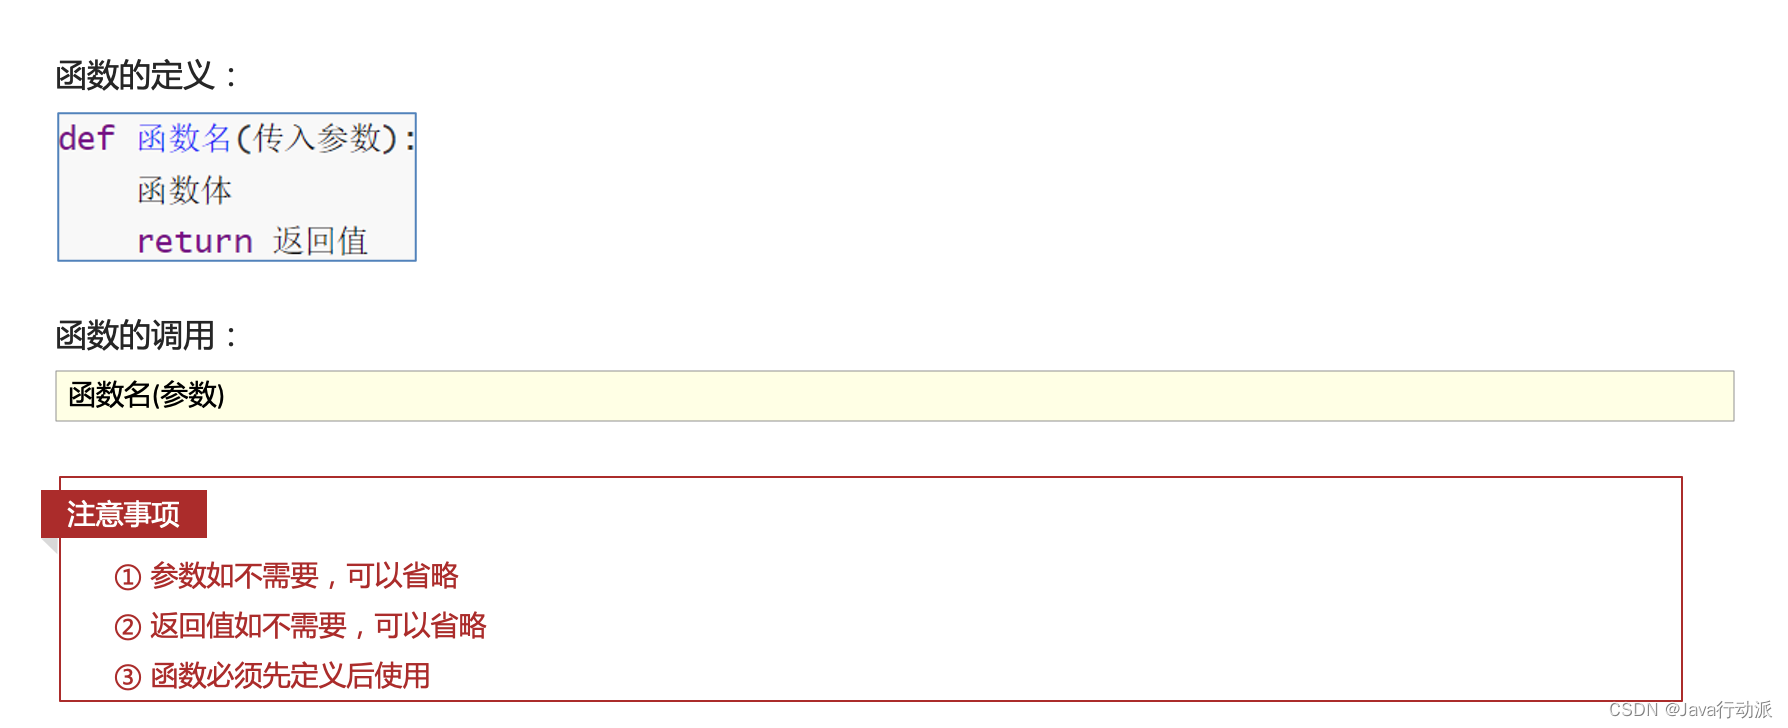
print(f"向员工:{num},发工资:{1000},账户余额:{money}")10、函数
"""
    无参 无返回值数函数
"""


def no_arg_fun():
    print("我是无参数函数")


no_arg_fun()

"""
    有参 无返回值数函数
"""


def had_arg_fun(msg):
    print(f"hello:{msg}")


had_arg_fun("world")

"""
    有参数有返回值 函数
"""


def had_arg_and_return_fun(msg):
    return f"hello:{msg}"


print(had_arg_and_return_fun("有参有返回值"))

"""
    多参数
"""


def mul_arg_fun(num1: int, num2: int) -> int:
    return num1 + num2


# 传参数方式1,多参数必须按顺序传入
print(mul_arg_fun(1, 2))
# 传参数方式2 ,多参数之间不需要舒心
print(mul_arg_fun(num2=4, num1=3))

"""
    不定长参数 不定长参数一定是最后一个参数
    nums 被作为一个元组(tuple)传入
"""


def mul_arg_fun_3(num1: int, *nums: int) -> int:
    print(type(nums))
    for i in nums:
        num1 = num1 + i

    return num1


print(mul_arg_fun_3(2, 3, 4, 5, 6, 7))

"""
    不定长参数2 不定长参数一定是最后一个参数
    keyMaps 被作为一个字典
"""


def mul_arg_fun_4(**key_maps) -> int:
    print(type(key_maps))
    print(key_maps)


print(mul_arg_fun_4(age=4, name='张三'))

"""
    函数嵌套使用
"""


def fun_a():
    print("函数A")


def fun_b():
    print("调用函数A之前")
    fun_a()
    print("调用函数A之后")


fun_b()

"""
    函数作为参数传递
"""


def test_fun(compute):
    result = compute(1, 2)
    print(result)


def compute(x, y):
    return x + y


# 正常函数传入
test_fun(compute)
# 匿名函数传入
test_fun(lambda x, y: x + y)
11、Phton中文件操作
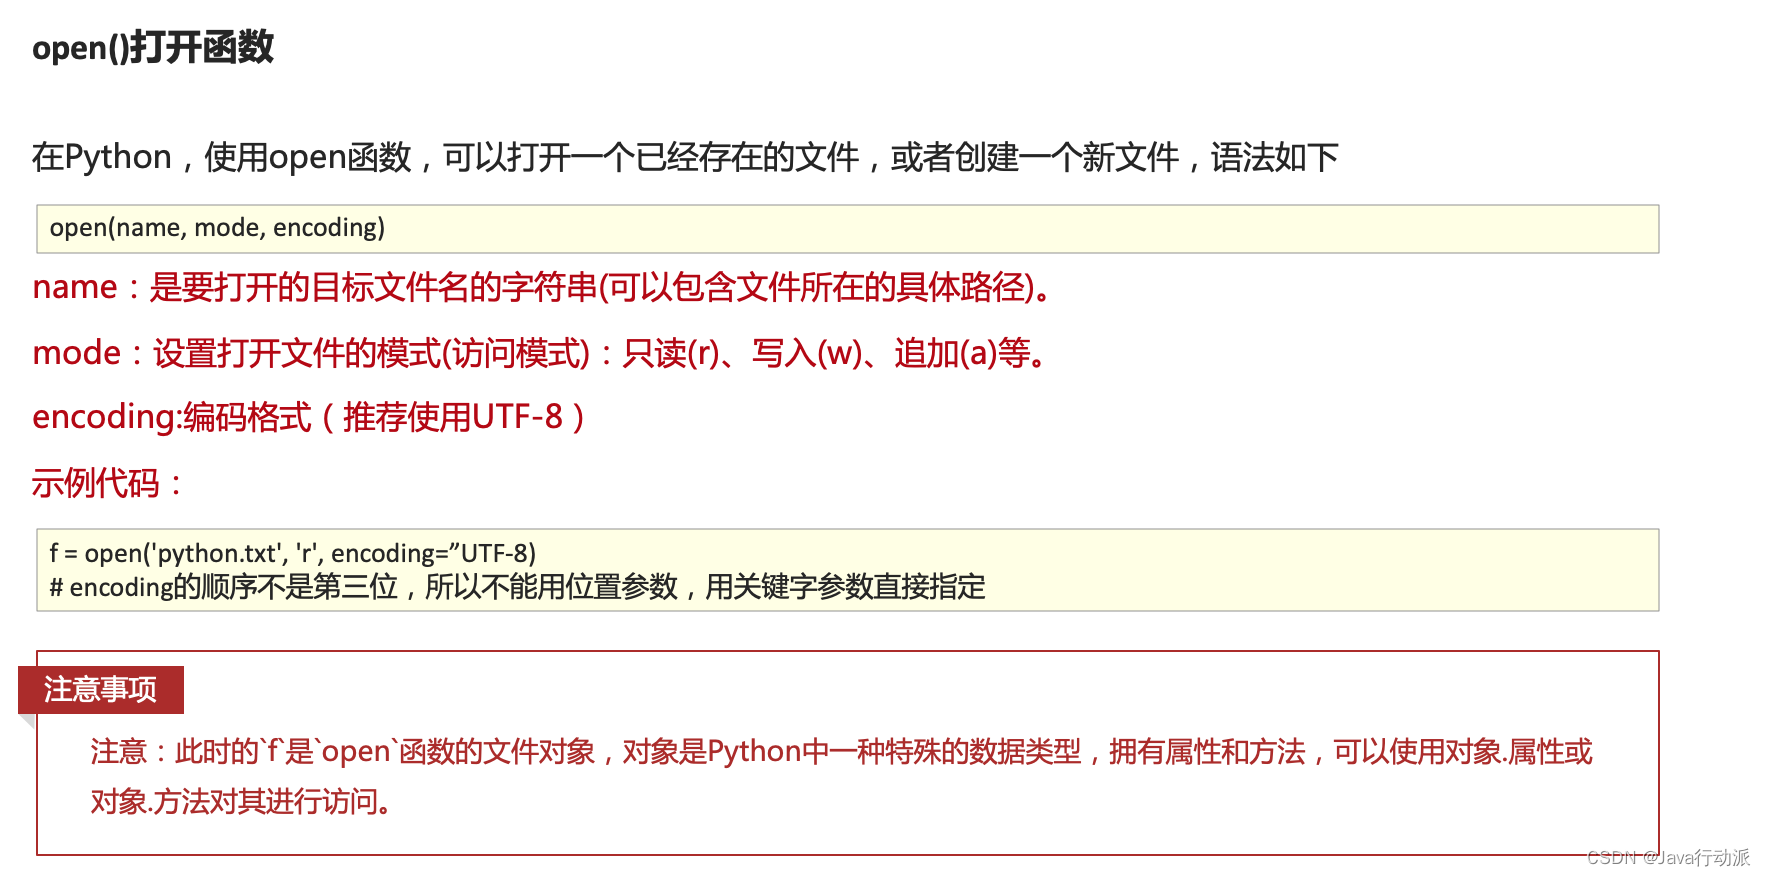
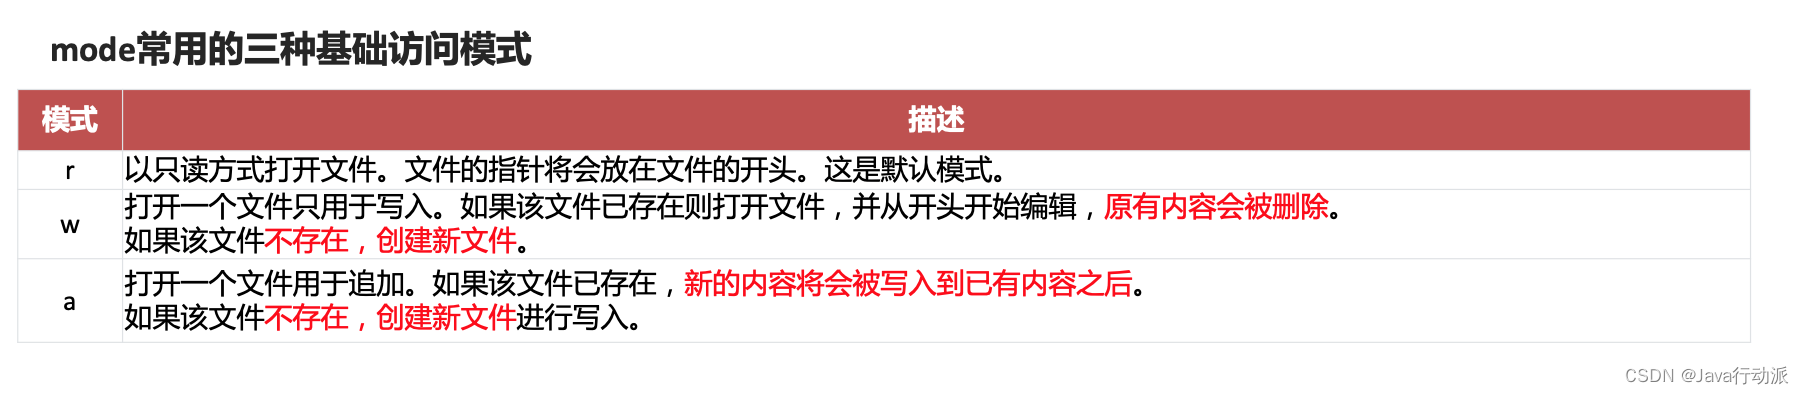
11.1、读取文件
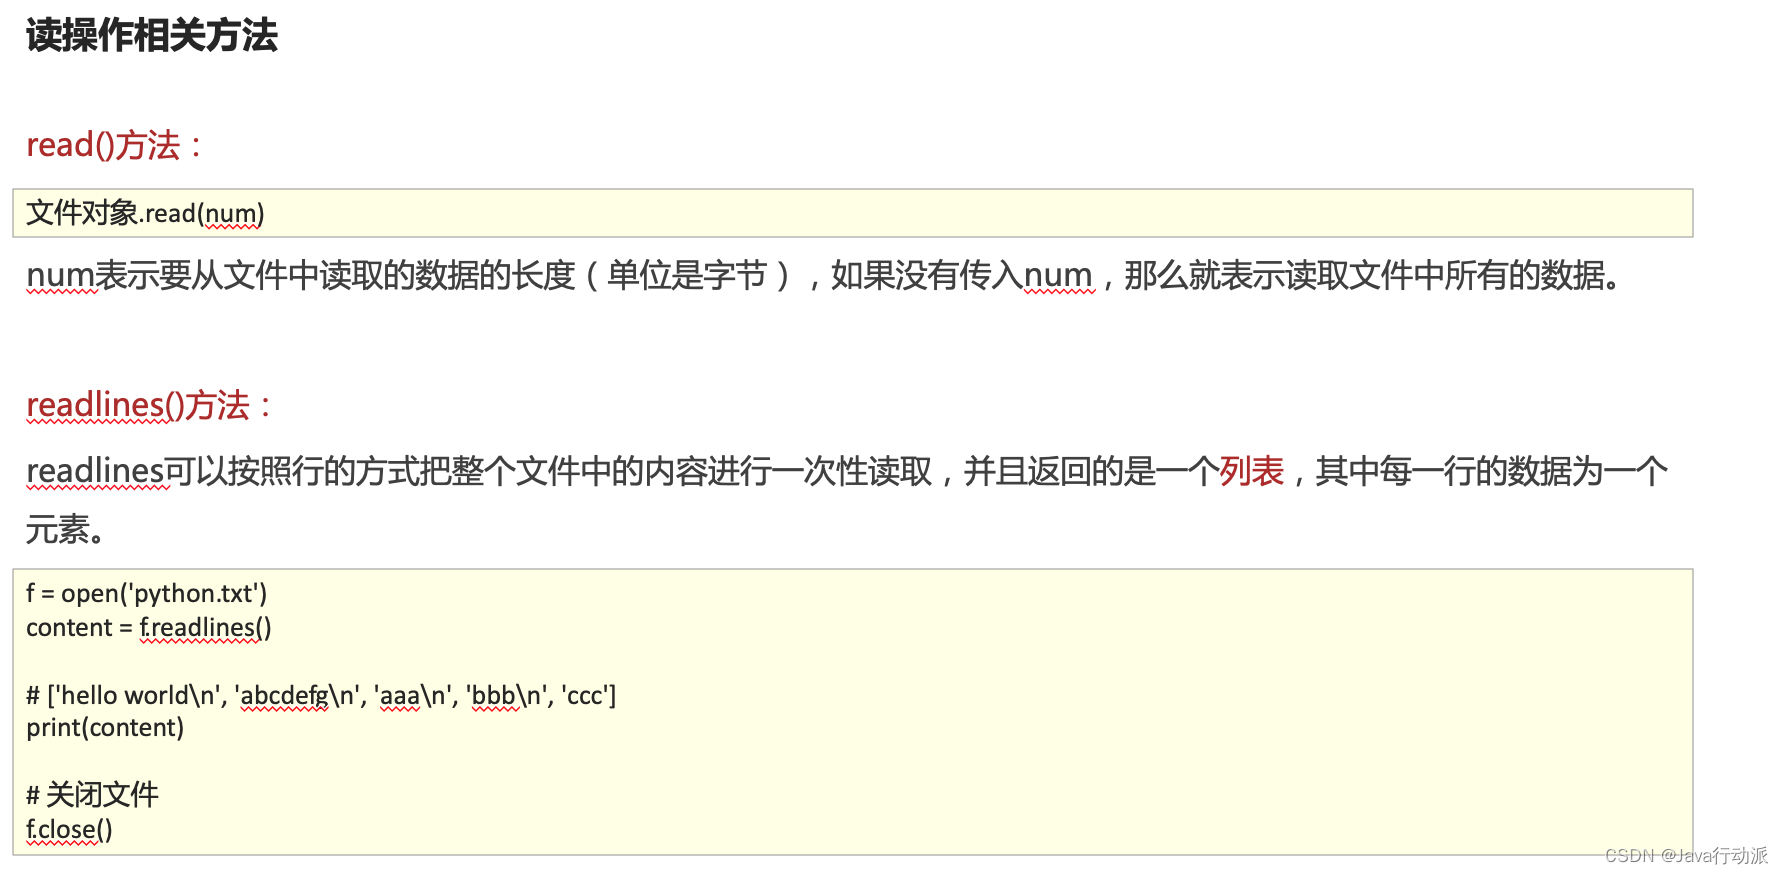
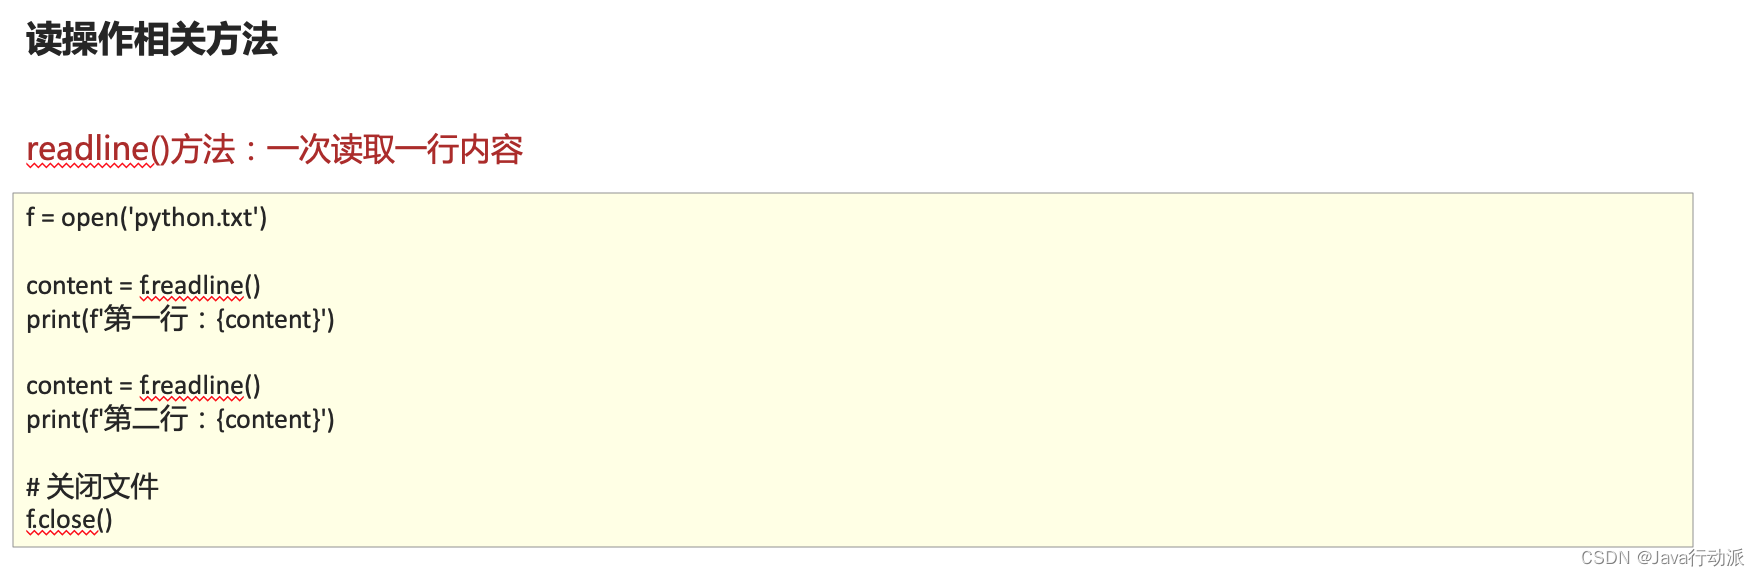
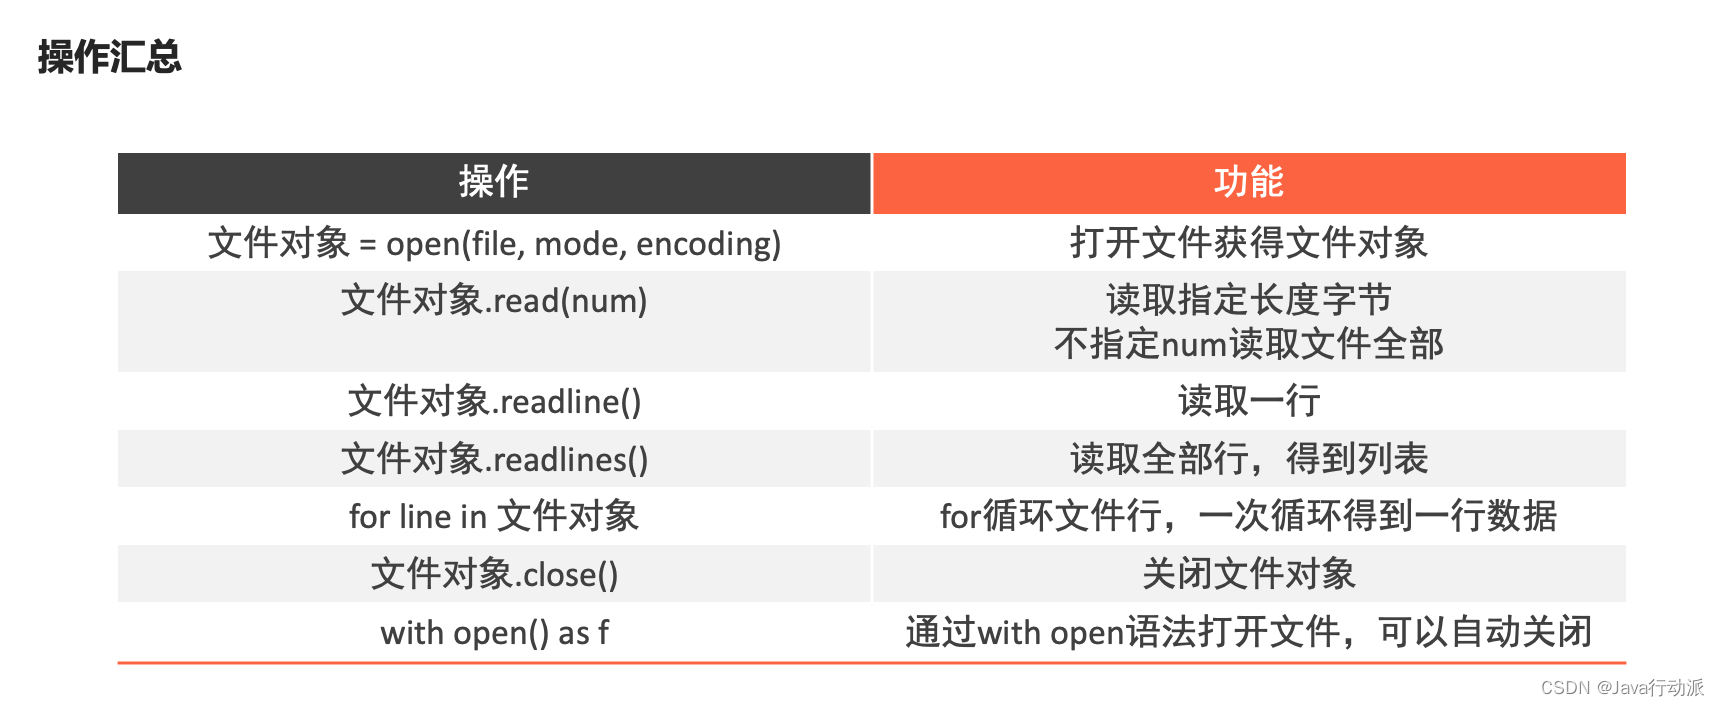
实例:
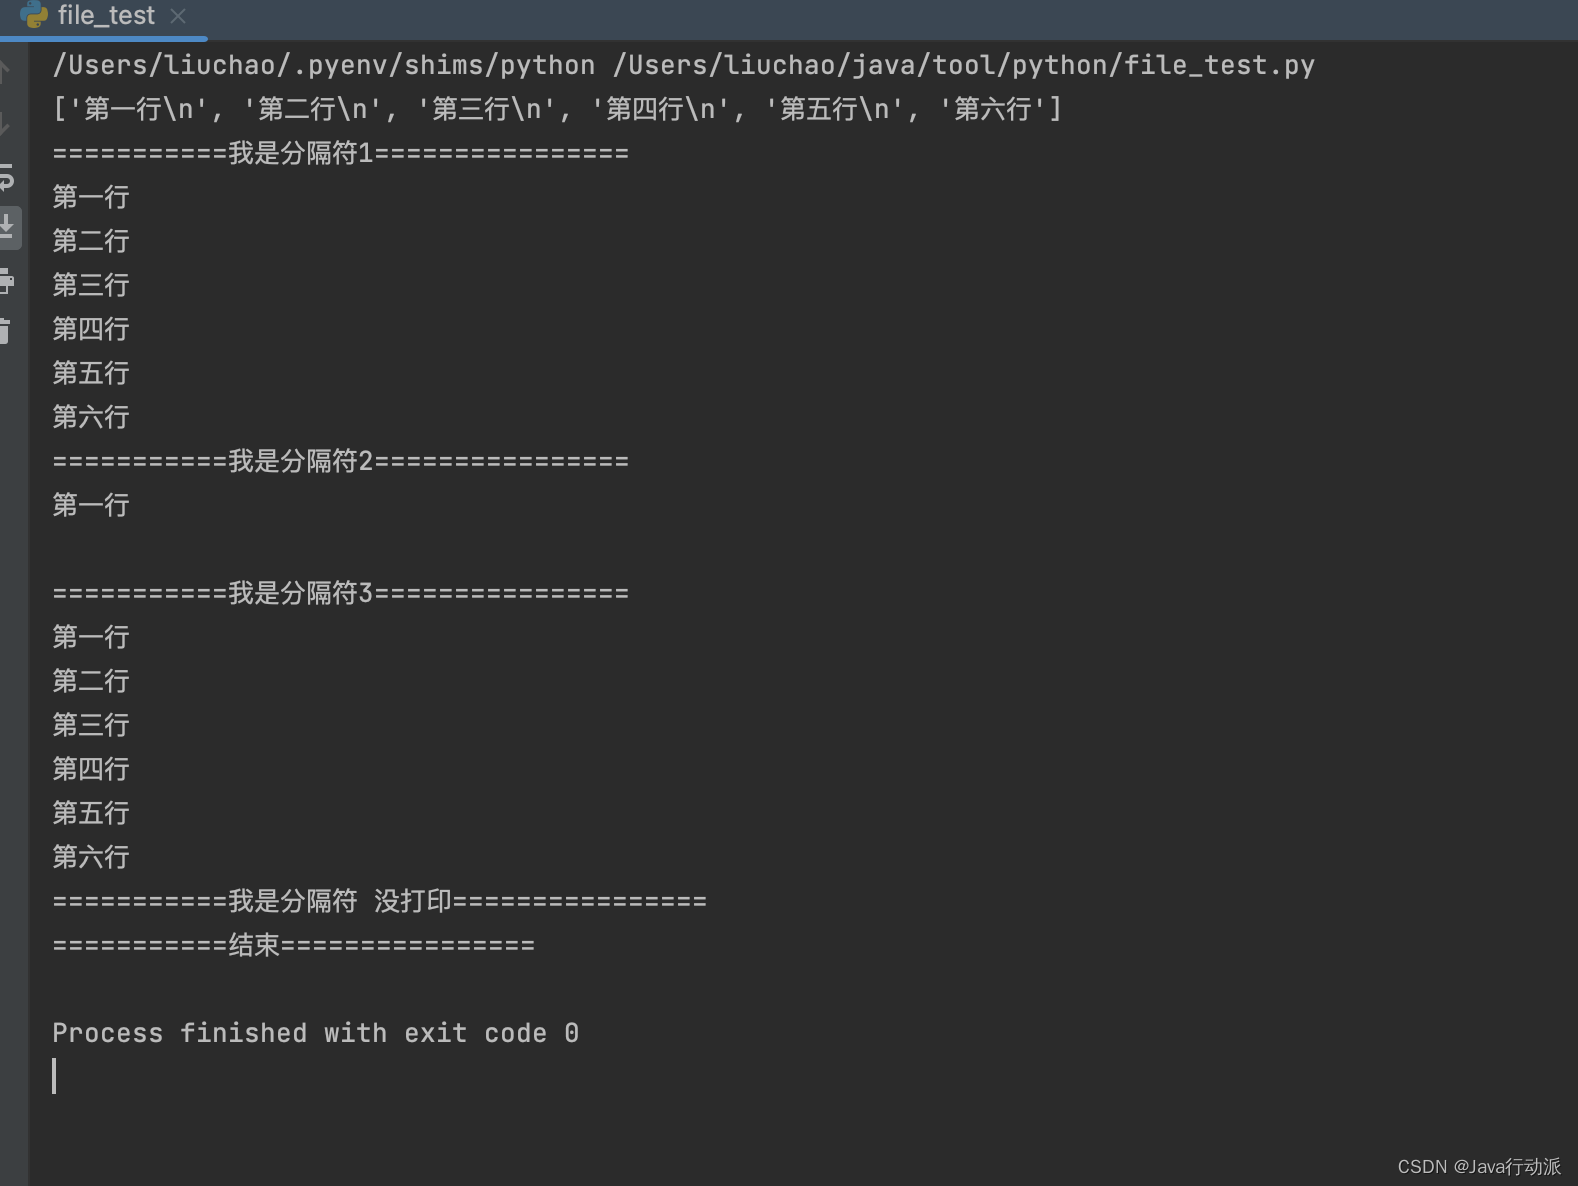
"""
读文件
"""
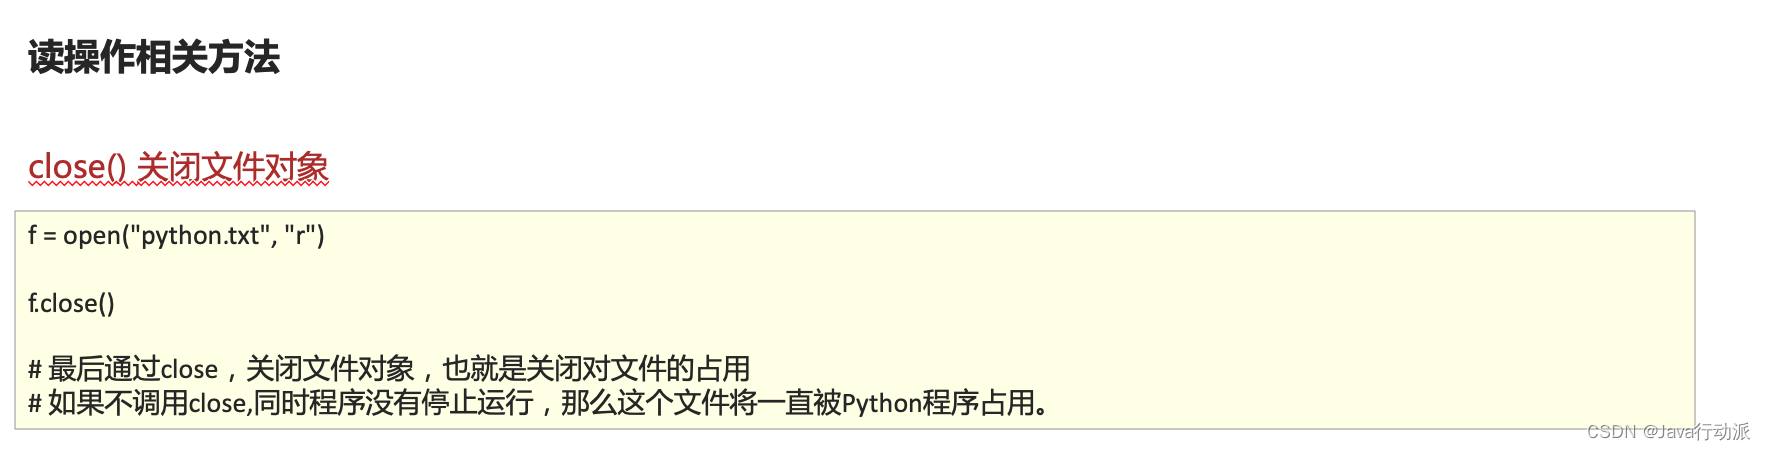
f = open("1.txt", "r", encoding="UTF-8")
print(f.readlines())
f.close()
print("===========我是分隔符1================")
f = open("1.txt", "r", encoding="UTF-8")
print(f.read())
f.close()
print("===========我是分隔符2================")
f = open("1.txt", "r", encoding="UTF-8")
print(f.readline())
f.close()
print("===========我是分隔符3================")
# 此操作未关闭文件对象
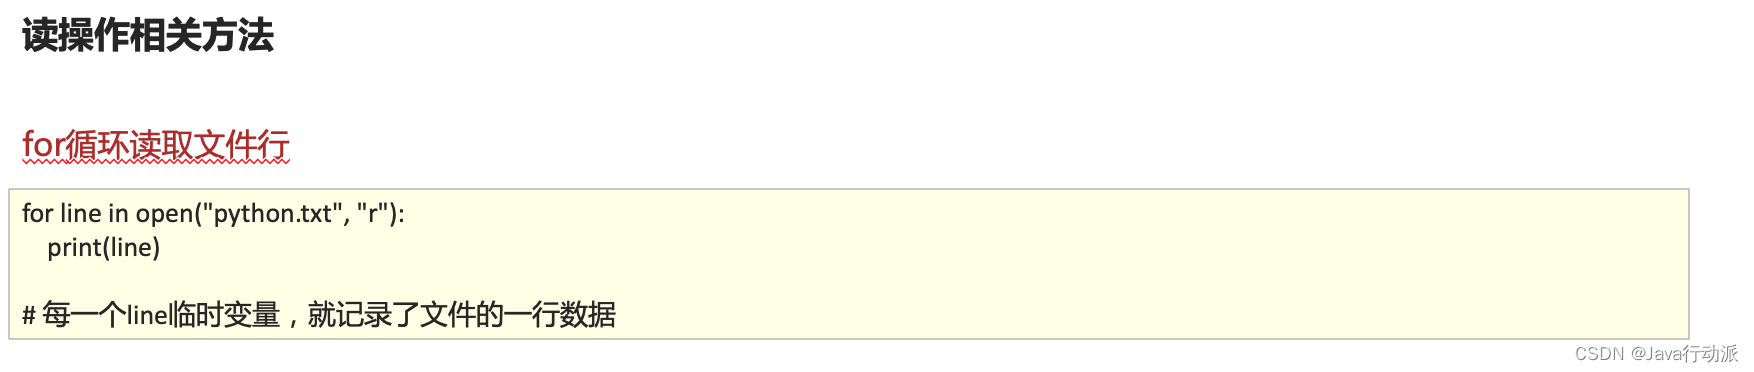
for line in open("1.txt", "r", encoding="UTF-8"):
print(line, end="")
print("")
print("===========我是分隔符 没打印================")
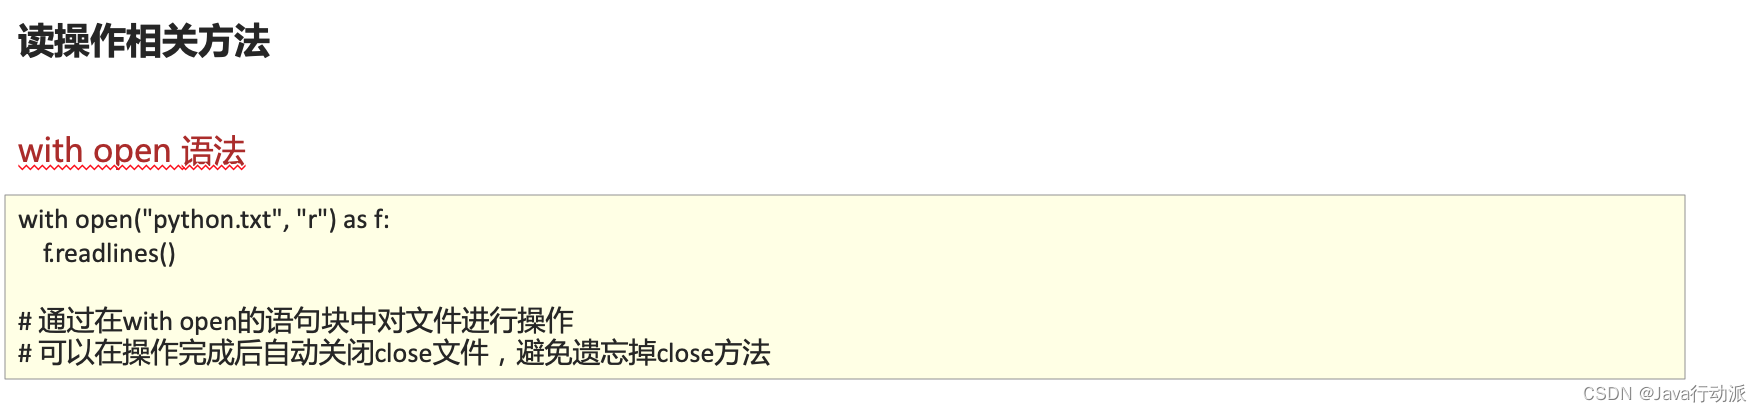
with open("1.txt", "r", encoding="UTF-8") as f:
f.readlines()
print("===========结束================")
效果
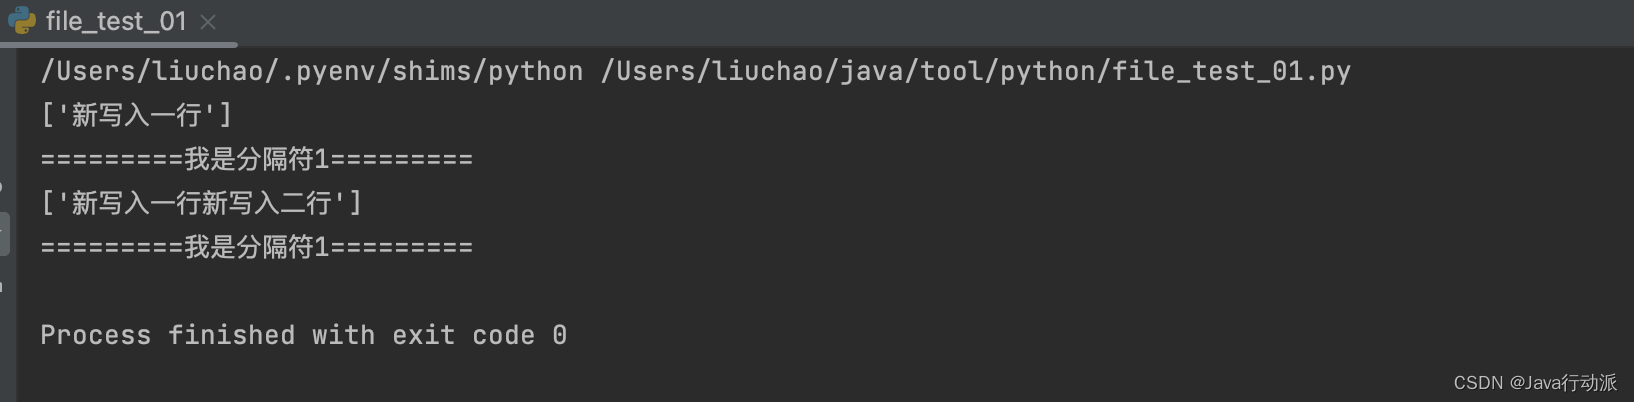
11.2、写入文件


写入实例:文件内容被替换
"""
    写入操作
"""

# 写入之前看看文件内容
f = open("1.txt", "r", encoding="UTF-8")
print(f.readlines())
f.close()

print("=========我是分隔符1=========")

f = open("1.txt", "w", encoding="UTF-8")
f.write("新写入一行")
f.flush()

# 写入之后看看文件内容
f = open("1.txt", "r", encoding="UTF-8")
print(f.readlines())
f.close()

print("=========我是分隔符1=========")

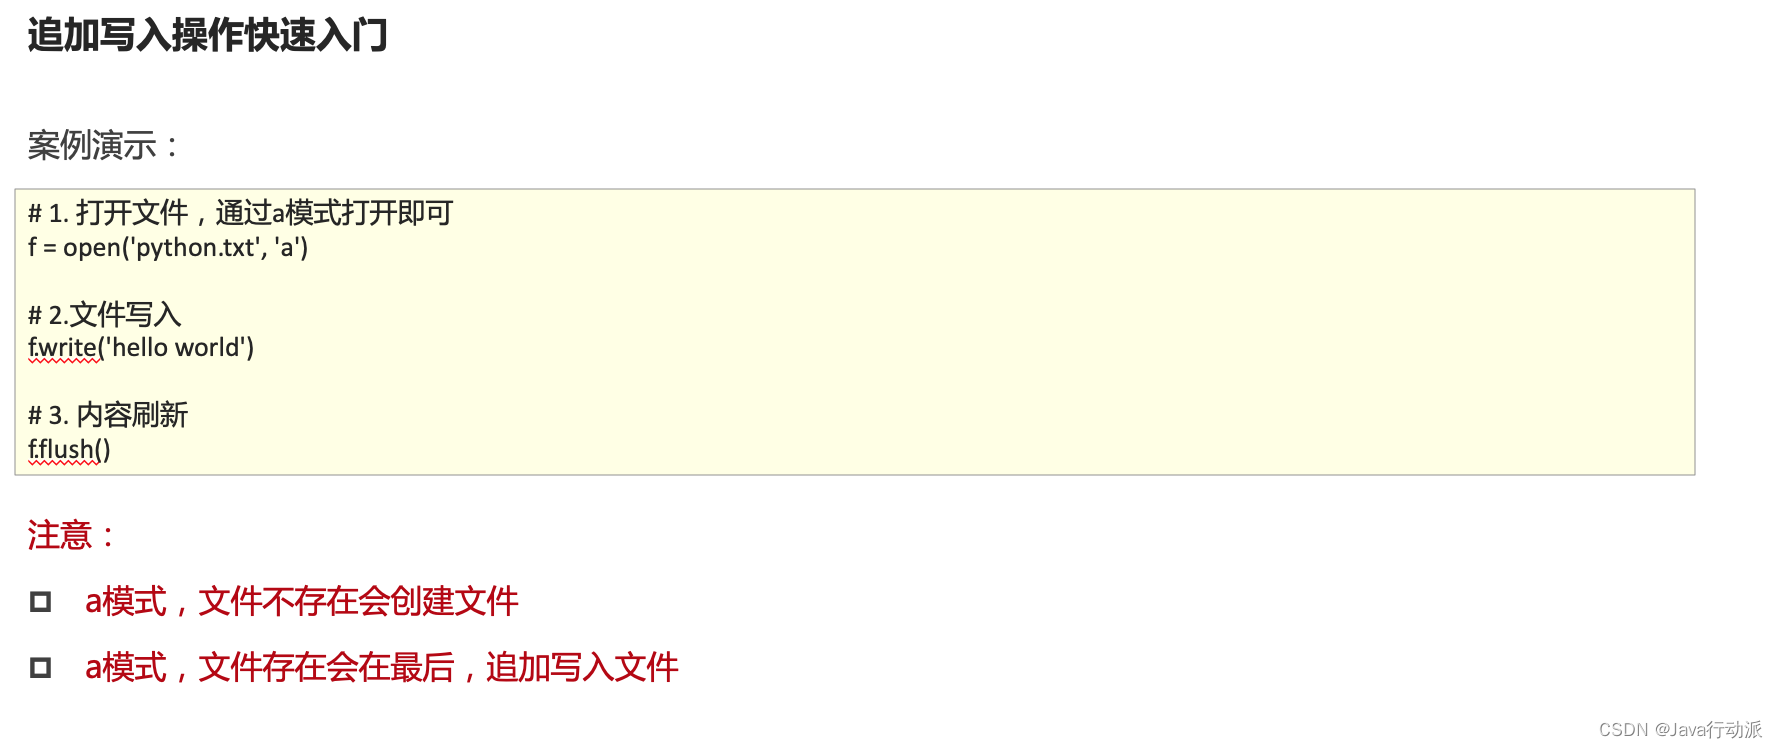
追加实例
"""
    写入操作
"""

# 写入之前看看文件内容
f = open("1.txt", "r", encoding="UTF-8")
print(f.readlines())
f.close()

print("=========我是分隔符1=========")

f = open("1.txt", "a", encoding="UTF-8")
f.write("新写入二行")
f.flush()

# 写入之后看看文件内容
f = open("1.txt", "r", encoding="UTF-8")
print(f.readlines())
f.close()

print("=========我是分隔符1=========")
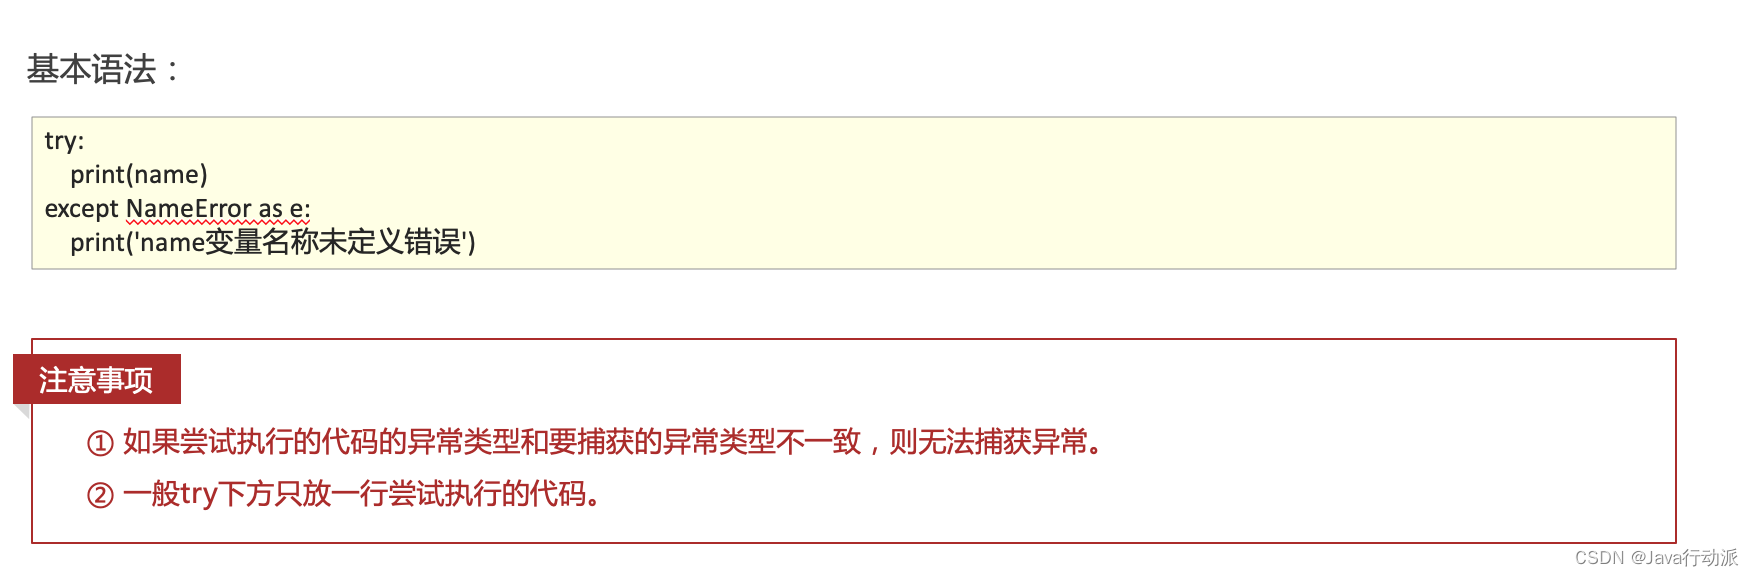
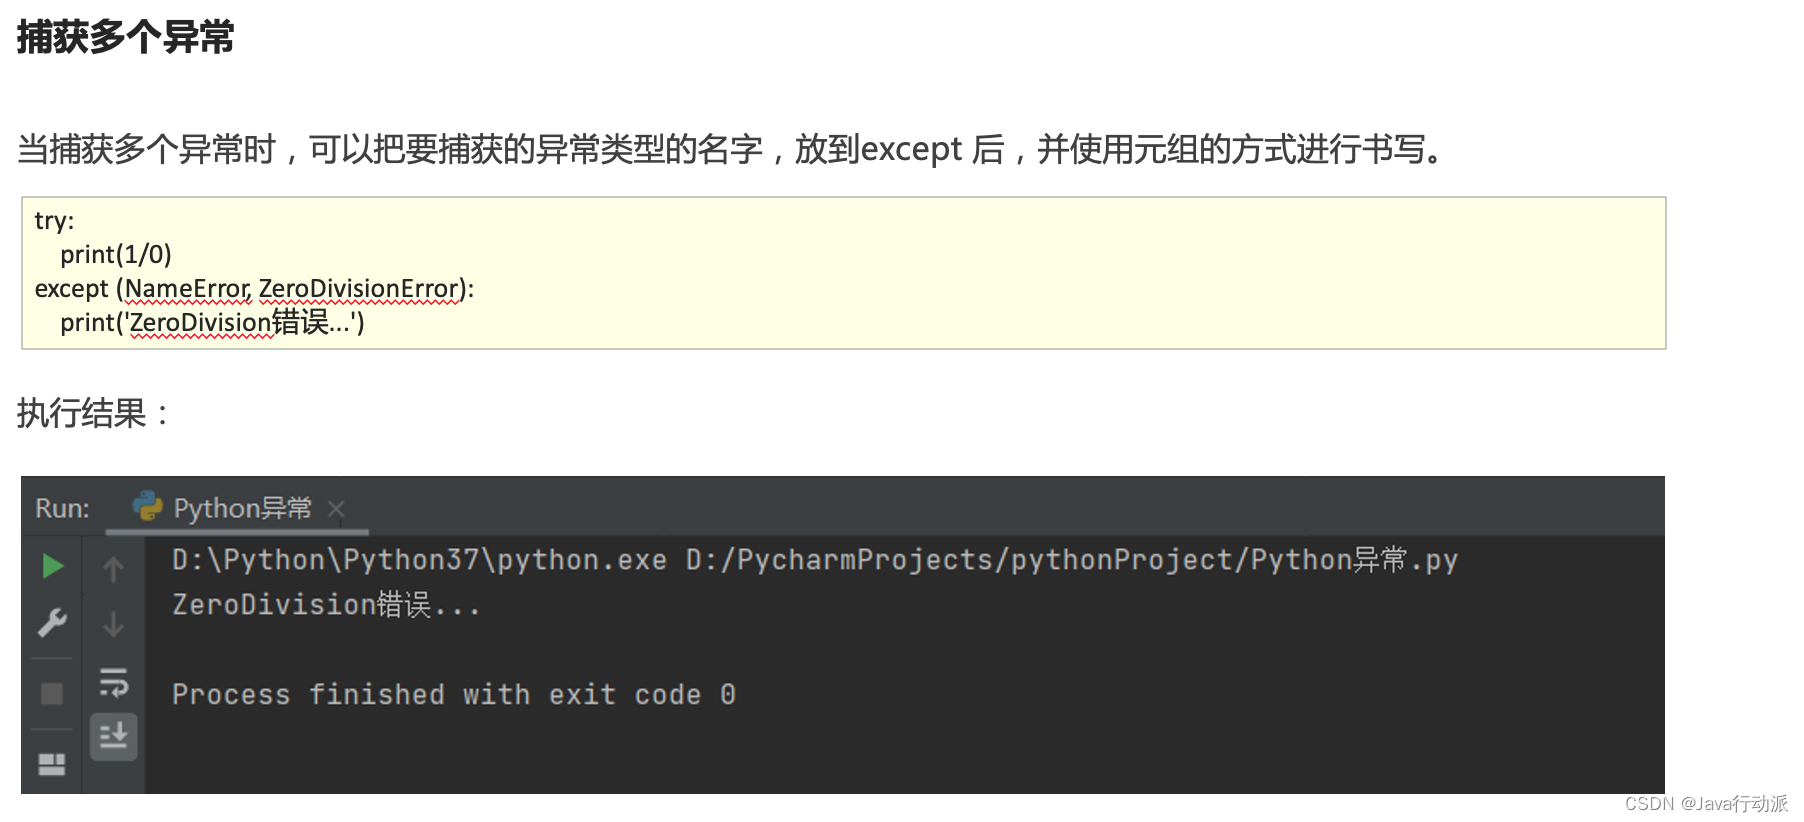
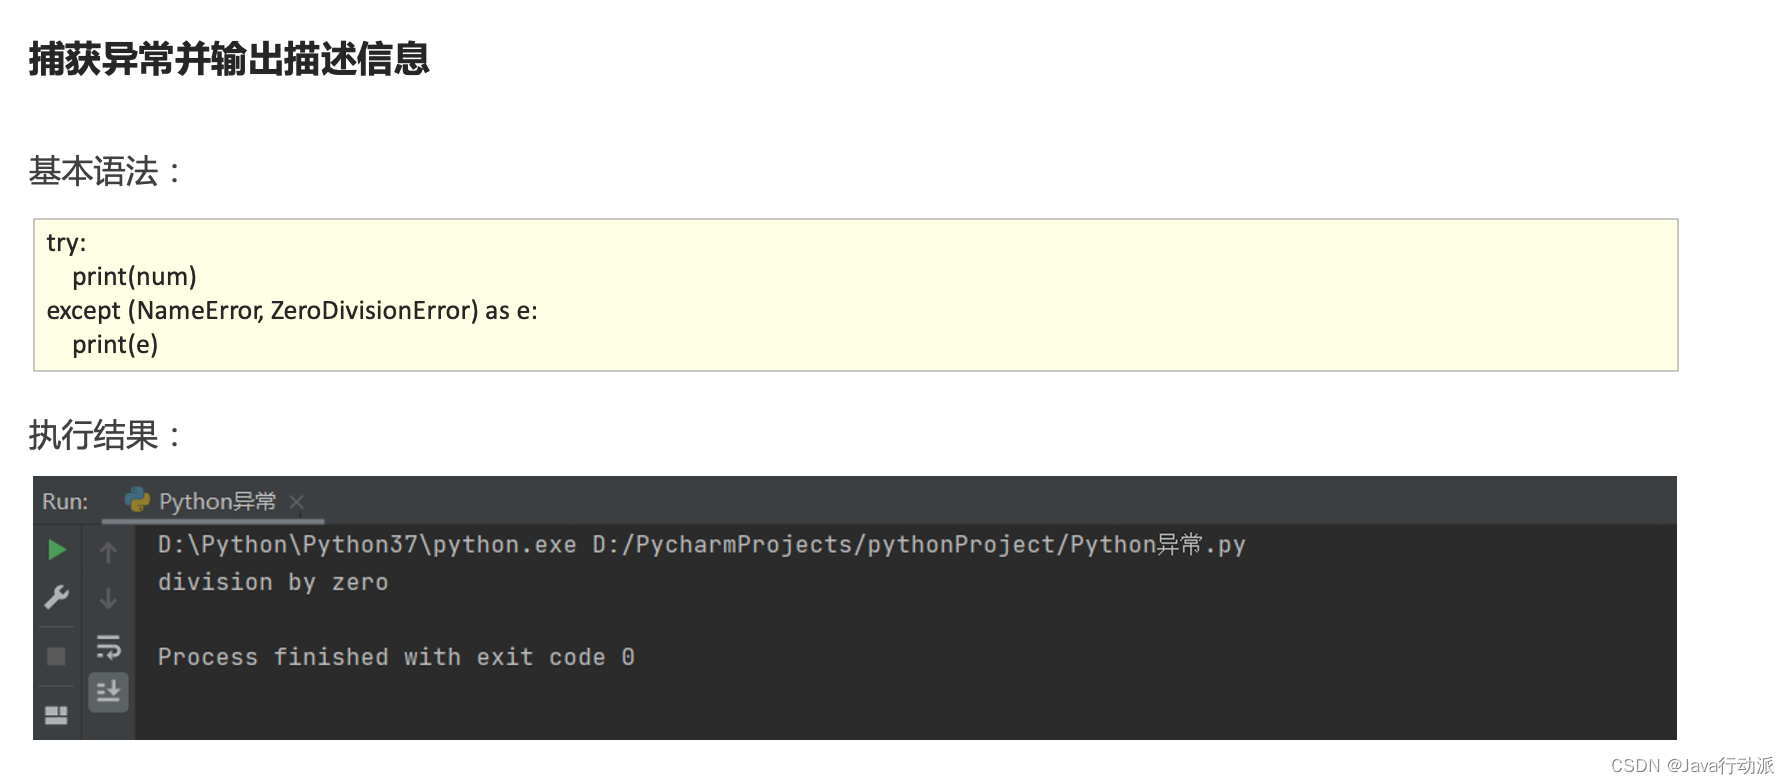
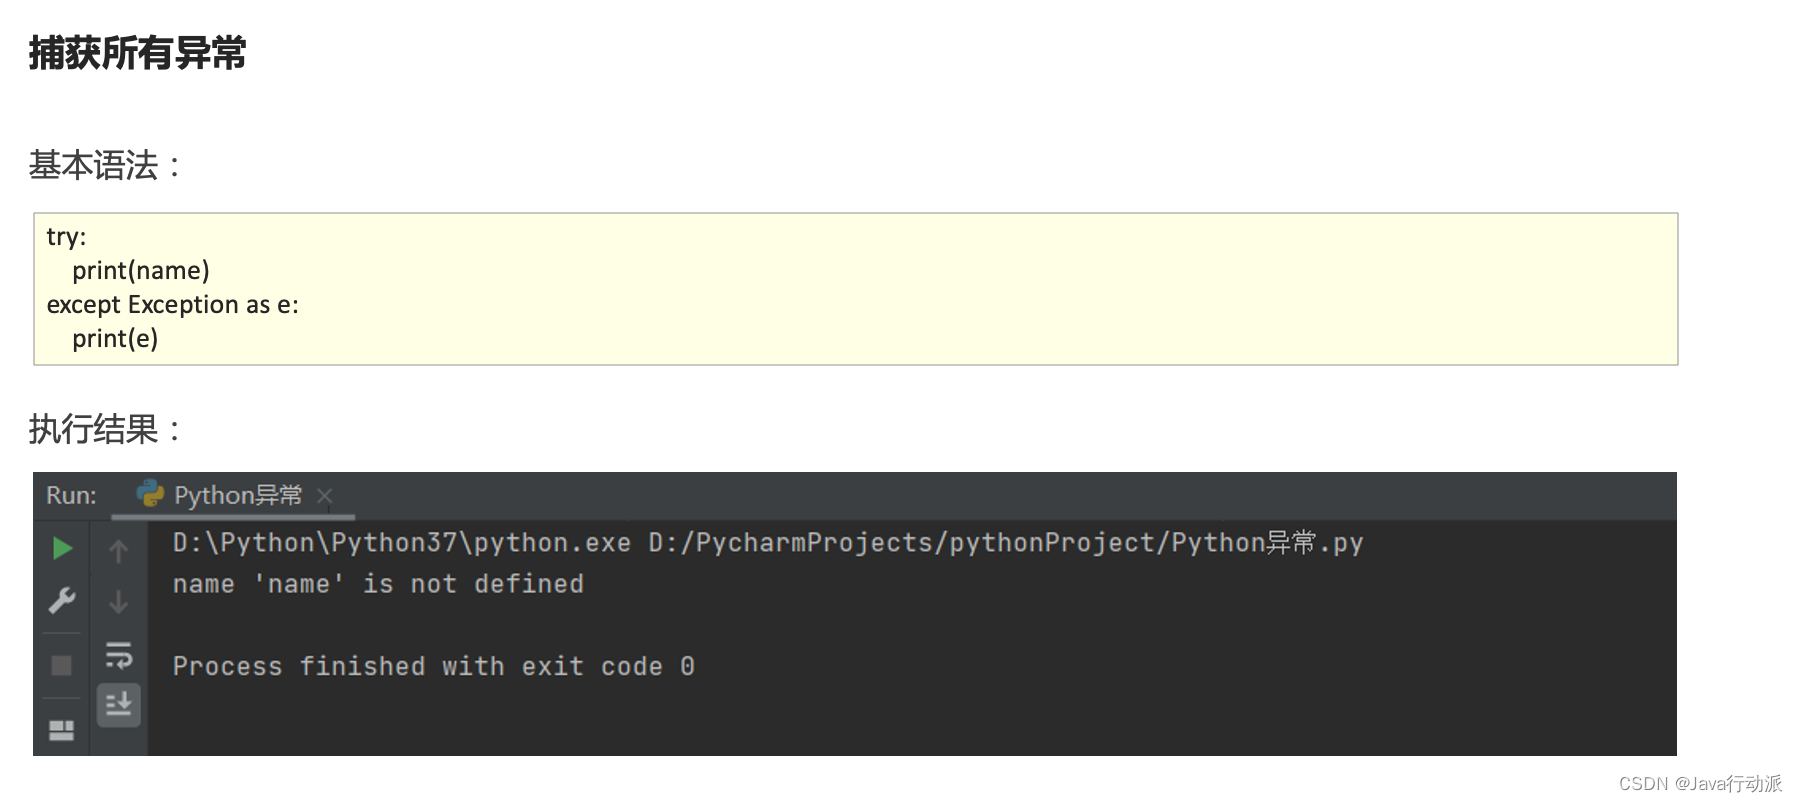
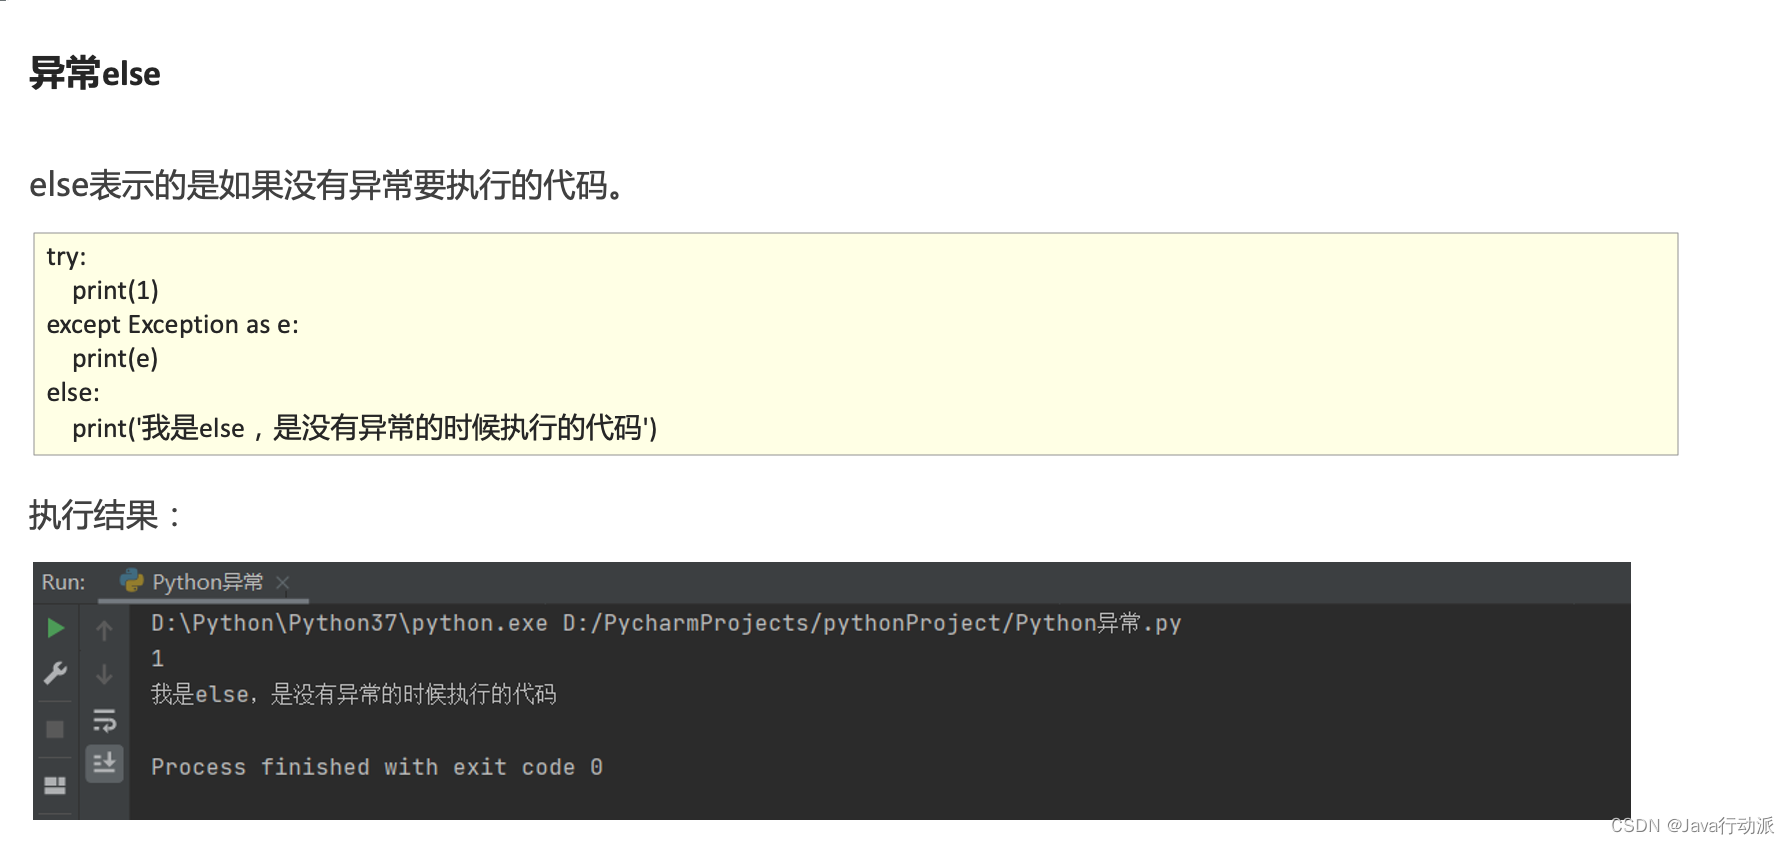
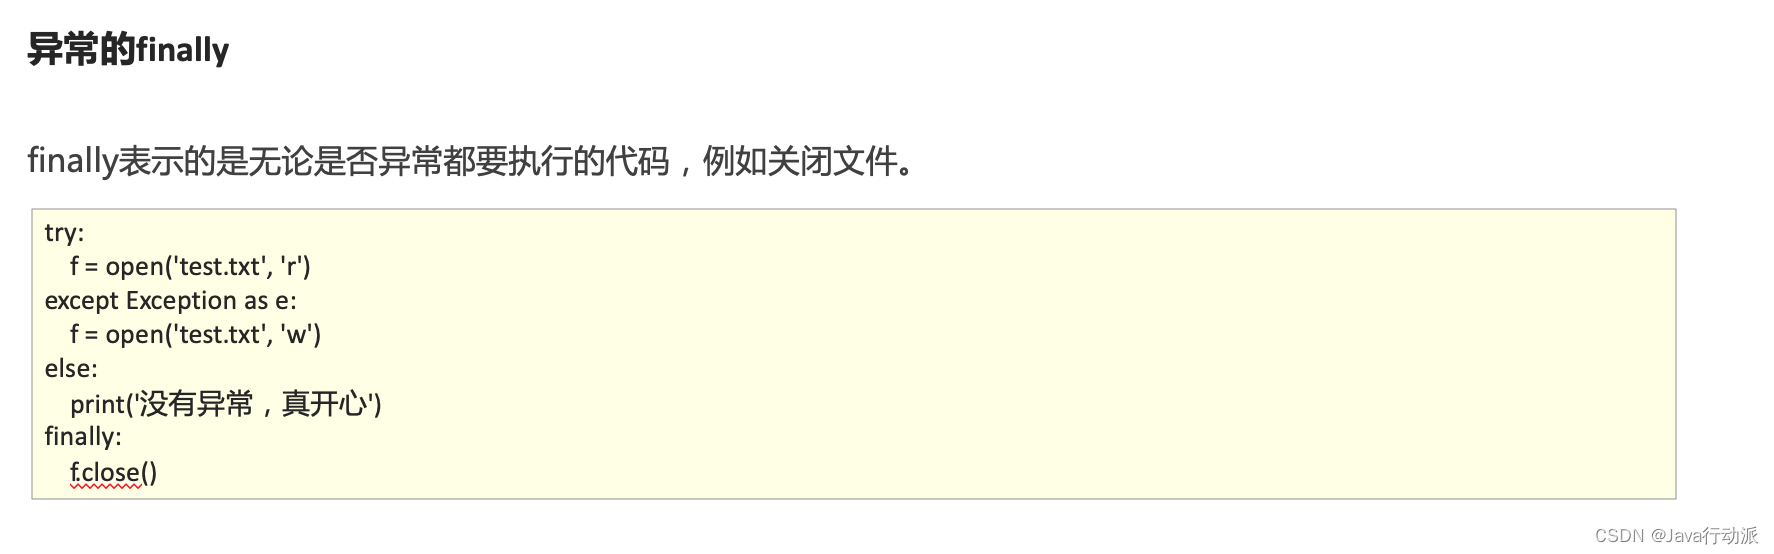
12、Python中异常捕获
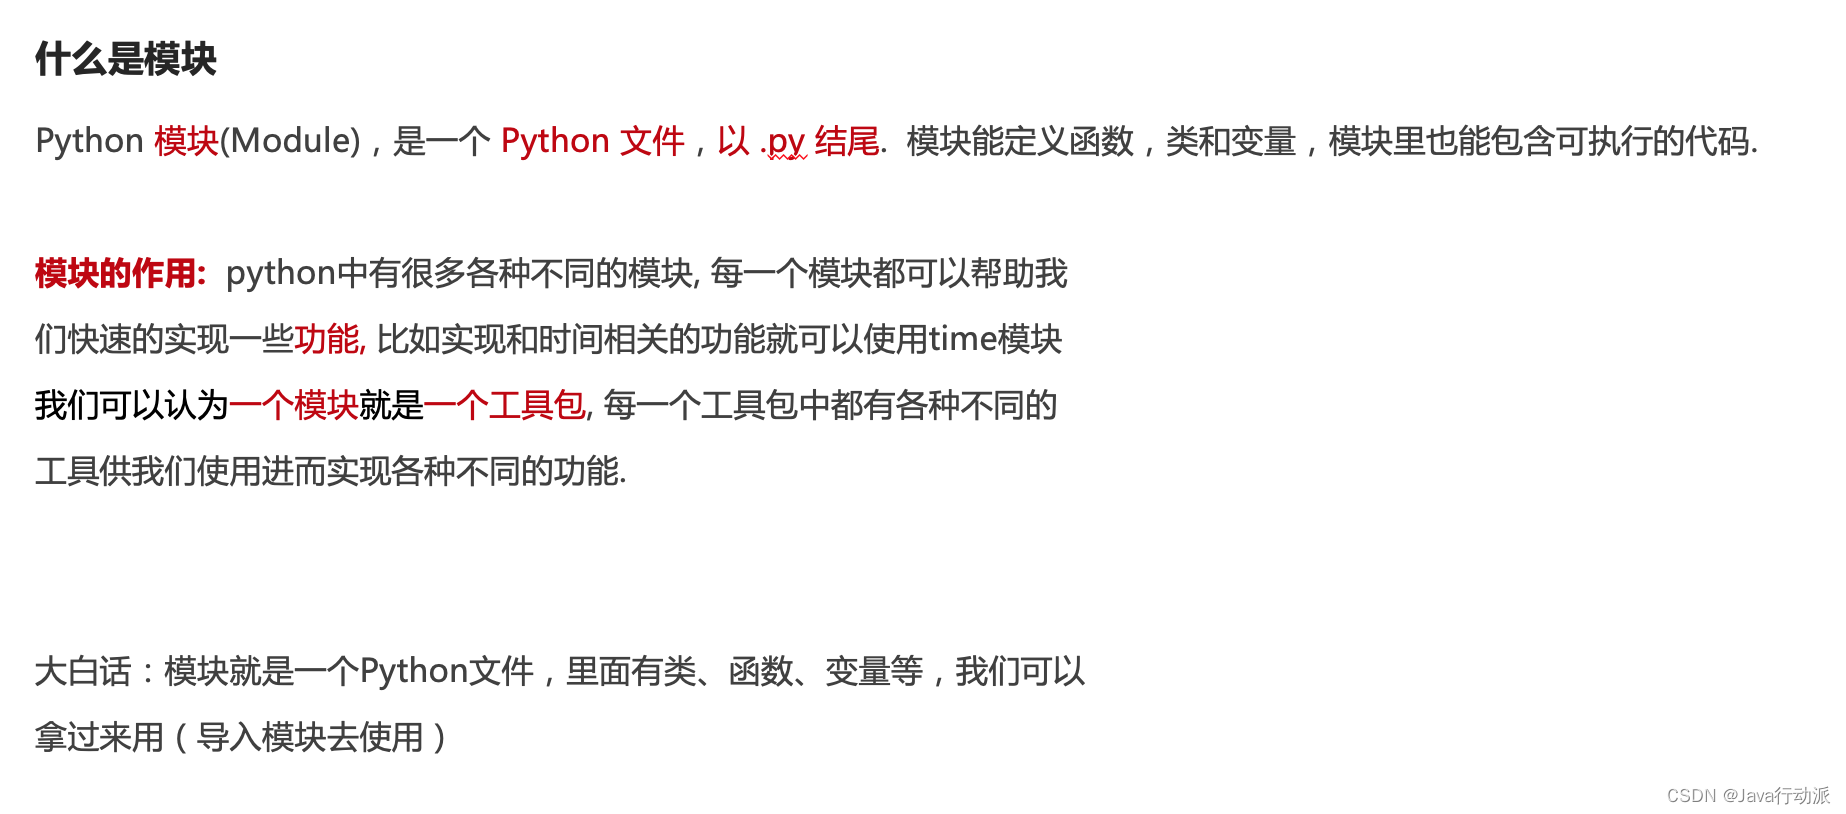
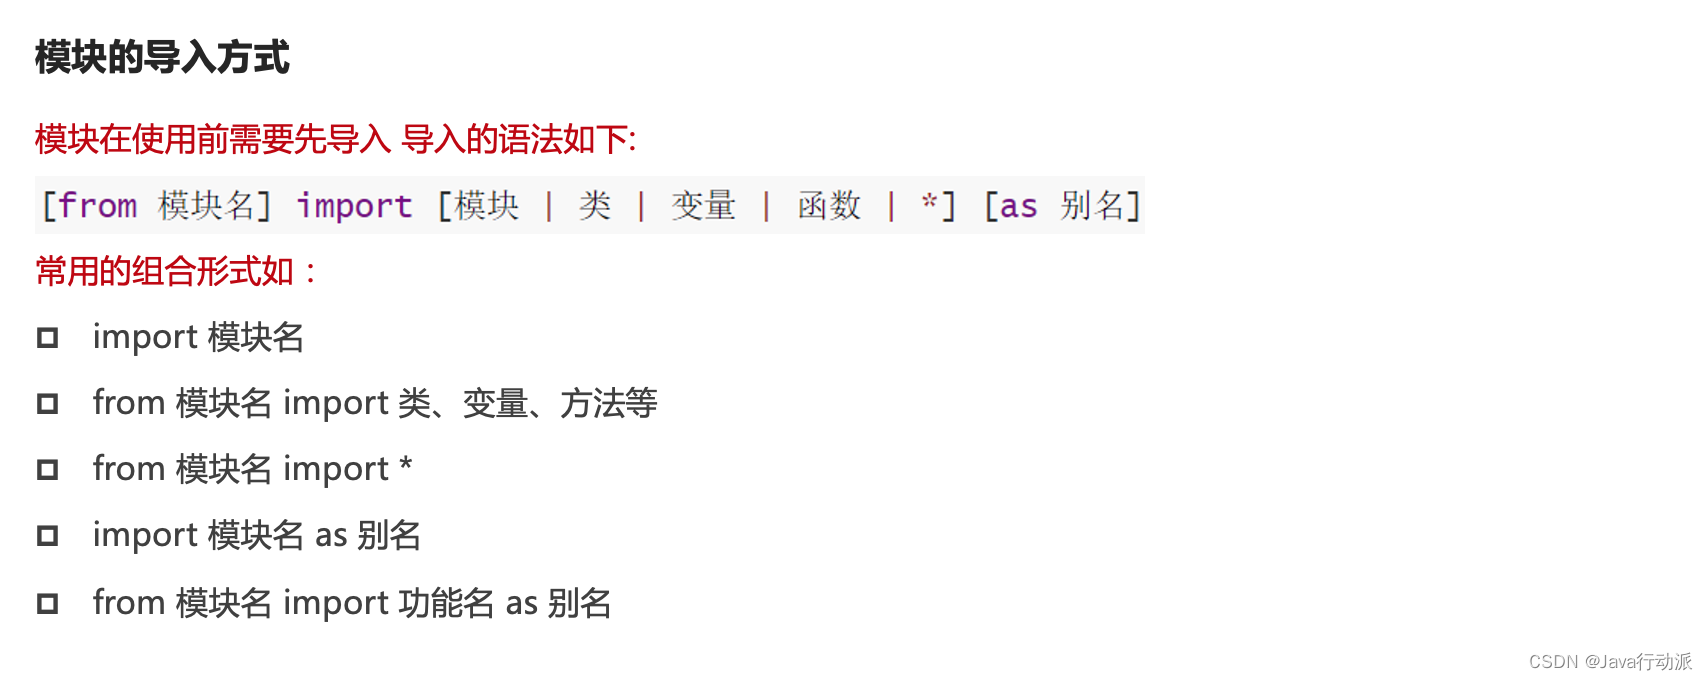
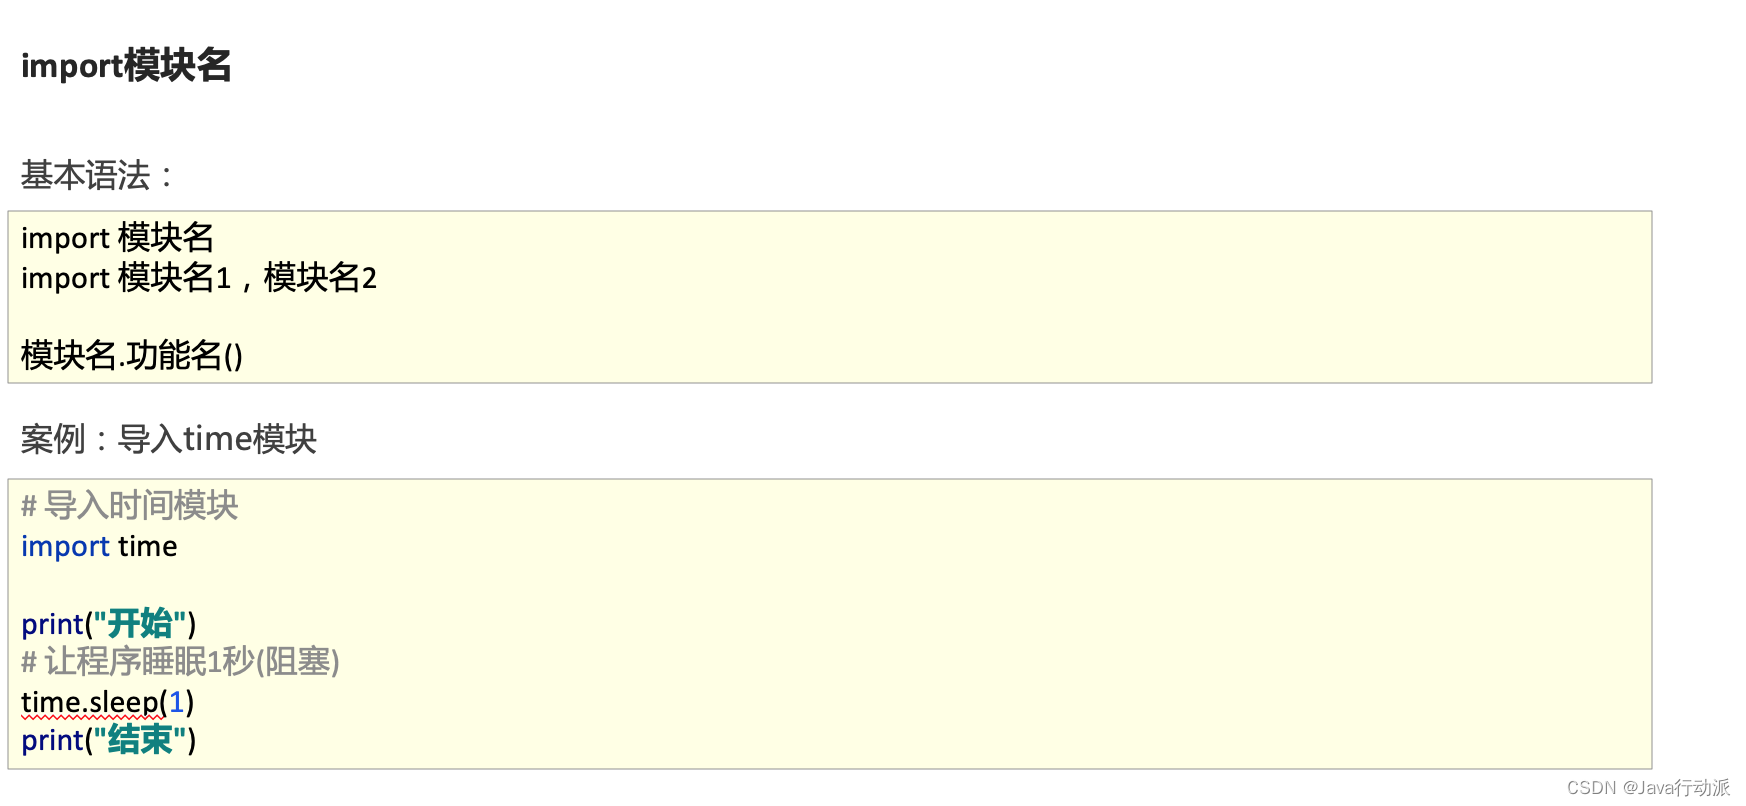
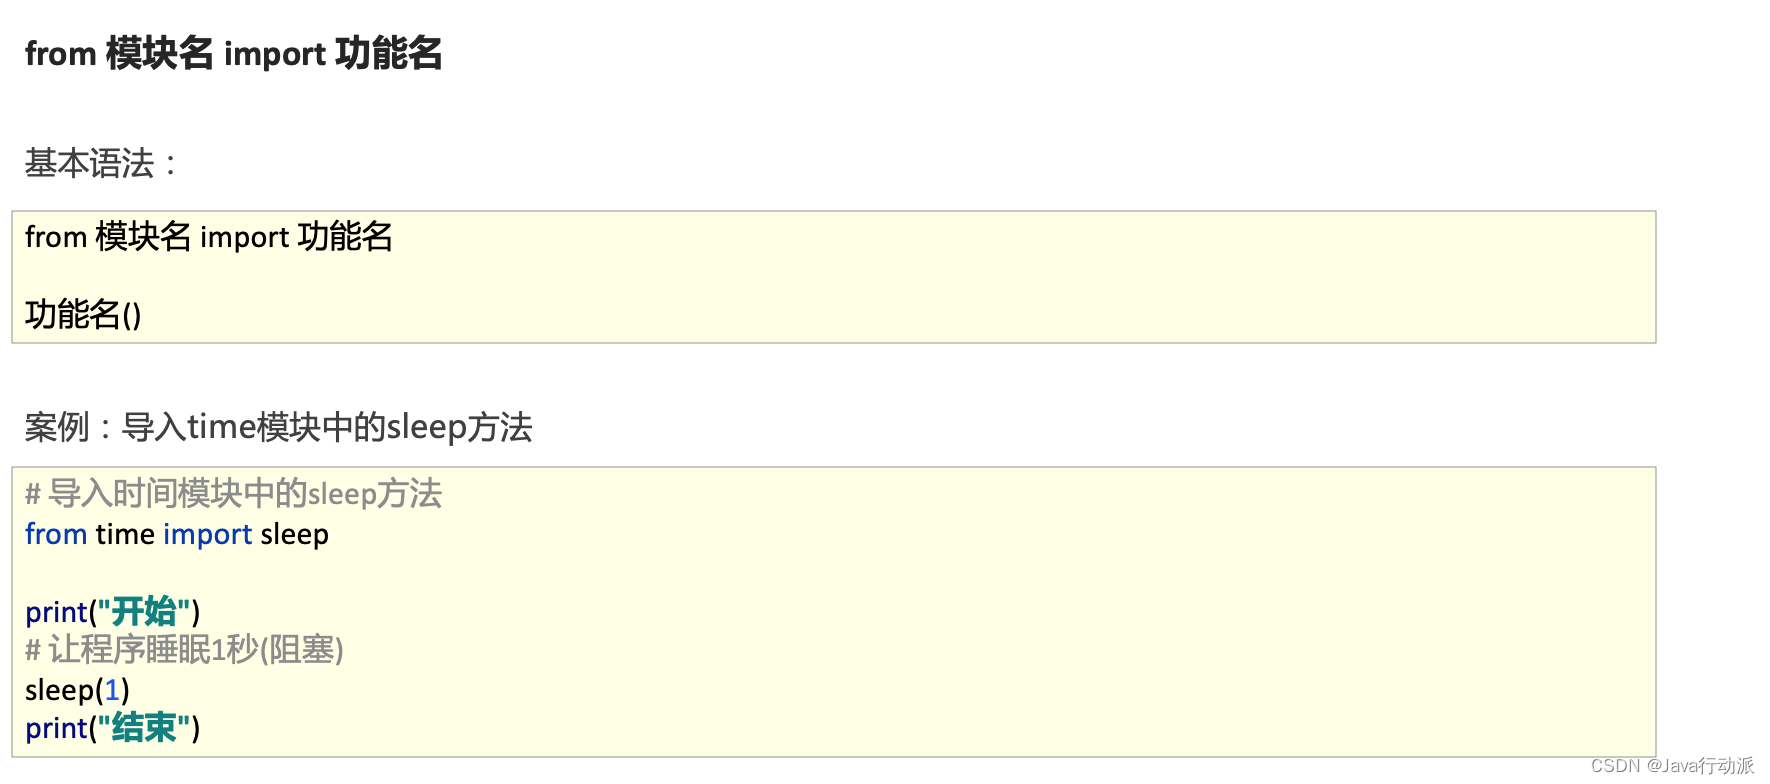
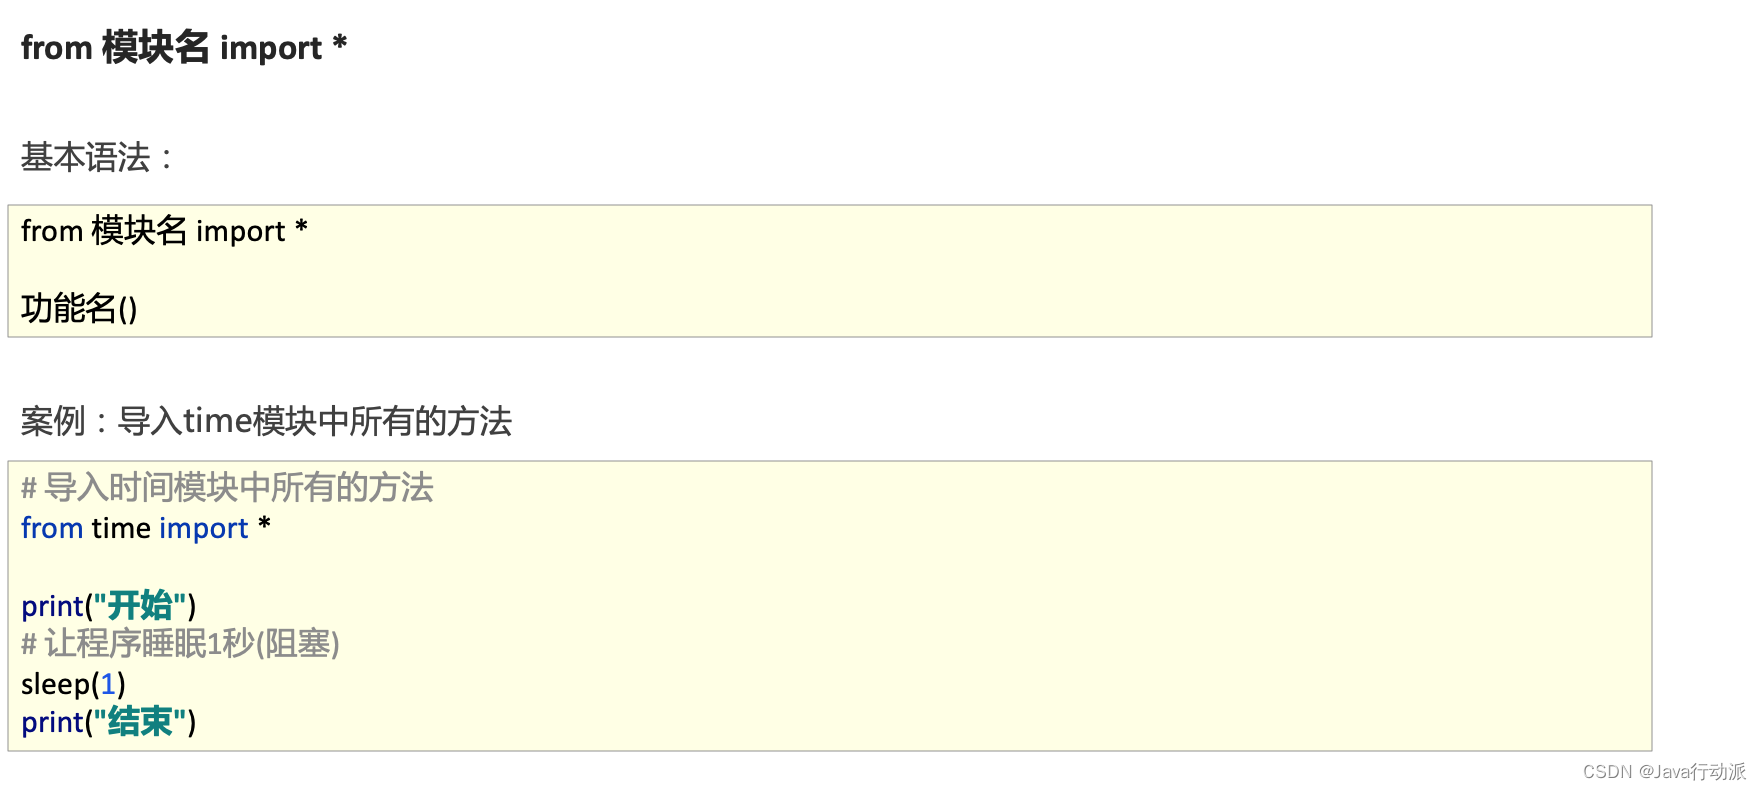
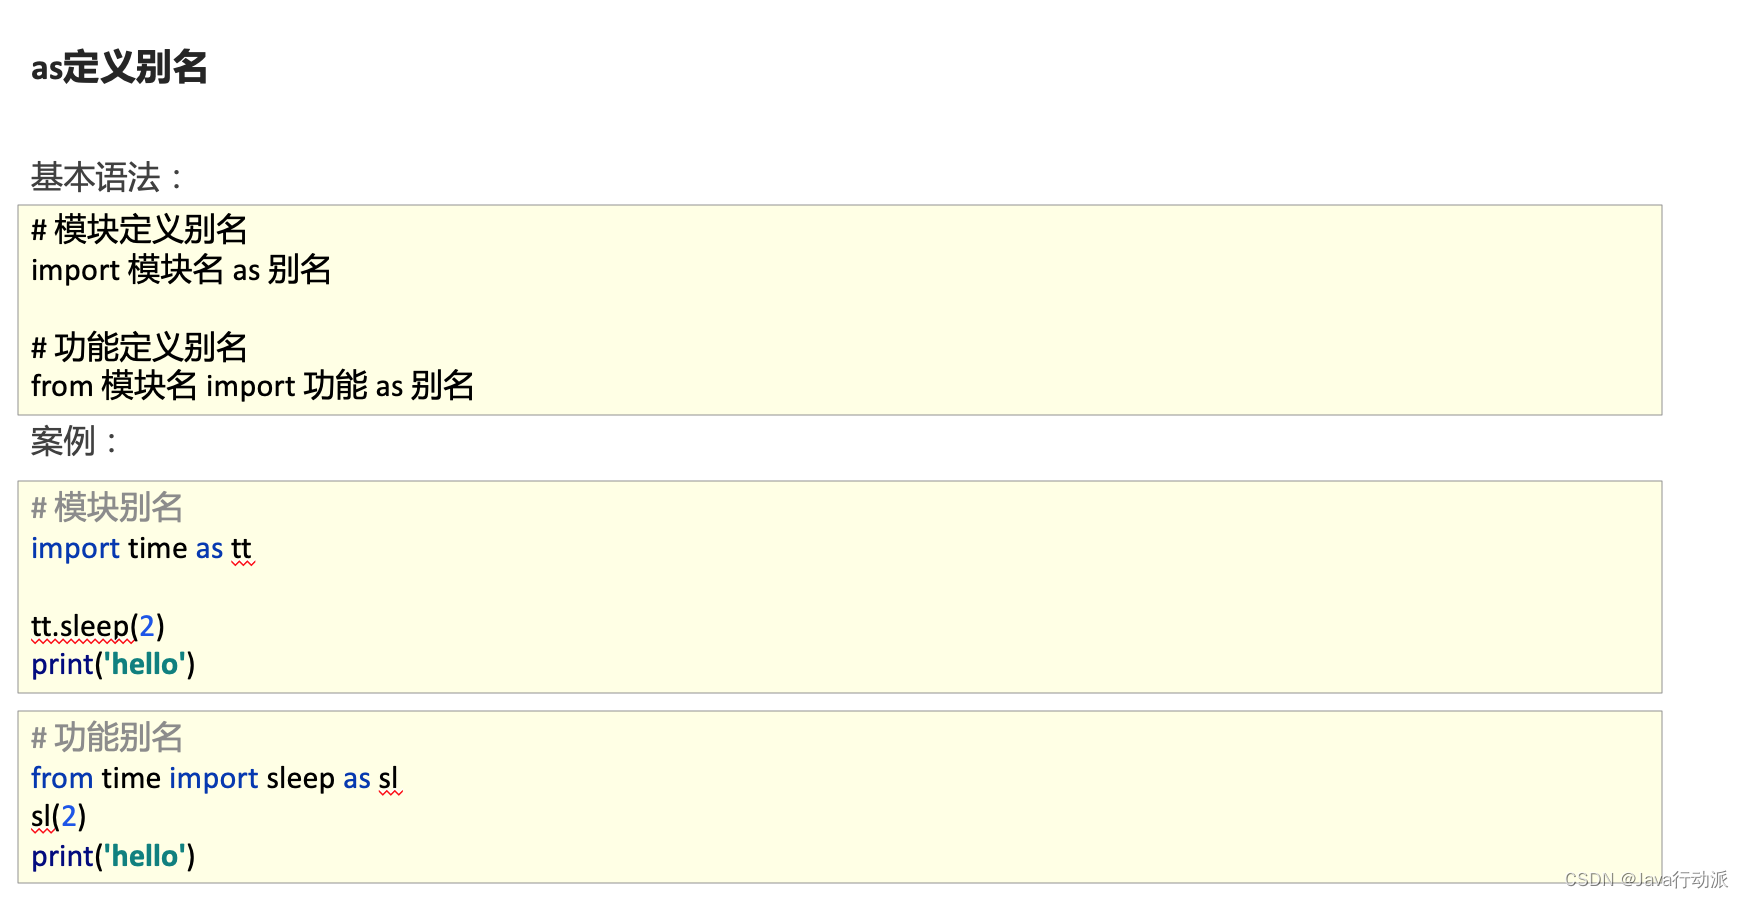
13、Python中包模块导入
这篇文章如果是有过Java或者其他开发语言基础的朋友很快就能掌握,无非就是语法不一致,可以将此篇文章作为日记,后续忘记了翻下即可,好了,下篇文章我们实例讲解pyecharts生成可视化图形。


 493
493


 被折叠的 条评论
为什么被折叠?
被折叠的 条评论
为什么被折叠?
 到【灌水乐园】发言


