


 本文详细介绍两种Android沉浸式状态栏实现方式:一种通过设置透明状态栏并利用fitsSystemWindows属性,另一种则通过插入与状态栏等高的View。文中提供具体代码示例,并针对DrawerLayout场景给出解决方案。
本文内容大多参考网络上的Android实现沉浸式状态栏教程,由于看了太多类似文章,固在此不再一一列举出处。本文仅为我自己梳理思路和供各位看到本文的朋友参考(百度:Android沉浸式状态栏,第一页内容我基本全都看了…)
1、参考网络上其他文章,和观察QQ和简书App,我发现沉浸式 状态栏基本有两种,口述不清,如图:
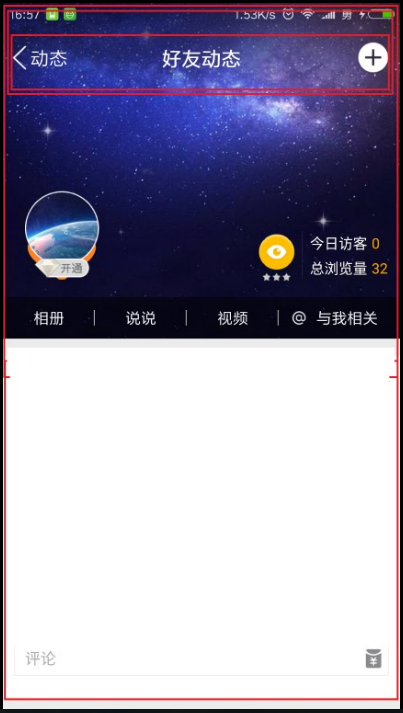
图一
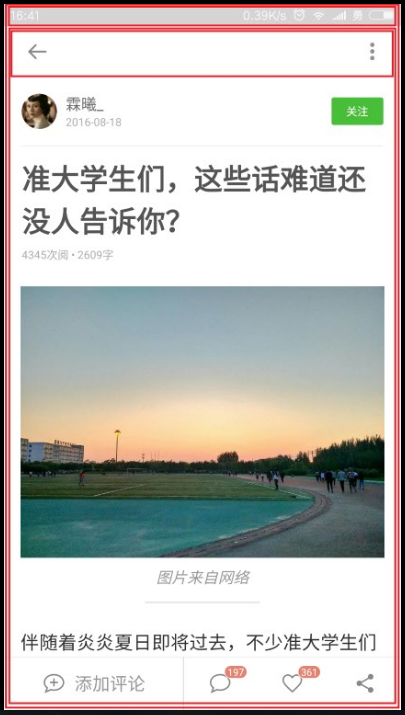
图二
从图中可以看出简书的界面是在根视图中插入了一个与状态栏高度一样的View,而QQ的qq空间界面没有插入任何View(注:类似QQ空间这个界面的还有开发者头条App,QQ中其他界面是在标题栏中插入了一个View,)
2、下面先实现QQ空间界面样式:
只需要两个属性:
(1) 由于Android从4.4开始支持透明状态栏,固在Activity的onCreate(Bundle savedInstanceState)方法中添加如下代码,我把它写在了BaseActivity中。布局根节点为DrawerLayout时特殊对待,代码中有注释(当然也可在style中定义,我觉太麻烦,在此不描述):
@Override
protected void onCreate(Bundle savedInstanceState) {
    // TODO Auto-generated method stub
    super.onCreate(savedInstanceState);
    ...
    setBarStyle();
    ...
}

/**
     * 设置透明状态栏,设置此属性的Activity的最顶部布局需设置 android:fitsSystemWindows="true" 属性
     * 以确保状态栏颜色和界面第一个控件背景色一样,否则状态栏背景颜色为界面背景色
     * 如果想以图片为背景时,不要设置此属性
     * android:fitsSystemWindows="true" 属性 控件不占用系统控件位置(例如状态栏,导航栏)
     * 特别注意:根控件为 DrawerLayout时,应为内容布局的适当位置(例如Title布局中,根布局)设置此属性,抽屉布局设置此属性无效(文章后面有举例),自己注意设置paddingTop或marginTop
     */
    public void setBarStyle() {
        if (VERSION.SDK_INT >= VERSION_CODES.KITKAT) {
            // 设置状态栏透明
            getWindow().addFlags(WindowManager.LayoutParams.FLAG_TRANSLUCENT_STATUS);
        }
    }
(2) 在xml中,为根布局或最顶端的布局设置android:fitsSystemWindows=”true”属性,我的xml代码如下:
hide_title_acticity.xml
<?xml version="1.0" encoding="utf-8"?>
<LinearLayout xmlns:android="http://schemas.android.com/apk/res/android"
    android:layout_width="match_parent"
    android:layout_height="match_parent"
    android:background="#ffffff"
    android:orientation="vertical">

    ***<include layout="@layout/hide_title_activity_title"></include>***

    <ImageView
        android:layout_width="match_parent"
        android:layout_height="3000dp"
        android:background="@drawable/ic_launcher" />

</LinearLayout>
可以看出我的代码中包含了一个当作title的布局
<include layout="@layout/hide_title_activity_title"></include>使用这个Title的xml文件,配合BaseActivity就可以使所有的Activity都实现沉浸式状态栏了。hide_title_activity_title.xml代码如下:
<?xml version="1.0" encoding="utf-8"?>
<LinearLayout xmlns:android="http://schemas.android.com/apk/res/android"
    android:layout_width="match_parent"
    android:layout_height="wrap_content"
    android:orientation="vertical">

    <LinearLayout
        android:id="@+id/hide_title_ll_title"
        android:layout_width="match_parent"
        android:layout_height="wrap_content"
        android:orientation="vertical"
        android:background="#245697"
        ***android:fitsSystemWindows="true"***
        <!--属性二-->>

        <com.wuxy.wtool.view.FontTextView
            android:layout_width="wrap_content"
            android:layout_height="wrap_content"
            android:layout_gravity="center"
            android:gravity="center"
            android:text="标题"
            android:textSize="24sp" />
    </LinearLayout>
</LinearLayout>
可以看到我在id为hide_title_ll_title的LinearLayout中设置了android:fitsSystemWindows=”true”属性
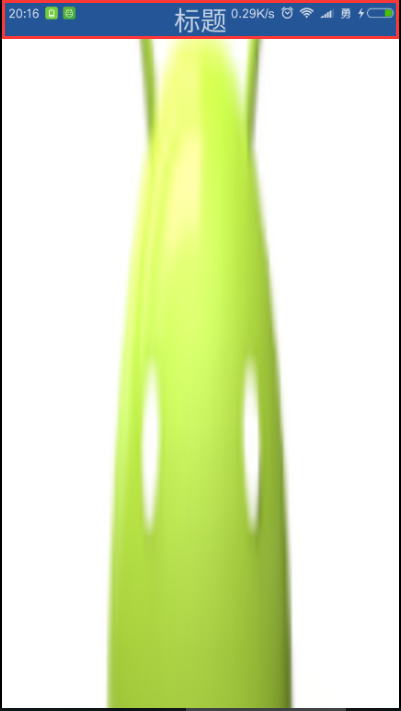
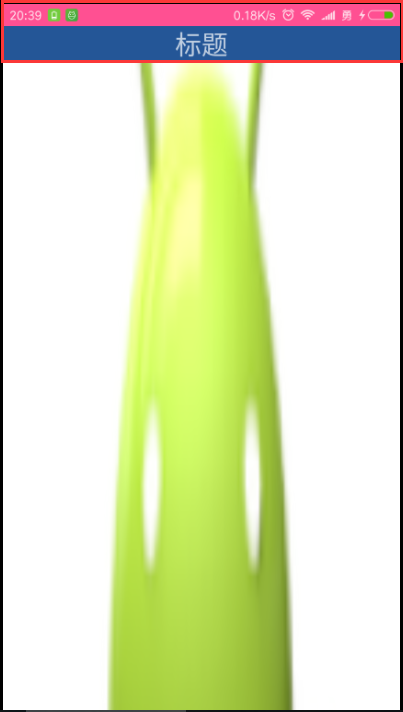
运行效果如下:
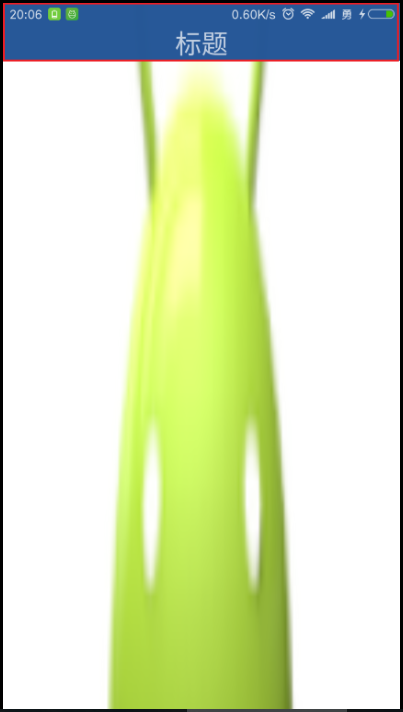
图三
设置在hide_title_acticity.xml根布局中,运行效果如下:
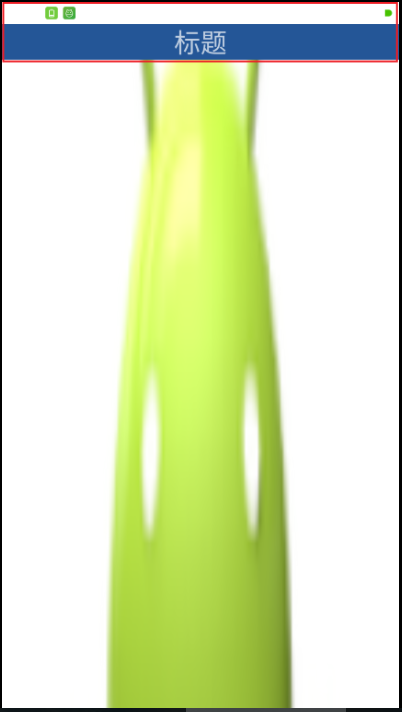
图四
如果都不设置,运行效果如下:
图五
3、实现简书界面样式样式(即插入一个和状态栏一样高度的View):
(1) 思路:先把界面弄成图四的效果,然后再状态栏位置插入一个和状态栏一样高度的View。
(2) 实现方法:设置状态栏透明,为布局根节点设置android:fitsSystemWindows=”true”,测量状态栏高度,创建View,插入到Activity根视图,Activity的根视图为FrameLayout,所以直接插入到最上层就可以遮盖最顶部空白部分,我仿照网络上其它文章写了一个类StatusBarUtils.java,代码如下(一般布局不需要在xml中设置android:fitsSystemWindows=”true”属性了):
public class StatusBarUtils {

    /**获取状态栏高度
     * @param context
     * @return
     */
    public static int getStatusBarHeight(Context context){
        int resourceId = context.getResources().getIdentifier("status_bar_height","dimen","android");
        int height = context.getResources().getDimensionPixelSize(resourceId);
        return height;
    }

    /**创建一个和StatusBar大小相同的view
     * @param activity
     * @param statusColor
     * @return
     */
    public static View createStatusBarView(Activity activity,int statusColor){
        View statusView = new View(activity);
        LinearLayout.LayoutParams params = new LinearLayout.LayoutParams(ViewGroup.LayoutParams.MATCH_PARENT,getStatusBarHeight(activity));
        statusView.setLayoutParams(params);
        statusView.setBackgroundColor(statusColor);
        return statusView;
    }

    /**实现沉浸式状态栏,在状态栏下面添加一个和 状态栏一样高的View
     * (注:当自己的布局根节点为DrawerLayout的时候,需要自己在XML中设置DrawerLayout的FitsSystemWindows属性,否则无效果)
     * @param activity
     * @param color 状态栏颜色
     */
    public static void setStatusBar(Activity activity,int color){
        if(Build.VERSION.SDK_INT >= Build.VERSION_CODES.KITKAT) {
            activity.getWindow().addFlags(WindowManager.LayoutParams.FLAG_TRANSLUCENT_STATUS);
            //添加一个和状态栏同样大小的view
            View statusView = createStatusBarView(activity,color);
            ViewGroup decorView = (ViewGroup) activity.getWindow().getDecorView();
            decorView.addView(statusView);
            //设置根布局FitsSystemWindows属性
            ViewGroup rootView = (ViewGroup) ((ViewGroup) activity.findViewById(android.R.id.content)).getChildAt(0);
            rootView.setFitsSystemWindows(true);//防止布局被状态栏遮挡
        }
    }
}
在Activity的setContentView(int layoutResID)方法之后调用,我是写在BaseActivity中的,代码如下:
@Override
    public void setContentView(int layoutResID) {
        // TODO Auto-generated method stub
        super.setContentView(layoutResID);
        ...
        ***StatusBarUtils.setStatusBar(this,Color.parseColor("#ff5092"));***
        ...
    }
代码运行效果如下:
图六
4、附上DrawerLayout特殊情况处理及结果:
drawerlayout_activity.xml代码:
<?xml version="1.0" encoding="utf-8"?>
<android.support.v4.widget.DrawerLayout xmlns:android="http://schemas.android.com/apk/res/android"
    android:layout_width="match_parent"
    android:layout_height="match_parent"
    ***<!--位置一-->***>

    <include
        layout="@layout/drawerlayout_content" />

    <include
        layout="@layout/drawerlayout_menu"
        android:layout_width="match_parent"
        android:layout_height="match_parent"
        android:layout_gravity="start"
        />
</android.support.v4.widget.DrawerLayout>
drawerlayout_content.xml代码:
<?xml version="1.0" encoding="utf-8"?>
<LinearLayout xmlns:android="http://schemas.android.com/apk/res/android"
    android:orientation="vertical" android:layout_width="match_parent"
    android:layout_height="match_parent">

***<!--自定义的一个TitleView,如方法一中,在其布局文件中设置fitsSystemWindows="true"-->***
    <com.wuxy.wtool.view.TitleView
        android:layout_width="match_parent"
        android:layout_height="wrap_content">
    </com.wuxy.wtool.view.TitleView>

    <com.wuxy.wtool.view.FontEditText
        android:layout_width="match_parent"
        android:layout_height="wrap_content"
        android:layout_marginTop="100dp"
        android:hint="please enter...."/>
</LinearLayout>
drawerlayout_menu.xml代码,其中设置了两个android:fitsSystemWindows=”true”,但不起作用:
<?xml version="1.0" encoding="utf-8"?>
<LinearLayout xmlns:android="http://schemas.android.com/apk/res/android"
android:orientation="vertical"
android:layout_width="match_parent"
android:layout_height="match_parent"
***android:fitsSystemWindows="true"***>
<LinearLayout
android:layout_width="match_parent"
android:layout_height="wrap_content"
android:orientation="vertical"
android:background="#879876"
***android:fitsSystemWindows="true"***>
<ImageView
android:layout_width="wrap_content"
android:layout_height="wrap_content"
android:background="@drawable/ic_launcher"/>
<com.wuxy.wtool.view.FontEditText
android:layout_width="match_parent"
android:layout_height="wrap_content"
android:hint="当EditView在最顶部时,弹出输入法效果"
android:layout_marginBottom="150dp"/>
<com.wuxy.wtool.view.FontEditText
android:layout_width="match_parent"
android:layout_height="wrap_content"
android:hint="please enter..."
android:layout_marginBottom="150dp"/>
</LinearLayout>
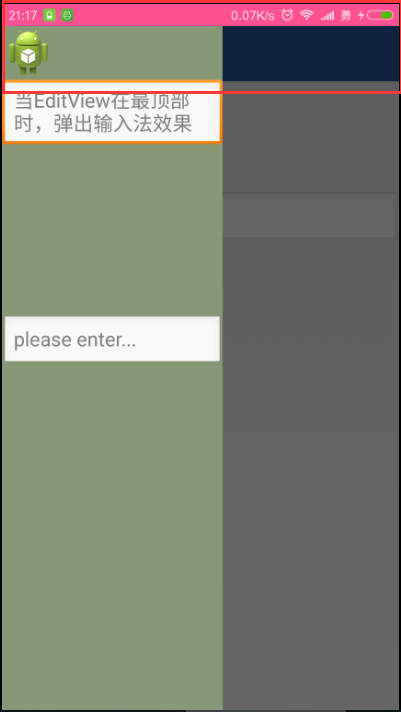
</LinearLayout>使用方法一时,在TitleView中设置android:fitsSystemWindows=”true”,drawerLayout中不要设置,
效果类似QQ的抽屉,如下,可以看到抽屉布局中图片位置太靠上,所以注意layout_margin或padding:

图七
使用方法二时,在drawerLayout中设置android:fitsSystemWindows=”true”(drawerlayout_activity.xml代码中 位置一),TitleView中可以不设置,效果类似简书的抽屉,如下:
图八
5、总结:沉浸式状态栏实现主要依赖两个属性:
//设置状态栏透明
activity.getWindow().addFlags(WindowManager.LayoutParams.FLAG_TRANSLUCENT_STATUS)
fitsSystemWindows=”true” 控件不占用系统控件位置(例如状态栏,导航栏)
然后根据需求的不同来处理状态栏位置。例如要实现QQ控件界面那种状态栏随滚动条滚动而改变透明度效果,建议使用第一种方法,因为状态栏位置下层是和标题栏为一体的,容易控制;如简书界面标题栏随滚动条滚动标题栏向上隐藏的效果,建议使用第二种,因为标题栏隐藏不会使状态栏颜色改变…
6、结尾
本文为本人写的第一篇文章,很多地方写的不好,如果有人看的话还请海涵,请高手指教。
本文版权归CNDN博客频道项阳所有,如有转载,请注明出处,谢谢合作!


 被折叠的 条评论
为什么被折叠?
被折叠的 条评论
为什么被折叠?
 到【灌水乐园】发言


