


Create Splash Screens on Xamarin Forms: The right way!
You wanted to learn Xamarin Forms to write code once for both Android and iOS, unfortunatly not today, not for making splash screens. It’s not too complicated though, so let’s get started!
How to make splash screen for Xamarin.Android
Under your .Droid project right click Resources->Drawable and click Add Files… to import your splash screen photo. Preferebly a logo of your app.
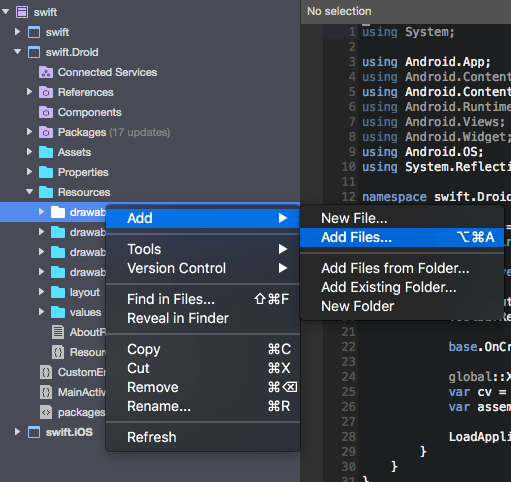
Tip: Remember the name, you will need to use the same exact name for your .iOS project if you want it to work for iOS. For our example we called it logo_splash.png
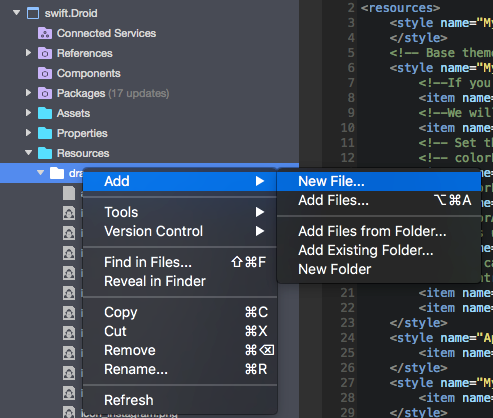
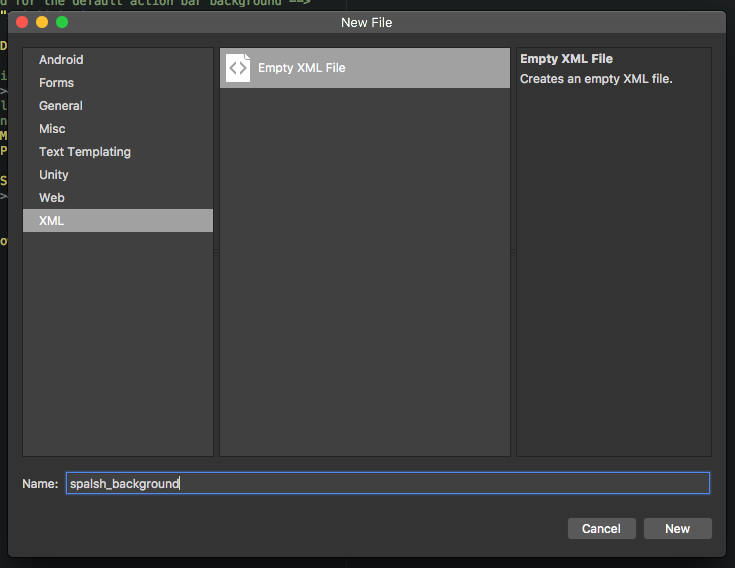
Under your .Droid project right click Resources->Drawable and click Add New File and select a XML file format, name the file splash_background
Now paste this code in your new file and save it, but be sure to replace [YOUR_IMAGE_FILE_NAME_HERE] with your actual photo name.
<?xml version=”1.0" encoding=”utf-8"?>
 <layer-list xmlns:android=”http://schemas.android.com/apk/res/android">
 <item>
 <color android:color=”#000000"/>
 </item>
 <item>
 <bitmap
 android:src=”@drawable/[YOUR_IMAGE_FILE_NAME_HERE]”
 android:tileMode=”disabled”
 android:gravity=”center”/>
 </item>
 </layer-list>
Note: Pasting the above code will include “” quotes your editor cannot understand, so replace them by retyping the quotes “”
Open Resources->values->styles.xml and paste the following code inside the <resources> tag
<style name=”MyTheme.Splash” parent=”Theme.AppCompat.Light.NoActionBar”>
 <item name=”android:windowBackground”>@drawable/splash_background</item>
 </style>

Note: Pasting the above code will include “” quotes your editor cannot understand, so replace them by retyping the quotes “”
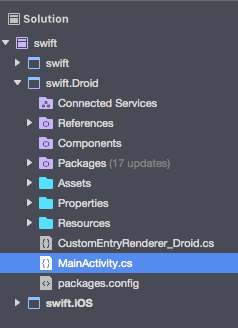
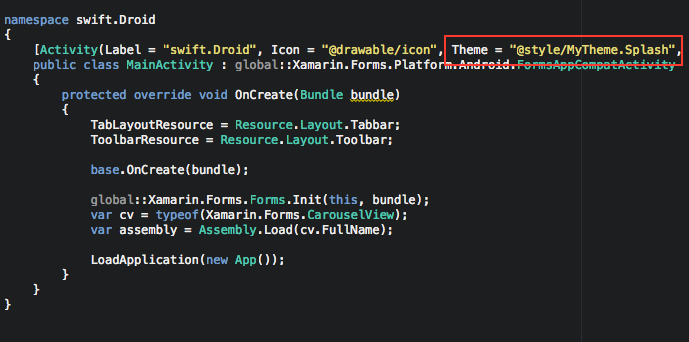
Under your .Droid project open MainActivity.cs and change your theme to “@style/MyTheme.Splash”
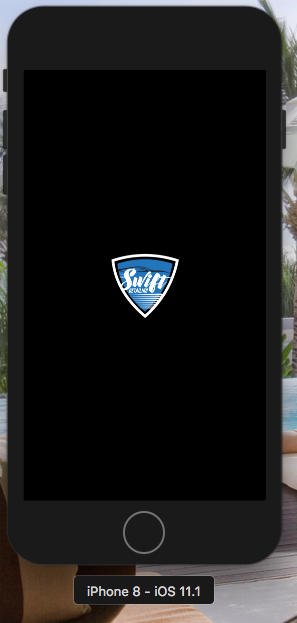
Now build your app and you should see your splash screen appear!

Note: The splash screen will always appear as a background for every new screen we create on the app. To get rid of it just set the background color of your <ContentPage> or whatever layout is being used.
How to make splash screen for Xamarin.iOS
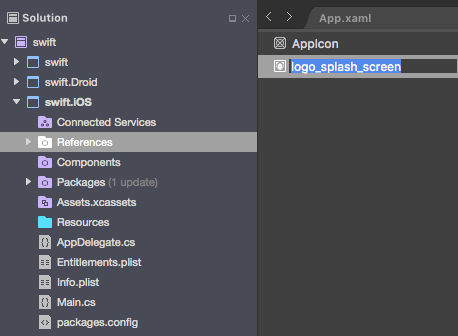
Under your .iOS project open Assets.xcassets and right click the column to click New Image Set

Drag your photo into the 2x box. Click on your file on the left side and rename your asset by pressing enter on the keyboard. We called ours logo_splash_screen
Tip: Remember the name, you will need to use the same exact name for your .Droid project if you want it to work for Android

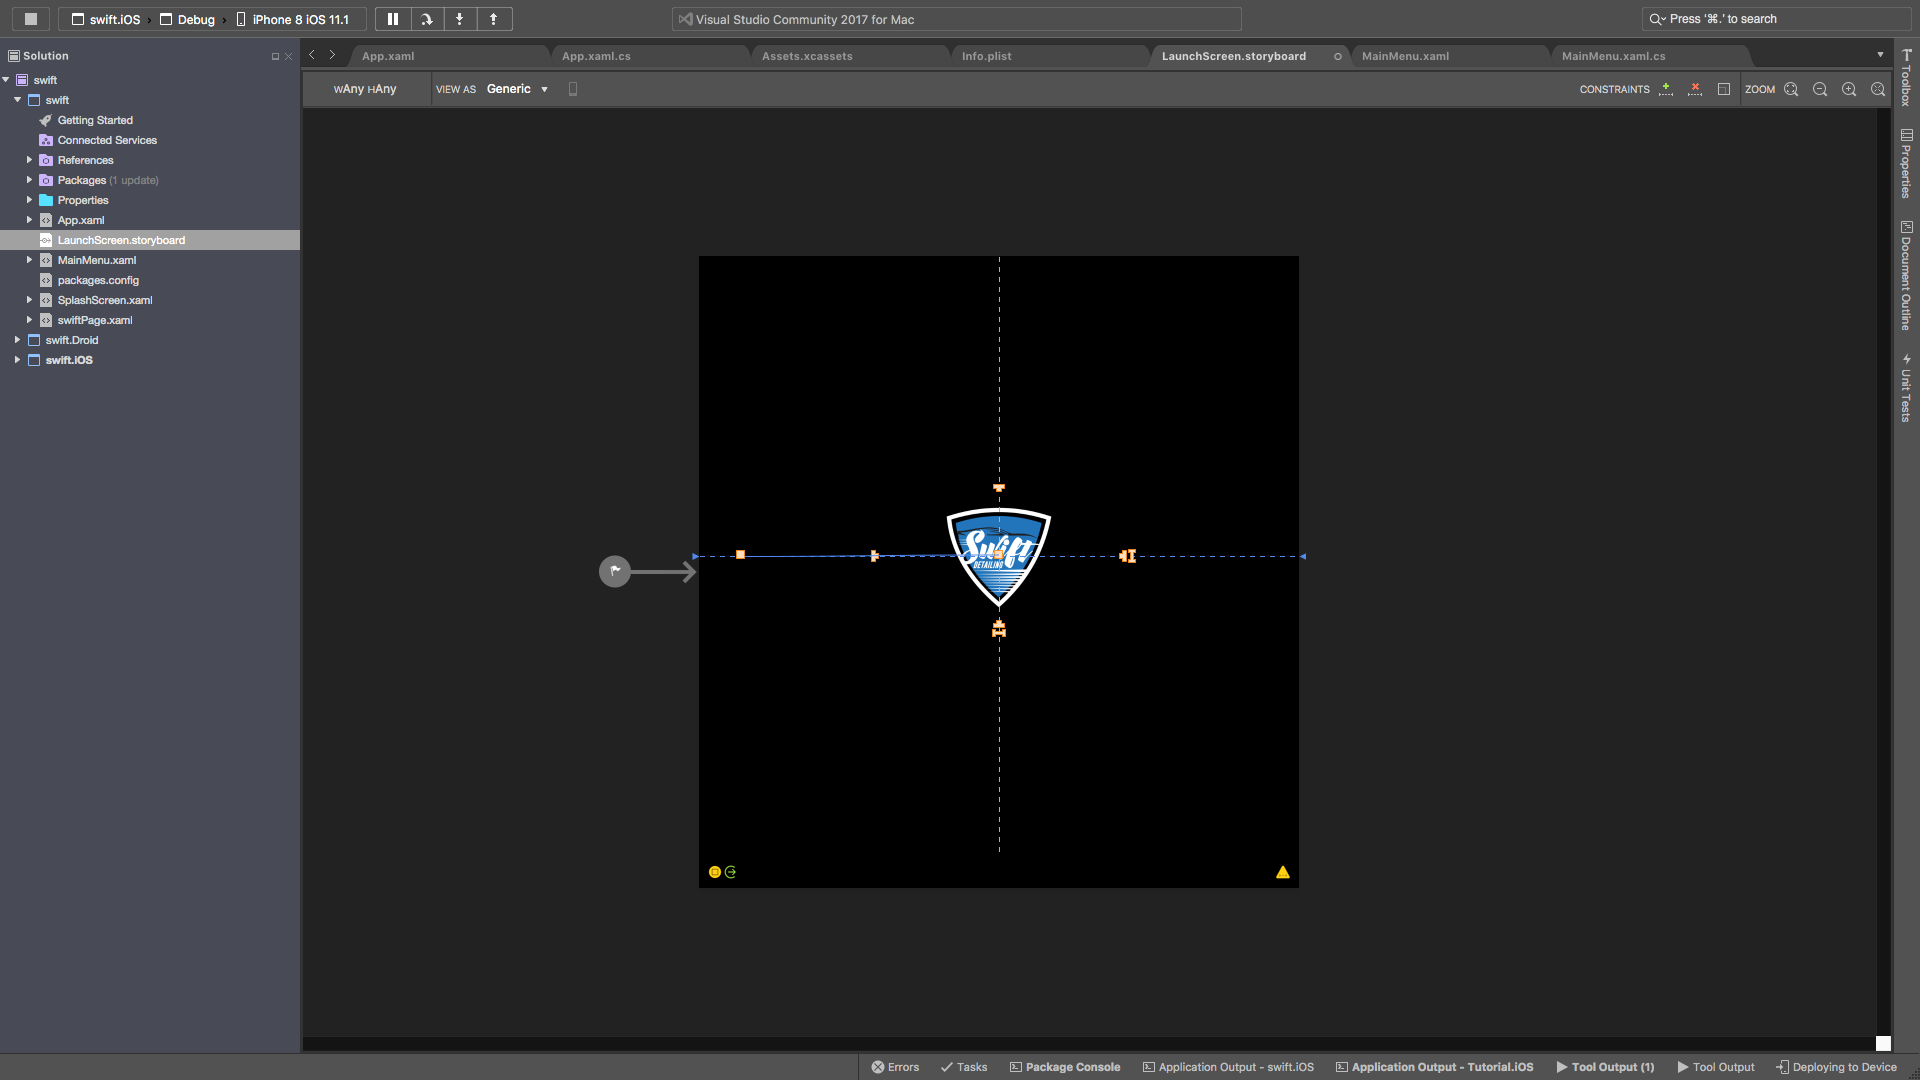
Under your cross platform project open LaunchScreen.storyboard.
On the rght hand side under Toolbox, search for an ImageView. Then drag it to the center of the story board.
On the bottom right corner under Properties pane assign our ImageView the splash screen image. We can select an aspect fit.


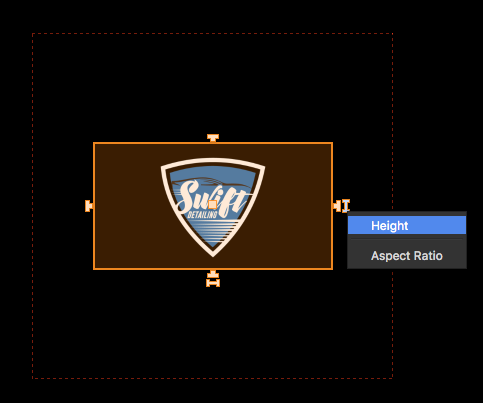
Time to do our contstraints! Double click the ImageView so we go on contraint selection mode

It should look like this
Click on the center square and drag it to the top horizontal dotted line. When the dotted line becomes blue then let go.

Click on the center square and drag it to the left vertical dotted line. When the dotted line becomes blue then let go.
Now right click on the | — | looking icon on the bottom of the ImageView and click Width
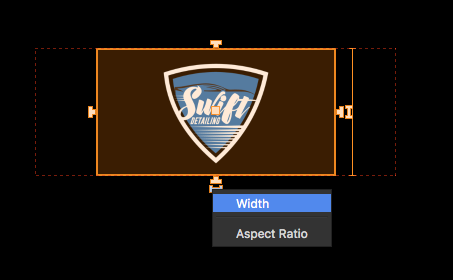
Right click the I looking icon on the right side of the ImageView and click Height
That’s it! Build the apps and enjoy!


 972
972


 被折叠的 条评论
为什么被折叠?
被折叠的 条评论
为什么被折叠?
 到【灌水乐园】发言


