


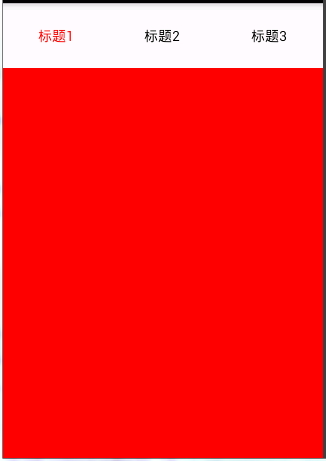
首先是一个主布局和三个碎片布局
<?xml version="1.0" encoding="utf-8"?>
<LinearLayout xmlns:android="http://schemas.android.com/apk/res/android"
    xmlns:tools="http://schemas.android.com/tools"
    android:layout_width="match_parent"
    android:layout_height="match_parent"
 android:orientation="vertical"
    tools:context="my.microsoft.com.viewpagerdemo3.MainActivity">

    <LinearLayout
        android:layout_width="match_parent"
        android:layout_height="0dp"
        android:orientation="horizontal"
        android:layout_weight="1">
        <LinearLayout
            android:id="@+id/lay1"
            android:layout_width="0dp"
            android:layout_weight="1"
            android:gravity="center"
            android:layout_height="match_parent">
            <TextView
                android:id="@+id/tv1"
                android:layout_width="wrap_content"
                android:layout_height="wrap_content"
                android:text="标题1"/>
        </LinearLayout>
        <LinearLayout
            android:id="@+id/lay2"
            android:layout_width="0dp"
            android:layout_weight="1"
            android:gravity="center"
            android:layout_height="match_parent">
            <TextView
                android:id="@+id/tv2"
                android:layout_width="wrap_content"
                android:layout_height="wrap_content"
                android:text="标题2"/>
        </LinearLayout>
        <LinearLayout
            android:id="@+id/lay3"
            android:layout_width="0dp"
            android:layout_weight="1"
            android:gravity="center"
            android:layout_height="match_parent">
            <TextView
                android:id="@+id/tv3"
                android:layout_width="wrap_content"
                android:layout_height="wrap_content"
                android:text="标题3"/>
        </LinearLayout>
    </LinearLayout>
    <LinearLayout
        android:layout_width="match_parent"
        android:layout_height="0dp"
        android:layout_weight="6">
        <android.support.v4.view.ViewPager
            android:id="@+id/viewpager"
            android:layout_width="match_parent"
            android:layout_height="match_parent">

        </android.support.v4.view.ViewPager>

    </LinearLayout>
</LinearLayout>
<?xml version="1.0" encoding="utf-8"?>
<LinearLayout xmlns:android="http://schemas.android.com/apk/res/android"
    android:orientation="vertical" android:layout_width="match_parent"
    android:layout_height="match_parent">
    <FrameLayout
        android:layout_width="match_parent"
        android:layout_height="match_parent"
        android:background="#ff0000"></FrameLayout>

</LinearLayout><?xml version="1.0" encoding="utf-8"?>
<LinearLayout xmlns:android="http://schemas.android.com/apk/res/android"
android:orientation="vertical" android:layout_width="match_parent"
android:layout_height="match_parent">
<FrameLayout
android:layout_width="match_parent"
android:layout_height="match_parent"
android:background="#00ff00"></FrameLayout>
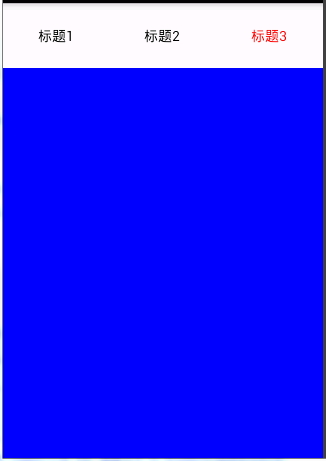
</LinearLayout>fragment3,背景为蓝色
<?xml version="1.0" encoding="utf-8"?>
<LinearLayout xmlns:android="http://schemas.android.com/apk/res/android"
    android:orientation="vertical" android:layout_width="match_parent"
    android:layout_height="match_parent">
    <FrameLayout
        android:layout_width="match_parent"
        android:layout_height="match_parent"
        android:background="#0000ff"></FrameLayout>

</LinearLayout>
下面是java代码文件
MainActivity 如下
:
package my.microsoft.com.viewpagerdemo3;

import android.graphics.Color;
import android.support.v4.app.Fragment;
import android.support.v4.app.FragmentActivity;
import android.support.v4.app.FragmentManager;
import android.support.v4.app.FragmentPagerAdapter;
import android.support.v4.view.ViewPager;
import android.support.v7.app.AppCompatActivity;
import android.os.Bundle;
import android.view.View;
import android.widget.LinearLayout;
import android.widget.Switch;
import android.widget.TextView;

import java.util.ArrayList;
import java.util.List;

public class MainActivity extends FragmentActivity implements View.OnClickListener,ViewPager.OnPageChangeListener{
    private LinearLayout ll1,ll2,ll3;
    private List<Fragment> fragments;
    private Fragment fragment1,fragment2,fragment3;
    private TextView tv1,tv2,tv3;
    private ViewPager viewPager;

    @Override
    protected void onCreate(Bundle savedInstanceState) {
        super.onCreate(savedInstanceState);
        setContentView(R.layout.activity_main);
        ll1= (LinearLayout) this.findViewById(R.id.lay1);
        ll2= (LinearLayout) this.findViewById(R.id.lay2);
        ll3= (LinearLayout) this.findViewById(R.id.lay3);
        //给layout添加监听,实现不同标签,点击之后就会呈现不同的碎片
        ll1.setOnClickListener(this);
        ll2.setOnClickListener(this);
        ll3.setOnClickListener(this);

        fragments=new ArrayList<>();
//把碎片加到集合里
        fragment1=new Fragment01();
        fragment2=new Fragment02();
        fragment3=new Fragment03();
        fragments.add(fragment1);
        fragments.add(fragment2);
        fragments.add(fragment3);

        tv1= (TextView) this.findViewById(R.id.tv1);
        tv2= (TextView) this.findViewById(R.id.tv2);
        tv3= (TextView) this.findViewById(R.id.tv3);

        viewPager= (ViewPager) this.findViewById(R.id.viewpager);
        viewPager.setAdapter(new MyFragmentadapter(getSupportFragmentManager()));
        //viewPager加监听,为了做到,被点击的标签文字变颜色的功能
        viewPager.addOnPageChangeListener(this);
        //第一次打开页面,默认显示的是标题1,但是标题1文字并没有变色,所以要设置一下
        setTabColor(0);
    }
    //viewPager加监听实现的三个方法
    @Override
    public void onPageScrolled(int position, float positionOffset, int positionOffsetPixels) {

    }
    //设置点击之后文字变颜色
    @Override
    public void onPageSelected(int position) {
        setTabColor(position);
    }

    @Override
    public void onPageScrollStateChanged(int state) {

    }
    //下面的两个方法是为了实现改变标签文字颜色而写的
    //设置标题颜色
    public void setTabColor(int position){
        resetTabColor();
        switch (position){
            case 0:
                tv1.setTextColor(Color.RED);
                // 还可以这样写tv1.setTextColor(Color.parseColor("#ff0000"));
                break;
            case 1:
                tv2.setTextColor(Color.RED);
                break;
            case 2:
                tv3.setTextColor(Color.RED);
                break;
        }
    }
    //重置颜色
    public void resetTabColor(){
        tv1.setTextColor(Color.parseColor("#000000"));
        tv2.setTextColor(Color.parseColor("#000000"));
        tv3.setTextColor(Color.parseColor("#000000"));
    }

    //适配器类
    class MyFragmentadapter extends FragmentPagerAdapter{

        public MyFragmentadapter(FragmentManager fm) {
            super(fm);
        }

        @Override
        public Fragment getItem(int position) {
            return fragments.get(position);
        }

        @Override
        public int getCount() {
            return fragments.size();
        }
    }

    @Override
    public void onClick(View view) {
        switch (view.getId()){
            case R.id.lay1:
                viewPager.setCurrentItem(0);
                break;
            case R.id.lay2:
                viewPager.setCurrentItem(1);
                break;
            case R.id.lay3:
                viewPager.setCurrentItem(2);
                break;

        }
    }
}
fragment1代码:
package my.microsoft.com.viewpagerdemo3;

import android.os.Bundle;
import android.support.annotation.Nullable;
import android.support.v4.app.Fragment;
import android.view.LayoutInflater;
import android.view.View;
import android.view.ViewGroup;

/**
 * Created by czw on 2016/7/4  17:03.
 */
public class Fragment01 extends Fragment{
    @Nullable
    @Override
    public View onCreateView(LayoutInflater inflater, @Nullable ViewGroup container, @Nullable Bundle savedInstanceState) {
        return inflater.inflate(R.layout.fragment1,null);
    }
}
fragment2和fragment3代码同上


 240
240

 被折叠的 条评论
为什么被折叠?
被折叠的 条评论
为什么被折叠?
 到【灌水乐园】发言


