


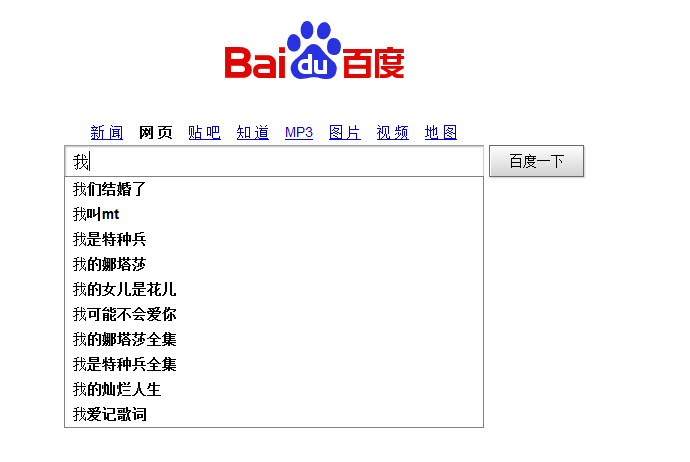
这画面不陌生吧,百度的提示,他的词库并不是历史记录,是搜索引擎收集的当前最常搜索的内容。假如我们也要在android的应用实现如上功能怎么做呢?
方法很简单,android已经帮我们写好了api ,这里就用到了AutoCompleteTextView组件。
网上有不少教程,那个提示框字符集都是事先写好的,例如用一个String[] 数组去包含了这些数据,但是,我们也可以吧用户输入的作为历史记录保存
下面先上我写的代码:
import android.app.Activity;
- import android.content.SharedPreferences;
- import android.os.Bundle;
- import android.util.Log;
- import android.view.View;
- import android.view.View.OnClickListener;
- import android.view.View.OnFocusChangeListener;
- import android.widget.ArrayAdapter;
- import android.widget.AutoCompleteTextView;
- import android.widget.Button;
- public class Read_historyActivity extends Activity implements
- OnClickListener {
- private AutoCompleteTextView autoTv;
- /** Called when the activity is first created. */
- @Override
- public void onCreate(Bundle savedInstanceState) {
- super.onCreate(savedInstanceState);
- setContentView(R.layout.main);
- autoTv = (AutoCompleteTextView) findViewById(R.id.autoCompleteTextView1);
- initAutoComplete("history",autoTv);
- Button search = (Button) findViewById(R.id.button1);
- search.setOnClickListener(this);
- }
- @Override
- public void onClick(View v) {
- // 这里可以设定:当搜索成功时,才执行保存操作
- saveHistory("history",autoTv);
- }
- /**
- * 初始化AutoCompleteTextView,最多显示5项提示,使
- * AutoCompleteTextView在一开始获得焦点时自动提示
- * @param field 保存在sharedPreference中的字段名
- * @param auto 要操作的AutoCompleteTextView
- */
- private void initAutoComplete(String field,AutoCompleteTextView auto) {
- SharedPreferences sp = getSharedPreferences("network_url", 0);
- String longhistory = sp.getString("history", "nothing");
- String[] hisArrays = longhistory.split(",");
- ArrayAdapter<String> adapter = new ArrayAdapter<String>(this,
- android.R.layout.simple_dropdown_item_1line, hisArrays);
- //只保留最近的50条的记录
- if(hisArrays.length > 50){
- String[] newArrays = new String[50];
- System.arraycopy(hisArrays, 0, newArrays, 0, 50);
- adapter = new ArrayAdapter<String>(this,
- android.R.layout.simple_dropdown_item_1line, newArrays);
- }
- auto.setAdapter(adapter);
- auto.setDropDownHeight(350);
- auto.setThreshold(1);
- auto.setCompletionHint("最近的5条记录");
- auto.setOnFocusChangeListener(new OnFocusChangeListener() {
- @Override
- public void onFocusChange(View v, boolean hasFocus) {
- AutoCompleteTextView view = (AutoCompleteTextView) v;
- if (hasFocus) {
- view.showDropDown();
- }
- }
- });
- }
- /**
- * 把指定AutoCompleteTextView中内容保存到sharedPreference中指定的字符段
- * @param field 保存在sharedPreference中的字段名
- * @param auto 要操作的AutoCompleteTextView
- */
- private void saveHistory(String field,AutoCompleteTextView auto) {
- String text = auto.getText().toString();
- SharedPreferences sp = getSharedPreferences("network_url", 0);
- String longhistory = sp.getString(field, "nothing");
- if (!longhistory.contains(text + ",")) {
- StringBuilder sb = new StringBuilder(longhistory);
- sb.insert(0, text + ",");
- sp.edit().putString("history", sb.toString()).commit();
- }
- <span style="font-family: monospace; white-space: pre; background-color: rgb(240, 240, 240);"> }
- }</span>
import android.content.SharedPreferences;
import android.os.Bundle;
import android.util.Log;
import android.view.View;
import android.view.View.OnClickListener;
import android.view.View.OnFocusChangeListener;
import android.widget.ArrayAdapter;
import android.widget.AutoCompleteTextView;
import android.widget.Button;

public class Read_historyActivity extends Activity implements
		OnClickListener {
	private AutoCompleteTextView autoTv;

	/** Called when the activity is first created. */
	@Override
	public void onCreate(Bundle savedInstanceState) {
		super.onCreate(savedInstanceState);
		setContentView(R.layout.main);
		autoTv = (AutoCompleteTextView) findViewById(R.id.autoCompleteTextView1);
		initAutoComplete("history",autoTv);
		Button search = (Button) findViewById(R.id.button1);
		search.setOnClickListener(this);
	}
	@Override
	public void onClick(View v) {
		// 这里可以设定:当搜索成功时,才执行保存操作
		saveHistory("history",autoTv);
	}

	/**
	 * 初始化AutoCompleteTextView,最多显示5项提示,使
	 * AutoCompleteTextView在一开始获得焦点时自动提示
	 * @param field 保存在sharedPreference中的字段名
	 * @param auto 要操作的AutoCompleteTextView
	 */
	private void initAutoComplete(String field,AutoCompleteTextView auto) {
		SharedPreferences sp = getSharedPreferences("network_url", 0);
		String longhistory = sp.getString("history", "nothing");
		String[]  hisArrays = longhistory.split(",");
		ArrayAdapter<String> adapter = new ArrayAdapter<String>(this,
				android.R.layout.simple_dropdown_item_1line, hisArrays);
		//只保留最近的50条的记录
		if(hisArrays.length > 50){
			String[] newArrays = new String[50];
			System.arraycopy(hisArrays, 0, newArrays, 0, 50);
			adapter = new ArrayAdapter<String>(this,
					android.R.layout.simple_dropdown_item_1line, newArrays);
		}
		auto.setAdapter(adapter);
		auto.setDropDownHeight(350);
		auto.setThreshold(1);
		auto.setCompletionHint("最近的5条记录");
		auto.setOnFocusChangeListener(new OnFocusChangeListener() {
			@Override
			public void onFocusChange(View v, boolean hasFocus) {
				AutoCompleteTextView view = (AutoCompleteTextView) v;
				if (hasFocus) {
						view.showDropDown();
				}
			}
		});
	}


	/**
	 * 把指定AutoCompleteTextView中内容保存到sharedPreference中指定的字符段
	 * @param field  保存在sharedPreference中的字段名
	 * @param auto  要操作的AutoCompleteTextView
	 */
	private void saveHistory(String field,AutoCompleteTextView auto) {
		String text = auto.getText().toString();
		SharedPreferences sp = getSharedPreferences("network_url", 0);
		String longhistory = sp.getString(field, "nothing");
		if (!longhistory.contains(text + ",")) {
			StringBuilder sb = new StringBuilder(longhistory);
			sb.insert(0, text + ",");
			sp.edit().putString("history", sb.toString()).commit();
		}
<span style="font-family:monospace;white-space: pre; background-color: rgb(240, 240, 240);">	}
}</span>
补上布局的代码
- <?xml version="1.0" encoding="utf-8"?>
- <LinearLayout
- xmlns:android="http://schemas.android.com/apk/res/android"
- android:orientation="vertical"
- android:layout_width="fill_parent"
- android:layout_height="fill_parent">
- <TextView android:layout_width="fill_parent"
- android:layout_height="wrap_content"
- android:text="@string/hello" />
- <LinearLayout android:layout_width="0px"
- android:layout_height="0px" android:focusable="true"
- android:focusableInTouchMode="true"></LinearLayout>
- <AutoCompleteTextView
- android:hint="请输入文字进行搜索" android:layout_height="wrap_content"
- android:layout_width="match_parent"
- android:id="@+id/autoCompleteTextView1">
- </AutoCompleteTextView>
- <Button android:text="搜索" android:id="@+id/button1"
- android:layout_width="wrap_content"
- android:layout_height="wrap_content"></Button>
- </LinearLayout>
<?xml version="1.0" encoding="utf-8"?>
<LinearLayout
	xmlns:android="http://schemas.android.com/apk/res/android"
	android:orientation="vertical"
	android:layout_width="fill_parent"
	android:layout_height="fill_parent">
	<TextView android:layout_width="fill_parent"
		android:layout_height="wrap_content"
		android:text="@string/hello" />
	<LinearLayout android:layout_width="0px"
		android:layout_height="0px" android:focusable="true"
		android:focusableInTouchMode="true"></LinearLayout>
	<AutoCompleteTextView
		android:hint="请输入文字进行搜索" android:layout_height="wrap_content"
		android:layout_width="match_parent"
		android:id="@+id/autoCompleteTextView1">
	</AutoCompleteTextView>
	<Button android:text="搜索" android:id="@+id/button1"
		android:layout_width="wrap_content"
		android:layout_height="wrap_content"></Button>
</LinearLayout>效果图如下


下面出现的是源码内容
需要注意的是,我这里用到的AutoCompleteTextView的几个方法
1. setAdapter()方法:这里要传递的adapter参数必须是继承ListAdapter和Filterable的,其中arrayAdapter和simpleAdapter都能满足要求,我们常用arrayAdapter,因为他不需要像simpleAdapte那样设置他的显示位置和textview组件。
要想掌握它,就必须查看他的源码,我们可以看看arrayadapter是如何实现
凡是继承了Filterable的adapter都必须重写getFilter接口方法
- public Filter getFilter() {
- if (mFilter == null) {
- mFilter = new ArrayFilter();
- }
- return mFilter;
- }
    public Filter getFilter() {
        if (mFilter == null) {
            mFilter = new ArrayFilter();
        }
        return mFilter;
}- /**
- * <p>An array filter constrains the content of the array adapter with
- * a prefix. Each item that does not start with the supplied prefix
- * is removed from the list.</p>
- */
- private class ArrayFilter extends Filter {
- @Override
- protected FilterResults performFiltering(CharSequence prefix) {
- FilterResults results = new FilterResults();
- if (mOriginalValues == null) {
- synchronized (mLock) {
- mOriginalValues = new ArrayList<T>(mObjects);
- }
- }
- if (prefix == null || prefix.length() == 0) {
- synchronized (mLock) {
- ArrayList<T> list = new ArrayList<T>(mOriginalValues);
- results.values = list;
- results.count = list.size();
- }
- } else {
- String prefixString = prefix.toString().toLowerCase();
- final ArrayList<T> values = mOriginalValues;
- final int count = values.size();
- final ArrayList<T> newValues = new ArrayList<T>(count);
- for (int i = 0; i < count; i++) {
- final T value = values.get(i);
- final String valueText = value.toString().toLowerCase();
- // First match against the whole, non-splitted value
- if (valueText.startsWith(prefixString)) {
- newValues.add(value);
- } else {
- final String[] words = valueText.split(" ");
- final int wordCount = words.length;
- for (int k = 0; k < wordCount; k++) {
- if (words[k].startsWith(prefixString)) {
- newValues.add(value);
- break;
- }
- }
- }
- }
- results.values = newValues;
- results.count = newValues.size();
- }
- return results;
- }
 /**
     * <p>An array filter constrains the content of the array adapter with
     * a prefix. Each item that does not start with the supplied prefix
     * is removed from the list.</p>
     */
    private class ArrayFilter extends Filter {
        @Override
        protected FilterResults performFiltering(CharSequence prefix) {
            FilterResults results = new FilterResults();

            if (mOriginalValues == null) {
                synchronized (mLock) {
                    mOriginalValues = new ArrayList<T>(mObjects);
                }
            }

            if (prefix == null || prefix.length() == 0) {
                synchronized (mLock) {
                    ArrayList<T> list = new ArrayList<T>(mOriginalValues);
                    results.values = list;
                    results.count = list.size();
                }
            } else {
                String prefixString = prefix.toString().toLowerCase();

                final ArrayList<T> values = mOriginalValues;
                final int count = values.size();

                final ArrayList<T> newValues = new ArrayList<T>(count);

                for (int i = 0; i < count; i++) {
                    final T value = values.get(i);
                    final String valueText = value.toString().toLowerCase();

                    // First match against the whole, non-splitted value
                    if (valueText.startsWith(prefixString)) {
                        newValues.add(value);
                    } else {
                        final String[] words = valueText.split(" ");
                        final int wordCount = words.length;

                        for (int k = 0; k < wordCount; k++) {
                            if (words[k].startsWith(prefixString)) {
                                newValues.add(value);
                                break;
                            }
                        }
                    }
                }

                results.values = newValues;
                results.count = newValues.size();
            }

            return results;
        }
2.setDropDownHeight方法 ,用来设置提示下拉框的高度,注意,这只是限制了提示下拉框的高度,提示数据集的个数并没有变化
3.setThreshold方法,设置从输入第几个字符起出现提示
4.setCompletionHint方法,设置提示框最下面显示的文字
5.setOnFocusChangeListener方法,里面包含OnFocusChangeListener监听器,设置焦点改变事件
6.showdropdown方法,让下拉框弹出来
我没有用到的一些方法列举
1.clearListSelection,去除selector样式,只是暂时的去除,当用户再输入时又重新出现
2.dismissDropDown,关闭下拉提示框
3.enoughToFilter,这是一个是否满足过滤条件的方法,sdk建议我们可以重写这个方法
4. getAdapter,得到一个可过滤的列表适配器
5.getDropDownAnchor,得到下拉框的锚计的view的id
6.getDropDownBackground,得到下拉框的背景色
7.setDropDownBackgroundDrawable,设置下拉框的背景色
8.setDropDownBackgroundResource,设置下拉框的背景资源
9.setDropDownVerticalOffset,设置下拉表垂直偏移量,即是list里包含的数据项数目
10.getDropDownVerticalOffset ,得到下拉表垂直偏移量
11..setDropDownHorizontalOffset,设置水平偏移量
12.setDropDownAnimationStyle,设置下拉框的弹出动画
13.getThreshold,得到过滤字符个数
14.setOnItemClickListener,设置下拉框点击事件
15.getListSelection,得到下拉框选中为位置
16.getOnItemClickListener。得到单项点击事件
17.getOnItemSelectedListener得到单项选中事件
18.getAdapter,得到那个设置的适配器
一些隐藏方法和构造我没有列举了,具体可以参考api文档
转自: http://download.csdn.net/detail/iamkila/4042528


 1172
1172

 被折叠的 条评论
为什么被折叠?
被折叠的 条评论
为什么被折叠?
 到【灌水乐园】发言


