


Automatically print delivery-related PDFs documents and labels in Odoo, containing package recipient details, contents, or handling instructions.
The following PDFs can be configured to print upon validating an Inventory operation (e.g. receipt, picking, delivery orders, quality checks):
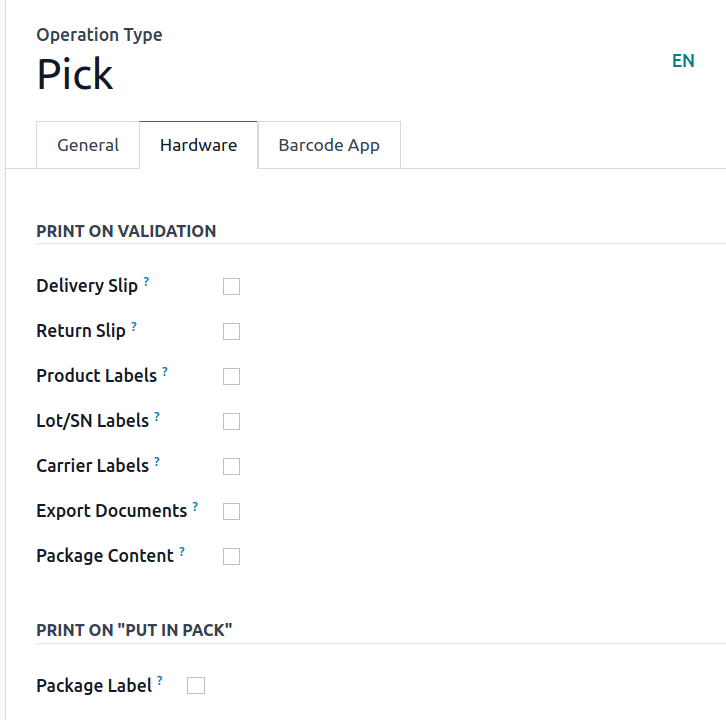
To automatically print these forms, navigate to Inventory app ‣ Configuration ‣ Operations Types, and select the desired operation type.
In the Hardware tab, tick each of the desired options available in the Print on Validation section to download the PDF of those selected documents automatically after validating the Operation Type. For details on what each of the checkbox options do, jump to the related section.
Delivery slip
A delivery slip contains recipient and package details, usually placed inside (or attached to) the package.
See also
After enabling the Delivery Slip setting in the Hardware tab configuration options, clicking Validate on the desired operation type downloads a PDF of the delivery slip.
The delivery slip shows products, quantities, the delivery order reference number, and the total order weight.

Return slip
Print a return slip to include in a delivery for customer return packages. It identifies the return, links to the sales order, and includes item details and customer information. It can also include specific return instructions for the customer.
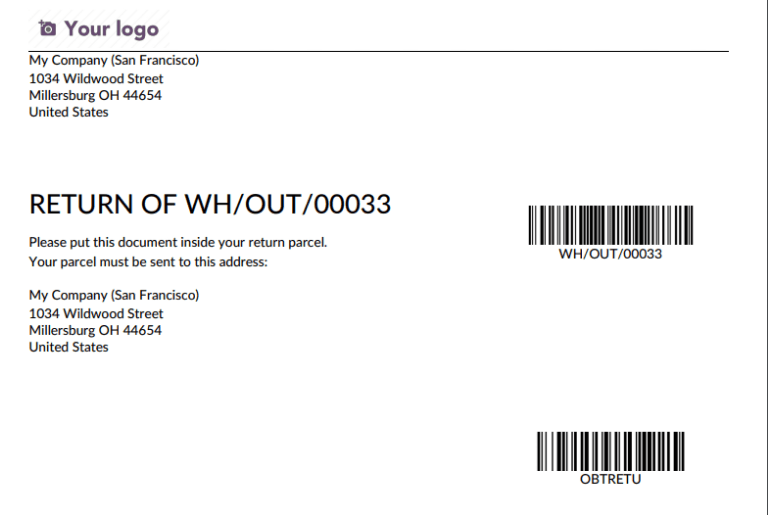
After enabling the Return Slip setting in the Hardware tab configuration options, clicking Validate on the desired operation type downloads a PDF of the return slip.
The return slip displays the company’s return address, along with barcodes for both the order and the return operation.
Product labels
Print product labels to affix to items in an order, providing essential information, such as product name, barcode, and price.
After navigating to the intended operation type (Inventory app ‣ Configuration ‣ Operations Types), in the Hardware tab, tick the Product Labels option.
Doing so makes the Print label as: drop-down menu visible, where each product label can be printed as:
-
2 x 7 with price: PDF displays product name, barcode, and price, fitting two rows and seven columns of product labels per page.
Example 2 x 7
-
4 x 7 with price: displays product name, barcode, and price, fitting four rows and seven columns of product labels per page.
Example 4 x 7
-
4 x 12: displays product name and barcode. Fits four rows and twelve columns of product labels per page.
Example 4 x 12
-
4 x 12 with price: displays product name, barcode, and price. Fits four rows and twelve columns of product labels per page.
-
ZPL Labels: prints labels in the Zebra Programming Language (ZPL) containing the product name and barcode. Readable for Zebra printers to automatically print labels.
-
ZPL Labels with price: prints labels in the ZPL containing the product name, barcode, and price.
Note
Product labels can be manually printed from any delivery order, by clicking the Print Labels button.
Lot/SN Labels
Print lot/SN labels to affix to items in an order, providing essential information, such as product name, lot or serial number, and the barcode.
To automatically print this PDF, navigate to the intended operation type’s options page (Inventory app ‣ Configuration ‣ Operations Types). Then, in the Hardware tab, tick the Lot/SN Labels option.
Doing so makes the Print label as: drop-down menu visible, where each product label can be printed as:
-
4 x 12 - One per lot/SN: PDF with labels for unique lot/serial numbers in the order, including product name, lot/serial number, and barcode. Fits four rows and twelve columns per page.
Example 4 x 12 - One per lot/SN
-
4 x 12 - One per unit: PDF with labels matching the quantity of items, displaying the product name, lot/serial number, and barcode. Fits four rows and twelve columns per page.
-
ZPL Labels - One per lot/SN: prints labels in ZPL, containing the product name, lot/serial number, and barcode.
-
ZPL Labels - One per unit: prints labels with the quantity of items in ZPL, containing the product name, lot/serial number, and barcode.
Carrier labels
To automatically print a carrier label with the recipient address, tracking number, and carrier details for specific third-party shipping carriers, complete the following setup:
-
Tick the Carrier Labels checkbox in the operation type settings.
-
Connect a printer to Odoo’s IoT app.
-
Configure the shipping method’s label type.
Assign printer
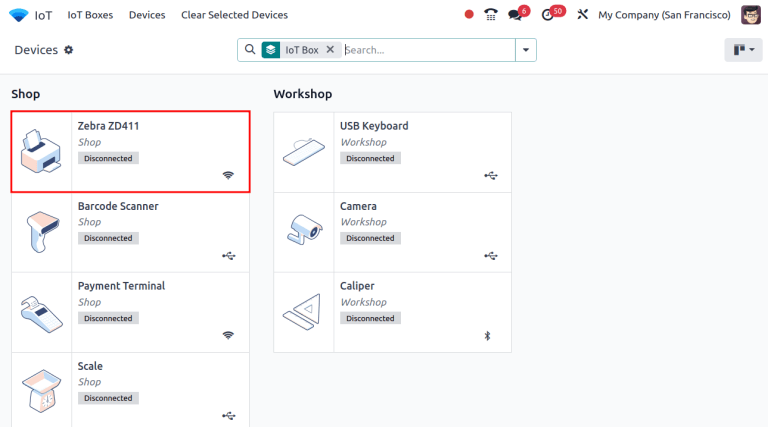
Refer to the Connect a printer documentation for details on connecting a printer to Odoo’s IoT app. Upon completion, assign the carrier label to the printer, by navigating to IoT app ‣ Devices, and selecting the desired printer.
In the printer configuration form, go to the Printer Reports tab to configure the types of documents the printer automatically prints. Click Add a line to open the Add: Reports pop-up window. In the Search… bar, type Shipping, and select Shipping Labels.
Note
The Shipping Documents report is for export documents.
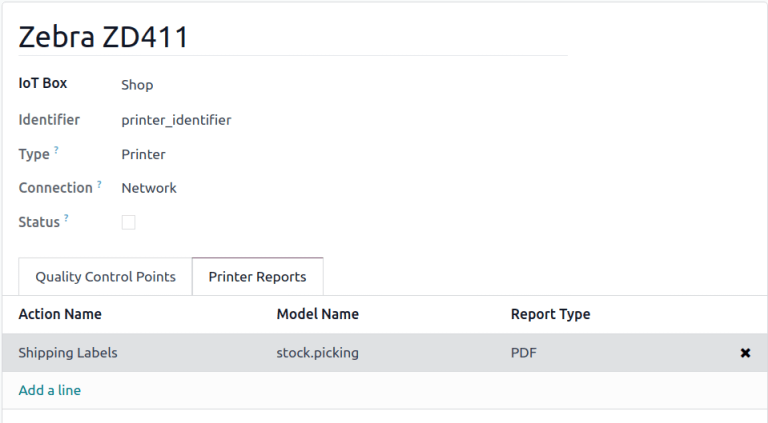
After adding the Shipping Labels report in the Printer Reports tab, ensure the Report Type matches the IoT-connected printer’s type.
-
For laser printers, set the Report Type to PDF.
-
For Zebra printers, set the Report Type to Text.
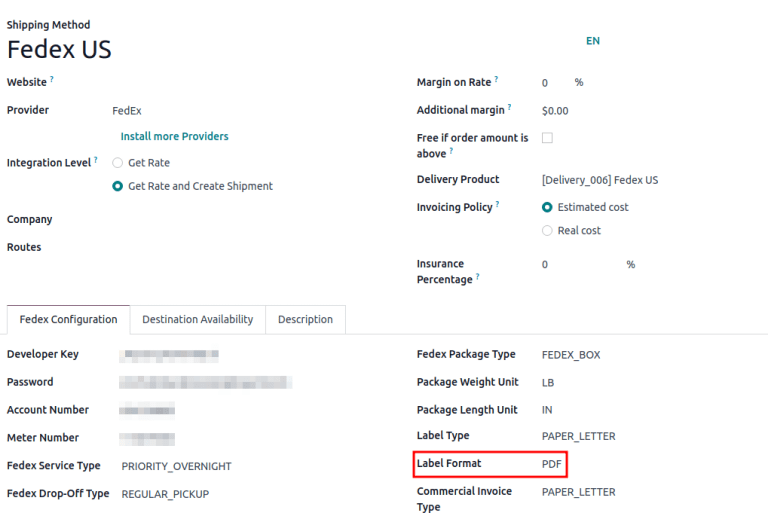
Shipping carrier label type
Next, complete the setup for the third-party shipping connector. After that, go to Inventory app ‣ Configuration ‣ Shipping Methods, and select the desired shipping method.
On the shipping method configuration form, in the [carrier name] Configuration tab, ensure the Label Format matches the report type assigned earlier:
-
For laser printers, set the Label Format to PDF.
-
For Zebra printers, set the Label Format to ZPL2.
Example carrier label
After validating the operation, the carrier label is generated in the chatter, and printed using the IoT-connected printer.
Example carrier label
See also
Export document
An export document, required by customs to ship packages from one country to another, can be automatically printed in Odoo by following these steps:
-
Tick the Export Documents checkbox in the operation type settings.
-
Connect a printer to Odoo’s IoT app.
-
Assign the export document to the printer.
Assign printer
Similar to the printer assignment instructions for carrier labels, after connecting a compatible printer to the Odoo IoT app, go to IoT app ‣ Devices, and select the desired printer.
In the printer configuration form, go to the Printer Reports tab, and click Add a line. In the Add: Reports pop-up window that appears, add the Shipping Documents report to assign the export document to the printer.
Example export document
Package content
A package content PDF includes the package’s barcode, packed date, along with a list of contained products and quantities.
To print this form automatically, go to Inventory app ‣ Configuration ‣ Operation Types, and select the desired operation type. Then, go to the Hardware tab, and tick the Package Contents checkbox.
Important
If the option is not available, enable the Packages feature, by going to Inventory app ‣ Configuration ‣ Settings, ticking the Packages checkbox, and clicking Save.
After enabling the feature in the Hardware tab, validating the operation prints a PDF of the package contents.
Example package content PDF
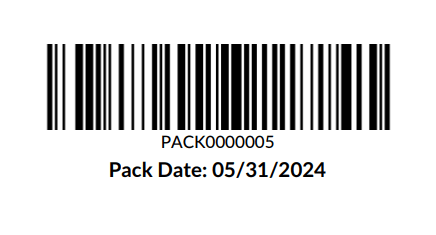
Package label
A package label that shows the package’s barcode and pack date can be configured to print upon clicking the Put in Pack button.
Important
The Put in Pack button is available only when the Packages feature is enabled in Inventory app ‣ Configuration ‣ Settings.
After it is enabled, the Put in Pack button is available on all inventory operations (e.g. receipt, pickings, internal transfers, delivery orders, etc.).
To automatically print the package label when the Put in Pack button is clicked, go to Inventory app ‣ Configuration ‣ Operation Types. Select the desired operation type, and tick the Package Label checkbox in the Hardware tab. Labels can be printed in PDF or ZPL file formats, as defined in the Print label as field.
Example of package barcode


 1148
1148

 被折叠的 条评论
为什么被折叠?
被折叠的 条评论
为什么被折叠?
 到【灌水乐园】发言


