


1.导入js,css样式文件,缺一不可,顺序不可乱
    <link rel="stylesheet" href="css/qunit-1.11.0.css">
     <link rel="stylesheet" href="css/bootstrapv3.css">

    <script src="js/jquery-1.9.1.min.js"></script>
    <script src="js/bootstrap.min.js"></script>

    <script src="js/bootstrap-paginator.js"></script>
    <script src="js/qunit-1.11.0.js"></script>
2.代码,options绝大数可选配置
<body>
<div id="alert-content"></div>
<div id="alert-content"></div>
<div>
<ul id='bp-3-element-test'></ul>
</div>
<script>
$(function(){
var element = $('#bp-3-element-test');
var options = {
bootstrapMajorVersion:3,
currentPage: 3,//当前页
numberOfPages: 5,//每次展示多少页
totalPages:11,//总页数
size:'small',//大小
alignment:'right',//位置
pageUrl: function(type, page, current){//访问连接
return "#"+page;
},
itemTexts: function (type, page, current) { //样式文字设置
switch (type) {
case "first":
return "首页";
case "prev":
return "前一页";
case "next":
return "下一页";
case "last":
return "最后";
case "page":
return ""+page;
}
},
shouldShowPage:function(type, page, current){//控制哪些显示,哪些隐藏
switch(type)
{
case "first":
case "last":
return false; //首页最后一页隐藏
default:
return true; //其他显示
}
},
tooltipTitles: function (type, page, current) { //提示框,当鼠标放上去给提示
switch (type) {
case "first":
return "提示首页";
case "prev":
return "提示前页";
case "next":
return "Tooltip for next page";
case "last":
return "Tooltip for last page";
}
},
useBootstrapTooltip:true,
onPageClicked: function(e,originalEvent,type,page){
$('#alert-content').text("点击页数时,触发该函数, type: "+type+" page: "+page);
},
onPageChanged: function(e,oldPage,newPage){
$('#alert-content').text("当页面改变时,触发该函数, old: "+oldPage+" new: "+newPage);
}
}
element.bootstrapPaginator(options);
});
</script>
</body>
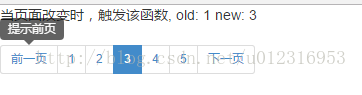
</html>效果图
3.官方文档下载地址,包含英文文档,和所有文件
https://github.com/lyonlai/bootstrap-paginator


 1309
1309

 被折叠的 条评论
为什么被折叠?
被折叠的 条评论
为什么被折叠?
 到【灌水乐园】发言


