1,下载对应php对应版本xdebug并,配置php.ini
[XDebug]
xdebug.profiler_append = 0
xdebug.profiler_enable = 1
xdebug.profiler_enable_trigger = 0
xdebug.profiler_output_dir =”D:\phpStudy\tmp\xdebug”
xdebug.trace_output_dir =”D:\phpStudy\tmp\xdebug”
xdebug.profiler_output_name = “cache.out.%t-%s”
xdebug.remote_enable = 1
xdebug.remote_handler = “dbgp”
xdebug.remote_host = “127.0.0.1”
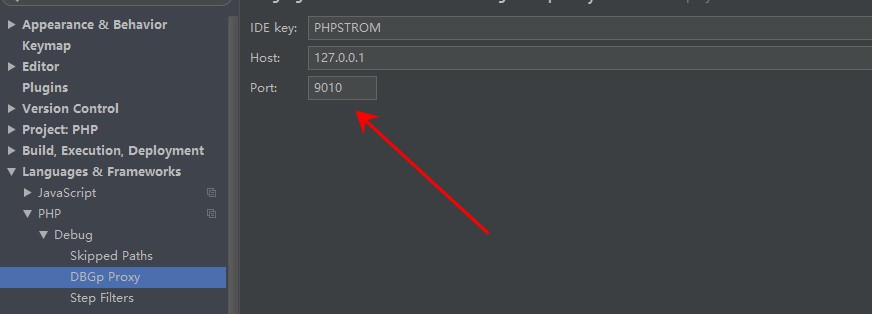
xdebug.remote_port = 9010 为了端口不冲突,可使用其他
xdebug.idekey = PHPSTORM 和浏览器插件对应
zend_extension=”D:\phpStudy\php55n\ext\xdebug.dll”
2,配置phpstrom,有两处端口
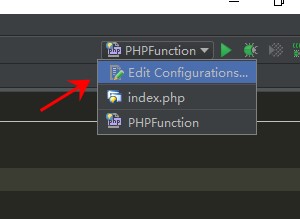
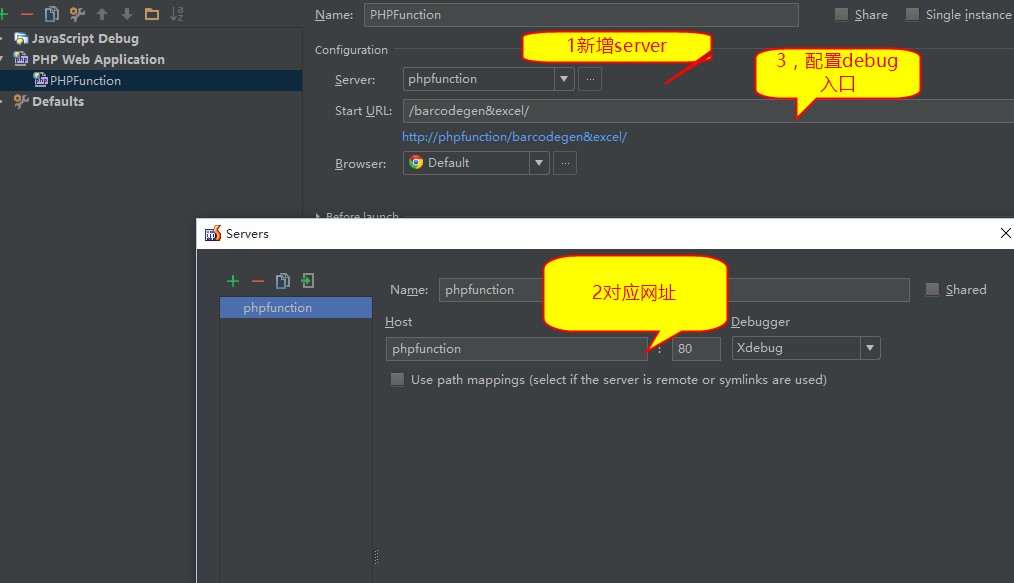
3,配置debug入口
选择新增web application,再新增server
这里的phpfunction是我配置的虚拟主机(你也可以是localhost或其他www)
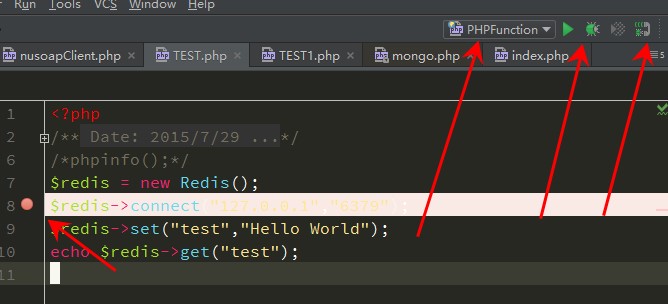
4,设置断点
这里都要有哈,
5,开始调试
然后点击调试,会打开网页,然后你在编辑器中单步调试F8,phpstrom会有对应变化,浏览器也会有(等到有浏览器内容显示的时候)


 209
209

 被折叠的 条评论
为什么被折叠?


