


当我们的系统需要支持的版本越来越多的时候,程序中将不可避免的出现很多IF判断,久而久之,我们的框架将和业务紧紧地耦合在一起,程序中也会到处都是IF,ELSE判断。如下面的程序,完成一个模块分支的功能,当module增加的时候,就要增加一个ELSEIF,让程序可读性可维护性严重下降,也会更容易出错。
public class OldUserService
{
	public void doService(int module, int cmd)
	{
		if (module == 1)
		{
			if (cmd == 1)
			{
				System.out.println("module: " + module + " cmd: " + cmd);
			} else if (cmd == 2)
			{
				System.out.println("module: " + module + " cmd: " + cmd);
			}
		} else if (module == 2)
		{
			if (cmd == 1)
			{
				System.out.println("module: " + module + " cmd: " + cmd);
			} else if (cmd == 2)
			{
				System.out.println("module: " + module + " cmd: " + cmd);
			}
		}
	}
}
今天学习一种解决方法,借助Spring注解完成业务分离。主题思想是,自定义注解,将自己的模块注册到自己的bean容器中,需要使用的时候按模块ID去取即可。
1. 实现自定义注解
/**
 * 模块号
 *
 * @author NonkeyJiang
 *
 */
@Target(ElementType.TYPE)
@Retention(RetentionPolicy.RUNTIME)
public @interface SocketModule
{
	/**
	 * 模块,方法的返回类型就是使用注解的时候module判断的值类型
	 *
	 * @return
	 */
	int module();
}
/**
* 模块号
*
* @author NonkeyJiang
*
*/
@Target(ElementType.METHOD)
@Retention(RetentionPolicy.RUNTIME)
public @interface SocketCmd
{
/**
* 模块
*
* @return
*/
int cmd();
}2. 实现业务接口类
/**
 * 用户模块
 *
 * @author NonkeyJiang
 *
 */
@SocketModule(module = 1)
public interface UserService
{
	@SocketCmd(cmd = 1)
	void login(String userName);

	@SocketCmd(cmd = 2)
	void getInfo(String userName);
}
3. 继承业务接口,实现具体逻辑
继承类里面不需要加模块和命令的接口,可以看到,实现不同的具体功能,比如增加一个cmd = 3功能的时候,只需要在UserService中新增一个方法,并且注明 @SocketCmd(cmd = 3),不需要写IF,ELSE。@Component
public class UserServiceImpl implements UserService
{
@Override
public void login(String userName)
{
System.out.println("login:" + userName);
}
@Override
public void getInfo(String userName)
{
System.out.println("get Info:" + userName);
}
}4. 实现执行器以及执行器容器
/**
 * 执行器
 *
 * @author Lenovo
 *
 */
public class Invoker
{
	private Object targer;

	private Method method;

	public static Invoker valueOf(Object targer, Method method)
	{
		Invoker invoker = new Invoker();
		invoker.setTarger(targer);
		invoker.setMethod(method);
		return invoker;
	}

	public Object invoke(Object[] args)
	{
		try
		{
			method.invoke(targer, args);
		} catch (IllegalAccessException | IllegalArgumentException | InvocationTargetException e)
		{
			e.printStackTrace();
		}
		return null;
	}

	public Object getTarger()
	{
		return targer;
	}

	public void setTarger(Object targer)
	{
		this.targer = targer;
	}

	public Method getMethod()
	{
		return method;
	}

	public void setMethod(Method method)
	{
		this.method = method;
	}

}
/**
* 执行器管理器
*
* @author Lenovo
*
*/
public class InvokerHolder
{
public static Map<Integer, Map<Integer, Invoker>> invokers = new HashMap<>();
public static void addInvoker(int module, int cmd, Invoker invoker)
{
Map<Integer, Invoker> map = invokers.get(module);
if (map == null)
{
map = new HashMap<>();
invokers.put(module, map);
}
map.put(cmd, invoker);
}
public static Invoker getInvoker(int module, int cmd)
{
Map<Integer, Invoker> map = invokers.get(module);
if (map != null)
{
return map.get(cmd);
}
return null;
}
}
5. 实现自定义扫描器
/**
 * 扫描器
 *
 * @author Lenovo
 *
 */
@Component
public class Scanner implements BeanPostProcessor
{

	@Override
	public Object postProcessAfterInitialization(Object bean, String beanName) throws BeansException
	{
		Class<? extends Object> clazz = bean.getClass();
		Class<?>[] interfaces = clazz.getInterfaces();

		if (interfaces != null && interfaces.length > 0)
		{
			for (Class<?> interFace : interfaces)
			{
				SocketModule socketModule = interFace.getAnnotation(SocketModule.class);
				if (socketModule == null)
				{
					continue;
				}

				Method[] methods = interFace.getMethods();
				if (methods != null && methods.length > 0)
				{
					for (Method method : methods)
					{
						SocketCmd socketCmd = method.getAnnotation(SocketCmd.class);
						if (socketCmd == null)
						{
							continue;
						}

						int module = socketModule.module();
						int cmd = socketCmd.cmd();
						Invoker invoker = Invoker.valueOf(bean, method);
						if (InvokerHolder.getInvoker(module, cmd) == null)
						{
							InvokerHolder.addInvoker(module, cmd, invoker);
						} else
						{
							System.out.println("重复注册 module:" + module + " cmd:" + cmd);
						}
					}
				}

			}
		}

		return bean;
	}

	@Override
	public Object postProcessBeforeInitialization(Object bean, String beanName) throws BeansException
	{
		return bean;
	}

}
自定义扫描器必须实现 BeanPostProcessor 接口,这个接口提供 postProcessAfterInitialization 初始化后操作,postProcessBeforeInitialization 初始化前操作,这里我们只需要实现一个方法postProcessAfterInitialization即可,具体是初始化前还是初始化后对我们没有影响。Spring在初始化的时候,会过一遍postProcessAfterInitialization ,将所有bean传入到postProcessAfterInitialization 方法中,我们就在这里将使用了自定义的注解的bean装载到我们自己的执行器管理器中。
6. 测试
扫描器和执行器,执行器管理器三个类在第一次写完之后,后续不需要再动,对业务代码没有任何侵入,程序员可以只关注具体业务的书写。当需要扩展的时候,也很容易实现。
使用的时候,也不需要判断module去实例化不同类的对象,一切交给管理器。
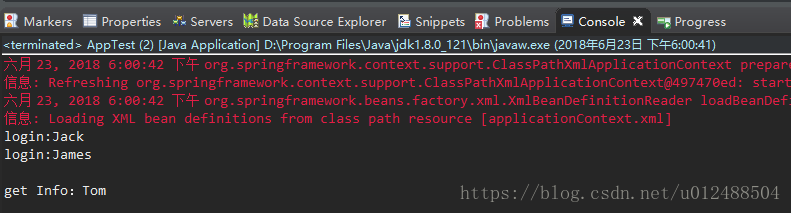
public class AppTest
{
	public static void main(String[] args)
	{
		ApplicationContext applicationContext = new ClassPathXmlApplicationContext("applicationContext.xml");

		Invoker logInvoker = InvokerHolder.getInvoker(1, 1);
		logInvoker.invoke(new Object[] { "Jack" });
		logInvoker.invoke(new Object[] { "James" });

		Invoker infinvoker = InvokerHolder.getInvoker(1, 2);
		infinvoker.invoke(new Object[] { "Tom" });
	}
}
执行结果:


 2968
2968


 被折叠的 条评论
为什么被折叠?
被折叠的 条评论
为什么被折叠?
 到【灌水乐园】发言


