


[iOS]系统TabBar简单使用
demo:http://download.csdn.net/download/u012881779/9950684
以前一直使用自定义样式导航和TabBar,最近发觉系统导航和TabBar也蛮好用的,这里demo先简单用用。
UITabBarController
#import "MainViewController.h"
#import "HomeViewController.h"
#import "ShopViewController.h"
#import "BaseTabBar.h"

@interface MainViewController ()

@end

@implementation MainViewController

- (void)viewDidLoad {
    [super viewDidLoad];
    // 不需要切换动画或分割线时,可以移除下面两句代码
    BaseTabBar *bTabBar = [[BaseTabBar alloc] init];
    [self setValue:bTabBar forKey:@"tabBar"];

    HomeViewController *home = [[HomeViewController alloc] initWithNibName:@"HomeViewController" bundle:nil];
    home.navigationItem.title = @"首页标题";
    home.tabBarItem.title = @"首页";
    home.tabBarItem.image = [[UIImage imageNamed:@"icon1"] imageWithRenderingMode:UIImageRenderingModeAlwaysOriginal];
    home.tabBarItem.selectedImage = [[UIImage imageNamed:@"icon0"] imageWithRenderingMode:UIImageRenderingModeAlwaysOriginal];
    UINavigationController *firstNav = [[UINavigationController alloc]initWithRootViewController:home];

    ShopViewController *shop = [[ShopViewController alloc] initWithNibName:@"ShopViewController" bundle:nil];
    shop.navigationItem.title = @"店铺标题";
    shop.tabBarItem.title = @"店铺";
    shop.tabBarItem.image = [self useImageName:@"icon11"];
    shop.tabBarItem.selectedImage = [[UIImage imageNamed:@"icon10"] imageWithRenderingMode:UIImageRenderingModeAlwaysOriginal];
    UINavigationController *secondNav = [[UINavigationController alloc]initWithRootViewController:shop];

    NSMutableArray *arrays = [[NSMutableArray alloc] init];
    [arrays addObject:firstNav];
    [arrays addObject:secondNav];
    self.viewControllers = arrays;

    // 设置标签栏文字和图片的颜色
    self.tabBar.tintColor = [UIColor orangeColor];
    // 设置标签栏的颜色
    self.tabBar.barTintColor = [UIColor whiteColor];
    // 设置标签栏风格(默认高度49)
    self.tabBar.barStyle = UIBarStyleDefault;
    // 设置初始状态选中的下标
    self.selectedIndex = 1;

    // 改变UITabbar顶部分割线颜色
    CGRect rect = CGRectMake(0, 0, [UIScreen mainScreen].bounds.size.width, 1);
    UIGraphicsBeginImageContext(rect.size);
    CGContextRef context = UIGraphicsGetCurrentContext();
    CGContextSetFillColorWithColor(context,[[UIColor redColor] CGColor]);
    CGContextFillRect(context, rect);
    UIImage *img = UIGraphicsGetImageFromCurrentImageContext();
    UIGraphicsEndImageContext();
    [self.tabBar setShadowImage:img];
    [self.tabBar setBackgroundImage:[[UIImage alloc] init]];

}

// 系统默认会把tabBar上按钮的选中图片,渲染成蓝色。这里告诉图片保持最原始的图片,不要渲染。
- (UIImage *)useImageName:(NSString *)picName {
    UIImage *image = [[UIImage imageNamed:picName] imageWithRenderingMode:UIImageRenderingModeAlwaysOriginal];
    return image;
}

@end
#import "BaseTabBar.h"

@implementation BaseTabBar

- (void)layoutSubviews {
    [super layoutSubviews];
    for (UIControl *tabBarButton in self.subviews) {
        if ([tabBarButton isKindOfClass:NSClassFromString(@"UITabBarButton")]) {
            [self createTheDivider];
            [tabBarButton addTarget:self action:@selector(tabBarButtonClick:) forControlEvents:UIControlEventTouchUpInside];
        }
    }
}

- (void)tabBarButtonClick:(UIControl *)tabBarButton {
    for (UIView *imageView in tabBarButton.subviews) {
        if ([imageView isKindOfClass:NSClassFromString(@"UITabBarSwappableImageView")]) {
            // 需要实现的帧动画
            CAKeyframeAnimation *animation = [CAKeyframeAnimation animation];
            animation.keyPath = @"transform.scale";
            animation.values = @[@1.0,@1.3,@0.9,@1.15,@0.95,@1.02,@1.0];
            animation.duration = 1;
            animation.calculationMode = kCAAnimationCubic;
            // 把动画添加上去
            [imageView.layer addAnimation:animation forKey:nil];
        }
    }
}

// 添加分割线
- (void)createTheDivider {
    NSInteger num = self.items.count;
    for (int i = 1; i < num; i++) {
        UIImageView *image = [[UIImageView alloc] initWithFrame:CGRectMake(0, 5, 1, self.bounds.size.height - 2*5)];
        [image setBackgroundColor:[UIColor greenColor]];
        image.center = CGPointMake(([UIScreen mainScreen].bounds.size.width/num-1)*i, image.center.y);
        [self addSubview:image];
    }
}

@end
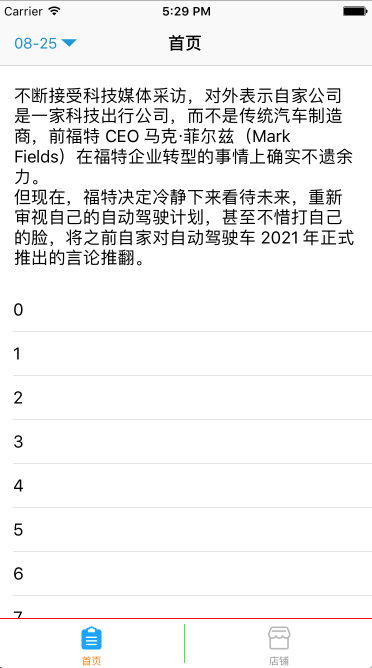
示意图:


 1500
1500

 被折叠的 条评论
为什么被折叠?
被折叠的 条评论
为什么被折叠?
 到【灌水乐园】发言


