


转自:http://blog.csdn.net/u012561176/article/details/22993063
1.首先,新建一个安卓项目,打开项目下的res下的layout,里面有个activity_main.xml布局文件,打开来,修改里面的代码,其中第一个EditText下的android:inputType="phnoe"这条代码是指定编辑框的类型为电话号码,即0-9的阿拉伯数字,其中,第二个EditText下的android:minLines="3"这条代码是设置此编辑框最小的行数为3行,在界面显示下将会出现3行的编辑框,接下来,我将附上布局文件的代码:
- <LinearLayout xmlns:android="http://schemas.android.com/apk/res/android"
- xmlns:tools="http://schemas.android.com/tools"
- android:orientation="vertical"
- android:layout_width="match_parent"
- android:layout_height="match_parent"
- android:paddingBottom="@dimen/activity_vertical_margin"
- android:paddingLeft="@dimen/activity_horizontal_margin"
- android:paddingRight="@dimen/activity_horizontal_margin"
- android:paddingTop="@dimen/activity_vertical_margin"
- tools:context=".MainActivity" >
- <!-- 定义一个文本视图控件 -->
- <TextView
- android:layout_width="match_parent"
- android:layout_height="wrap_content"
- android:text="@string/number" />
- <!-- 定义一个文本编辑框控件,即可输入电话号码 -->
- <EditText
- android:id="@+id/number"
- android:layout_width="match_parent"
- android:layout_height="wrap_content"
- android:inputType="phone"/>
- <!-- 定义一个文本视图控件 -->
- <TextView
- android:layout_width="match_parent"
- android:layout_height="wrap_content"
- android:text="@string/content" />
- <!-- 定义一个文本编辑框控件,即可输入短信内容-->
- <EditText
- android:id="@+id/content"
- android:layout_width="match_parent"
- android:layout_height="wrap_content"
- android:minLines="3"/>
- <!-- 定义一个按钮 -->
- <Button
- android:id="@+id/button1"
- android:layout_width="wrap_content"
- android:layout_height="wrap_content"
- android:text="@string/button"/>
- </LinearLayout>
2.接下来,打开安卓项目中src下的MainActivity.java文件,在里面添加些代码,下面,将附上MainActivity.java的代码:
- package com.example.sms;
- import java.util.ArrayList;
- import android.app.Activity;
- import android.os.Bundle;
- import android.telephony.SmsManager;
- import android.view.Menu;
- import android.view.View;
- import android.widget.Button;
- import android.widget.EditText;
- import android.widget.Toast;
- public class MainActivity extends Activity {
- private EditText numberText;
- private EditText contentText;
- @Override
- protected void onCreate(Bundle savedInstanceState) {
- super.onCreate(savedInstanceState);
- setContentView(R.layout.activity_main);
- numberText=(EditText)findViewById(R.id.number);//获取第一个EditText,即输入电话号码的组件
- contentText=(EditText)findViewById(R.id.content);//获取第二个EditText,即输入短信内容的组件
- Button button1=(Button)findViewById(R.id.button1);//获取按钮组件,即发送按钮组件
- button1.setOnClickListener(new ButtonClickListener());//为发送短信添加一个单击监听器
- }
- private final class ButtonClickListener implements View.OnClickListener{
- @Override
- public void onClick(View v){
- String number=numberText.getText().toString();//获取第一个文本编辑框里的输入内容,即输入什么电话号码
- String content=contentText.getText().toString();//获取第二个文本编辑框里的输入内容,即要发送的短信内容
- SmsManager manager=SmsManager.getDefault();//获得发送短信的管理器,使用的是android.telephony.SmsManager
- ArrayList<String> texts=manager.divideMessage(content);
- for(String text:texts){
- //使用短信管理器发送短信内容
- //参数一为短信接收者
- //参数三为短信内容
- //其他可以设为null
- manager.sendTextMessage(number, null, text, null, null);
- }
- Toast.makeText(MainActivity.this, R.string.success, Toast.LENGTH_LONG).show();//Toast,用来显示发送成功的提示
- }
- }
- @Override
- public boolean onCreateOptionsMenu(Menu menu) {
- // Inflate the menu; this adds items to the action bar if it is present.
- getMenuInflater().inflate(R.menu.main, menu);
- return true;
- }
- }
3.以上是完整的代码,但是还要对其设置可以发送短信的权限。
4.接下来设置一下权限,在项目下的AndroidManifest要添加多一条代码,即在安卓配置文件下设置可以发送短信的权限,那条代码为: <uses-permission android:name="android.permission.SEND_SMS"/>,这个权限经常会忘记设置,大家要记得写上哦,不然,运行将会无法实现发送短信的功能,按下发送按钮将会报错,接下来附上安卓配置文件的代码,即AndroidManifest.xml的代码:
- <?xml version="1.0" encoding="utf-8"?>
- <manifest xmlns:android="http://schemas.android.com/apk/res/android"
- package="com.example.sms"
- android:versionCode="1"
- android:versionName="1.0" >
- <uses-sdk
- android:minSdkVersion="8"
- android:targetSdkVersion="18" />
- <application
- android:allowBackup="true"
- android:icon="@drawable/start_b"
- android:label="@string/app_name"
- android:theme="@style/AppTheme" >
- <activity
- android:name="com.example.sms.MainActivity"
- android:label="@string/app_name" >
- <intent-filter>
- <action android:name="android.intent.action.MAIN" />
- <category android:name="android.intent.category.LAUNCHER" />
- </intent-filter>
- </activity>
- </application>
- <!-- 设置可以发送短信的权限的代码 -->
- <uses-permission android:name="android.permission.SEND_SMS"/>
- </manifest>
5.其中的电话号码和短信内容是我自己在模拟器里打下去的,其模拟器运行显示如下:
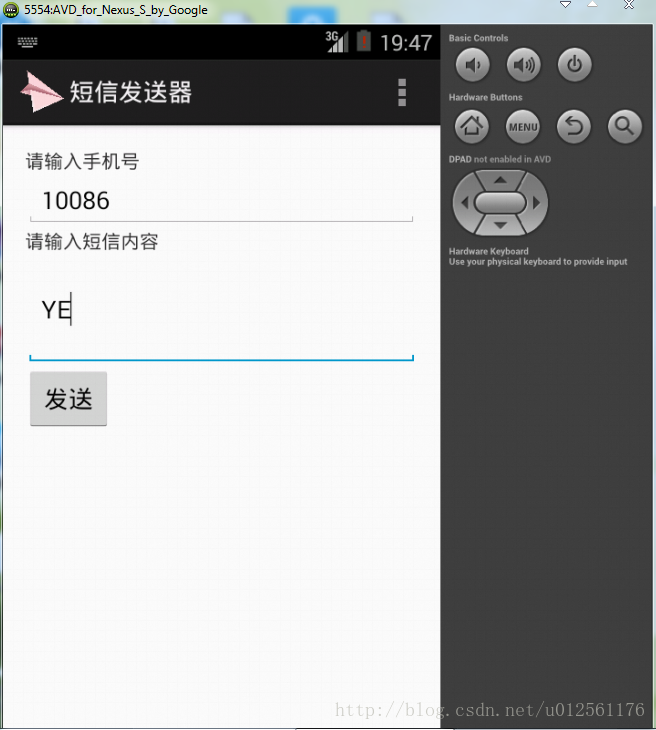
6.要实验一下是否能实现发送短信的功能,如果你是部署到真机调试的话,可直接输入电话号码和短信内容,便可发送短信,如果是用模拟器的话,可开启2个模拟器,模拟器中的那个5554:AVD中的5554便是它本身的电话号码,启动第二个模拟器的话,它的电话号码将为5556,在输入手机号中输入5556,短信内容可任意写,点击发送,便可在5556那个模拟器接收到5554那个模拟器发来的信息。
7.另外,还有一个可行的方法,在工具上方菜单下有Window,下拉菜单下有Show View,选择other...里面有个Emulator Control,点击一下,将会出现这样的界面:
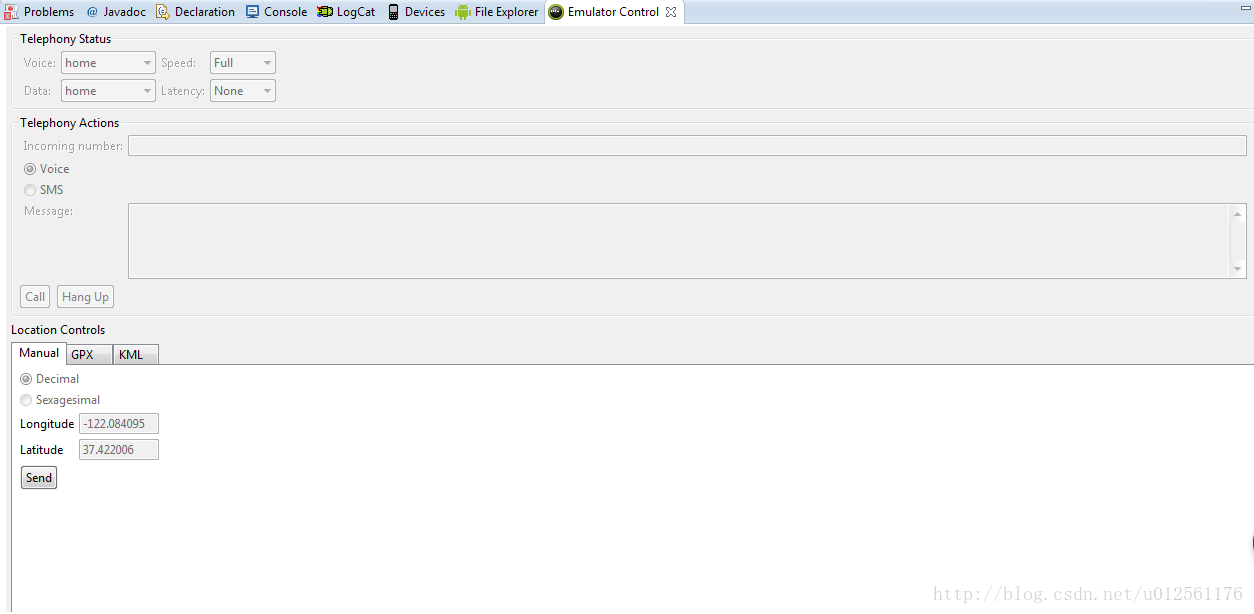
8.在这个视图里,可不用写程序和代码,便可发送短信到模拟器上,在那个Incoming number里输入5554模拟器,在选择SMS,在Message里输入短信内容,点击下面的send按钮,便可发送短信到模拟器上。


 2967
2967

 被折叠的 条评论
为什么被折叠?
被折叠的 条评论
为什么被折叠?
 到【灌水乐园】发言


