


介绍
插件html-webpack-plugin实现打包时生成html文件,自动引入打包的资源并可以插入hash。
还可以指定模板,默认lodash模板。
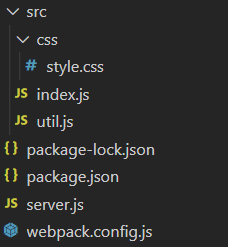
创建初始项目
// package.json
{
  // ...
  "scripts": {
    "build": "webpack --progress",
    "server": "node server.js"
  },
  "devDependencies": {
    "css-loader": "^3.5.3",
    "express": "^4.17.1",
    "html-webpack-plugin": "^4.3.0",
    "mini-css-extract-plugin": "^0.9.0",
    "style-loader": "^1.2.0",
    "webpack": "^4.43.0",
    "webpack-cli": "^3.3.11",
    "webpack-dev-middleware": "^3.7.2",
    "webpack-hot-middleware": "^2.25.0"
  }
}
// webpack.config.js
const path = require('path');
// 加载插件
const MiniCssExtractPlugin = require('mini-css-extract-plugin');
const webpack = require('webpack');
const hotMiddlewareScript = 'webpack-hot-middleware/client?quiet=true';
const HtmlWebpackPlugin = require('html-webpack-plugin'); // 加载html-webpack-plugin

module.exports = {
    devtool: 'cheap-module-eval-source-map',
    entry: {
        main: [hotMiddlewareScript, './src/index.js'],
        util: [hotMiddlewareScript, './src/util.js']
    },
    output: {
        path: path.resolve(__dirname, 'dist'),
        filename: '[name].js',
    },
    module: {
        rules: [
            {
                test: /\.css$/, // 根据正则匹配.css结尾的文件
                use: [ // 配置loader,倒序使用
                    {
                    	loader: MiniCssExtractPlugin.loader,
                        options: {
                            hmr: true // process.env.NODE_ENV === 'development'
                        }
                    },
                    { loader: 'css-loader' }
                ]
            }
        ]
    },
    plugins: [
        // 用 MiniCssExtractPlugin 抽离出 css 文件
        new MiniCssExtractPlugin({
            filename: '[name].css'
        }),
        new webpack.HotModuleReplacementPlugin(),
        new HtmlWebpackPlugin() // 使用html-webpack-plugin
    ],
}
// server.js
const express = require('express');
const webpack = require('webpack');
const webpackDevMiddleware = require('webpack-dev-middleware');
const webpackHotMiddleware = require('webpack-hot-middleware')

const app = express();
const config = require('./webpack.config.js');
const compiler = webpack(config);

// 告诉express使用webpack-dev-middleware并使用webpack.config.js
app.use(webpackDevMiddleware(compiler));

app.use(webpackHotMiddleware(compiler));

app.use(express.static('dist'))


// 在8080端口运行文件
app.listen(8080, function () {
  console.log('Example app listening on port 8080!\n');
});
// src/index.js
import './css/style.css';
console.log('this is index.js')

// src/util.js
let app = document.getElementById('app');
if (!app) {
    app = document.createElement('div');
    app.id = 'app';
    document.body.appendChild(app);
    app.innerText = 'I from createElement'; // 标记app为util创建的
} else {
    app.innerText = 'I from HTML element'; // 标记app是html页面已有的
}
// src/css/style.css
body{
    font-size:14px;
    line-height: 1.8em;
    color: #333;
}
打包,npm run build,查看dist
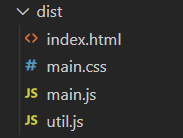
自动生成了一个html文件,将入口文件main.js util.js按entry配置的顺序引入到body的底部,
将css文件引入到了head的底部:
// 格式化后
<!doctype html>
<html>
	<head>
		<meta charset="utf-8">
		<title>Webpack App</title>
		<meta name="viewport" content="width=device-width,initial-scale=1">
		<link href="main.css" rel="stylesheet">
	</head>
	<body>
		<script src="main.js"></script>
		<script src="util.js"></script>
	</body>
</html>
HtmlWebpackPlugin 配置
| 参数 | 类型 | 默认值 | 描述 |
|---|---|---|---|
| title | String | Webpack App | 用于生成HTML文档的标题 |
| filename | String | ‘index.html’ | 将HTML写入的文件。默认是index.html。你也可以在此处指定子目录(比如:assets/admin.html) |
| template | String | ‘’ | 根据自己的指定的模板文件(相对路径或绝对路径)来生成特定的 html 文件。 模板类型可以是 html, jade, ejs, hbs 等等,默认情况下,它将使用src/index.ejs(如果存在)。 html模板可以使用lodash语法,其他模板需要安装对应的loader。 |
| templateContent | String|Function|false | false | 可代替模板使用以提供内联模板 |
| templateParameters | Boolean|Object|Function | false | 允许设置或覆盖模板中使用的参数 |
| inject | Boolean|String | true | 资源注入选项,将所有打包的资源注入到template或templateContent,枚举值:true | ‘body’ | ‘head’ | false。 true | ‘body’ 将js放置到body底部。 ‘head’ 将js放置在head元素底部。 false 不注入任何资源(css、js以及viewport meta) |
| scriptLoading | ‘blocking’|‘defer’ | ‘blocking’ | 配置script标签的defer属性。类似于将script放入文档最底部 |
| favicon | String | ‘’ | favicon 文件所在的路径名 |
| meta | Object | {} | 允许注入meta标签,例如:{viewport: ‘width=device-width, initial-scale=1’} |
| base | Object|String|false | false | 插入一个base标签 |
| minify | Boolean|Object | webpack mode='production’时默认为true,否则默认为false | 设置是否压缩html,及如何压缩。 它使用 html-minifier-terser 压缩,当为true时使用默认配置见文档 |
| hash | Boolean | false | 设置为true时会在script引用的js文件(output.filename)后附加webpack的hash值,例如: |
| cache | Boolean | true | 只有内容被改变时才生成文件(没明白什么意思) |
| showErrors | Boolean | true | 是否显示错误提示,会在html页面中将错误信息写在一个pre标签中。 |
| chunks | ? | ? | 单独设置要注入的资源,用于多入口打包。 |
| chunksSortMode | String|Function | auto | 用于设置将chunks注入时的排序。可设置为:‘none’ | ‘auto’ | ‘manual’ | {Function} |
| excludeChunks | Array. | ‘’ | 用于排除哪些资源,例如:单元测试 |
使用模板
// webpack.config.js
// ...
	new HtmlWebpackPlugin({
	    inject: false, // 禁用自动注入
        templateContent: ({htmlWebpackPlugin}) => `
	        <!doctype html>
            <html>
                <head>
                ${htmlWebpackPlugin.tags.headTags}
                </head>
                <body>
                ${htmlWebpackPlugin.tags.bodyTags}
                </body>
            </html>
        `
	})
// ...
打包生成html文件:
<!doctype html>
<html>
	<head>
		<link href="main.css" rel="stylesheet">
	</head>
	<body>
		<script src="main.js"></script>
		<script src="util.js"></script>
	</body>
</html>
基本一致,区别是没有插入默认的title meta。配置title meta 并 增加一个自定义参数,看看如何使用:
// webpack.config.js
// ...
    new HtmlWebpackPlugin({
        inject: false, // 禁用自动注入
        title: 'my App',
	    meta: {
	    	viewport: 'width=device-width, initial-scale=1'
	    },
        templateParameters: {
            h1text: 'hello World'
        },
        templateContent: ({htmlWebpackPlugin,h1text}) => `
            <html>
                <head>
                ${htmlWebpackPlugin.tags.headTags}
                </head>
                <body>
                <h1>${h1text}</h1>
                ${htmlWebpackPlugin.tags.bodyTags}
                </body>
            </html>
        `
    })
// ...
打包生成html文件:
<!doctype html>
<html>
	<head>
		<title>my App</title>
		<meta name="viewport" content="width=device-width,initial-scale=1">
		<link href="main.css" rel="stylesheet">
	</head>
	<body>
		<h1>hello World</h1>
		<script src="main.js"></script>
		<script src="util.js"></script>
	</body>
</html>
模板可使用的信息
上面示例看到,html-webpack-plugin将一些对象和自定义参数传入到模板中使用。
| 参数名 | 描述 |
|---|---|
| htmlWebpackPlugin | 插件可用数据 |
| htmlWebpackPlugin.options | 插件的配置信息 |
| htmlWebpackPlugin.tags | 插件要注入的tag信息,包括<base><meta><script><link>,可以直接在模板中使用。 htmlWebpackPlugin.tags.headTags 要注入head的标签; htmlWebpackPlugin.tags.bodyTags 要注入body的标签。 |
| htmlWebpackPlugin.files | 直接访问编译期间使用的文件。 |
| webpackConfig | webpack的配置信息,例如:webpackConfig.output.publicPath |
| compilation | the webpack compilation object |
| templateParameters中自定义参数 | 可直接用参数名访问 |
使用模板文件
创建src/index.html,并指定为模板,使用lodash语法,内容如下:
<!doctype html>
<html>
	<head>
		<title><%= htmlWebpackPlugin.options.title %></title>
		<%= htmlWebpackPlugin.tags.headTags %>
	</head>
	<body>
		<h1><%= h1text %></h1>
		<div id="app"></div>
		<%= htmlWebpackPlugin.tags.bodyTags %>
	</body>
</html>
// webpack.config.js
// ...
    new HtmlWebpackPlugin({
        template: './src/index.html',
        inject: false, // 禁用自动注入
        title: 'my App',
        meta: {
            viewport: 'width=device-width, initial-scale=1'
        },
        templateParameters: {
            h1text: 'hello World'
        }
    })
// ...
打包生成html文件,与templateContent方式一样,这里新增了id为app的div,可以发现,自定义的内容也会保留。
生成多个html文件
生成多个html文件,需要在插件plugins数组中多次声明该插件:
// webpack.config.js
// ...
    plugins: [
        // ...
        new HtmlWebpackPlugin({
            template: './src/index.html',
            inject: false, // 禁用自动注入
            title: 'my App',
            meta: {
                viewport: 'width=device-width, initial-scale=1'
            },
            templateParameters: {
                h1text: 'hello World'
            }
        }),
        new HtmlWebpackPlugin({
            filename: 'test.html',
            title: 'Test',
            chunks: ['util'],
        })
    ],
// ...
打包后,生成了index.html和test.html
clean-webpack-plugin
现在dist中的文件都是打包生成的了,为避免每次打包会遗留文件,可用clean-webpack-plugin插件在每次打包前,清空dist目录。
默认情况下,此插件将在每次成功构建后删除webpack的output.path目录中的所有文件,以及所有未使用的webpack资源。
安装配置
npm install -D clean-webpack-plugin
// webpack.config.js
// ...
const { CleanWebpackPlugin } = require('clean-webpack-plugin');
module.exports = {
	//...
    plugins: [
    	// ...
	    // 取消生成第二个html文件
        // new HtmlWebpackPlugin({
        //     filename: 'test.html',
        //     title: 'Test',
        //     chunks: ['util'],
        // }),
        new CleanWebpackPlugin()
	]
};
打包后,dist/test.html被删除
HMR
使用html-webpack-plugin生成的index.html文件会实时编译,但不会自动刷新页面。
可通过loader或其他方式实现。


 880
880


 被折叠的 条评论
为什么被折叠?
被折叠的 条评论
为什么被折叠?
 到【灌水乐园】发言


