


转载请注明出处:http://blog.csdn.net/u012975705/article/details/49282835
前言
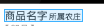
最近在项目中遇到一个问题,要求显示下面的效果。


如图所示,“所属农庄”必须紧挨在“商品名字”后面,但当商品名字过长时必须使得所属农庄显示完整,并且商品名字中显示不全的部分使用省略号,开始一直没弄出来,后面想到用layout_align****,才成功实现其效果。
其他不说,先来来看看layout_align**** 的用法。
layout_align**** 介绍
layout_align**** 是RelativeLayout布局中子控件所拥有的一个用来帮助确定显示位置属性。align翻译过来为对齐,所以layout_align**** 即为与某某对其,先看例子:
<RelativeLayout
    android:layout_width="match_parent"
    android:layout_height="wrap_content">

    <TextView
        android:id="@+id/shop_item_name"
        style="@style/TextNormal"
        android:layout_width="wrap_content"
        android:layout_height="match_parent"
        android:singleLine="true"
        android:ellipsize="end"
        android:text="商品名字商品名字" />

    <TextView
        android:layout_alignRight="@id/shop_item_name"
        android:layout_alignBaseline="@id/shop_item_name"
        android:layout_width="wrap_content"
        android:layout_height="match_parent"
        android:gravity="center_vertical"
        android:text="所属农庄"
        android:textColor="@color/red"
        android:textSize="@dimen/typeface_micro_12" />
</RelativeLayout>
显示效果:

其中
layout_alignRight="@id/shop_item_name"表示与id=shop_item_name的控件又对齐,即“所属农庄”的右边缘与“商品名字”的右边缘重合。
layout_align** ="@id/shop_item_name"顾名思义,是该两个控件的** 边重合。
当然RelativeLayout中还有些比较特别的控件,
比如
android:layout_alignBaseline="@id/shop_item_name"表示“所属农庄”控件中的文字与“商品名字”控件中的文字的下边对齐;
比如
android:layout_alignParentLeft="true"
android:layout_alignParentTop="true"
android:layout_alignParentRight="true"
android:layout_alignParentBottom="true"
分别表示与该控件的父控件的左、上、右、下边缘对齐
效果实现具体方式
上面代码中的实现效果

明显不符合要求,想要实现符合要求的布局必须在控件“商品名字”中添加代码:
android:paddingRight="控件'所属农场'的长度"其中padding** 即该控件中的内容距该控件** 边缘的距离
完整代码如下:
<RelativeLayout
    android:layout_width="match_parent"
    android:layout_height="wrap_content">

    <TextView
        android:id="@+id/shop_item_name"
        style="@style/TextNormal"
        android:paddingRight="控件'所属农场'的长度"
        android:layout_width="wrap_content"
        android:layout_height="match_parent"
        android:singleLine="true"
        android:ellipsize="end"
        android:text="商品名字" />

    <TextView
        android:layout_alignRight="@id/shop_item_name"
        android:layout_alignBaseline="@id/shop_item_name"
        android:layout_width="wrap_content"
        android:layout_height="match_parent"
        android:gravity="center_vertical"
        android:text="所属农庄"
        android:textColor="@color/red"
        android:textSize="@dimen/typeface_micro_12" />
</RelativeLayout>
实现效果:
下面介绍其中涉及到的怎么动态获取控件的长度和动态设置控件的padding值
1、动态获取控件长度
在获取控件高宽的时候不能直接在代码中使用
int width = holder.mTvName.getWidth();来获取,因为只有在measure方法被调用之后才能获取到控件的真实长度,所以必须通过利用ViewTreeObserver 监听来获取控件高宽。使用方式如下:
ViewTreeObserver vto = holder.mTvName.getViewTreeObserver();
vto.addOnGlobalLayoutListener(new ViewTreeObserver.OnGlobalLayoutListener() {
     @Override
     public void onGlobalLayout() {
                holder.mTvName.getViewTreeObserver().removeGlobalOnLayoutListener(this);
                int width = holder.mTvName.getWidth();
            }
        });
2、在代码中设置控件的padding
holder.shopName.setPadding(left, top, right, bottom);设置控件中内容距离控件左、上、右、下边缘的距离,单位为px
完整代码:
ViewTreeObserver vto = holder.mTvName.getViewTreeObserver();
        vto.addOnGlobalLayoutListener(new ViewTreeObserver.OnGlobalLayoutListener() {
            @Override
            public void onGlobalLayout() {
                holder.mTvName.getViewTreeObserver().removeGlobalOnLayoutListener(this);
                int width = holder.mTvName.getWidth();
                holder.shopName.setPadding(0, 0, width + 5, 0);
            }
        });


 2201
2201

 被折叠的 条评论
为什么被折叠?
被折叠的 条评论
为什么被折叠?
 到【灌水乐园】发言


