


VPN英文全称是“Virtual Private Network”,就是“虚拟专用网络”。可以远程帮助用户、分公司、商业伙伴及供应商同公司的内部网建立可信的安全连接,用于经济有效地连接到商业伙伴和用户的安全外联网虚拟专用网。
搭建环境:
服务器系统:Windows server 2008 R2
客户机系统:Windows 7
具体配置如下:
一、配置环境
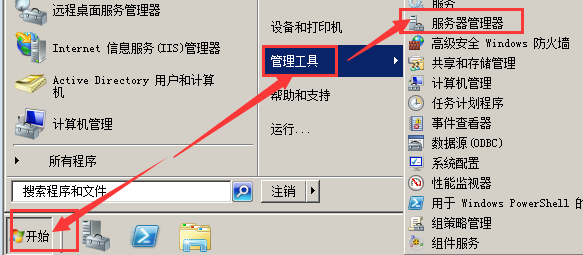
1、点击“开始”右边的“服务器管理器”
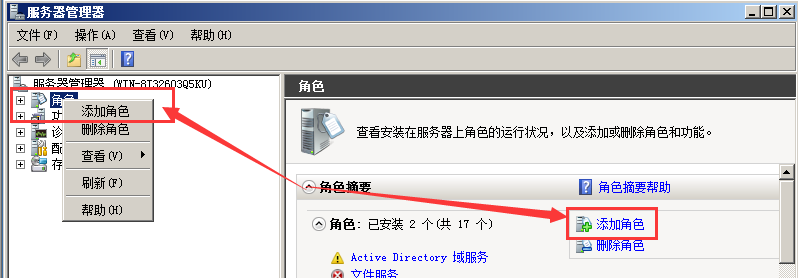
2、在“服务器管理器”里点击“角色”,右击选译“添加角色”,点击“下一步”
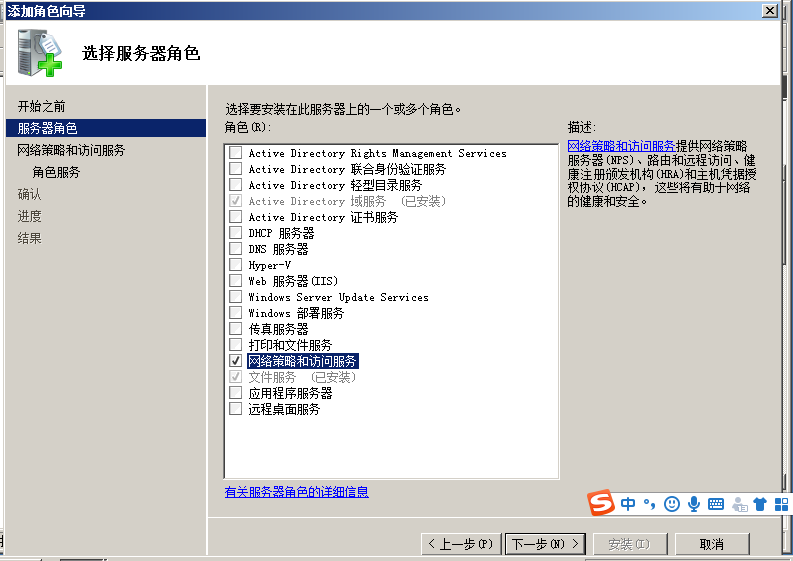
3、在“角色”里选择“网络策略和访问服务”,点击“下一步”
4、点击“下一步”

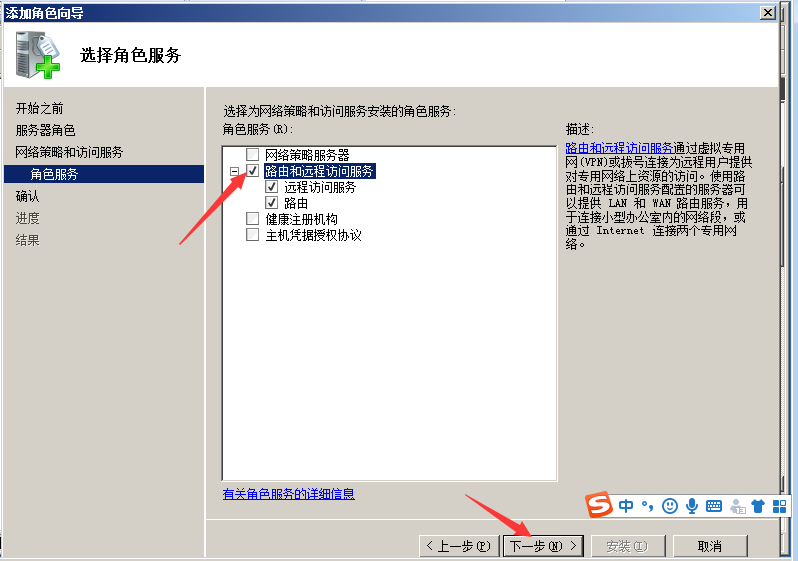
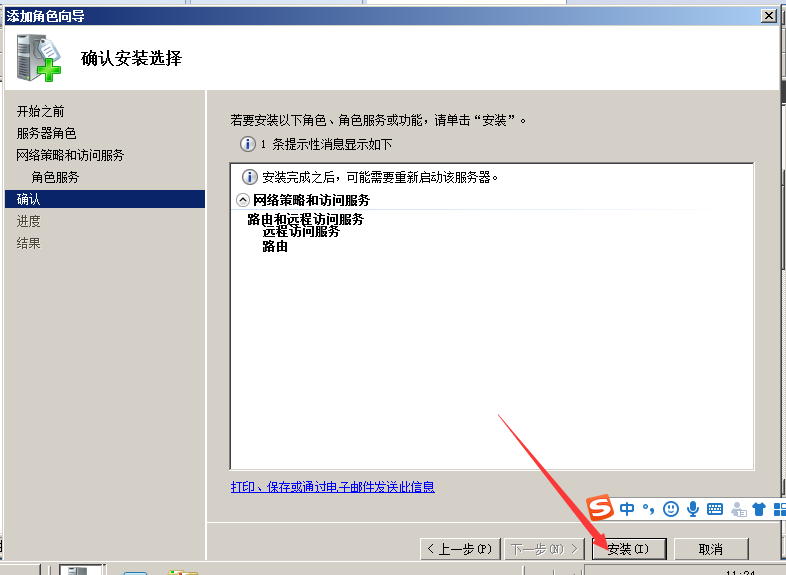
5、选择“路由和远程访问服务”,点击“安装”
二、配置VPN服务器
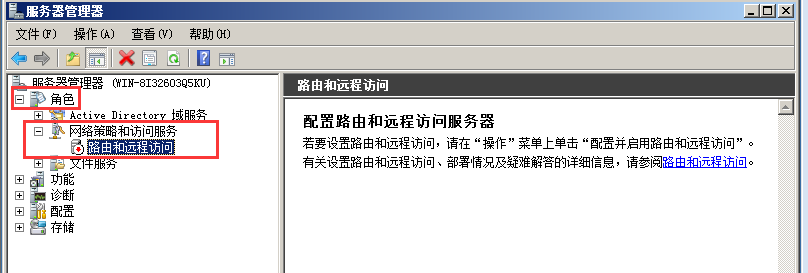
1、点击“角色”-“网络策略和访问服务”-“路由和远程访问”
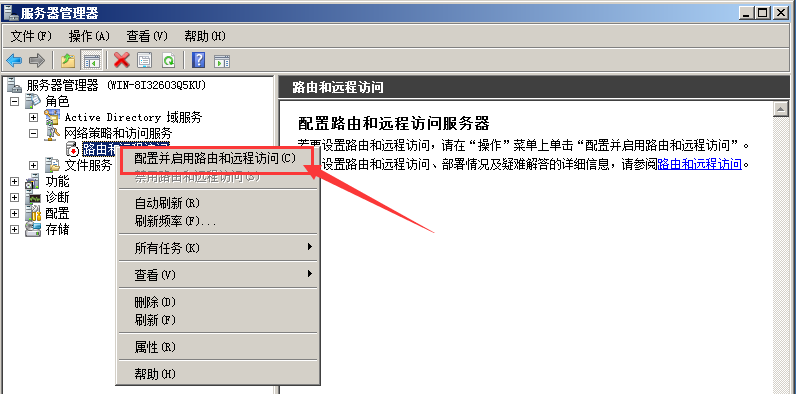
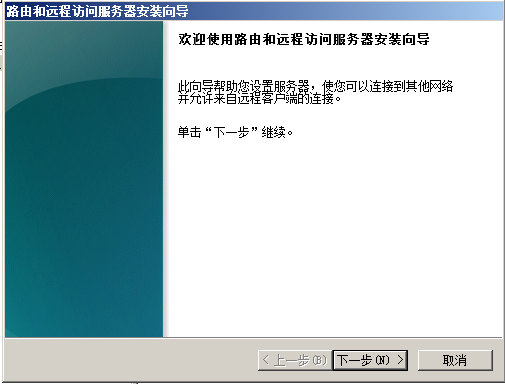
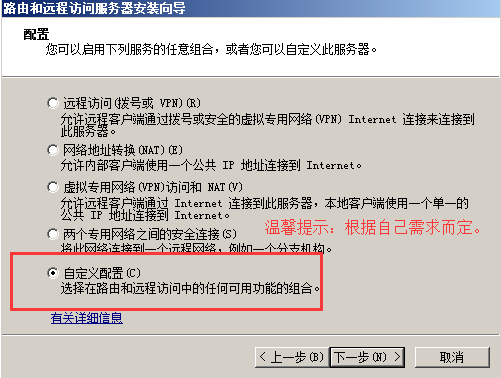
2、在“路由和远程访问”上点右键选择“配置并启用路由和远程访问”,点击“下一步”
3、选译“自定义配置”点击“下一步”
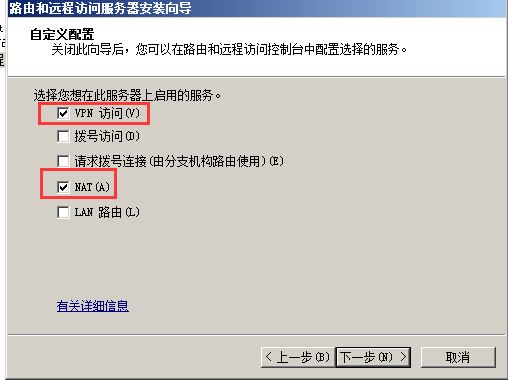
4、选择“VPN访问”和“NAT”点击“下一步”
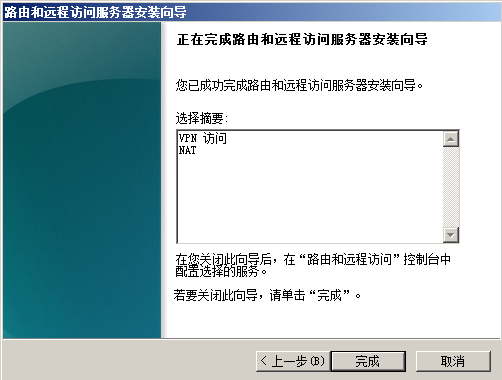
5、配置成功点击“完成”,出现提示”启动服务”点击“启动服务”。
三、配置NAT:
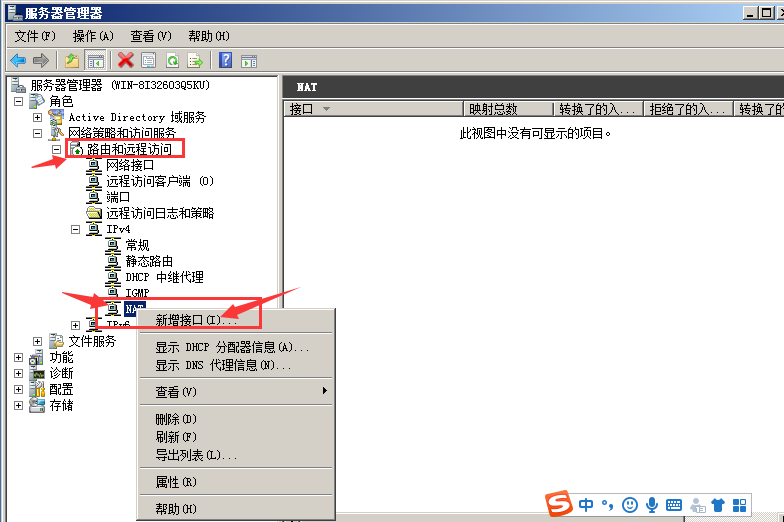
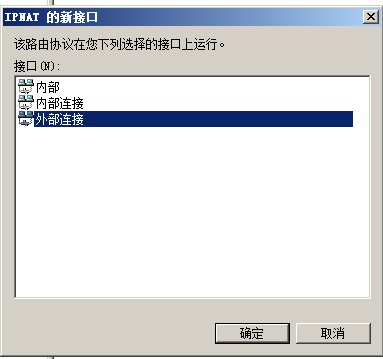
1、在“路由和远程访问”-“IPv4”-“NAT”上点击右键选择“新增接口”
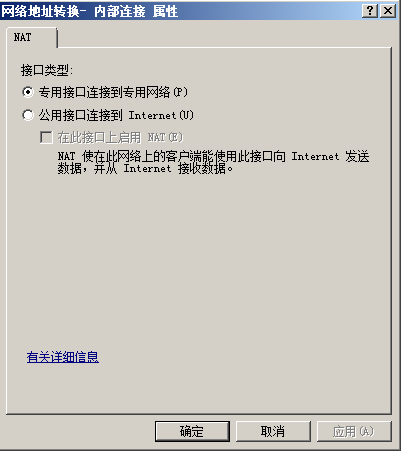
2、在接口里选一下你的外网接口,我这里的是外部连接,点击“确定”弹出属性。
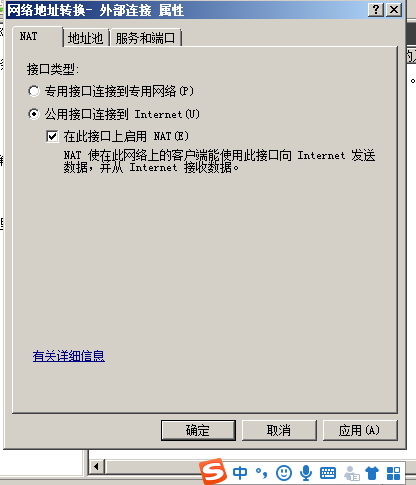
3、在这里选择“公用接口连接到Internet”-“在此接口上启用NAT”,点击确定。
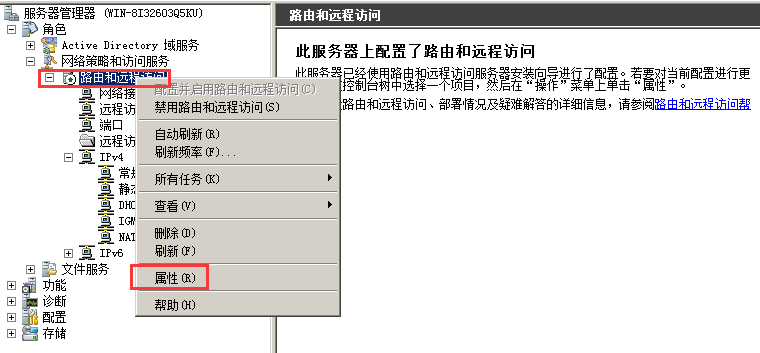
4、在“路由和远程访问”上点击右键选择“属性”
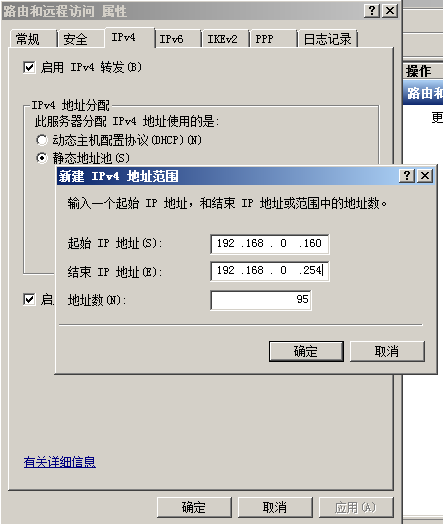
5、在弹出的窗口中选译“IPv4”-“静态地址池”点击“添加”,在“起始IP地址”里输入“192.168.0.160”,“结束IP地址”里输入“192.168.0.254”点击“确定”
6、右击NAT-新增接口-内部-专用接口 (连接虚拟专用网络)

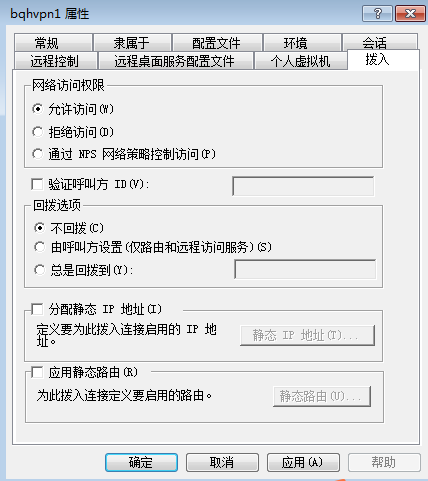
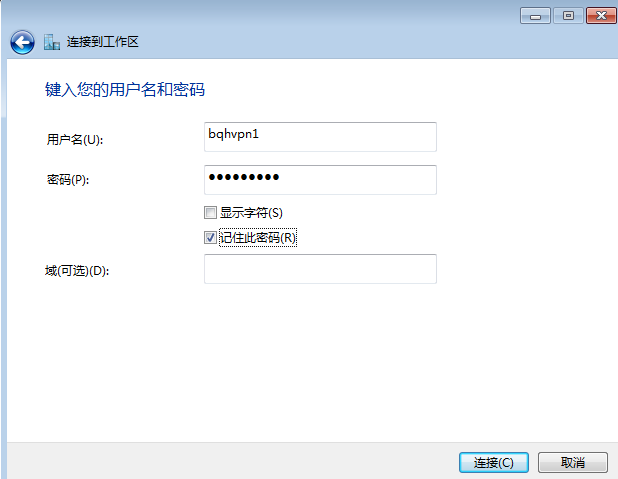
VPN服务器配置成功后,还需要帐号连接。创建一个名为bqhvpn1的用户-属性-允许拨入。
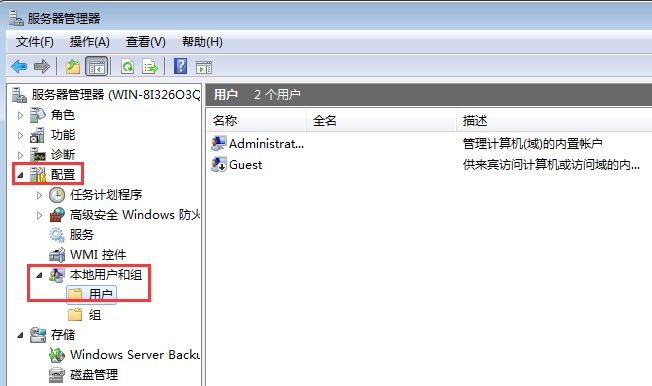
四、配置VPN连接帐号:
1、点击“配置”-“本地用户和组”-“用户”
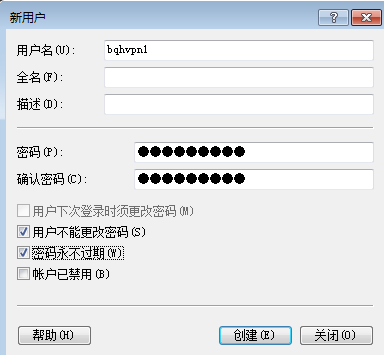
2、在“用户”上点击右键选择“新用户”,输入“用户名”和“密码”在选译“用户不能更换密码”和“密码永不过期”,点击“创建”,在点击“关闭”
3、双击新增加的用户“pcvpn”弹出“属性”窗口,选择“拨入”-“网络访问权限”-“允许访问”点击“确定”
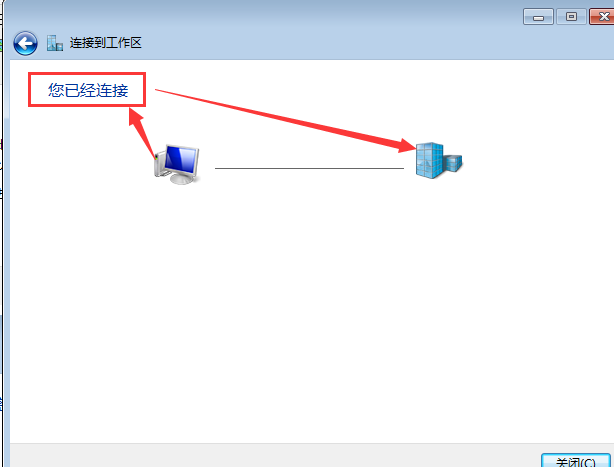
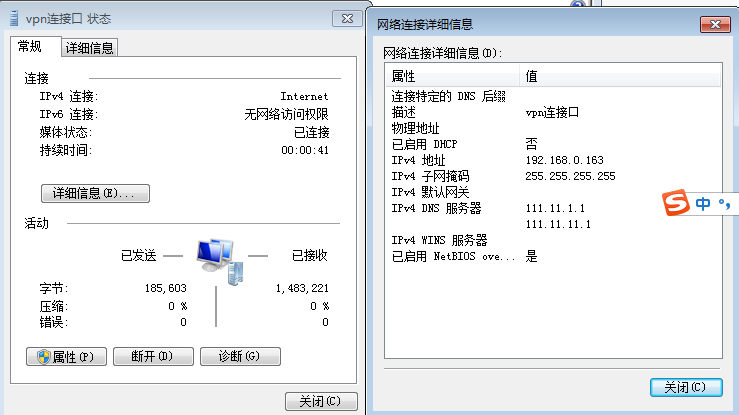
现在VPN服务器已全部完成配置,可以用添加的用户登陆VPN服务器了。
在客户端配置连接方式:
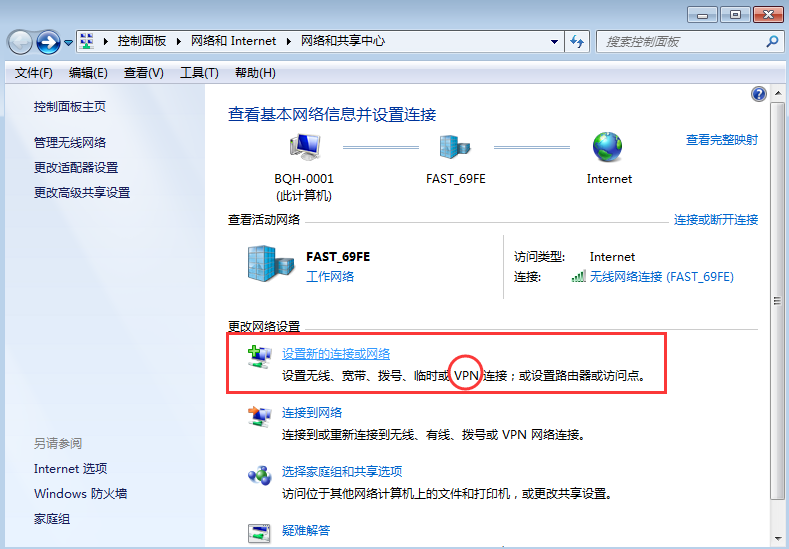
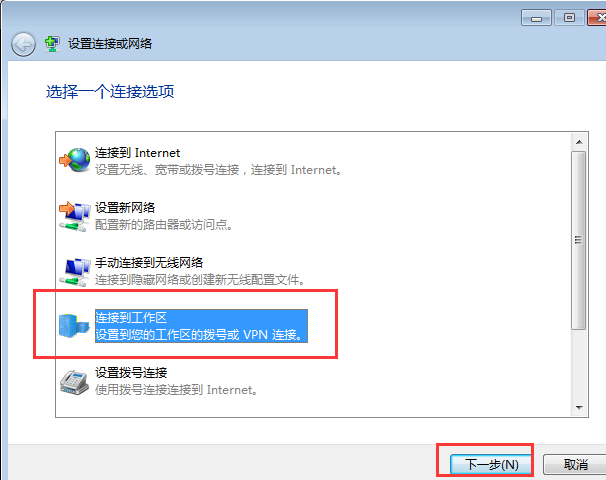
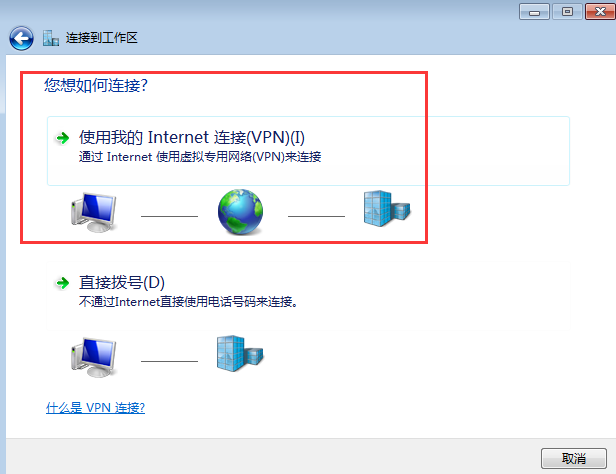
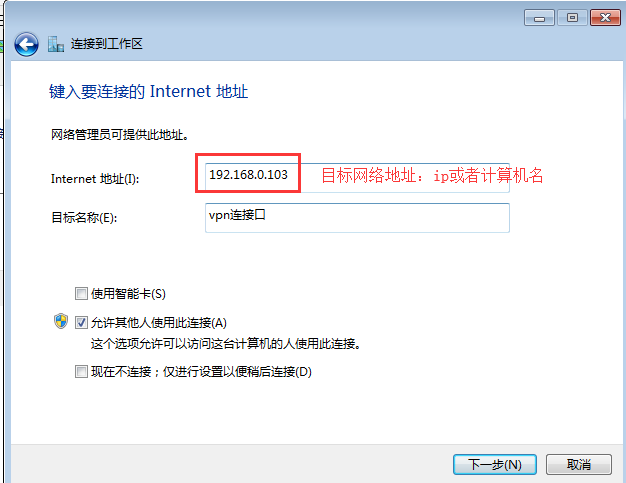
1、打开网络共享中心,选择设置新的连接或网络...


 2482
2482

 被折叠的 条评论
为什么被折叠?
被折叠的 条评论
为什么被折叠?
 到【灌水乐园】发言


