


- 每次创建新的工程,总会要做的事情
关ARC 释放window 创建RootViewController
 RootViewController *rootVC = [[RootViewController alloc] init];
    UINavigationController *naVC = [[UINavigationController alloc] initWithRootViewController:rootVC];
    self.window.rootViewController = naVC;
    [naVC release];
    [rootVC release];
在.h中设置属性
#import <UIKit/UIKit.h>

@interface RootViewController : UIViewController

{
    // 剩余票数和售出票数
    int _leftTicks;
    int _saledTicks;

    // 三个线程
    NSThread *_firstThread;
    NSThread *_secondThread;
    NSThread *_threeThread;

    // lock 条件
    NSCondition *_ticksConfiton;

}

@property (nonatomic, retain)  UILabel *leftTicksLabel;

@property (nonatomic, retain)  UILabel *saledTicksLabel;

@property (nonatomic, retain)  UILabel *currentThreadLabel;

@property (nonatomic, retain) UIButton *startButton;

@end
在.m中实现
不要忘记把之前的属性释放哦
#import "RootViewController.h"

@interface RootViewController ()

@end

@implementation RootViewController

- (void)dealloc
{
    [_currentThreadLabel release];
    [_saledTicksLabel release];
    [_startButton release];
    [_leftTicksLabel release];
    [super dealloc];
}
具体事项
- (void)viewDidLoad {

    _leftTicks = 100; // 火车票数
    _saledTicks = 0; // 销售个数
    _ticksConfiton = [[NSCondition alloc] init];

    [self addSubView];
    [super viewDidLoad];
    // Do any additional setup after loading the view.
}
添加视图
- (void)addSubView
{

    self.navigationItem.title = @"售票系统";

    UIImageView *imageView = [[UIImageView alloc] initWithFrame:[UIScreen mainScreen].bounds];

    imageView.backgroundColor = [UIColor whiteColor];
    imageView.image = [UIImage imageNamed:@"6.jpg"];

    [self.view addSubview:imageView];
    [imageView release];


    UILabel *shengYuLabel = [[UILabel alloc] initWithFrame:CGRectMake(60, 100, 100, 30)];
    shengYuLabel.text = @"剩余票数";
    shengYuLabel.textColor = [UIColor blueColor];
    [self.view addSubview:shengYuLabel];
    [shengYuLabel release];


    UILabel *shouChuLabel = [[UILabel alloc] initWithFrame:CGRectMake(60, 140, 100, 30)];
    shouChuLabel.text = @"售出票数";
    shouChuLabel.textColor = [UIColor blueColor];
    [self.view addSubview:shouChuLabel];
    [shouChuLabel release];


    UILabel *xianChengLabel = [[UILabel alloc] initWithFrame:CGRectMake(60, 180, 100, 30)];
    xianChengLabel.text = @"当前线程";
    xianChengLabel.textColor = [UIColor blueColor];
    [self.view addSubview:xianChengLabel];
    [xianChengLabel release];


    self.leftTicksLabel = [[UILabel alloc] initWithFrame:CGRectMake(200, 100, 100, 20)];
//    self.leftTicksLabel.backgroundColor = [UIColor grayColor];
    self.leftTicksLabel.textColor = [UIColor redColor];
    [self.view addSubview:self.leftTicksLabel];
    [_leftTicksLabel release];

    self.saledTicksLabel = [[UILabel alloc] initWithFrame:CGRectMake(200, 140, 100, 20)];
//    self.saledTicksLabel.backgroundColor = [UIColor grayColor];
    self.saledTicksLabel.textColor = [UIColor redColor];
    [self.view addSubview:self.saledTicksLabel];
    [_saledTicksLabel release];

    self.currentThreadLabel = [[UILabel alloc] initWithFrame:CGRectMake(200, 180, 100, 20)];
//    self.currentThreadLabel.backgroundColor = [UIColor grayColor];
    self.currentThreadLabel.textColor = [UIColor redColor];
    [self.view addSubview:self.currentThreadLabel];
    [_currentThreadLabel release];

    self.startButton = [UIButton buttonWithType:(UIButtonTypeCustom)];
//    self.startButton.backgroundColor = [UIColor greenColor];
    self.startButton.frame = CGRectMake(80, 220, 200, 30) ;
    [self.startButton setTitle:@"开始" forState:(UIControlStateNormal)];
    [self.startButton setTitleColor:[UIColor blueColor] forState:(UIControlStateNormal)];
    [self.startButton addTarget:self action:@selector(startAction:) forControlEvents:(UIControlEventTouchUpInside)];

    [self.view addSubview:self.startButton];

}
实现点击方法 在里面进行多线程管理
- (void)startAction:(id)sender
{
    // 线程一开始
    _firstThread = [[NSThread alloc] initWithTarget:self selector:@selector(startThread:) object:nil];
    [_firstThread setName:@"火车站"];
    [_firstThread start];

    // 线程二开始
    _secondThread = [[NSThread alloc] initWithTarget:self selector:@selector(startThread:) object:nil];
    [_secondThread setName:@"12306"];
    [_secondThread start];

    // 线程三开始
    _threeThread = [[NSThread alloc] initWithTarget:self selector:@selector(startThread:) object:nil];
    [_threeThread setName:@"代售点"];
    [_threeThread start];
}
方法
- (void)startThread:(id)sender
{
    while (TRUE) {
        // 线程锁 使一二线程交互
        [_ticksConfiton lock];
        if (_leftTicks > 0) {
        // 控制跳动快慢
            [NSThread sleepForTimeInterval:0.2];
            _leftTicks--;
            _saledTicks = 100 - _leftTicks;
            NSString *pstr = [[NSThread currentThread] name];
            NSLog(@"售出票数:%d 剩余票数%d 当前线程%@",_saledTicks, _leftTicks, pstr);
        } else if (_leftTicks == 0) {
            NSLog(@"票已售完");
            break;
        }
        // 在主线程中更新
        [self performSelectorOnMainThread:@selector(updateView:) withObject:[[NSThread currentThread] name] waitUntilDone:YES];
        // 解锁
        [_ticksConfiton unlock];

    }
}
最后在屏幕上进行更新
“`
// 屏幕上更新
- (void)updateView:(id)sender
{
self.leftTicksLabel.text = [NSString stringWithFormat:@”%d”,_leftTicks];
self.saledTicksLabel.text = [NSString stringWithFormat:@”%d”, _saledTicks];
self.currentThreadLabel.text = (NSString *)sender;
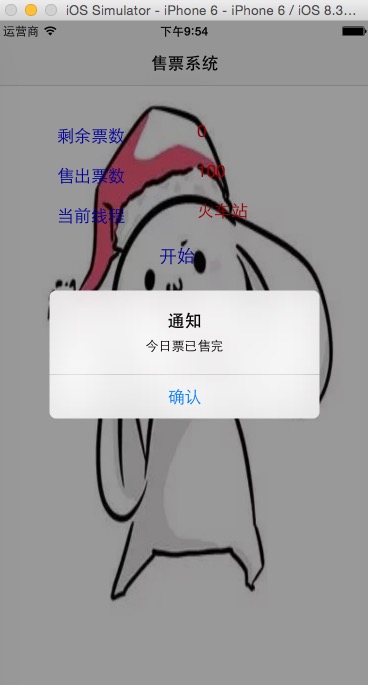
if (_leftTicks == 0) {
    UIAlertView *alertView = [[UIAlertView alloc] initWithTitle:@"通知" message:@"今日票已售完" delegate:nil cancelButtonTitle:nil otherButtonTitles:@"确认", nil];
    [alertView show];
    [alertView release];
}
}
“`


 149
149

 被折叠的 条评论
为什么被折叠?
被折叠的 条评论
为什么被折叠?
 到【灌水乐园】发言


