


一、Gin介绍
Gin是一个用Go编写的HTTPweb框架。它是一个类似于martini但拥有更好性能的API框架, 优于httprouter,速度提高了近 40 倍。 点击此处访问Gin官方中文文档。
二、安装
1、安装Gin
go get -u github.com/gin-gonic/gin2、代码中引入
import "github.com/gin-gonic/gin"
3、简单示例,验证
新建文件main.go,内容如下:
package main
import (
"net/http"
"github.com/gin-gonic/gin"
)
func main() {
// 1.创建路由
r := gin.Default()
// 2.绑定路由规则,执行的函数
// gin.Context,封装了request和response
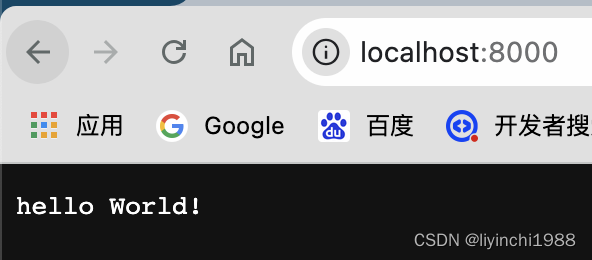
r.GET("/", func(c *gin.Context) {
c.String(http.StatusOK, "hello World!")
})
// 3.监听端口,默认在8080
// Run("")里面不指定端口号默认为8080
r.Run(":8000")
}
运行后访问: http://localhost:8000/
三、渲染前端与配置跨域
1、渲染html模板
Gin支持加载HTML模板, 然后根据模板参数进行配置并返回相应的数据,本质上就是字符串替换。LoadHTMLGlob()方法可以加载模板文件(参数为待渲染的html模板文件,如果参数为相对路径则为运行路径的相对路径)。
a、 渲染单个文件
r.LoadHTMLGlob("web/index.html")
b、 渲染文件夹下的所有文件
r.LoadHTMLGlob("web/*")
c、 渲染文件夹下的所有html后缀的文件
比如:
r.LoadHTMLGlob("web/*.html")
2、定义模板分割
r.Delims("<<<", ">>>")第一个参数为:模板标签开始标记
第二个参数为:模板标签结束标记
3、渲染静态文件和目录
如果你需要引入静态文件需要定义一个静态文件目录
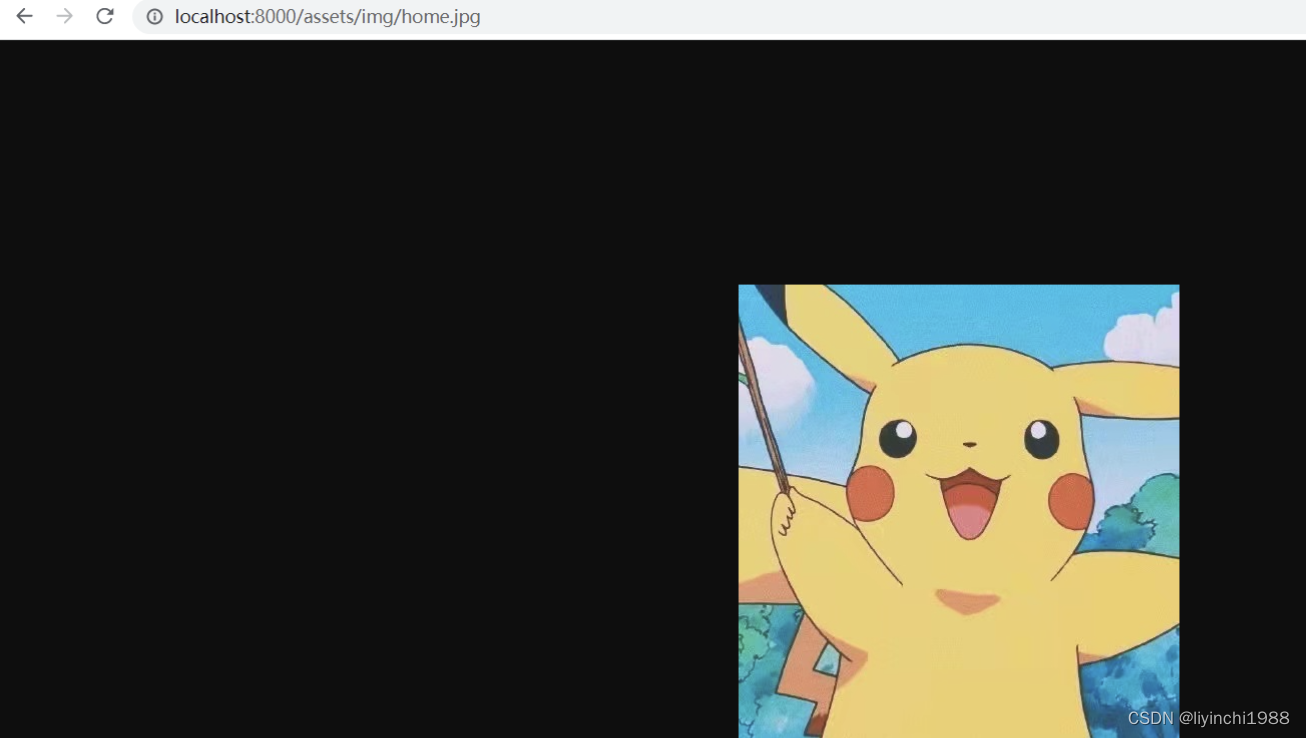
r.Static("/assets", "./static/assets")
若assets的目录结构为

可以根据 http://localhost:8000/assets/img/home.jpg 访问指定资源
如果r为路由组,则需要在assets前拼接路由组的路径包括其前缀
4、重定向
// 重定向两种默认应支持的首页访问方式
router.GET("/", func(c *gin.Context) {
	//重定向到/index.html
	c.Redirect(302, "/index.html")
})
router.GET("/index", func(c *gin.Context) {
	//重定向到/index.html
	c.Redirect(302, "/index.html")
})
router.GET("/index.html", func(c *gin.Context) {
	//返回渲染的html模板中的index.html
	c.HTML(http.StatusOK, "index.html", gin.H{
		"baseUrl": "http://" + host,
	})
})
5、配置跨域
Next()
r.Use(Next())允许跨域
// 允许跨域
func Next() gin.HandlerFunc {
	return func(c *gin.Context) {
		method := c.Request.Method
		c.Header("Access-Control-Allow-Origin", "*")
		c.Header("Access-Control-Allow-Headers", "Access-Control-Allow-Headers,Authorization,User-Agent, Keep-Alive, Content-Type, X-Requested-With,X-CSRF-Token,AccessToken,Token")
		c.Header("Access-Control-Allow-Methods", "GET, POST, DELETE, PUT, PATCH, OPTIONS")
		c.Header("Access-Control-Expose-Headers", "Content-Length, Access-Control-Allow-Origin, Access-Control-Allow-Headers, Content-Type")
		c.Header("Access-Control-Allow-Credentials", "true")

		// 放行所有OPTIONS方法
		if method == "OPTIONS" {
			c.AbortWithStatus(http.StatusAccepted)
		}
		c.Next()
	}
}
6、响应格式 c.String() c.JSON() c.JSONP() c.XML() c.HTML()
(1)返回一个字符串
r.GET("/news", func(c *gin.Context) {
    aid := c.Query("aid")
    c.String(200, "aid=%s", aid)
})
(2)返回一个 JSON 数据
//方法一:自己拼接JSON
    r.GET("/json", func(c *gin.Context) {
        //返回json数据,使用 map[string]interface
        //c.JSON(返回的状态码, 任意类型的数据(如:map,struct,...)
        c.JSON(200, map[string]interface{}{
            "success": true,
            "msg":     "你好",
        })
    })
    //方法二:gin中的H函数
    r.GET("/json2", func(c *gin.Context) {
        //返回json数据,使用gin中的H函数, gin.H 是 map[string]interface{}的缩写
        c.JSON(200, gin.H{
            "success": true,
            "msg":     "你好gin",
        })
    })
    //方法三:使用结构体
    r.GET("/json3", func(c *gin.Context) {
        //实例化一个结构体
        a := &Article{
            Title:   "标题",
            Desc:    "说明",
            Content: "内容",
        }
        c.JSON(200, a)
    })
JSOPN: jsonp请求 主要用来解决跨域问题
  //jsonp请求 主要用来解决跨域问题
    //http://127.0.0.1:8080/jsonp?callback=call
    //call({"title":"标题-jsonp","desc":"说明-jsonp","content":"内容-jsonp"});
    r.GET("/jsonp", func(c *gin.Context) {
        //实例化一个结构体
        a := &Article{
            Title:   "标题-jsonp",
            Desc:    "说明-jsonp",
            Content: "内容-jsonp",
        }
        c.JSONP(200, a)
    })
(3)返回 XML 数据
//方法一:使用gin.H返回
    r.GET("/xml", func(c *gin.Context) {
        c.XML(http.StatusOK, gin.H{
            "success": true,
            "msg":     "成功xml",
        })
    })
    //方法二:使用结构体
    r.GET("/xmlStruct", func(c *gin.Context) {
        //实例化一个结构体
        a := &Article{
            Title:   "标题-xmlStruct",
            Desc:    "说明-xmlStruct",
            Content: "内容-xmlStruct",
        }
        c.XML(200, a)
    })
(4)返回HTML数据
     //初始化路由
     r := gin.Default()
     //加载templates文件中所有模板文件,以便后续c.HTML()渲染文件时使用
     r.LoadHTMLGlob("templates/*")
     r.GET("/news", func(c *gin.Context) {
        //使用模板文件渲染HTML文件
        //前提: r.LoadHTMLGlob("templates/*")
        //HTML(状态码, 要渲染的文件名, 加载的参数)
        c.HTML(http.StatusOK, "news.html", gin.H{
            "title": "我是一个news",
        })
    })
完整代码案例如下:
package main

import (
    "github.com/gin-gonic/gin"
    "net/http"
)

type Article struct {
    Title   string `json:"title"`
    Desc    string `json:"desc"`
    Content string `json:"content"`
}

func main() {
    //初始化路由
    r := gin.Default()
    //加载templates文件中所有模板文件,以便后续c.HTML()渲染文件时使用
    r.LoadHTMLGlob("templates/*")
    //配置路由
    r.GET("/", func(c *gin.Context) {
        c.String(200, "首页")
    })
    r.GET("/json", func(c *gin.Context) {
        //返回json数据,使用 map[string]interface
        //c.JSON(返回的状态码, 任意类型的数据(如:map,struct,...)
        c.JSON(200, map[string]interface{}{
            "success": true,
            "msg":     "你好",
        })
    })
    r.GET("/json2", func(c *gin.Context) {
        //返回json数据,使用gin中的H函数
        c.JSON(200, gin.H{
            "success": true,
            "msg":     "你好gin",
        })
    })
    r.GET("/json3", func(c *gin.Context) {
        //实例化一个结构体
        a := &Article{
            Title:   "标题",
            Desc:    "说明",
            Content: "内容",
        }
        c.JSON(200, a)
    })
    //jsonp请求 主要用来解决跨域问题
    //http://127.0.0.1:8080/jsonp?callback=call
    //call({"title":"标题-jsonp","desc":"说明-jsonp","content":"内容-jsonp"});
    r.GET("/jsonp", func(c *gin.Context) {
        //实例化一个结构体
        a := &Article{
            Title:   "标题-jsonp",
            Desc:    "说明-jsonp",
            Content: "内容-jsonp",
        }
        c.JSONP(200, a)
    })
    r.GET("/xml", func(c *gin.Context) {
        c.XML(http.StatusOK, gin.H{
            "success": true,
            "msg":     "成功xml",
        })
    })
    r.GET("/news", func(c *gin.Context) {
        //使用模板文件渲染HTML文件
        //前提: r.LoadHTMLGlob("templates/*")
        //HTML(状态码, 要渲染的文件名, 加载的参数)
        c.HTML(http.StatusOK, "news.html", gin.H{
            "title": "我是一个news",
        })
    })
    r.GET("/goods", func(c *gin.Context) {
        //使用模板文件渲染HTML文件
        //前提: r.LoadHTMLGlob("templates/*")
        //HTML(状态码, 要渲染的文件名, 加载的参数)
        c.HTML(http.StatusOK, "goods.html", gin.H{
            "title": "我是一个goods",
            "price": 12.99,
        })
    })
    r.Run() // 启动一个web服务
}
四、路由相关
1、创建路由组
// 创建路由组
// 根据需要,可以为这种多级的路由组:r.Group("/v1/user")
userApi:= r.Group("/user")

// 创建用户
// 匹配POST请求的 /user
userApi.POST("", userCreate)

// 修改用户
// 匹配PUT请求的 /user/1 但不会匹配 /user/ 或者 /user
userApi.PUT("/:id", userUpdate)

// 获取用户
// 匹配GET请求的 /user/1 但不会匹配 /user/ 或者 /user
userApi.GET("/:id", userGet)

// 查询用户
// 匹配GET请求的 /user/list
userApi.GET("/list", userQuery)

// 删除用户
// 匹配DELETE请求的 /user/1 但不会匹配 /user/ 或者 /user
userApi.DELETE("/:id", userDelete)
Restful风格的API
2、获取路由参数
a、api参数
通过Context的Param方法来获取api参数
userApi.GET("/:id/:name", userGet)第一个参数:获取url路径参数id和name的值
第二个参数:userGet函数
func userGet(ctx *gin.Context) {
	//api参数可以为单个或者多个也可以拼接多级

	//ctx.Param()函数获取时参数需要与api中的名称一致才能获取到

	id := ctx.Param("id")
	name:= ctx.Param("name")

	ctx.JSON(http.StatusOK, gin.H{"data": id,"name":name})

	return
}
http://localhost:8000/user/1/admin
b、url参数
通过Context的Query方法与DefaultQuery方法来获取url参数
userApi.GET("/list", userQuery)userQuery方法
func userQuery(ctx *gin.Context) {
	//获取
	id := ctx.Query("id")
	//获取,第二个参数为获取为空的默认值,如果参数不存在则放回第二个参数
	name := ctx.DefaultQuery("name", "user")
	ctx.JSON(http.StatusOK, gin.H{"data": id, "name": name})
	return
}
备注:默认值为当客户端没有在请求中带这个参数,服务端将取name默认值为”user“
可以根据 http://localhost:8000/user/list 后面拼接查询参数,访问此接口
客户端没有有传参数,则取默认值
客户端有传参数,则不取默认值

c、表单参数
表单参数测试与观察请求效果需要安装postman
通过Context的PostForm方法来获取表单参数
userApi.POST("", userCreate)userCreate函数为
func userCreate(ctx *gin.Context) {
    id := ctx.PostForm("id")
    name := ctx.PostForm("name")
    ctx.JSON(http.StatusOK, gin.H{"data": id, "name": name})
    return
}
如图,访问此接口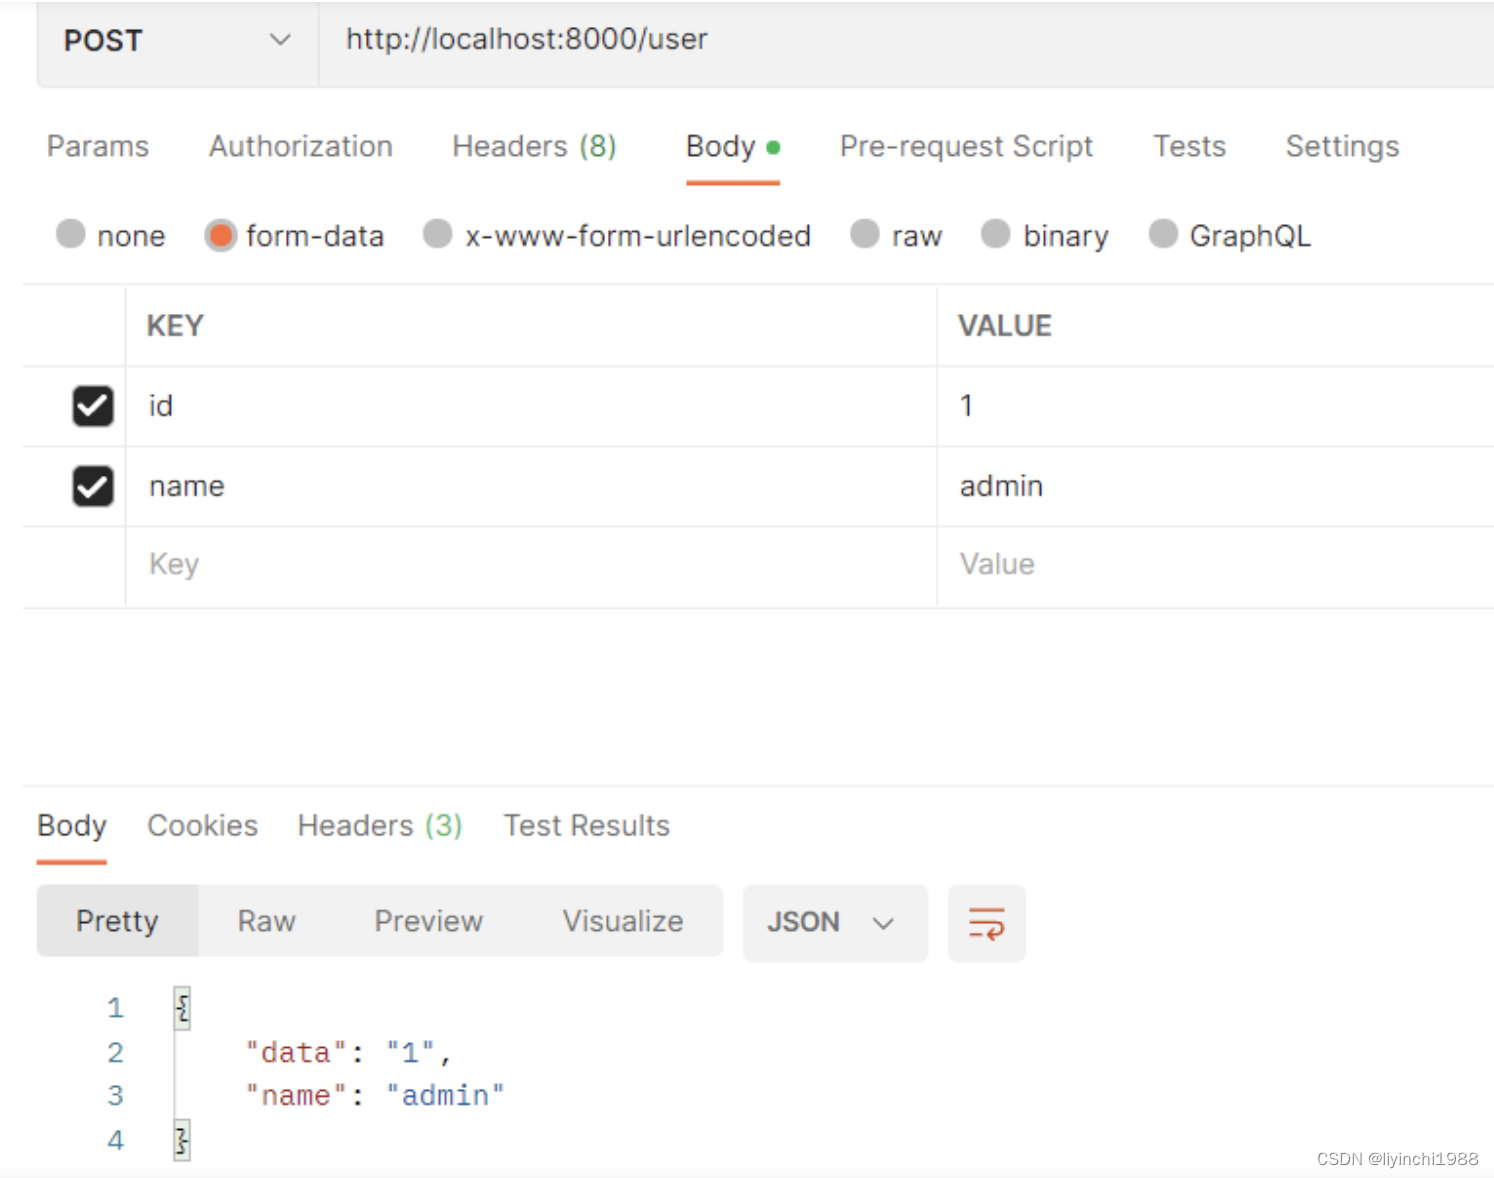
d、json参数
json参数测试与观察请求效果需要安装postman
通过Context的GetRawData或者ShouldBindJSON方法来获取表单参数
userApi.PUT("/:id", userUpdate)
userUpdate函数为
GetRawData方法
func userUpdate(ctx *gin.Context) {

	b, err := ctx.GetRawData() // 从ctx.Request.Body读取请求数据
    if err !=nil{
        fmt.print(err)
    }
	// 定义map或结构体
	var m map[string]interface{}
	// 反序列化
	_ = json.Unmarshal(b, &m)
	ctx.JSON(http.StatusOK, gin.H{"data": m["id"], "name": m["name"]})
	return
}
ShouldBindJSON方法
// 先定义结构
type User struct {
	Id   string `form:"id" json:"id" binding:"required"`
	Name string `form:"name" json:"name" binding:"required"`
}

// 函数实现
func userUpdate(ctx *gin.Context) {
	var user User
	if err := ctx.ShouldBindJSON(&user); err == nil {
		ctx.JSON(http.StatusOK, gin.H{"data": user.Id, "name": user.Name})
		return
	} else {
		ctx.JSON(http.StatusOK, gin.H{"err": err.Error()})
		return
	}
}

e、参数绑定
为了能够更方便的获取请求相关参数,提高开发效率,我们可以基于请求的Content-Type识别请求数据类型并利用反射机制自动提取请求中form表单、JSON、XML等参数到结构体中。
代码示例:
定义要获取的结构
type User struct {
	Id   string `form:"id" json:"id" binding:"required"`
	Name string `form:"name" json:"name" binding:"required"`
}
userCreate函数
func userCreate(ctx *gin.Context) {
    // 实例化结构体对象
	var user User

	if err := ctx.ShouldBind(&user); err == nil {
        // 响应体 json 格式
		ctx.JSON(http.StatusOK, gin.H{"data": user.Id, "name": user.Name})
		return
	}else{
		ctx.JSON(http.StatusOK, gin.H{"err": err.Error()})
		return
	}
}
userUpdate函数
func userUpdate(ctx *gin.Context) {
    // 实例化结构体对象
	var user User
	if err := ctx.ShouldBind(&user); err == nil {
		ctx.JSON(http.StatusOK, gin.H{"data": user.Id, "name": user.Name})
		return
	}else{
		ctx.JSON(http.StatusOK, gin.H{"err": err.Error()})
		return
	}
}
3、上传文件
一般都是post请求表单传参
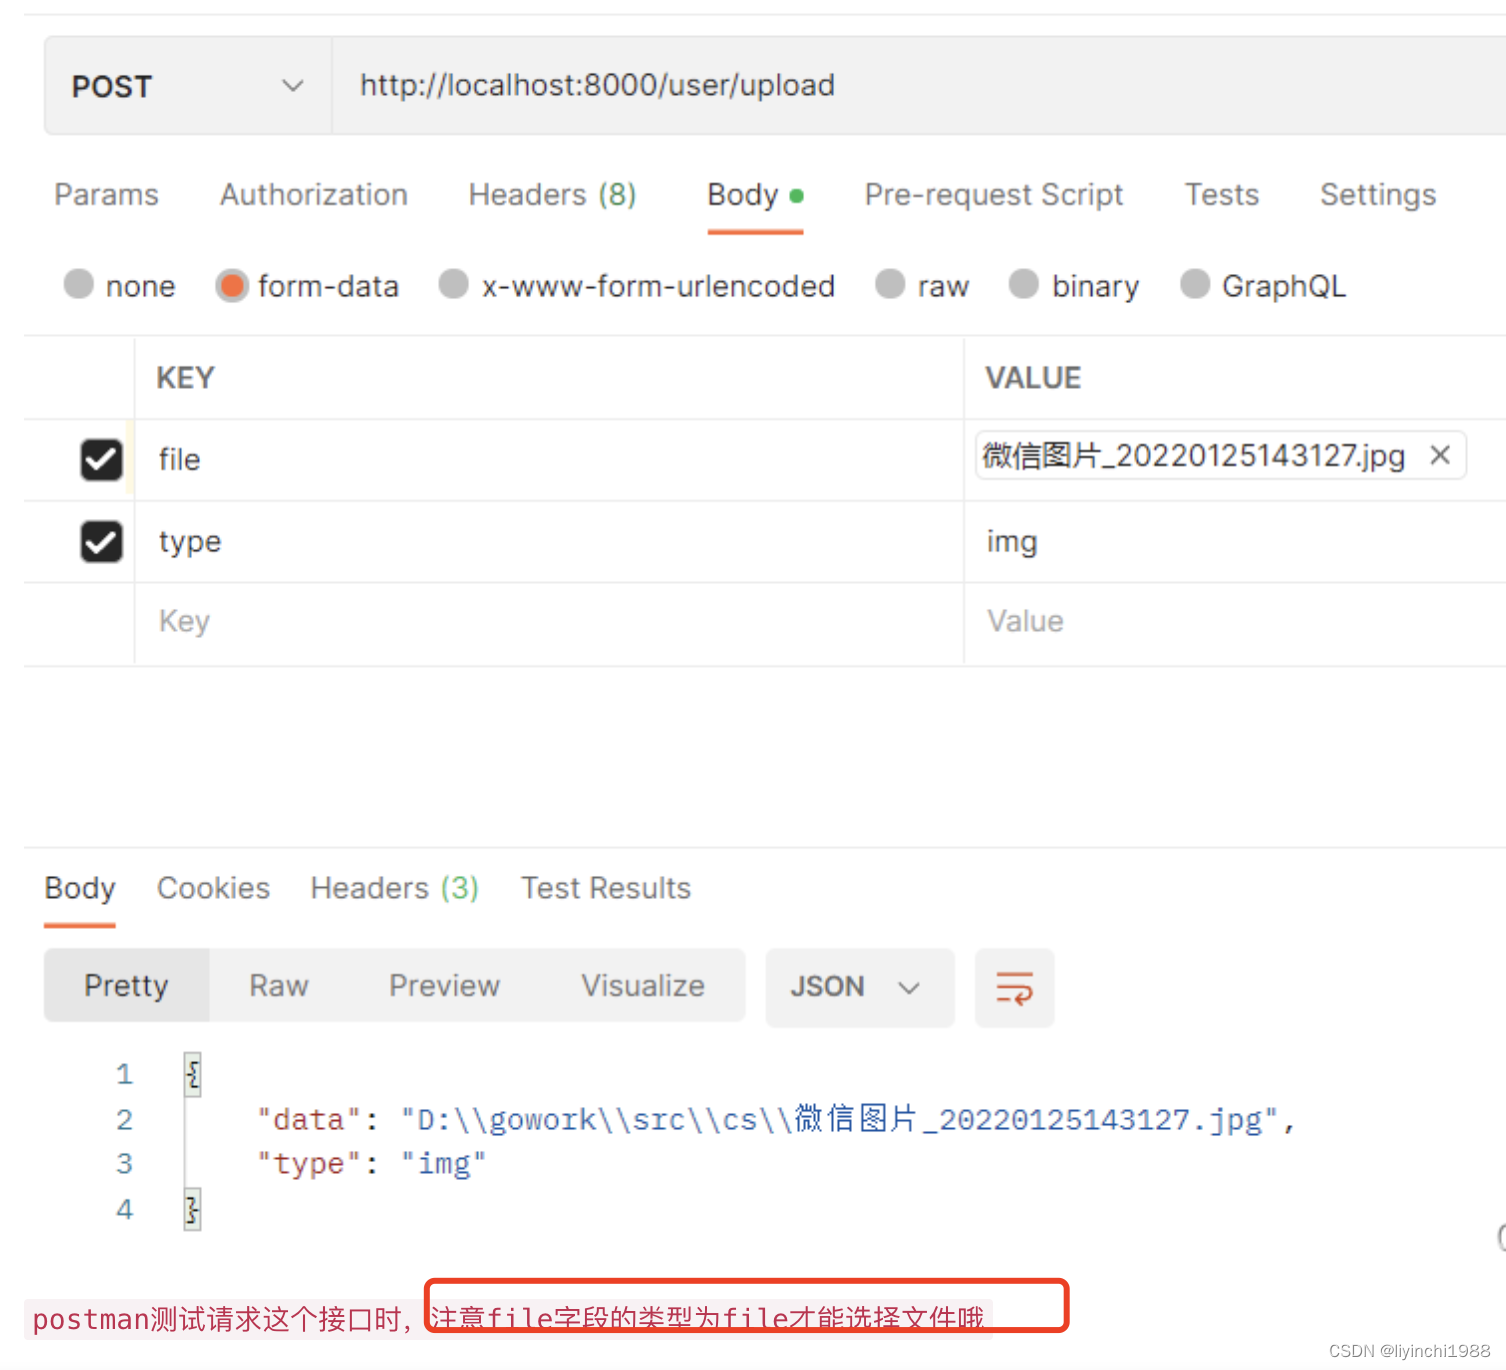
userApi.POST("/upload", userUpload)
userUpload函数
// 先定义结构
type FileUpload struct {
	File *multipart.FileHeader `form:"file"`
	Type string                `form:"type"`
}
// 函数实现
func userUpload(ctx *gin.Context) {
	var fileUpload FileUpload
//
	if err := ctx.ShouldBind(&fileUpload); err == nil {
		//获取运行路径
		ex, err := os.Executable()
        //
		if err != nil {
			ctx.JSON(http.StatusOK, gin.H{"err": err.Error()})
			return
		}
		//定义接收文件的存放地址
		path := filepath.Dir(ex) + string(os.PathSeparator) + fileUpload.File.Filename
		//接收文件并保存到指定path
		err = ctx.SaveUploadedFile(fileUpload.File, path)
		ctx.JSON(http.StatusOK, gin.H{"data": path, "type": fileUpload.Type})
		return
	} else {
		ctx.JSON(http.StatusOK, gin.H{"err": err.Error()})
		return
	}
}
五、路由分组分文件
使用Gin框架写Go项目的时候,如果把路由都写在一个.go文件中,随着路由的数量的增加,会导致路由文件显得异常臃肿。
此时需要对路由进行分组并且分文件管理,更有利于代码的组织和维护
使用Gin框架写Go项目的时候,如果把路由都写在一个.go文件中,随着路由的数量的增加,会导致路由文件显得异常臃肿。
此时需要对路由进行分组并且分文件管理,更有利于代码的组织和维护
路由分组的实现
原始未分组的文件
func main() {
	router := gin.Default()
	router.POST("/one/a", OneAFunc)
	router.POST("/one/b", OneBFunc)
	router.POST("/one/c", OneCFunc)
	router.POST("/one/d", OneDFunc)
	router.POST("/one/e", OneEFunc)
	router.POST("/one/f", OneFFunc)
	router.POST("/one/g", OneGFunc)
	router.POST("/one/h", OneHFunc)
	router.POST("/one/i", OneIFunc)
	/*
		省略n条路由
	*/
	router.POST("/one/x", OneXFunc)
	router.POST("/one/y", OneYFunc)
	router.POST("/one/z", OneZFunc)

	router.POST("/two/a", TwoAFunc)
	router.POST("/two/b", TwoBFunc)
	router.POST("/two/c", TwoCFunc)
	router.POST("/two/d", TwoDFunc)
	router.POST("/two/e", TwoEFunc)
	router.POST("/two/f", TwoFFunc)
	router.POST("/two/g", TwoGFunc)
	router.POST("/two/h", TwoHFunc)
	router.POST("/two/i", TwoIFunc)
	/*
		省略n条路由
	*/
	router.POST("/two/x", TwoXFunc)
	router.POST("/two/y", TwoYFunc)
	router.POST("/two/z", TwoZFunc)
	router.Run(":8080")
}
路由逻辑分组
我们首先创建了一个路由组 one,它的前缀为 /one。
然后,使用了 POST 方法在路由组 one 中定义了多个路由处理函数 oneAFunc到oneZFunc,它们分别处理 /two/a到 /two/z 路由的 HTTP POST 请求
请求路径
/one/a/
/tow/a/
	// 路由分组第一组
	one := router.Group("/one")
	{
		one.POST("/a", OneAFunc)
		one.POST("/b", OneBFunc)
		one.POST("/c", OneCFunc)
		one.POST("/d", OneDFunc)
		one.POST("/e", OneEFunc)
		one.POST("/f", OneFFunc)
		one.POST("/g", OneGFunc)
		one.POST("/h", OneHFunc)
		one.POST("/i", OneIFunc)
		/*
			省略n条路由
		*/
		one.POST("/x", OneXFunc)
		one.POST("/y", OneYFunc)
		one.POST("/z", OneZFunc)
	}
	//路由分组第二组
	two := router.Group("/two")
	{
		two.POST("/a", twoAFunc)
		two.POST("/b", twoBFunc)
		two.POST("/c", twoCFunc)
		two.POST("/d", twoDFunc)
		two.POST("/e", twoEFunc)
		two.POST("/f", twoFFunc)
		two.POST("/g", twoGFunc)
		two.POST("/h", twoHFunc)
		two.POST("/i", twoIFunc)
		/*
			省略n条路由
		*/
		two.POST("/x", twoXFunc)
		two.POST("/y", twoYFunc)
		two.POST("/z", twoZFunc)
	}
分组后的go代码,虽然路由都实现路由分组,路由的逻辑显得清晰,但是路由文件还是集中在一个文件中,文件还是大。
路由分组后并分文件管理
文件结构
main.go
handlers/
├── one_handlers.go
└── two_handlers.go
main.go
import (
	"github.com/gin-gonic/gin"
	"your_project/routers"
)

func main() {
    // 创建路由
	router := gin.Default()
    //
    routers.SetupRouter(router)
	// 路由分组第一组
	routers.TwoRoutersInit(router)
	// 路由分组第二组
	routers.OneRoutersInit(router)
    // 启动服务
	router.Run(":8080")
}
TwoRoutersInit() 和 OneRoutersInit()对应下面两个文件:
one_handlers.go
package routers

import "github.com/gin-gonic/gin"

func OneRoutersInit(engine *gin.Engine) {
	one := engine.Group("/one")
	{
		one.POST("/a", OneAFunc)
		one.POST("/b", OneBFunc)
		one.POST("/c", OneCFunc)
		one.POST("/d", OneDFunc)
		one.POST("/e", OneEFunc)
		one.POST("/f", OneFFunc)
		/*
			省略n条路由
		*/
		one.POST("/x", OneXFunc)
		one.POST("/y", OneYFunc)
		one.POST("/z", OneZFunc)
	}
}

func OneAFunc(context *gin.Context) {

}
/*
	省略N多方法
*/
func OneZFunc(context *gin.Context) {

}
two_handlers.go
package routers

import "github.com/gin-gonic/gin"

func TwoRoutersInit(engine *gin.Engine) {
	two := engine.Group("/two")
	{
		two.POST("/a", twoAFunc)
		two.POST("/b", twoBFunc)
		two.POST("/c", twoCFunc)
		two.POST("/d", twoDFunc)
		two.POST("/e", twoEFunc)
		two.POST("/f", twoFFunc)
		two.POST("/g", twoGFunc)
		two.POST("/h", twoHFunc)
		two.POST("/i", twoIFunc)
		/*
			省略n条路由
		*/
		two.POST("/x", twoXFunc)
		two.POST("/y", twoYFunc)
		two.POST("/z", twoZFunc)
	}
}

func twoAFunc(context *gin.Context) {

}
/*
省略n多方法
*/

func twoZFunc(context *gin.Context) {

}
备注:每个路由都要放在{}中,每个路由对应的方法入参固定context *gin.Context 其中context风状态request和response
官方示例:
main.go
// main.go
package main

import (
	"github.com/gin-gonic/gin"
	"your_project/routers"
)

func main() {
	r := gin.Default()

	routers.SetupRouter(r)

	r.Run() // listen and serve on 0.0.0.0:8080
}
routers/router.go
package routers

import (
	"github.com/gin-gonic/gin"
)

func SetupRouter(r *gin.Engine) {
	v1 := r.Group("/v1")
	{
		v1.GET("/hello", func(c *gin.Context) {
			c.JSON(200, gin.H{
				"message": "hello",
			})
		})
	}

	v2 := r.Group("/v2")
	{
		v2.GET("/hello", func(c *gin.Context) {
			c.JSON(200, gin.H{
				"message": "hello v2",
			})
		})
	}
}
六、中间件
1、统一注册中间件
对全局路由或者已注册的路由组统一注册中间件
r.Use(CheckToken())
2、单独注册中间件
userApi.POST("/upload",CheckToken(),userUpload)
3、中间件函数实现
func CheckToken() gin.HandlerFunc {
	return func(c *gin.Context) {
		// 验证不通过直接跳出
		//c.JSON(http.StatusBadRequest, gin.H{"msg": "need token"})
		//c.Abort()
		//return
		// 验证通过继续
		c.Next()
	}
}
中间件场景
Go Gin JWT
https://blog.csdn.net/u013302168/article/details/132178429
七、vscode中如何使用go module导入包
go版本管理使用go module
(一)假设我们现在有moduleA和moduleB两个包
其中moduleA包中会导入moduleB包并使用它的New方法。
(注意:函数名称大写开头才能被引用)
moduleB/moduleB.go内容如下:
package moduleB

import "fmt"

func New(){
	fmt.Println("moduleB.New")
}
1.分两种情况讨论:
(1)在同一个项目下
注意:在一个项目(project)下我们是可以定义多个包(package)的。
目录结构如下:
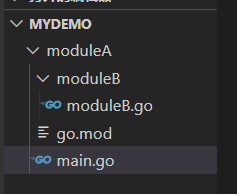
接着创建moduleA的mod,在集成终端中打开,并在命令行输入
go mod init moduleA 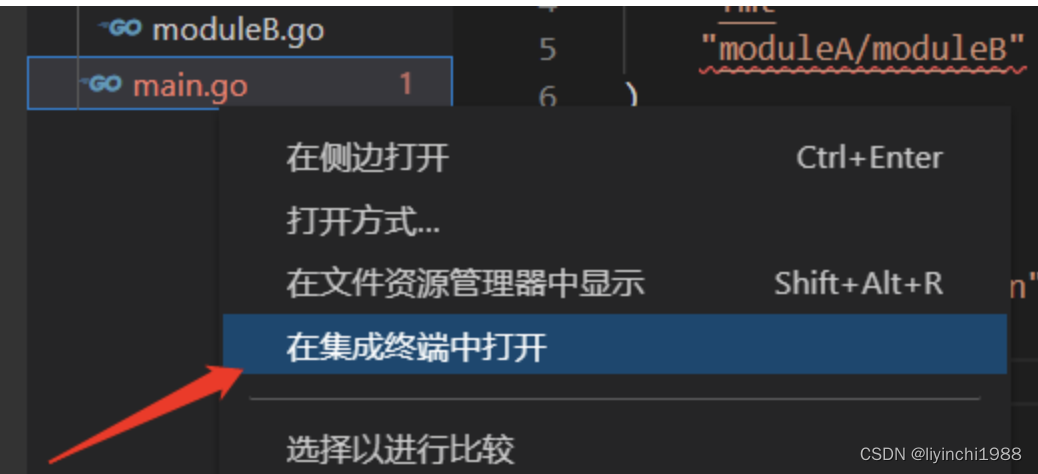
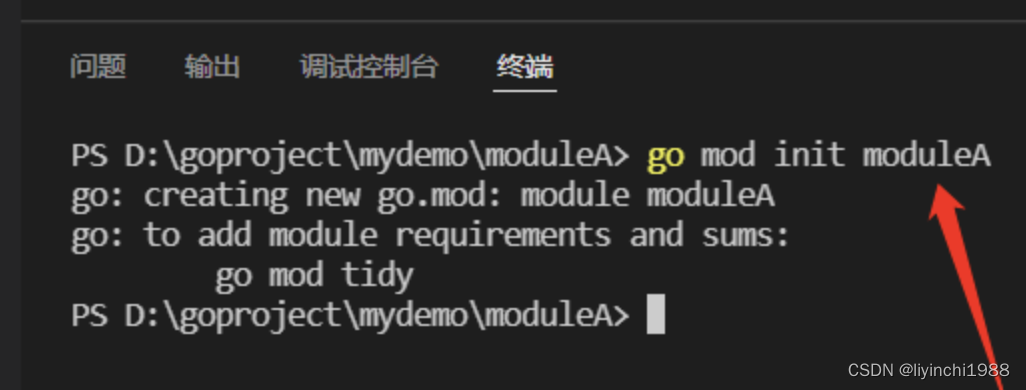
执行后,会在项目根目录下生成一个mod.go文件,执行go mod tidy 执行安装依赖 。
moduleA的go.mod内容如下:
module moduleA

go 1.17
moudleA的main.go内容如下:
package main

import (
    "fmt"
    "moduleA/moduleB"
)

func main() {
    moduleB.New()
    fmt.Println("main")
}
(2)在不同项目下执行
到这里完成了第一步,现在来到的第二步;
首先,将moduleB的代码拉出外面来,我们来实现不同项目下的包的引用
此时的moduleB的包(文件夹)里没有mod文件,所以需要自己mod init 。
打开终端,在命令行输入
go mod init moduleB此时moduleB的go.mod应该为:
module moduleA

go 1.17

require "moduleB" v0.0.0
replace "moduleB" => "../moduleB"
moduleB中的moduleB.go文件不动,和上面的一样
因为这两个包不在同一个项目路径下,你想要导入本地包,并且这些包也没有发布到远程的github或其他代码仓库地址。
这个时候我们就需要在go.mod文件中使用replace指令。
在调用方也就是moduleA/go.mod中按如下方式指定使用相对路径来寻找moduleB这个包。此时moduleA的go.mod文件应该为:
module moduleA

go 1.17

require "moduleB" v0.0.0
replace "moduleB" => "../moduleB"
moduleA的main.go文件应该为:
package main

import (
    "fmt"
    "moduleB"
)func main() {
    moduleB.New()
    fmt.Println("main")
}


 1247
1247


 被折叠的 条评论
为什么被折叠?
被折叠的 条评论
为什么被折叠?
 到【灌水乐园】发言


