


基本环境:
win10 64位宿主机,16G+1T;
虚拟机版本virtual box 6.0.2;
每台分配资源:内存3G,硬盘50G
附:
Ubuntu Kylin 16.04 LTS下载(64bit):
http://www.ubuntu.org.cn/download/ubuntu-kylin
cdh搭建系统要求:
一、 先搭建虚拟机集群:
1、 装好三个虚拟机后,先要让虚拟机之间相互ping通,直接编辑连接信息将IP v4改到手动的统一局域网即可(没外网不要紧,win10要关了宿主防火墙才能虚拟机ping通win10):

顺便获取下root权限:
~$ sudo passwd root
“设置密码...”
~$ su root “输入之前你设置的密码...”
IP设置参考:https://blog.csdn.net/u013303361/article/details/81003930
二、 选一个虚拟机做master,装cm
参考:https://www.cloudera.com/documentation/enterprise/6/latest/topics/install_cm_server.html
1. 通过共享文件夹把jdk装好:

2. 安装cloudera manager:
Step 1: Configure a Repository for Cloudera Manager
到 https://www.cloudera.com/documentation/enterprise/6/release-notes/topics/rg_cm_6_version_download.html 下载cloudera-manager.list 后放到/etc/apt/sources.list.d/文件夹下
wget https://archive.cloudera.com/cm6/6.1.0/ubuntu1604/apt/archive.key
sudo apt-key add archive.key
sudo apt-get update
Step 2: Install Java Development Kit(略过)
Step 3: Install Cloudera Manager Server
sudo apt-get install cloudera-manager-daemons cloudera-manager-agent cloudera-manager-server这里下载极其缓慢,导致报错“下载 https://archive.cloudera.com/cm6/6.1.0/ubuntu1604/apt/pool/contrib/e/enterprise/cloudera-manager-daemons_6.1.0~769885.ubuntu1604_all.deb transfer closed with 835060566 bytes remaining to read 失败“
于是我手动到浏览器里面下载cloudera-manager-daemons_6.1.0_769885.ubuntu1604_all.deb 然后复制到虚拟机里面安装:
sudo dpkg -i cloudera-manager-daemons_6.1.0_769885.ubuntu1604_all.deb这里出现了个问题:报jdk版本不对

我的jdk是之前官网下载的tar包解压配置的,后来发现cdh要求手动安装配置的jdk必须安装到/usr/java/jdk-version 路径下!!
Step 4: Install and Configure MySQL for Cloudera Software
我的Ubuntu16.04安装默认MySQL5.7;
1. sudo apt-get install mysql-server
2. apt-get isntall mysql-client
3. sudo apt-get install libmysqlclient-dev
安装完成后执行mysql -uroot -p123456 直接进入MySQL正常即可;安装过程中提示设置密码,如果没有提示参考 https://blog.csdn.net/u013303361/article/details/80333955
然后设置MySQL:
- Stop the MySQL server if it is running( sudo service mysql stop).
- Move old InnoDB log files /var/lib/mysql/ib_logfile0 and /var/lib/mysql/ib_logfile1 out of /var/lib/mysql/ to a backup location.
- Determine the location of the option file, my.cnf (/etc/MySQL/my.cnf by default).
- Update my.cnf so that it conforms to the following requirements: 我直接贴入官网配置删掉“socket=/var/lib/mysql/mysql.sock”(MySQL链接失败mysql.sock 报错参考https://blog.csdn.net/hjf161105/article/details/78850658);
然后我的MySQL默认是开机自启的,接下来初始化MySQL
sudo service mysql start
sudo /usr/bin/mysql_secure_installation
[...]
Enter current password for root (enter for none):
OK, successfully used password, moving on...
[...]
Set root password? [Y/n] Y
New password:
Re-enter new password:
Remove anonymous users? [Y/n] Y
[...]
Disallow root login remotely? [Y/n] N
[...]
Remove test database and access to it [Y/n] Y
[...]
Reload privilege tables now? [Y/n] Y
All done!Installing the MySQL JDBC Driver
sudo apt-get install libmysql-java下载下面的tar包解压出jar驱动包 https://dev.mysql.com/downloads/file/?id=484818
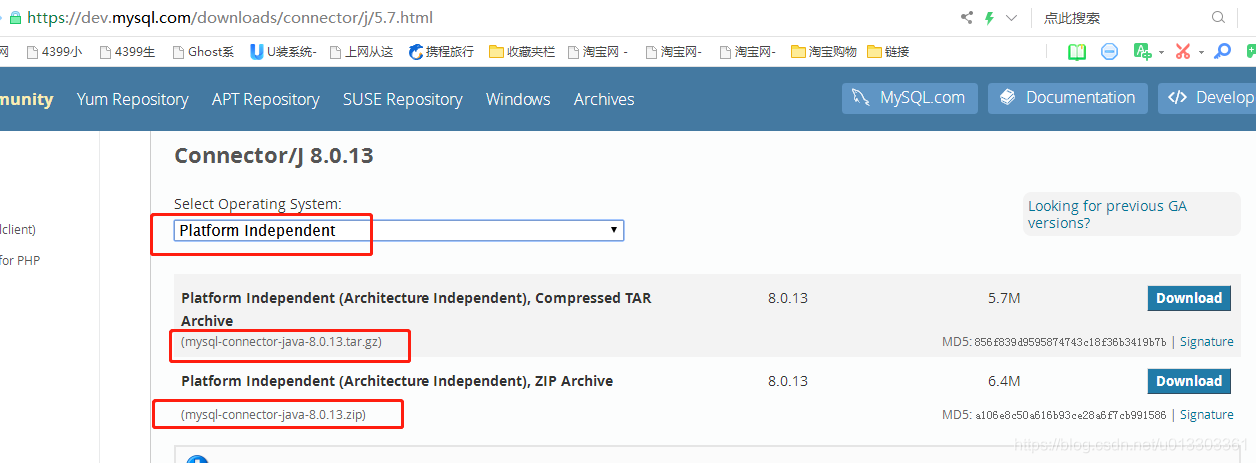
sudo mkdir -p /usr/share/java/
sudo cp mysql-connector-java-5.1.46-bin.jar /usr/share/java/mysql-connector-java.jar
我按照官网说的将jar驱动放到/usr/share/java/ 路径下,但没用(),后来我放到Scala/lib 目录后Scala才能找到驱动。
Creating Databases for Cloudera Software
Create databases for each service you are using from the below table:
CREATE DATABASE bigData DEFAULT CHARACTER SET utf8 DEFAULT COLLATE utf8_general_ci;Query OK, 1 row affected (0.00 sec)GRANT ALL ON bigData.* TO 'wenbin'@'%' IDENTIFIED BY 'Wenbin@456';Query OK, 0 rows affected (0.00 sec)
Step 5: Set up the Cloudera Manager Database
Preparing the Cloudera Manager Server Database
- Run the scm_prepare_database.sh script on the Cloudera Manager Server host, using the database name, username, and password you created in Step 4: Install and Configure Databases:
sudo /opt/cloudera/cm/schema/scm_prepare_database.sh mysql <databaseName> <databaseUser>这里我的报错找不到驱动,,,还有授权问题 When prompted, enter the password. - If it exists, remove the embedded PostgreSQL properties file:
sudo rm /etc/cloudera-scm-server/db.mgmt.properties
未完待续。。。
附:
参考:
https://www.cnblogs.com/zhanggl/p/5053716.html
http://blog.51cto.com/7072753/2176533?source=dra
我都Ubuntu16.04老是报:appstreamcli意外停止....double free or corruption

需要执行下列命令:
sudo apt-get purge libappstream3
sudo apt-get update
若update出现“无法解析软件包文件 /var/lib/apt/lists/cn.archive.ubuntu.com_ubuntu_dists_xenial-backports_main_binary-amd64_Packages (1)”则执行:sudo rm /var/lib/apt/lists/* -vf 后再更新
参考:
https://blog.csdn.net/zhbpd/article/details/77508675
https://blog.csdn.net/taosera/article/details/78148845


 195
195


 被折叠的 条评论
为什么被折叠?
被折叠的 条评论
为什么被折叠?
 到【灌水乐园】发言


