


- 给k8s 集群中容器运行时配置代理
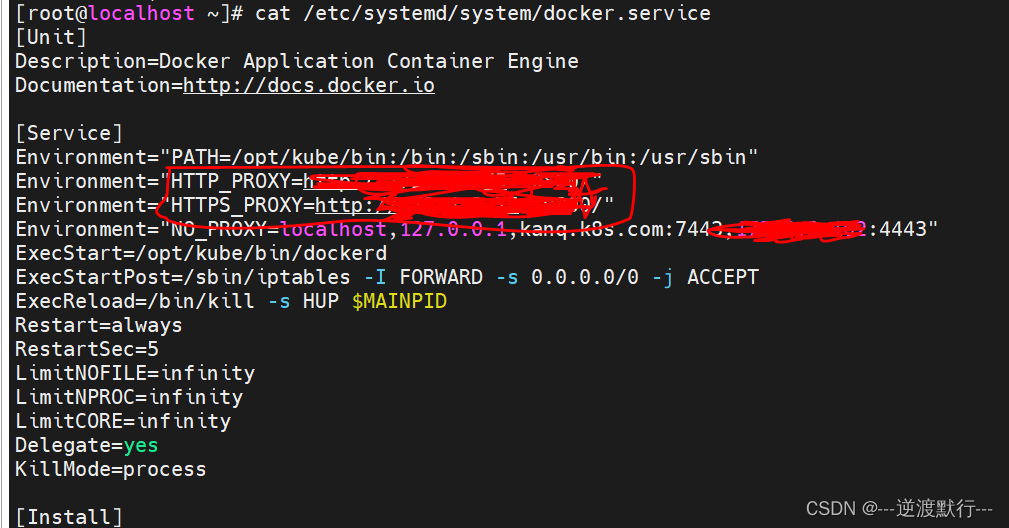
然后重启docker - 部署mlrun
kubectl create namespace mlrun
helm repo add mlrun https://mlrun.github.io/ce
export http_proxy=xxx.xx.x.x
export https_proxy=xxx.xx.x.x
helm repo update
helm pull mlrun-ce/mlrun-ce
自己搭建的私有仓库无法在mlrun 中使用(只能使用公有docker仓库),需要手动修改配置文件
run-ce/charts/nuclio/values.yaml

helm --namespace mlrun install mlrun-ce --wait --timeout 960s --set global.registry.url= ./mlrun-ce
registry-url: 私有仓库地址 - demo 使用
!pip install -U typing-extensions --proxy=http://x.x.x.x:10800/
########## For TF.Keras: ##########
#!pip uninstall tensorflow -y
#!pip install -U tensorflow==2.7.0
########## For PyTorch: ##########
!pip install -U torch1.10 --proxy=http://x.x.x.x:10800/
!pip install -U torchvision0.11.1 --proxy=http://x.x.x.x:10800/
pip 使用 中需添加 代理不然会失败
Import the function:
import os
os.environ[‘HTTP_PROXY’]=“http://x.x.x.x:10800”
os.environ[‘HTTPS_PROXY’]=“http://x.x.x.x:10800”
open_archive_function = mlrun.import_function(“hub://open_archive”)
del(os.environ[‘HTTP_PROXY’])
del(os.environ[‘HTTPS_PROXY’])
Print the function’s documentation:
open_archive_function.doc()
python 代码执行中也不要添加代理
dataset_path = get_dataset_path()
open_archive_function.set_env(name=“HTTP_PROXY”, value=“http://x.x.x.x:10800”)
open_archive_function.set_env(name=“HTTPS_PROXY”, value=“http://x.x.x.x:10800”)
open_archive_function.set_env(name=“NO_PROXY”, value=“mlrun-api”)
部署的k8s 资源也需增加代理配置


 545
545


 被折叠的 条评论
为什么被折叠?
被折叠的 条评论
为什么被折叠?
 到【灌水乐园】发言


