


据我所知,android自定义控件有三种方法。
1.第一种。
参照http://www.open-open.com/lib/view/open1328836804515.html
步骤如下:
①定义一个layout实现内部布局。
<?xml version="1.0" encoding="utf-8"?>
<LinearLayout xmlns:android="http://schemas.android.com/apk/res/android"
    android:layout_width="match_parent"
    android:layout_height="match_parent"
    android:orientation="horizontal">

    <TextView
        android:id="@+id/textViewID"
        android:layout_width="wrap_content"
        android:layout_height="wrap_content"
        android:text="充值"/>
	<EditText
	    android:id="@+id/editTextID"
	    android:layout_width="fill_parent"
	    android:layout_height="wrap_content"
	    android:hint="请输入"/>
</LinearLayout>
②写一个类继承layout,在构造函数中把刚刚写的布局inflate出来,并实现相应的功能,当在xml中调用此布局时其实就会调用此布局的构造方法
package com.example.myconponent;

import android.content.Context;
import android.util.AttributeSet;
import android.view.LayoutInflater;
import android.widget.EditText;
import android.widget.LinearLayout;
import android.widget.TextView;

public class abc extends LinearLayout {
	TextView textview;
	EditText edittext;

	public abc(Context context) {
		super(context);
		// TODO Auto-generated constructor stub
		LayoutInflater inflater = (LayoutInflater) context.getSystemService(Context.LAYOUT_INFLATER_SERVICE);
		inflater.inflate(R.layout.conponent, this);
		textview = (TextView)findViewById(R.id.textViewID);
		edittext = (EditText)findViewById(R.id.editTextID);
	}


	public abc(Context context, AttributeSet attrs) {
		super(context, attrs);
		// TODO Auto-generated constructor stub
		LayoutInflater inflater = (LayoutInflater) context.getSystemService(Context.LAYOUT_INFLATER_SERVICE);
		inflater.inflate(R.layout.conponent, this);
		textview = (TextView)findViewById(R.id.textViewID);
		edittext = (EditText)findViewById(R.id.editTextID);
	}

}
③在xml中使用第二步完成的layout
<LinearLayout xmlns:android="http://schemas.android.com/apk/res/android"
    xmlns:tools="http://schemas.android.com/tools"
    android:id="@+id/container"
    android:layout_width="match_parent"
    android:layout_height="match_parent"
    android:orientation="vertical">


   <com.example.myconponent.abc
       android:id="@+id/a"
       android:layout_width="wrap_content"
       android:layout_height="wrap_content"/>

</LinearLayout>
④在Activity中使用即可。
package com.example.myconponent;

import android.app.Activity;
import android.app.ActionBar;
import android.app.Fragment;
import android.os.Bundle;
import android.view.LayoutInflater;
import android.view.Menu;
import android.view.MenuItem;
import android.view.View;
import android.view.ViewGroup;
import android.os.Build;

public class MainActivity extends Activity {

	@Override
	protected void onCreate(Bundle savedInstanceState) {
		super.onCreate(savedInstanceState);
		setContentView(R.layout.activity_main);

	}
}

2.第二种。
和第一种类似,但比第一种繁琐。先写个大框架,然后再addview,这一种主要用于构造内部复杂的自定义组件。不用写xml,直接在构造函数中搞定。
①先在 values下面新建一个attr.xml文件:
<?xml version="1.0" encoding="utf-8"?>
<resources>
    <declare-styleable name = "myCon">

         <attr name ="what" format = "string"></attr >

    </declare-styleable>
</resources>
②
package com.example.myconponentt;

import android.content.Context;
import android.content.res.TypedArray;
import android.util.AttributeSet;
import android.util.Log;
import android.view.Gravity;
import android.widget.EditText;
import android.widget.LinearLayout;
import android.widget.TextView;

public class MyView extends LinearLayout {

    EditText editText;
	TextView textView;
	String textViewString ;

	public MyView(Context context, AttributeSet attrs, int defStyle) {
		super(context, attrs, defStyle);
		// TODO Auto-generated constructor stub
	}

	public MyView(Context context, AttributeSet attrs) {
		super(context, attrs);
		// TODO Auto-generated constructor stub
		Log.i("tag", "MyView(Context context, AttributeSet attrs)");
		setLayoutParams(new LinearLayout.LayoutParams(426, 90));
		setOrientation(HORIZONTAL);
		setAddStatesFromChildren(true);

		///获得对属性集的引用,然后就可以用"typedArray"的各种方法来获取相应的属性值
		TypedArray typedArray = context.obtainStyledAttributes(attrs, R.styleable.myCon);
		this.textViewString = typedArray.getString(R.styleable.myCon_what);

		textView = new TextView(context);
		Log.i("tag", "new TextView");
		textView.setLayoutParams(new LayoutParams(120, 90));
		//当在xml中调用app:editText = "充值号码:"时,自动调用以下一行
		textView.setText(textViewString);
		textView.setTextSize(20);
		textView.setGravity(Gravity. CENTER_VERTICAL | Gravity.RIGHT );
		addView(textView);

		editText = new EditText(context);
		editText.setLayoutParams(new LayoutParams(266, 90));
		editText.setHint("请输入");
		editText.setGravity(Gravity. CENTER_VERTICAL);
		editText.setTextSize(20);

		addView(editText);
		typedArray.recycle();
	}
	public MyView(Context context) {

		super(context, null);
		// TODO Auto-generated constructor stub
		Log.i("tag", "MyView(Context context)");
	}
}
<LinearLayout xmlns:android="http://schemas.android.com/apk/res/android"
    xmlns:tools="http://schemas.android.com/tools"
    xmlns:app= "http://schemas.android.com/apk/res/com.example.myconponentt"
    android:id="@+id/container"
    android:layout_width="match_parent"
    android:layout_height="match_parent"
    android:orientation="vertical" >

    <!--一定要加下面这一行命名空间,不然app:what不能用
    xmlns:app= "http://schemas.android.com/apk/res/com.example.myconponentt"-->


    <com.example.myconponentt.MyView
        android:id="@+id/hellID"
        android:layout_width="wrap_content"
        android:layout_height="wrap_content"

        app:what = "输入"/>

</LinearLayout>

3.第三种。
步骤如下:
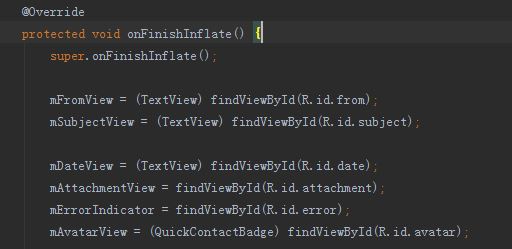
①首先写个类继承layout,并在此类中定义好相应的控件。不同于第一种的第二步,这一步不用把此layout inflate出来,而是重写protected void onFinishInflate() {}函数,在此函数中通过findviewbyId来找到个控件,并实现相应功能。

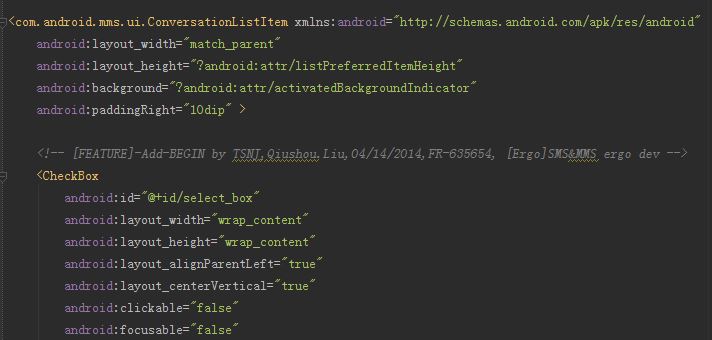
②在xml中使用步骤一完成的layout
③在Activity中inflate定义好的layout,当Activity实例化(inflate)此layout时,系统自动调用layout的onFinishInflate() {}函数,也就实现了相应的功能。


 被折叠的 条评论
为什么被折叠?
被折叠的 条评论
为什么被折叠?
 到【灌水乐园】发言


