


SpringBoot+Spring security
- 前言
- 搭建步骤
- 总结
1.前言
学习使用SpringBoot 结合spring security 搭建一个登录拦截和跳转的demo。
2.搭建步骤
(1)springboot 搭建项目,先新建TestController 测试springboot项目是否成功
(2)引入mybatis、springsecurity的maven依赖,附上pom.xml
<dependencies>
        <dependency>
            <groupId>org.springframework.boot</groupId>
            <artifactId>spring-boot-starter</artifactId>
        </dependency>

        <dependency>
            <groupId>org.springframework.boot</groupId>
            <artifactId>spring-boot-starter-test</artifactId>
            <scope>test</scope>
        </dependency>
        <dependency>
            <groupId>org.springframework.boot</groupId>
            <artifactId>spring-boot-starter-web</artifactId>
        </dependency>

        <dependency>
            <groupId>org.springframework.boot</groupId>
            <artifactId>spring-boot-starter-security</artifactId>
        </dependency>
        <dependency>
            <groupId>mysql</groupId>
            <artifactId>mysql-connector-java</artifactId>
        </dependency>
        <dependency>
            <groupId>org.mybatis.spring.boot</groupId>
            <artifactId>mybatis-spring-boot-starter</artifactId>
            <version>1.3.1</version>
        </dependency>
    </dependencies>
(3)数据库是mysql,在application下添加 配置信息
server.port=8900

spring.datasource.driver-class-name=com.mysql.jdbc.Driver
spring.datasource.url = jdbc:mysql://localhost:3306/qa?useUnicode=true&characterEncoding=utf-8&useSSL=true&serverTimezone=UTC
spring.datasource.username=root
spring.datasource.password=123456

#开启Mybatis下划线命名转驼峰命名
mybatis.configuration.map-underscore-to-camel-case=true
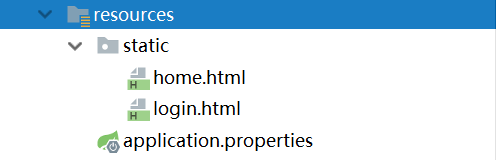
同时在resources 目录下添加static文件夹,新建登录页和主页
(4)src目录下新建dao、bean 读取数据库
(5)src 目录下新建service 注入dao
(6)controller 下新建LoginController ,编写两个测试接口
(7))src目录下新建security,在新建CustomUserDetailsService 实现UserDetailsService接口 ,重写loadUserByUsername方法
public UserDetails loadUserByUsername(String username) throws UsernameNotFoundException {
        Collection<GrantedAuthority> authorities = new ArrayList<>();
        // 从数据库中取出用户信息
        SysUser user = userService.selectByName(username);

        // 判断用户是否存在
        if(user == null) {
            throw new UsernameNotFoundException("用户名不存在");
        }

        // 添加权限
        List<SysUserRole> userRoles = userRoleService.listByUserId(user.getId());
        for (SysUserRole userRole : userRoles) {
            SysRole role = roleService.selectById(userRole.getRoleId());
            authorities.add(new SimpleGrantedAuthority(role.getName()));
        }

        // 返回UserDetails实现类
        return new User(user.getName(), user.getPassword(), authorities);
    }
(8)security下 新建WebSecurityConfig 继承 WebSecurityConfigurerAdapter
注入userDetailsService 重写configure(HttpSecurity http)方法
protected void configure(HttpSecurity http) throws Exception {
        http.authorizeRequests()
                // 如果有允许匿名的url,填在下面
//                .antMatchers().permitAll()
                .anyRequest().authenticated()
                .and()
                // 设置登陆页
                .formLogin().loginPage("/login")
                // 设置登陆成功页
                .defaultSuccessUrl("/").permitAll()
                // 自定义登陆用户名和密码参数,默认为username和password
//                .usernameParameter("username")
//                .passwordParameter("password")
                .and()
                .logout().permitAll();

        // 关闭CSRF跨域
        http.csrf().disable();
    }
(9)附上项目结构目录图

(10)测试 登录
 ###### 3.总结
代码地址:https://github.com/Jacob029049/springboot-security.git
数据库sql:提交到github目录


 8772
8772


 被折叠的 条评论
为什么被折叠?
被折叠的 条评论
为什么被折叠?
 到【灌水乐园】发言


