


在ElasticSearch搭建的过程中,遇到了很多的坑。也花费了很长时间去研究。终于从集群搭建到监控在到ES的kibana的搭建,完成了基本的搭建流程。下面把集群搭建的一些步骤以及一些遇到的问题,就在这里贴出来了,希望帮助到看到的你。
首先,在集群搭建之前,要先搞清楚ES中各种的配置属性是什么意思,不然在搭建时,有问题出现也是一头雾水,不多说了,做起来。
1.Elasticsearch cluster 三种角色
  master node:master节点主要用于元数据(metadata)处理,如、索引的新增、删除、分片
  data node: data节点上保存了数据片
  client node: client节点起到路由请求的作用,可看做负载均衡器
2.节点选择
    如果你想让节点从不选举为主节点,只用来存储数据,可作为负载器
      node.master: true
      node.data: true
    如果想让节点成为主节点,且不存储任何数据,并保有空闲资源,可作为协调器
      node.master: true
      node.data: false
    如果想让节点既不称为主节点,又不成为数据节点,那么可将他作为搜索器,从节点中获取数据,生成搜索结果等
    node.master: false
    node.data: false
3.配置说明
    cluster.name: es-hdfs           #集群的名称,同一个集群该值必须设置成相同的
    node.name: h001                 #该节点的名字
    node.master: true               #该节点有机会成为master节点
    node.data: true                 #该节点可以存储数据
    node.rack: r1                   #该节点所属的机架
    network.host: 10.41.2.84        #该参数用于同时设置
    bind_host和publish_host
    transport.tcp.port: 9300            #设置节点之间交互的端口号
    transport.tcp.compress: true        #设置是否压缩tcp上交互传输的数据
    http.port: 9200                     #设置对外服务的http 端口号
    http.max_content_length: 100mb      #设置http内容的最大大小
    http.enabled: true                  #是否开启http服务对外提供服务
    discovery.zen.ping.unicast.hosts:["h001", "h002", "h003","h004"]    #设置集群中的Master节点的初始列表,可以通过这些节点来自动发现其他新加入集群的节点
    discovery.zen.minimum_master_nodes: 1  #设置这个参数来保证集群中的节点可以知道其它N个有master资格的节点。默认为1,对于大的集群来说,可以设置大一点的值(2-4)
    discovery.zen.ping.timeout: 3s #设置集群中自动发现其它节点时ping连接超时时间,默认为3秒,对于比较差的网络环境可以高点的值来防止自动发现时出错
    discovery.zen.ping.multicast.enabled: false  #设置是否打开多播发现节点,默认是true
    gateway.recover_after_nodes: 1   #设置集群中N个节点启动时进行数据恢复,默认为1
    gateway.recover_after_time: 5m  #设置初始化数据恢复进程的超时时间,默认是5分钟
    gateway.expected_nodes: 2 # 设置这个集群中节点的数量,默认为2,一旦这N个节点启动,就会立即进行数据恢复
    cluster.routing.allocation.node_initial_primaries_recoveries: 4 #初始化数据恢复时,并发恢复线程的个数,默认为4
    cluster.routing.allocation.node_concurrent_recoveries: 2  #添加删除节点或负载均衡时并发恢复线程的个数,默认为4
    indices.recovery.max_size_per_sec: 0  #设置数据恢复时限制的带宽,如入100mb,默认为0,即无限制
    script.engine.groovy.inline.search: on
    script.engine.groovy.inline.aggs: on
    indices.recovery.max_bytes_per_sec: 20mb
    http.cors.enabled: true
    http.cors.allow-origin: "*"
以上就是对配置属性的一些介绍。接下来进入集群搭建。
一.安装与配置
1.下载对应的版本软件
  https://www.elastic.co/downloads/past-releases/elasticsearch-5-0-1
2.解压
  [hdfs@h001 tmp]# tar -zxvf elasticsearch-5.2.0.tar.gz -C /usr/bigdata/
3.修改配置elasticsearch.yml文件
  master节点(1个节点分为主节点)
  [hdfs@h001 config]$ vim elasticsearch.yml
  修改如下配置:
    cluster.name: es-hdfs
    node.name: es-h001
    node.master: true
    node.data: true
    path.data: /usr/bigdata/elasticsearch/data
    path.logs: /usr/bigdata/elasticsearch/logs
    bootstrap.memory_lock: false
    network.host: 192.168.1.128
    http.port: 9200
    transport.tcp.port: 9300
    discovery.zen.ping.unicast.hosts: ["h001", "h002", "h003","h004"]
    script.engine.groovy.inline.search: on
    script.engine.groovy.inline.aggs: on
    indices.recovery.max_bytes_per_sec: 20mb

  data节点(2个节点分为data节点)
  数据节点分别为h001,h002,h003
  [hdfs@h002 config]$ vim elasticsearch.yml
    修改如下配置:
    cluster.name: es-hdfs
    node.name:h002
    node.master: false
    node.data: true
    path.data: /usr/bigdata/elasticsearch/data
    path.logs: /usr/bigdata/elasticsearch/logs
    bootstrap.memory_lock: false
    network.host: 192.168.1.130
    http.port: 9200
    transport.tcp.port: 9300
    discovery.zen.ping.unicast.hosts: ["h001", "h002","h003","h004"]
    discovery.zen.minimum_master_nodes: 1
    gateway.recover_after_nodes: 2
    gateway.recover_after_time: 5m
    gateway.expected_nodes: 3
    cluster.routing.allocation.node_initial_primaries_recoveries: 4
    action.auto_create_index: false
    indices.fielddata.cache.size: 1g
    script.engine.groovy.inline.search: on
    script.engine.groovy.inline.aggs: on
    indices.recovery.max_bytes_per_sec: 20mb
    http.cors.enabled: true

client节点
[hdfs@h001 config]$ vim elasticsearch.yml
     修改如下配置:
    cluster.name: es-hdfs
    node.name:h004
    node.master: false
    node.data: false
    path.data: /usr/bigdata/elasticsearch/data
    path.logs: /usr/bigdata/elasticsearch/logs
    bootstrap.memory_lock: false
    network.host: 192.168.1.133
    http.port: 9200
    transport.tcp.port: 9300
    discovery.zen.ping.unicast.hosts: ["h001", "h002","h003","h004"]
    discovery.zen.minimum_master_nodes: 1
    gateway.recover_after_nodes: 2
    gateway.recover_after_time: 5m
    gateway.expected_nodes: 3
    cluster.routing.allocation.node_initial_primaries_recoveries: 4
    action.auto_create_index: false
    indices.fielddata.cache.size: 1g
    script.engine.groovy.inline.search: on
    script.engine.groovy.inline.aggs: on
    indices.recovery.max_bytes_per_sec: 20mb
    http.cors.enabled: true
    http.cors.allow-origin: "*"
以上是整个集群当中所要配置的所有属性,如果想直接配置集群的话,也可以。但我不建议这样做。如果直接搭建一个是问题很多,一个是在搭建的过程中是一头雾水,我建议就是先搞定单节点,在去搭建集群。这样让你对里面的知识会有更加的认识与理解。
如果非要直接搭建集群,如果中间遇到问题,我在上一章节有讲到,前期安装ES就那么多问题,解决了就行。
二.ES启动与检查
1.启动
 [hdfs@h004 elasticsearch]$ bin/elasticsearch #前台运行
 [hdfs@h004 elasticsearch]$ bin/elasticsearch -d  #后台运行
2.检查单台服务是否正常
 [hdfs@h001 elasticsearch]$ curl http://ip:9200/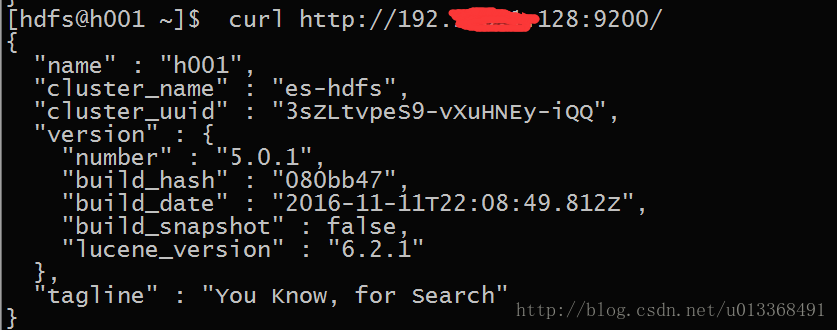
3. 查看集群状态
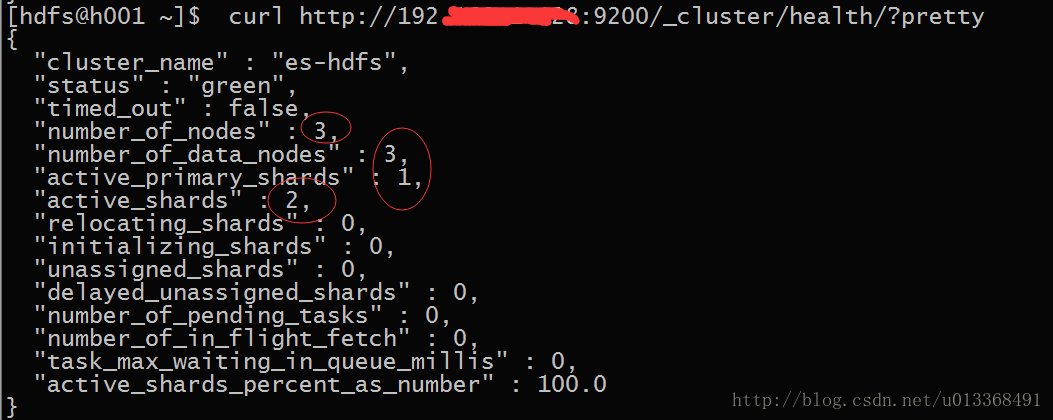
[hdfs@h001 elasticsearch]$curl http://192.168.1.128:9200/_cluster/health/?pretty
出现以上说明集群搭建成功了。
三.遇到的坑
   特别提醒:在搭建集群时,主节点(master),不能出现gateway,不能有gateway的原因是环境需要kibana,如果有了gateway配置,kibana启动会报错。详细的安装,我在记录kibana时,在说明。
   下面是集群搭建遇到的一个棘手问题,一定要注意了。
[2017-04-09T18:37:21,007][INFO ][o.e.d.z.ZenDiscovery ] [h002] failed to send join request to master [{h001}{r6lmgFHmRgCuMSMll9vcRQ}{lyioxGw9Roeji_wOO6iyow}{192.168.10.128}{192.168.10.111:9300}{rack=r1}], reason [RemoteTransportException[[h001][192.168.10.128:9300][internal:discovery/zen/join]]; nested: IllegalArgumentException[can't add node {h002}{r6lmgFHmRgCuMSMll9vcRQ}{1-haogdVTwmo0ON63nIN9Q}{192.168.10.145}{192.168.10.145:9300}{rack=r1}, found existing node {h001}{r6lmgFHmRgCuMSMll9vcRQ}{lyioxGw9Roeji_wOO6iyow}{192.168.19.128}{192.168.10.128:9300}{rack=r1} with the same id but is a different node instance]; ] 出现这个问题的原因是:在ES scp到其他的节点时,所有节点都有了相同的实例。所以这个时候需要清空文件,具体下面
解决办法:
[hdfs@h002 data]$ rm -rf *
删除成功后,集群之间就可以相互打通了,就如这样:
后面还有IK分词以及kibana,bigdesk插件的安装,请看我下次的文章即可。集群的优化,在学习过程中也会慢慢讲解。


 1万+
1万+

 被折叠的 条评论
为什么被折叠?
被折叠的 条评论
为什么被折叠?
 到【灌水乐园】发言


