


HttpHandler的使用
》》1.首先注册HttpHandler:在Web.config中注册,跟httpmodule类似
》》web.config中配置
<httpHandlers>
                <!--映射jpg格式的文件,给ProcessHandler_test.CustomHandler处理。-->
                <!--type里面逗号之前 命名空间加类名(ProcessHandler_test.CustomHandler),后面程序集名称-->
                <add path="*.jpg" verb="*" type="httphander_test.CustomHandler, ProcessHandler_test" />
</httpHandlers>
上面注册是把网站中请求jpg格式文件的请求,映射给命名空间为httphander_test类名为CustomHandler的程序集ProcessHandler_test来处理请求。
2.如果想通过HttpHandler处理请求,必须在映射的处理程序中实现接口IHttpHandler
3.映射到的程序代码如下
namespace xxxxx
{
    public class CustomHandler :IHttpHandler
    {
        public void ProcessRequest(HttpContext context)
        {
            // 获取文件服务器端物理路径
            string FileName = context.Server.MapPath(context.Request.FilePath);
            // 如果UrlReferrer为空,则显示一张默认的禁止盗链的图片
            if (context.Request.UrlReferrer.Host == null)
            {
               //context  可以为所欲为的
                context.Response.ContentType = "image/gif";
                context.Response.WriteFile("/error.gif");
            }
            else
            {
                // 如果 UrlReferrer中不包含自己站点主机域名,则显示一张默认的禁止盗链的图片
                if (context.Request.UrlReferrer.Host.IndexOf("xxxx域名") > 0)
                {
                    context.Response.ContentType = "image/gif";
                    context.Response.WriteFile(FileName);
                }
                else
                {
                    context.Response.ContentType = "image/gif";
                    context.Response.WriteFile("/error.gif");
                }
            }
        }

        public bool IsReusable
        {
            get { throw new NotImplementedException(); }
        }
    }
}
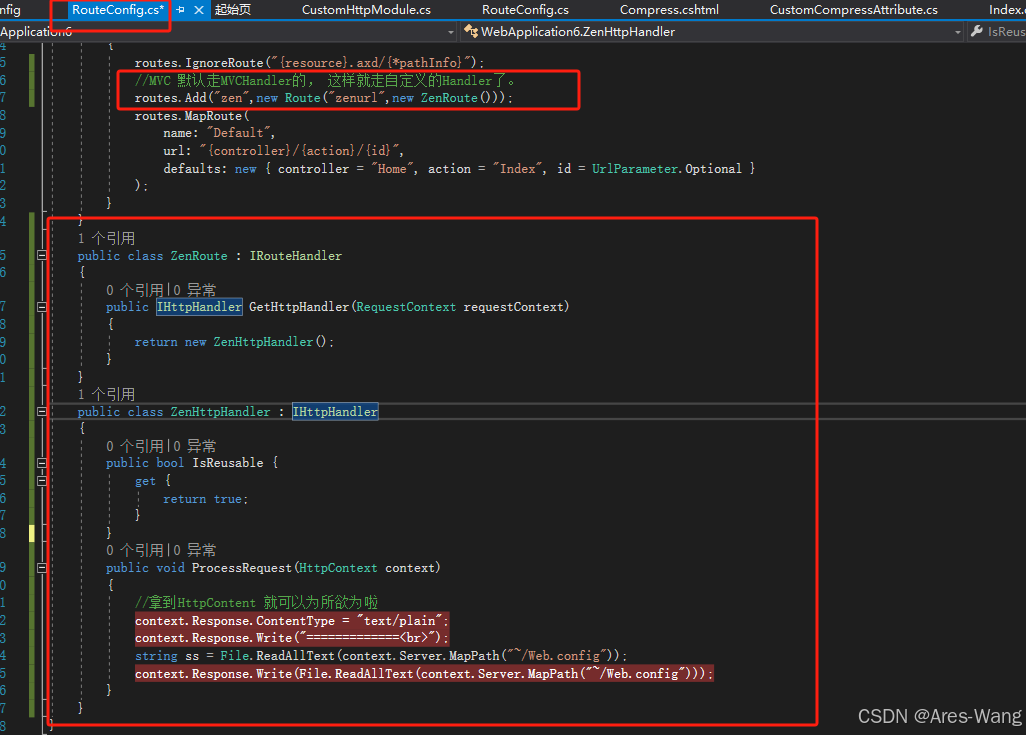
走自定义的 HttpHandler


 被折叠的 条评论
为什么被折叠?
被折叠的 条评论
为什么被折叠?
 到【灌水乐园】发言


