


开发中我们很多时候遇到类似这种的效果
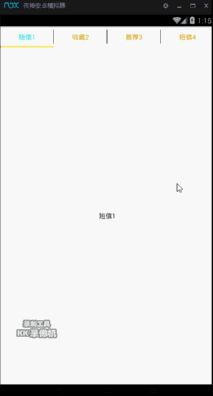
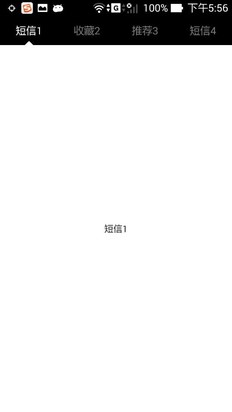
本篇介绍来源于慕课网的张鸿洋的自定义ViewPageIndctor,(视频中讲解的是三角形的那种)
我们看下项目的结构
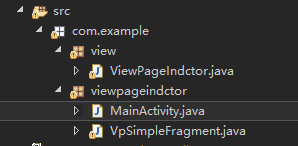
主要的程序都已经封装在ViewPageIndctor中,我们来看下MainActivity中的调用就知道
public class MainActivity extends FragmentActivity {
	private ViewPager mViewPager;
	private ViewPageIndctor mIndctor;

	private List<String> mTitles = Arrays.asList("短信1","收藏2","推荐3","短信4","收藏5","推荐6","短信7","收藏8","推荐9");
	private List<VpSimpleFragment> mContents = new ArrayList<VpSimpleFragment>();
	private FragmentPagerAdapter mAdapter;
	@Override
	protected void onCreate(Bundle savedInstanceState) {
		super.onCreate(savedInstanceState);
		requestWindowFeature(Window.FEATURE_NO_TITLE);
		setContentView(R.layout.activity_main);
		initViews();
		initDatas();

		<span style="color:#ff6666;background-color: rgb(255, 204, 102);">mIndctor.setTabItemTitles(mTitles);

		mViewPager.setAdapter(mAdapter);
		mIndctor.setViewPager(mViewPager, 0);</span>

	}

	private void initDatas() {
		for(String title :mTitles){
			VpSimpleFragment fragment = VpSimpleFragment.newInstance(title);
			mContents.add(fragment);
			}

		mAdapter = new FragmentPagerAdapter(getSupportFragmentManager()) {

			@Override
			public int getCount() {
				return mContents.size();
			}

			@Override
			public Fragment getItem(int position) {

				return mContents.get(position);
			}
		};
	}

	private void initViews() {
		mViewPager = (ViewPager) findViewById(R.id.id_viewPager);
		mIndctor = (ViewPageIndctor) findViewById(R.id.id_indicator);

	}

}
真正调用的就背景黄,字体红的那一段代码,对,就是这么的简单;
至于ViewPageIndctor中的的详细代码就不在这边贴出来了,(因为里面的注解也是非常的清晰)下面要介绍的是其中的主要方法,我们可以通过修改这些方法达到自己的效果
(1)title的字体大小,样式
这中运行的话效果是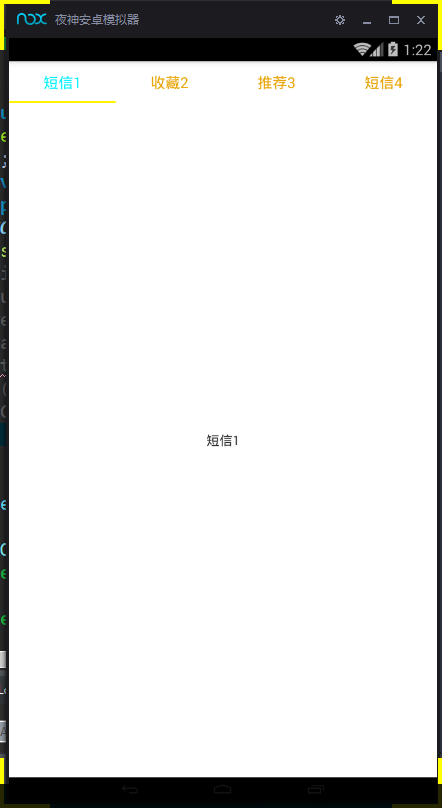
而下面注释掉的是开篇中的那个title效果,使用的是一个xml布局的效果 因为大家对于xml的写法的话比动态的java添加更熟悉一些,不过这你用xml的话,对应的滑动时候得字体颜色的改变的话也就要做一个相应的跳整了,我这里面做的是
2高亮字体
/**
	 * 重置TAB文本颜色
	 */
	private void resetTextView(){
		for(int i =0; i<getChildCount();i++){
			View view = getChildAt(i);
			if(view instanceof ViewGroup){//generateTextView()防止这个方法是xml布局
				for(int j =0; j<((ViewGroup)view).getChildCount();j++){
					if (((ViewGroup)view).getChildAt(j) instanceof TextView) {
						((TextView) ((ViewGroup)view).getChildAt(j)).setTextColor(COLOR_TEXT_NORMAl);
					}
				}
			}else if(view instanceof TextView){//generateTextView()就是一个textView
				((TextView) view).setTextColor(COLOR_TEXT_NORMAl);
			}
		}
	}

	/**
	 * 高亮某个Tab的文本
	 *
	 * @param pos
	 */
	private void highLightTextView(int pos) {
		resetTextView();
		View view = getChildAt(pos);
		if(view instanceof ViewGroup){//generateTextView()防止这个方法是xml布局
			for(int j =0; j<((ViewGroup)view).getChildCount();j++){
				if (((ViewGroup)view).getChildAt(j) instanceof TextView) {
					((TextView) ((ViewGroup)view).getChildAt(j)).setTextColor(COLOR_TEXT_HIGHLIGHT);
				}
			}
		}else if(view instanceof TextView){//generateTextView()就是一个textView
			((TextView) view).setTextColor(COLOR_TEXT_HIGHLIGHT);
		}

	}
当然这段代码只能时候那种xml是只有一个ViewGroup的,太复杂了还是要修改的,
3.字体下面的那块下划线
他是通过path画出来的(因为之前的那个三角形也是通过这个画出来的,图个方便也就这样了)
/**
	 * 初始化矩形
	 */
	private void initTriangle() {
		mTriangleHeight = 5;

		mPath = new Path();
		mPath.moveTo(0, 0);
		mPath.lineTo(mTriangleWidth, 0);
		mPath.lineTo(mTriangleWidth, -mTriangleHeight);
		mPath.lineTo(0, -mTriangleHeight);
		mPath.close();

	}
然后是通过cavas.drawPath();画出来,应该不会有人问我为啥在dispatchDraw()画,而不是在onDraw()中画吧。
	@Override
	protected void dispatchDraw(Canvas canvas) {
		canvas.save();

		canvas.translate(mInitTranslationX + mTranslationX, getHeight() + 2);// 平移
		canvas.drawPath(mPath, mPaint);
		canvas.restore();

		super.dispatchDraw(canvas);
	}
然后最后好像也没啥可说的了 ,
,
最后的话贴下慕课的视频地址吧(毕竟用了人家的东西,来点感恩嘛 ):http://www.imooc.com/learn/615
然后是demo的下载地址:滑动的是直线的:http://www.oschina.net/code/snippet_2702417_58151


 1万+
1万+


 被折叠的 条评论
为什么被折叠?
被折叠的 条评论
为什么被折叠?
 到【灌水乐园】发言


