


Spring Boot 自定义配置元数据
概述
开发Spring Boot应用程序时, 可以把 application.properties文件中的配置属性直接转换为 Java Bean对象。这也是Spring Boot 约定大于配置的理念的体现,通过框架内置的各种属性按照不同的需求进行排列组合,满足特定的业务规则。
server.port=8090
上述配置,相信大家都很熟悉,Spring Boot中默认端口为 8080,可以上面配置将端口更改为 8090. 仔细思考一下,这里有几个细节值得学习:
- 怎么样找到 Spring Boot 中所有的配置元数据
- Spring Boot 中的配置元数据格式是怎么样的
- 如何实现自定义的配置元数据
配置元数据
通常情况下,开发者期望应用程序在一定程度上可以配置,提高程序的灵活性。然而,很少有人能够真正的了解配置参数的作用,是否存在默认值,配置是否过期,属性名是否存在。
为了解决以上问题,Spring Boot 使用JSON文件生成配置元数据,为开发者提供了如何使用配置属性的有用信息。因此,配置元数据是一个描述性文件,其中包含了与配置属性相关的所需信息。
配置格式
使用Spring Boot 开发Web程序时,通常会直接依赖或者间接依赖各种jar文件,Spring Boot 2.7.5 版本为例,配置元数据位于spring-boot-autoconfig-2.7.5.jar里面的 META-INF/spring-configuration-metadata.json,

格式如下:
{"groups": [
    {
        "name": "server",
        "type": "org.springframework.boot.autoconfigure.web.ServerProperties",
        "sourceType": "org.springframework.boot.autoconfigure.web.ServerProperties"
    }
    ...
],"properties": [
    {
        "name": "server.port",
        "type": "java.lang.Integer",
        "sourceType": "org.springframework.boot.autoconfigure.web.ServerProperties"
    }
    ...
],"hints": [
    {
        "name": "spring.jpa.hibernate.ddl-auto",
        "values": [
            {
                "value": "none",
                "description": "Disable DDL handling."
            }
        ]
    }
]}
元数据文件中的每一个 property 可以指定一个默认的配置,如 server.port 的默认值为 8080。因此当开发者不配置 server.port 属性时,应用程序默认占用的端口为8080.
groups 是更高级别的项,它们本身并不指定属性值,而是为属性提供上下文分组。例如,server 分组,server.port 、server.address,端口、地址都是属于server组的一部分。
hints 属性经常用于帮助用户配置属性做出的提示。
Group 分组
| Name | Type | Purpose |
|---|---|---|
name | String | group分组名称,该属性必填 |
type | String | group的全类名(包含package)。例如,如果组基于用@ConfigurationProperties注释的类,则该属性将包含该类的完全限定名称。如果它基于@Bean方法,那么它将是该方法的返回类型。 |
description | String | Group的简短描述。如果没有可用的描述,可以省略。建议说明采用简短的段落,第一行提供简洁的摘要。 |
sourceType | String | group的全类名(包含package)。例如,如果组基于用@ConfigurationProperties注释的@Bean方法,则该属性将包含包含该方法的@Configuration类的完全限定名称。如果源类型未知,则可以省略该属性。 |
sourceMethod | String | 方法全名称(包括括号和参数类型)(例如,@ConfigurationProperties注释@Bean方法的名称)。如果源方法未知,则可以省略。 |
Property Attributes
| Name | Type | Purpose |
|---|---|---|
name | String | 属性的全名。名称采用小写句点分隔形式(例如,server.address)。此属性是必需的。 |
type | String | 属性数据类型的完整签名(例如java.lang.String),也可以是完整的泛型类型(例如java.util.Map<java.lang.Sstring,com.example.MyEnum>)。您可以使用此属性指导用户输入的值类型。为了保持一致性,原语的类型通过使用其包装器对应项来指定(例如,布尔值变为java.lang.boolean)。注意,这个类可能是一个复杂类型,在绑定值时从String转换而来。如果类型未知,则可以省略。 |
description | String | 可向用户展示的property简短描述。如果没有可用的描述,可以省略。建议说明采用简短的段落,第一行提供简洁的摘要。 |
sourceType | String | 提供此属性的源的类名。例如,如果属性来自用@ConfigurationProperties注释的类,则该属性将包含该类的完全限定名称。如果源类型未知,则可以省略。 |
defaultValue | Object | 默认值,如果未指定属性,则使用该值。如果属性的类型是数组,则它可以是值的数组。如果默认值未知,则可以省略。 |
deprecation | Deprecation | 指定该属性是否已弃用。如果该字段未被弃用或该信息未知,则可以省略该字段。 |
Hint Attributes
| Name | Type | Purpose |
|---|---|---|
name | String | 提示引用的属性的全名。名称采用小写句点分隔形式(如spring.mvc.servlet.path)。如果属性引用映射(例如system.contexts),则提示应用于映射的键(system.contents.keys)或映射的值(system.coontexts.values)。此属性是必需的。 |
values | ValueHint[] | ValueHint对象定义的有效值列表(在下表中描述)。每个条目都定义了值,并且可能有描述。 |
providers | ValueProvider[] | ValueProvider对象定义的提供者列表。 |
每个提示元素的值属性中包含的JSON对象可以包含下表中描述的属性
| Name | Type | Purpose |
|---|---|---|
value | Object | 提示引用的元素的有效值。如果属性的类型是数组,它也可以是值的数组。此属性是必需的。 |
description | String | 可向用户显示的值的简短描述。如果没有可用的描述,可以省略。建议说明采用简短的段落,第一行提供简洁的摘要。说明中的最后一行应以句点(.)结尾。 |
上面简单的介绍了配置元数据相关信息,一个关键点是JSON 格式的元数据文件是如何生成的?
Maven依赖
为了实现自动生成配置元数据文件,需要添加Maven依赖
<dependency>
    <groupId>org.springframework.boot</groupId>
    <artifactId>spring-boot-configuration-processor</artifactId>
    <version>2.7.5</version>
    <optional>true</optional>
</dependency>
该依赖让开发者在编译项目时,调用 Java 配置注解处理器。
配置元数据-Example
开发一个简单的Java Bean对象,并提供Get/Set方法
@Configuration
@ConfigurationProperties(prefix = "database")
public class DatabaseProperties {

    public static class Server {

        private String ip;
        private int port;

        // standard getters and setters
    }

    private String username;
    private String password;
    private Server server;

    // standard getters and setters
}
在类上使用 @ConfigurationProperties 声明,配置处理器会扫描使用该注解的类、方法,获取配置参数并生成配置元数据。
生成配置元数据
使用maven 编译项目(Idea 工具自动生成),在 target/classes/META-INF目录下自动生成 spring-configuration-metadata.json 元数据配置文件
# 1. 删除 target
rm -rf target/

# 2. mvn 编译
mvn clean install -Dmaven.test.skip=true
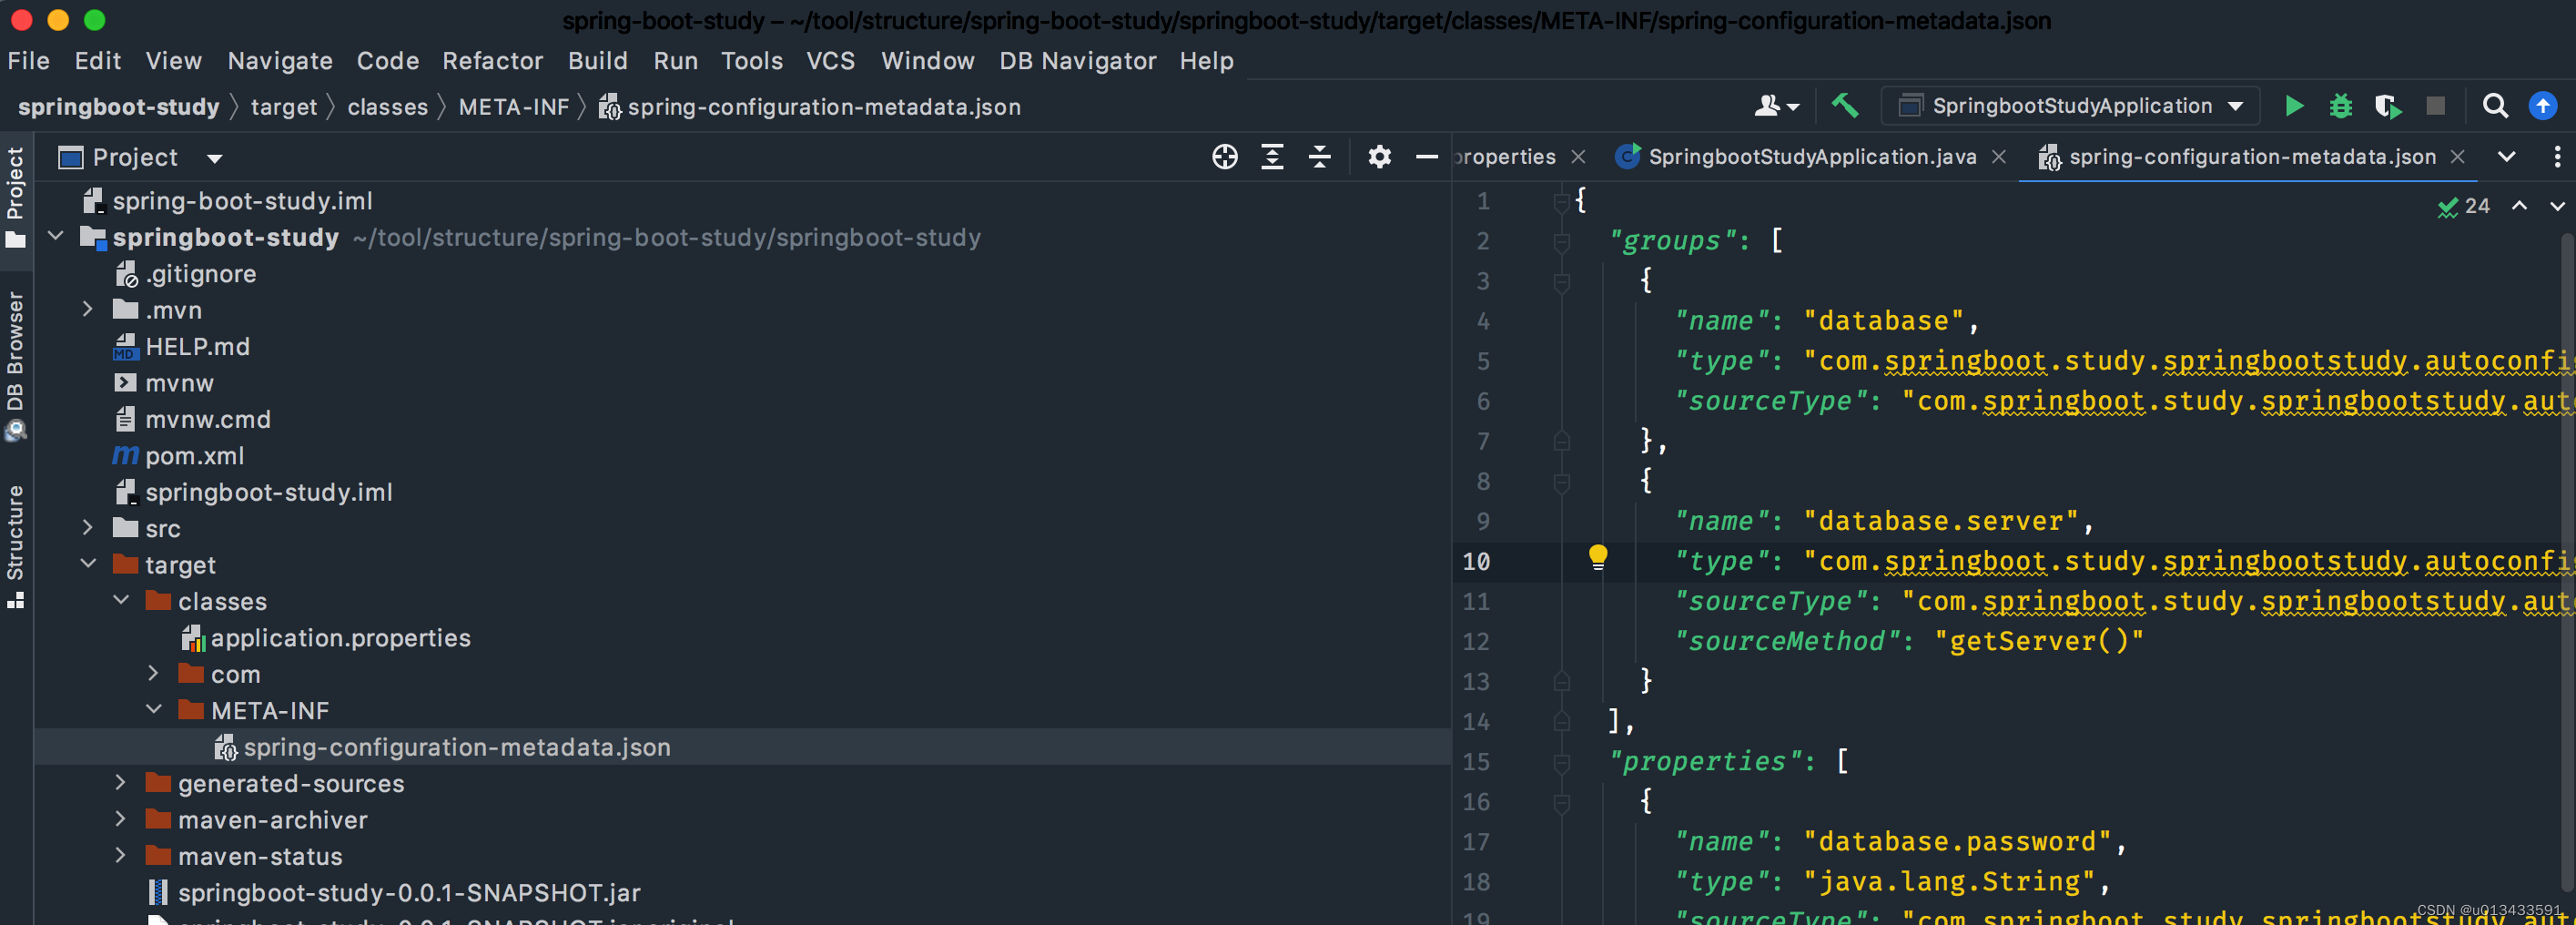
spring-configuration-metadata.json文件内容如下
{
  "groups": [
    {
      "name": "database",
      "type": "com.springboot.study.springbootstudy.autoconfig.DatabaseProperties",
      "sourceType": "com.springboot.study.springbootstudy.autoconfig.DatabaseProperties"
    },
    {
      "name": "database.server",
      "type": "com.springboot.study.springbootstudy.autoconfig.DatabaseProperties$Server",
      "sourceType": "com.springboot.study.springbootstudy.autoconfig.DatabaseProperties",
      "sourceMethod": "getServer()"
    }
  ],
  "properties": [
    {
      "name": "database.password",
      "type": "java.lang.String",
      "sourceType": "com.springboot.study.springbootstudy.autoconfig.DatabaseProperties"
    },
    {
      "name": "database.server.ip",
      "type": "java.lang.String",
      "sourceType": "com.springboot.study.springbootstudy.autoconfig.DatabaseProperties$Server"
    },
    {
      "name": "database.server.port",
      "type": "java.lang.Integer",
      "sourceType": "com.springboot.study.springbootstudy.autoconfig.DatabaseProperties$Server",
      "defaultValue": 0
    },
    {
      "name": "database.username",
      "type": "java.lang.String",
      "sourceType": "com.springboot.study.springbootstudy.autoconfig.DatabaseProperties"
    }
  ],
  "hints": []
}
代码验证
-
在application.properties 文件新增配置
server.port=8090 database.username=mysql -
Spring Boot 启动类中 输出配置
package com.springboot.study.springbootstudy; import com.springboot.study.springbootstudy.autoconfig.DatabaseProperties; import org.springframework.boot.SpringApplication; import org.springframework.boot.autoconfigure.SpringBootApplication; import org.springframework.boot.autoconfigure.web.ServerProperties; import org.springframework.context.ConfigurableApplicationContext; @SpringBootApplication public class SpringbootStudyApplication { public static void main(String[] args) { ConfigurableApplicationContext app = SpringApplication.run(SpringbootStudyApplication.class, args); DatabaseProperties bean = app.getBean(DatabaseProperties.class); ServerProperties server = app.getBean(ServerProperties.class); System.out.println("通过配置属性获取 =================: " + app.getEnvironment().getProperty("database.username")); System.out.println("通过bean属性获取 =================: " + bean.getUsername()); System.out.println("Spring Boot 内置属性装配 =================: " + server.getPort()); } } -
输出结果
通过配置属性获取  =================: mysql
通过bean属性获取 =================: mysql
Spring Boot 内置属性装配 =================: 8090
从输出结果可以分析出 无论是通过 Environment 还是通过bean都能够获取配置的值,且跟框架内置的属性配置方式一致,预期输出也一致。
-
项目结构
├── HELP.md
├── mvnw
├── mvnw.cmd
├── pom.xml
├── springboot-study.iml
├── src
│   ├── main
│   │   ├── java
│   │   │   └── com
│   │   │       └── springboot
│   │   │           └── study
│   │   │               └── springbootstudy
│   │   │                   ├── SpringbootStudyApplication.java
│   │   │                   └── autoconfig
│   │   │                       └── DatabaseProperties.java
│   │   └── resources
│   │       ├── application.properties


 1770
1770


 被折叠的 条评论
为什么被折叠?
被折叠的 条评论
为什么被折叠?
 到【灌水乐园】发言


