


1、下载安装包
#下载
wget https://dev.mysql.com/get/Downloads/MySQL-8.0/mysql-8.0.26-linux-glibc2.12-x86_64.tar.xz
#解压
tar -xvf mysql-8.0.26-linux-glibc2.12-x86_64.tar.xz -C /opt/mysql3307
2、创建mysql用户 & 授权
#用户组 & 用户
groupadd mysql
useradd mysql -g mysql
#授权
chown -R mysql:mysql /opt/mysql3307
chmod -R 755 /opt/mysql3307
3、创建目录 & 授权
cd /opt/mysql3307
#创建
mkdir data
mkdir etc
mkdir tmp
mkdir mysql-log
touch mysql-log/error.log
#授权
chmod 777 ./data
chmod 644 ./etc
chmod 777 ./tmp
chmod 777 ./mysql-log
4、创建配置文件
/opt/mysql3307/etc/my.cnf,内容如下
[mysqld]
basedir = /opt/mysql3307
datadir = /opt/mysql3307/data
socket = /opt/mysql3307/tmp/mysql.sock
port = 3307
mysqlx_port = 33070
lower_case_table_names = 1
sql_mode='STRICT_TRANS_TABLES,NO_ZERO_IN_DATE,NO_ZERO_DATE,ERROR_FOR_DIVISION_BY_ZERO,NO_ENGINE_SUBSTITUTION'

[client]
socket = /opt/mysql3307/tmp/mysql.sock
default-character-set=utf8

[mysqld_safe]
log-error=/opt/mysql3307/mysql-log/error.log
pid-file=/opt/mysql3307/data/mysql.pid
5、修改启动脚本
/opt/mysql3307/support-files/mysql.server
5.1 增加配置
basedir=/opt/mysql3307
datadir=/opt/mysql3307/data
conf=/opt/mysql3307/etc/my.cnf
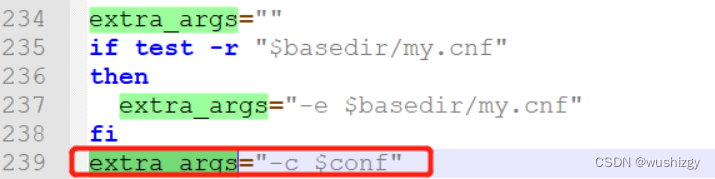
5.2、增加配置extra_args=“-c $conf”
5.3、修改mysql目录
把所有的/usr/local/mysql 替换成 /opt/mysql3307
5.4、修改启动命令,增加配置文件路径
$bindir/mysqld_safe --defaults-file="$conf" --datadir="$datadir" --pid-file="$mysqld_pid_file_path" $other_args >/dev/null &
6、初始化数据库,记录下初始root密码
./bin/mysqld --defaults-file=/opt/mysql3307/etc/my.cnf --initialize --user=mysql
7、启动
cd /opt/mysql3307

support-files/mysql.server start
8、连接 & 配置
#登录
mysql -uroot -p -h 127.0.0.1 --socket=../tmp/mysql.sock --port=3307
# 修改密码
alter user 'root'@'localhost' identified by '123456';
flush privileges;
# 远程访问权限
update user set host = '%' where user ='root';
flush privileges;
# 低版本navicat连接设置(选填)
alter user 'root'@'%' IDENTIFIED WITH mysql_native_password BY '123';
flush privileges;
9、设置开机自启动
cp /opt/mysql3307/support-files/mysql.server /etc/init.d/mysql3307
chkconfig --add mysql3308


 1029
1029


 被折叠的 条评论
为什么被折叠?
被折叠的 条评论
为什么被折叠?
 到【灌水乐园】发言


