


一:研发工具(推荐)
Eclipse:eclipse-jee-kepler-SR2-win32-x86_64.zip(自带maven)
Tomcat: apache-tomcat-7.0.53
Mysql: 5.0
在eclipse中引入工程(过程可能有点慢,因为需要下载工程需要的jar文件。Jar文件的下载目录为C:\Users\Administrator\.m2)
二:eclipse远程debug调试
1, 编辑tomcat\bin\catalina.bat,在
rem Guess CATALINA_HOME if not defined
set "CURRENT_DIR=�%"
前添加以下代码以绑定一个端口8787:
if ""%1"" == ""stop"" goto skip_config
SET CATALINA_OPTS=-server -Xdebug -Xnoagent -Djava.compiler=NONE -Xrunjdwp:transport=dt_socket,server=y,suspend=n,address=8787
:skip_config
address指的是将启动8787端口进行绑定.
2, 在eclipse中进行配置:

在弹出的设置框中找到 Remote Java Application 下面会有自己的工程,将port设置为8787,然后apply->close:

OK,设置完毕。要进行debug首先要运行start.bat启动tomcat,但是这样只是一般的启动,还未进入debug模式。要想debug,就要在工程上右键->Debug as->Debug Configurations->Remote Java Application->passing(自己的工程名)->debug。之后就可以打断点debug了
3:setting.xml拷贝到C:\Users\Administrator\.m2目录下面
<servers>
<server>
<id>tomcat</id>
<username>admin</username>
<password>pass!@#</password>
</server>
</servers>
编辑工程的pom.xml,添加下面的内容
<plugin>
<groupId>org.codehaus.mojo</groupId>
<artifactId>tomcat-maven-plugin</artifactId>
<version>1.1</version>
<configuration>
<server>tomcat</server>
<username>admin</username>
<password>pass!@#</password>
<url>http://127.0.0.1:8080/manager/text</url>
<path>/bright</path>
</configuration>
</plugin>
(1)启动tomcat的catalina.bat
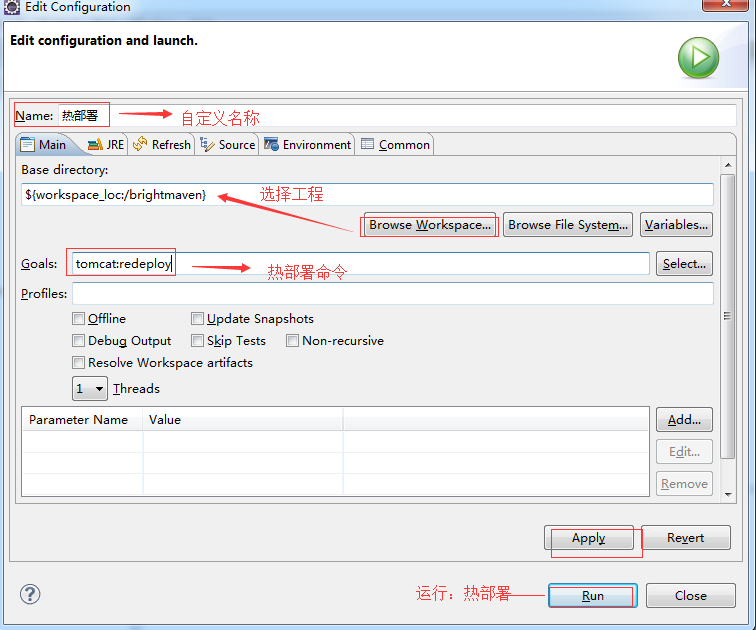
(2)右击工程或者pom.xml,然后Run as-Maven Build-


 1512
1512

 被折叠的 条评论
为什么被折叠?
被折叠的 条评论
为什么被折叠?
 到【灌水乐园】发言


