


震惊,Cypress不仅可以做UI自动化测试,还可以做接口测试,支持GET,POST,PUT等请求方式,我们来看看吧!
1、Cypress发起HTTP请求cy.request
cy.request(url)
cy.request(url, body)
cy.request(method, url)
cy.request(method, url, body)
cy.request(options)
说明:
-
url是接口请求地址,如果在cypress.json中设置了baseUrl,则url处可省略baseUrl,只需填写后面的路径即可。
-
body是接口请求报文。
-
method是请求方式,默认是get
-
options是可选项,可以改变cy.request()的默认行为,支持的参数如下表所示
| Option | Default | Description |
log | true | 在命令日志中显示该命令 |
url | null | 发出请求的URL |
method | GET | 要在请求中使用的HTTP方法 |
auth | null | 添加鉴权标头 |
body | null | 接口请求报文 |
failOnStatusCode | true |
|
followRedirect | true | 是否自动重定向 |
form | false | 是否将 body 的值转换为 url encoded 并设置 x-www-form-urlencoded 标头 |
encoding | utf8 | 序列化响应体时要使用的编码。支持以下编码: |
gzip | true | 是否接受gzip编码 |
headers | null | 要发送的额外请求头 |
qs | null | 把查询参数追加到url之后 |
retryOnStatusCodeFailure | false | 状态码错误是否自动重试。如果设置为true, Cypress将重试请求最多4次。 |
retryOnNetworkFailure | true | 网络问题引发的失败是否自动重试。如果设置为true, Cypress将重试请求最多4次 |
timeout | responseTimeout | 默认超时时间,可以 |
说明:cy.request()响应包含status,body,headers,duration四个属性。
2、GET请求
describe('接口测试', function() {
  it('https://example.cypress.io/commands/network-requests', function() {
   cy.visit('https://example.cypress.io/commands/network-requests')
    // 默认请求
    cy.request('https://jsonplaceholder.cypress.io/comments')
  })
})
说明:cy.request()与.as一起使用,用来断言接口返回值
describe('接口测试', function() {
  it('https://example.cypress.io/commands/network-requests', function() {
    cy.visit('https://example.cypress.io/commands/network-requests')
    cy.request('https://jsonplaceholder.cypress.io/comments').as('comments')
    cy.get('@comments').should((response) => {
    expect(response.body).to.have.length(500)
    expect(response).to.have.property('headers')
    expect(response).to.have.property('duration')
   })
  })
})
3、POST请求
describe('接口测试Post请求', function() {
  it('Post请求', function() {
    cy.request({
       method:'POST',
       url:'https://127.0.0.1:8080/api/login',
       failOnStatusCode:false,
       form:true,
       body:{
        'username':'mrjade',
        'password':'123456',
        }
     }).then((response)=>{
    expect(response.status).to.be.equal(200)
    expect(response.body).to.have.property('code', '10000')
   })
  })
})
4、鉴权
在测试某些接口的时候,必须登录后才可以操作,这就需要用到鉴权,使用cookie,即先通过登录在客户端保存cookie,这只是其中一种方式,其它方式后续会介绍。
describe('接口测试鉴权', function() {
 before(function(){
     cy.visit('https://127.0.0.1:8080/login')
     cy.viewport(1440,800)
     cy.get('[type="tel"]').type('mrjade')
     cy.get('[id="password"]').type('mrjade')
     cy.get('[type="submit"]').click()
     cy.url().should('include', '/dashboard')
     cy.getCookie('mrjade_ctoken').should('exist') //校验cookie是否存在
     cy.log('登录完成')

 })

  it('Get请求', function() {
     cy.request({
      method:'GET',
      url:'https://127.0.0.1:8080/api/templates',
      failOnStatusCode:false,
      form:true,
      body:{
    "id": "2072292",
    "type": "Book",
      }
    }).then((response)=>{
     expect(response.status).to.be.equal(200)
     expect(response.body).to.have.property('data')
    })
   })
})
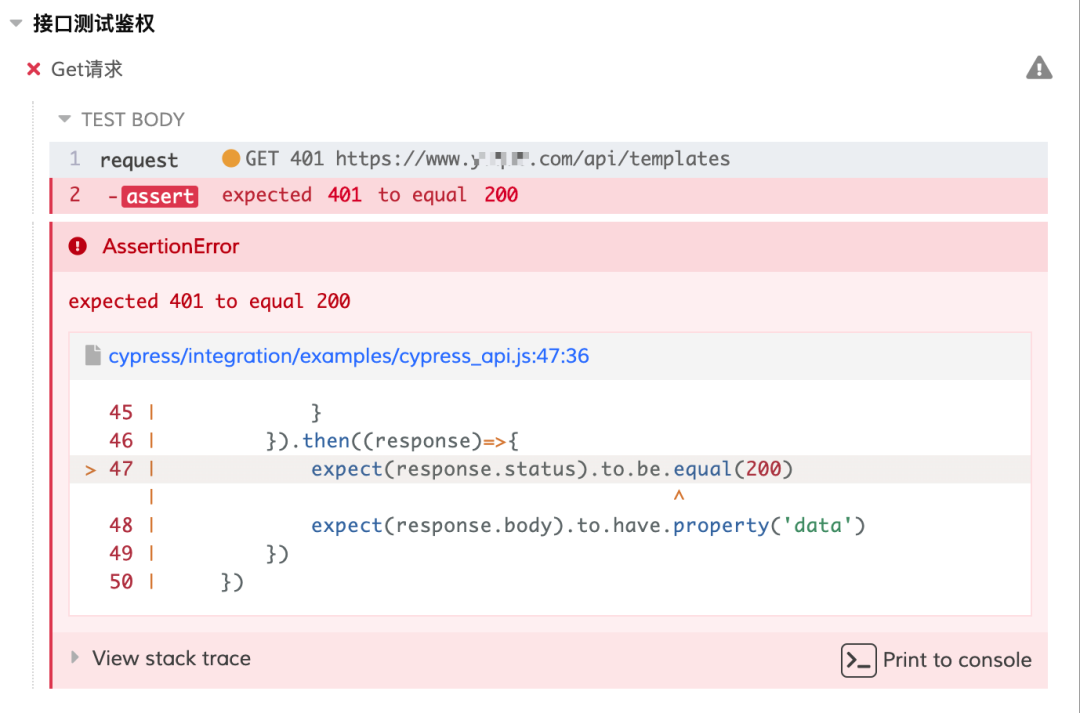
>>>>
未登录,使用查询模板接口
>>>>
已登录,使用查询模板接口

5、依赖接口测试
describe('依赖接口测试', function() {
   let responseBody // 定义接口返回结果为变量
   let responseToken // 定义token变量,供下游接口调用
   beforeEach(function(){
      cy.request({
         method:'POST',
         url:'https://127.0.0.1:8080/api/token',
         failOnStatusCode:false,
         form:false,
         body:{
            "username": "mrjade",
           "password": "123456",
         }
      }).then((response)=>{
         responseBody = response
         expect(response.status).to.be.equal(200)
         expect(response.body).to.have.property('code',200)
         responseToken = response.body.data.token
         cy.log(responseToken)
         // 获取token存放在localStorage中
         window.localStorage.setItem('Admin-Token',response.body.data.token)
         // window.localStorage.setItem('token',responseToken)
      })
   })
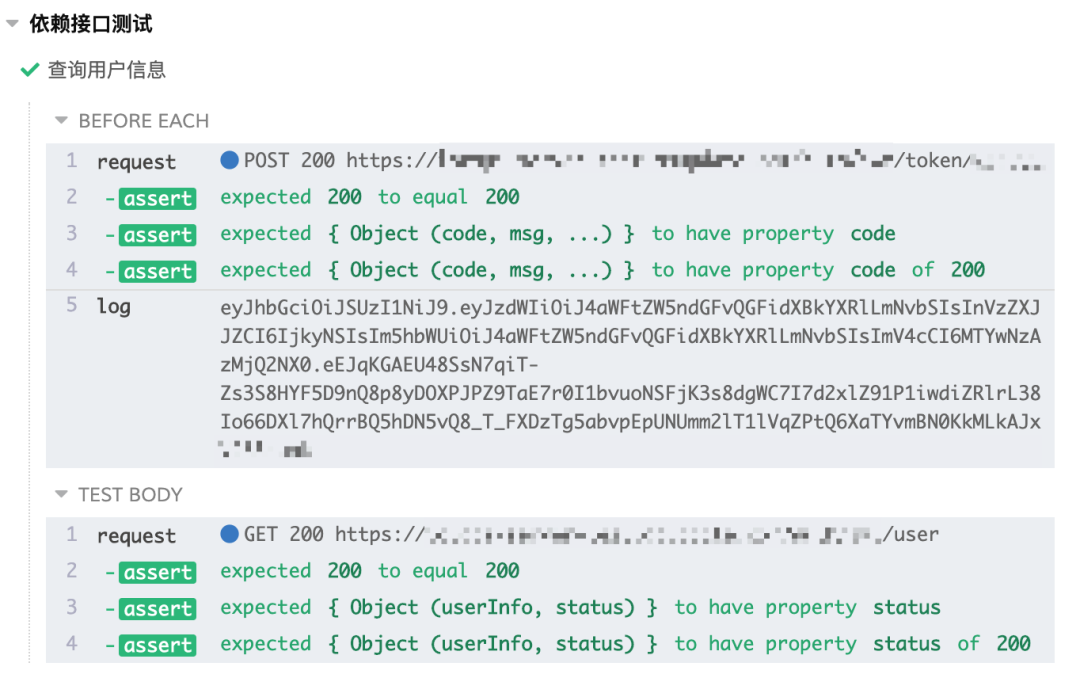
it('查询用户信息', function() {
   cy.request({
      method:'GET',
      url:' https://127.0.0.1:8080/api/user',
      failOnStatusCode:false,
      form:false,
      qs:{"token":responseToken},
    }).then((response)=>{
      expect(response.status).to.be.equal(200)
      expect(response.body).to.have.property('status',200)
    })
   })
})
>>>>
测试结果如下
6、带token的接口测试
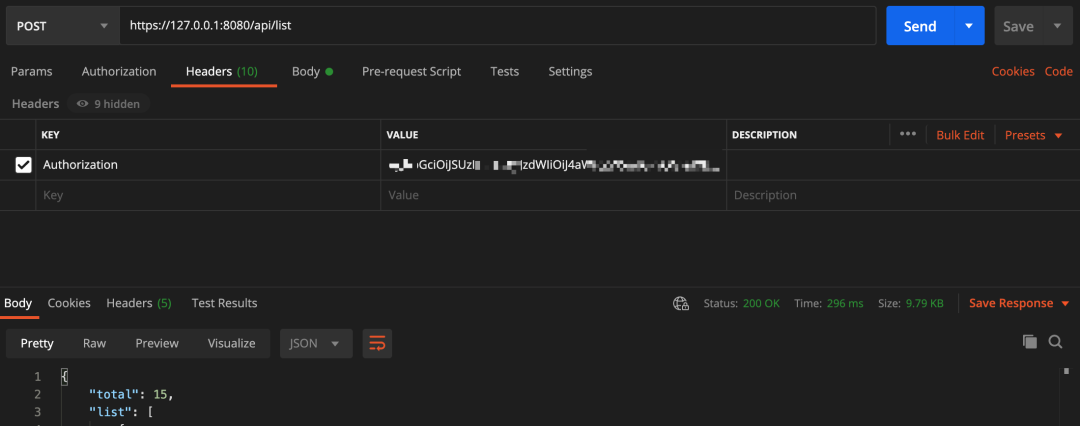
注意:在测某些接口时,需要获取上游接口返回的token供下游接口使用,与上面所讲接口不同的是,此接口需要将token放在headers中,如Postman中所示
// 调用获取token接口,从接口返回结果获取token,将token添加到headers中
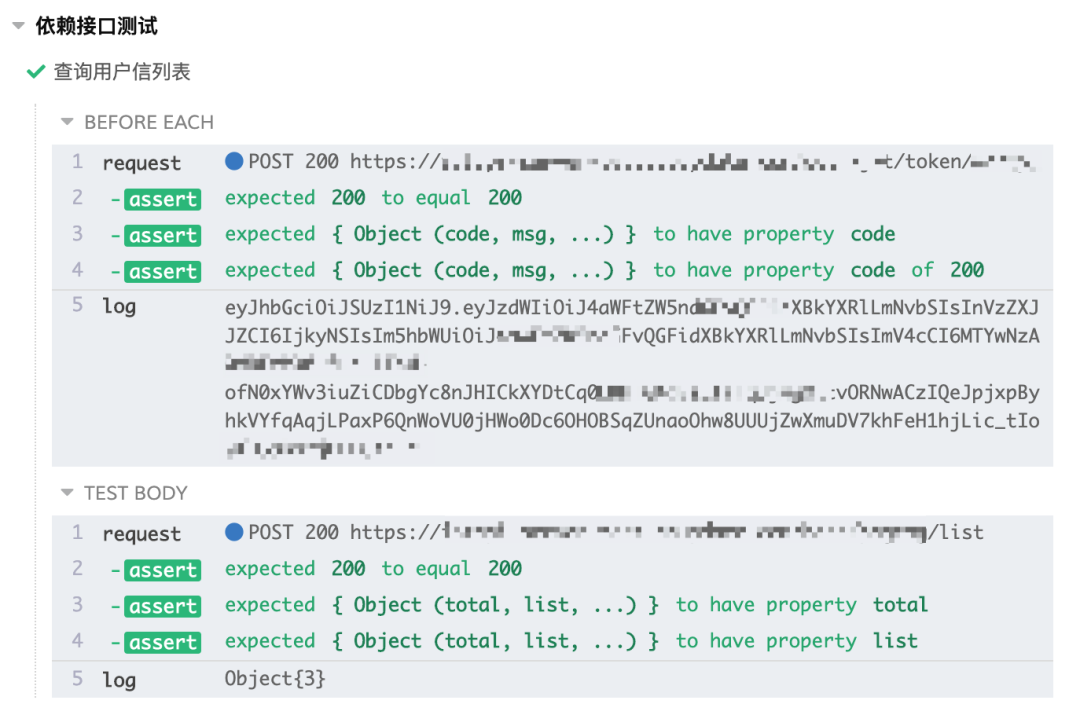
it('查询用户信列表', function() {
cy.request({
method:'POST',
url:'https://api-server-test.com/base/list',
headers:{"Authorization":responseToken},
form:false,
body:{
"pageNumber": 1,
"pageSize":0,
"imwStatus":3,
}
}).then((response)=>{
cy.log(response.body)
expect(response.status).to.be.equal(200)
expect(response.body).to.have.property('total')
expect(response.body).to.have.property('list')
})
})
>>>>
测试结果如下
推荐阅读


 1000
1000


 被折叠的 条评论
为什么被折叠?
被折叠的 条评论
为什么被折叠?
 到【灌水乐园】发言


