


spring中事件驱动开发
spring中是通过ApplicationListener及ApplicationEventMulticaster来进行事件驱动开发的,即实现观察者设计模式或发布-订阅模式。
ApplicationListener监听容器中发布的事件,只要事件发生,就触发监听器的回调,来完成事件驱动开发。属于观察者设计模式中的Observer对象。
ApplicationEventMulticaster用来通知所有的观察者对象,属于观察者设计模式中的Subject对象。
步骤:
1. 写一个监听器(ApplicationListener实现类)来监听某个事件(ApplicationEvent及其子类),监听器会在容器创建的第10步registerListeners()加入到容器中。
2. 在代码中合适的位置发布一个事件:
applicationContext.publishEvent();
//发布事件;
applicationContext.publishEvent(new ApplicationEvent(new String("我发布的事件")) {
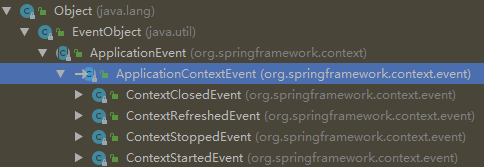
});3.我们就能监听到这个自定义事件;除自定义事件外,还有下面两个容器事件
ContextRefreshedEvent:容器刷新完成(所有bean都完全创建)会发布这个事件;
ContextClosedEvent:关闭容器会发布这个事件;
ApplicationEventMulticaster事件多播器创建
1. 容器创建对象:refresh();
2. spring容器创建第8步:initApplicationEventMulticaster();初始化ApplicationEventMulticaster;
// Initialize event multicaster for this context.

initApplicationEventMulticaster();
2.1 先去容器中找有没有id=“applicationEventMulticaster”的组件;
2.2如果没有,那就创建一个
this.applicationEventMulticaster = new SimpleApplicationEventMulticaster(beanFactory);
SimpleApplicationEventMulticaster类图

并且加入到容器中
在AbstractApplicationEventMulticaster中维护了一个Set
public final Set<ApplicationListener<?>> applicationListeners;在第10步 registerListener的时候,将系统中的ApplicationListener添加到这个set中
我们就可以在其他组件要派发事件,自动注入这个applicationEventMulticaster;
我们可以提前注入一个applicationEventMulticaster并指定多个executor
ApplicationListener监听器注册流程
在spring容器创建的第8步 initApplicationEventMulticaster()中
在AbstractApplicationEventMulticaster中维护了一个Set
public final Set<ApplicationListener<?>> applicationListeners;
在spring容器创建的第10步 registerListeners()中
// Check for listener beans and register them.

registerListeners();
从容器中拿到所有的监听器,把他们注册到applicationEventMulticaster中;
for (String listenerBeanName : listenerBeanNames) {

   getApplicationEventMulticaster().addApplicationListenerBean(listenerBeanName);

}
之后只要通过multicaster广播的事件,会foreach这个set,于是各个ApplicationListener就可以监听到事件了
创建listener的方式
public interface ApplicationListener<E extends ApplicationEvent>
监听 ApplicationEvent 及其下面的子事件;
方式1:编程实现ApplicationListener接口
方式2:使用@EventListener注解
@EventListener与SmartInitializingSingleton
@EventListener
原理:使用EventListenerMethodProcessor处理器来解析方法上的@EventListener;
Register {@link EventListener} annotated method as individual {@link ApplicationListener}
instances.
这个处理器的作用就是把@EventListener注解的方法注册为一个ApplicationListener的instance
EventListenerMethodProcessor的类图

其获取@EventListener注解的方法
org.springframework.context.event.EventListenerMethodProcessor#processBean
try {

   annotatedMethods = MethodIntrospector.selectMethods(targetType,

         new MethodIntrospector.MetadataLookup<EventListener>() {

            @Override

            public EventListener inspect(Method method) {

               return AnnotatedElementUtils.findMergedAnnotation(method, EventListener.class);

            }

         });

}
SmartInitializingSingleton 原理:->afterSingletonsInstantiated();
1. ioc容器创建对象并refresh();
2. finishBeanFactoryInitialization(beanFactory);初始化剩下的单实例bean(在spring aop中有看到)
2.1 先创建所有的单实例bean;getBean();
org.springframework.beans.factory.support.DefaultListableBeanFactory#preInstantiateSingletons
// Trigger post-initialization callback for all applicable beans...

for (String beanName : beanNames) {

   Object singletonInstance = getSingleton(beanName);

   if (singletonInstance instanceof SmartInitializingSingleton) {

      final SmartInitializingSingleton smartSingleton = (SmartInitializingSingleton) singletonInstance;

      if (System.getSecurityManager() != null) {

         AccessController.doPrivileged(new PrivilegedAction<Object>() {

            @Override

            public Object run() {

               smartSingleton.afterSingletonsInstantiated();

               return null;

            }

         }, getAccessControlContext());

      }

      else {

         smartSingleton.afterSingletonsInstantiated();

      }

   }

}
触发所有适用bean的后初始化回调...
2.2 获取所有创建好的单实例bean,判断是否是SmartInitializingSingleton类型的;
如果是就调用afterSingletonsInstantiated();
流程图:

之后创建spring容器和初始化bean的refresh方法继续向下,执行finishRefresh方法
之后就回到上面的ApplicationListener这块,通过事件多播器发布事件
事件发布流程
举例来说,现在有三个事件
ContextRefreshedEvent、IOCTest_Ext$1[source=我发布的事件]、ContextClosedEvent;
1. ContextRefreshedEvent事件:
1.1 容器创建对象:refresh();
1.2 在spring容器创建的最后一步finishRefresh(); 完成后 会发布ContextRefreshedEvent事件
// Last step: publish corresponding event.

finishRefresh();
2. 自己发布事件;
3. 容器关闭会发布ContextClosedEvent;
后两个事件也会像经过下面的处理过程
以发布ContextRefreshedEvent事件为例
publishEvent(new ContextRefreshedEvent(this));
1. 获取事件的多播器(派发器):getApplicationEventMulticaster()
getApplicationEventMulticaster().multicastEvent(applicationEvent, eventType);
2. multicastEvent派发事件:
3. 获取到所有的ApplicationListener;
for (final ApplicationListener<?> listener : getApplicationListeners(event, type)) {

   Executor executor = getTaskExecutor();

   if (executor != null) {

      executor.execute(new Runnable() {

         @Override

         public void run() {

            invokeListener(listener, event);

         }

      });

   }

   else {

      invokeListener(listener, event);

   }

}
for (final ApplicationListener<?> listener : getApplicationListeners(event, type)) {
3.1 如果有Executor,可以支持使用Executor进行异步派发;
Executor executor = getTaskExecutor();
3.2 否则,同步的方式直接执行listener方法;invokeListener(listener, event);
拿到listener回调onApplicationEvent方法;
流程图

这样就完成了ContextRefreshedEvent事件的发布和订阅


 1123
1123


 被折叠的 条评论
为什么被折叠?
被折叠的 条评论
为什么被折叠?
 到【灌水乐园】发言


