


简单搭建需要6部:
- 引用三个程序包:Prism.Core、Prism.Wpf、Prism.Unity
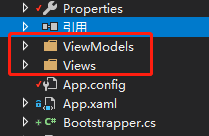
- 添加两个文件夹(完全一致):Views、ViewModels
- 在项目中添加Bootstrapper.cs类
//作用:初始化prism,做依赖注入等操作 class Bootstrapper : UnityBootstrapper { protected override DependencyObject CreateShell() { return Container.TryResolve<MainWindow>(); } protected override void InitializeShell() { Application.Current.MainWindow.Show(); } } - 在项目App.xaml的类文件App.xaml.cs中初始化Bootstrapper
/// <summary> /// App.xaml 的交互逻辑 /// </summary> public partial class App : Application { protected override void OnStartup(StartupEventArgs e) { base.OnStartup(e); Bootstrapper boot = new Bootstrapper(); boot.Run(); } } - 添加对应的View
<UserControl x:Class="ModuleA.Views.MessageView" xmlns="http://schemas.microsoft.com/winfx/2006/xaml/presentation" xmlns:x="http://schemas.microsoft.com/winfx/2006/xaml" xmlns:prism="http://prismlibrary.com/" prism:ViewModelLocator.AutoWireViewModel="True" Padding="25"> <StackPanel> <TextBox Text="{Binding Message}" Margin="5"/> <Button Command="{Binding SendMessageCommand}" Content="Send Message" Margin="5"/> </StackPanel> </UserControl> ========================================= xaml中必须有下边两句 xmlns:prism="http://prismlibrary.com/" prism:ViewModelLocator.AutoWireViewModel="True" - 添加对应的Model
//要继承BindableBase
public class MessageViewModel : BindableBase
{
    IEventAggregator _ea;

    private string _message = "Message to Send";
    public string Message
    {
        get { return _message; }
        set { SetProperty(ref _message, value); }
    }

    public DelegateCommand SendMessageCommand { get; private set; }
	//Prism中使用Bootstrapper运行后,此句话才能被执行到,即要有上方的3、4两步
    public MessageViewModel(IEventAggregator ea)
    {
        _ea = ea;
        SendMessageCommand = new DelegateCommand(SendMessage);
    }

    private void SendMessage()
    {
        _ea.GetEvent<MessageSentEvent>().Publish(Message);
    }
}


 216
216


 被折叠的 条评论
为什么被折叠?
被折叠的 条评论
为什么被折叠?
 到【灌水乐园】发言


