


一.属性赋值
1.@Value
1、基本数值
2、可以写SpEL; #{}
3、可以写${};取出配置文件【properties】中的值(在运行环境变量里面的值)
这样可以给Person类的属性赋默认值
public class Person {

	@Value("张三")
	private String name;
	@Value("#{20-2}")
	private Integer age;

	@Value("${person.nickName}")
	private String nickName;
}
给方法参数赋值
	@Bean("testDataSource")
	public DataSource dataSourceTest(@Value("${db.password}")String pwd) throws Exception{
		ComboPooledDataSource dataSource = new ComboPooledDataSource();
		dataSource.setUser(user);
		dataSource.setPassword(pwd);
		dataSource.setJdbcUrl("jdbc:mysql://localhost:3306/test");
		dataSource.setDriverClass(driverClass);
		return dataSource;
	}
2.@PropertySource
使用@PropertySource读取外部配置文件中的k/v保存到运行的环境变量中;加载完外部的配置文件以后使用${}取出配置文件的值。
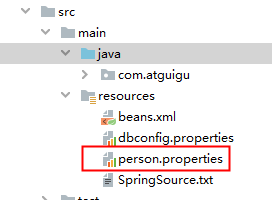
@PropertySource(value={"classpath:/person.properties"})
@Configuration
public class MainConfigOfPropertyValues {

	@Bean
	public Person person(){
		return new Person();
	}

}
属性value是数组,可以写多个配置文件。指定 类路径classpath下文件或文件file下路径。
@Target(ElementType.TYPE)
@Retention(RetentionPolicy.RUNTIME)
@Documented
@Repeatable(PropertySources.class)
public @interface PropertySource {
/**
* Indicate the resource location(s) of the properties file to be loaded.
* For example, {@code "classpath:/com/myco/app.properties"} or
* {@code "file:/path/to/file"}.
* <p>Resource location wildcards (e.g. **/*.properties) are not permitted;
* each location must evaluate to exactly one {@code .properties} resource.
* <p>${...} placeholders will be resolved against any/all property sources already
* registered with the {@code Environment}. See {@linkplain PropertySource above}
* for examples.
* <p>Each location will be added to the enclosing {@code Environment} as its own
* property source, and in the order declared.
*/
String[] value();测试:
通过ConfigurableEnvironment environment = applicationContext.getEnvironment(); 也可以获取到配置的环境变量。
public class IOCTest_PropertyValue {
	AnnotationConfigApplicationContext applicationContext = new AnnotationConfigApplicationContext(MainConfigOfPropertyValues.class);
	@Test
	public void test01(){
		printBeans(applicationContext);
		System.out.println("=============");

		Person person = (Person) applicationContext.getBean("person");
		System.out.println(person);


		ConfigurableEnvironment environment = applicationContext.getEnvironment();
		String property = environment.getProperty("person.nickName");
		System.out.println(property);
		applicationContext.close();
	}
3.@PropertySources
可以指定多个 @PropertySource
二.自动装配
自动装配;
Spring利用依赖注入(DI),完成对IOC容器中中各个组件的依赖关系赋值
1、@Autowired:自动注入:
1)、默认优先按照类型去容器中找对应的组件:applicationContext.getBean(BookDao.class);找到就赋值
2)、如果找到多个相同类型的组件,再将属性的名称(被装配的字段属性名)作为组件的id去容器中查找
applicationContext.getBean("bookDao")
3)、@Qualifier("bookDao"):使用@Qualifier指定需要装配的组件的id,而不是使用属性名
4)、自动装配默认一定要将属性赋值好,没有就会报错;
可以使用@Autowired(required=false);
5)、@Primary:让Spring进行自动装配的时候,默认使用首选的bean;
也可以继续使用@Qualifier指定需要装配的bean的名字
下面的例子中,会找到两个类型为BookDao的实例,但会根据BookService 的属性bookDao2 优先注入 id为bookDao2 的实例。
@Service
public class BookService {

	//@Qualifier("bookDao")
	@Autowired(required=false)
	private BookDao bookDao2;
@Bean("bookDao2")
public BookDao bookDao(){
BookDao bookDao = new BookDao();
bookDao.setLable("2");
return bookDao;
}
@Bean
public BookDao bookDao(){
BookDao bookDao = new BookDao();
bookDao.setLable("1");
return bookDao;
}
2.Spring还支持使用@Resource(JSR250)和@Inject(JSR330)[java规范的注解]
@Resource:
可以和@Autowired一样实现自动装配功能;默认是按照组件名称进行装配的;
可以手动写明name属性 指定实例id注入。
没有能支持@Primary功能没有支持@Autowired(reqiured=false);
@Service
public class BookService {

	//@Qualifier("bookDao")
	//@Autowired(required=false)
	@Resource(name="bookDao2")
	private BookDao bookDao;
@Inject:
需要导入javax.inject的包,和Autowired的功能一样,支持@Primary。没有required=false的功能;
@Autowired:Spring定义的; @Resource、@Inject都是java规范
AutowiredAnnotationBeanPostProcessor:解析完成自动装配功能;
3.@Autowired的使用位置:
构造器,参数,方法,属性;都是从容器中获取参数组件的值。
*      1)、[标注在方法位置]:@Bean+方法参数;参数从容器中获取;默认不写@Autowired效果是一样的;都能自动装配
*     2)、[标在构造器上]:如果组件只有一个有参构造器,这个有参构造器的@Autowired可以省略,参数位置的组件还是可以自动从容器中获取
*     3)、放在参数位置:
set方法参数:
//默认加在ioc容器中的组件,容器启动会调用无参构造器创建对象,再进行初始化赋值等操作
@Component
public class Boss {


	private Car car;

	@Autowired
	//标注在方法,Spring容器创建当前对象,就会调用方法,完成赋值;
	//方法使用的参数,自定义类型的值从ioc容器中获取
	public void setCar(Car car) {
		this.car = car;
	}
有参构造器:参数car就会从容器中取
@Component
public class Boss {


	private Car car;

	//构造器要用的组件,都是从容器中获取
        @Autowired
	public Boss(Car car){
		this.car = car;
		System.out.println("Boss...有参构造器");
	}
构造器参数上:不管怎么放,都是从IOC容器中获取实例
@Component
public class Boss {


	private Car car;

	//构造器要用的组件,都是从容器中获取
	public Boss(@Autowired Car car){
		this.car = car;
		System.out.println("Boss...有参构造器");
	}
如果类只有一个有参构造器,容器只能使用这个构造器去构建对象,甚至不用使用@Autowired 就可以自动注入:
@Component
public class Boss {


	private Car car;

	//构造器要用的组件,都是从容器中获取
	public Boss(Car car){
		this.car = car;
		System.out.println("Boss...有参构造器");
	}
4.@Bean 标注在方法上,创建对象时 参数从IOC容器中获取。
public class Color {

	private Car car;

	public Car getCar() {
		return car;
	}

	public void setCar(Car car) {
		this.car = car;
	}
Color 用@Bean注入, 其属下Car 依然是从容器中自动寻找。
	@Bean
	public Color color(Car car){
		Color color = new Color();
		color.setCar(car);
		return color;
	}
5.自定义组件想要使用Spring容器底层的一些组件
自定义组件实现xxxAware;
比如ApplicationContextAware 可以将容器上下文注入;
比如BeanNameAware 可以获得实例bean的名字;
比如EmbeddedValueResolverAware,可以获得spring的值解析器,可以获取配置文件参数。
测试:
@Component
public class Red implements ApplicationContextAware,BeanNameAware,EmbeddedValueResolverAware {

	private ApplicationContext applicationContext;

	@Override
	public void setApplicationContext(ApplicationContext applicationContext) throws BeansException {
		// TODO Auto-generated method stub
		System.out.println("传入的ioc:"+applicationContext);
		this.applicationContext = applicationContext;
	}

	@Override
	public void setBeanName(String name) {
		// TODO Auto-generated method stub
		System.out.println("当前bean的名字:"+name);
	}

	@Override
	public void setEmbeddedValueResolver(StringValueResolver resolver) {
		// 解析配置文件变量
		String resolveStringValue = resolver.resolveStringValue("你好 ${os.name} 我是 #{20*18}");
		System.out.println("解析的字符串:"+resolveStringValue);
	}

}
	@Test
	public void test01(){
		AnnotationConfigApplicationContext applicationContext = new AnnotationConfigApplicationContext(MainConifgOfAutowired.class);
}
ApplicationContextAware 得到的applicationContext 就是上面单元测试 构造的applicationContext。

每个XXXAware ,都有对应的XXXAwareProcessor,其实现了 BeanPostProcessor,成为后置处理器。
比如 ApplicationContextAware ===》ApplicationContextAwareProcessor。
后置处理器 postProcessBeforeInitialization 方法中,调用了invokeAwareInterfaces 方法,判断了 当前bean是否实现了各Aware接口,如果实现了对应接口,就会将对应的spring 底层组件 设置进bean。
class ApplicationContextAwareProcessor implements BeanPostProcessor {

	private final ConfigurableApplicationContext applicationContext;

	private final StringValueResolver embeddedValueResolver;


	/**
	 * Create a new ApplicationContextAwareProcessor for the given context.
	 */
	public ApplicationContextAwareProcessor(ConfigurableApplicationContext applicationContext) {
		this.applicationContext = applicationContext;
		this.embeddedValueResolver = new EmbeddedValueResolver(applicationContext.getBeanFactory());
	}


	@Override
	public Object postProcessBeforeInitialization(final Object bean, String beanName) throws BeansException {
		AccessControlContext acc = null;

		if (System.getSecurityManager() != null &&
				(bean instanceof EnvironmentAware || bean instanceof EmbeddedValueResolverAware ||
						bean instanceof ResourceLoaderAware || bean instanceof ApplicationEventPublisherAware ||
						bean instanceof MessageSourceAware || bean instanceof ApplicationContextAware)) {
			acc = this.applicationContext.getBeanFactory().getAccessControlContext();
		}

		if (acc != null) {
			AccessController.doPrivileged(new PrivilegedAction<Object>() {
				@Override
				public Object run() {
					invokeAwareInterfaces(bean);
					return null;
				}
			}, acc);
		}
		else {
			invokeAwareInterfaces(bean);
		}

		return bean;
	}

	private void invokeAwareInterfaces(Object bean) {
		if (bean instanceof Aware) {
			if (bean instanceof EnvironmentAware) {
				((EnvironmentAware) bean).setEnvironment(this.applicationContext.getEnvironment());
			}
			if (bean instanceof EmbeddedValueResolverAware) {
				((EmbeddedValueResolverAware) bean).setEmbeddedValueResolver(this.embeddedValueResolver);
			}
			if (bean instanceof ResourceLoaderAware) {
				((ResourceLoaderAware) bean).setResourceLoader(this.applicationContext);
			}
			if (bean instanceof ApplicationEventPublisherAware) {
				((ApplicationEventPublisherAware) bean).setApplicationEventPublisher(this.applicationContext);
			}
			if (bean instanceof MessageSourceAware) {
				((MessageSourceAware) bean).setMessageSource(this.applicationContext);
			}
			if (bean instanceof ApplicationContextAware) {
				((ApplicationContextAware) bean).setApplicationContext(this.applicationContext);
			}
		}
	}


 109
109


 被折叠的 条评论
为什么被折叠?
被折叠的 条评论
为什么被折叠?
 到【灌水乐园】发言


