


gitlab中文社区的教程 https://www.gitlab.com.cn/downloads/
GitLab中文文档 https://docs.gitlab.com.cn/omnibus/
一、安装配置依赖项
如想使用Postfix来发送邮件,在安装期间请选择’Internet Site’. 您也可以用sendmai或者 配置SMTP服务 并 使用SMTP发送邮件.
在 Centos7 系统上, 下面的命令将在系统防火墙里面开放HTTP和SSH端口.
- 1
- 2
- 3
- 4
- 5
- 6
- 7
- 8
- 1
- 2
- 3
- 4
- 5
- 6
- 7
- 8
二、添加GitLab仓库,并安装到服务器上
[root@Linux-node3 ~]# curl -sS http://packages.gitlab.cc/install/gitlab-ce/script.rpm.sh | sudo bash
[root@linux-node3 ~]# yum -y install gitlab-ce
如果不习惯使用命令管道的安装方式, 你可以在这里下载 安装脚本 或者 手动下载您使用的系统相应的安装包(RPM/Deb) 然后安装
- 1
- 2
- 3
- 1
- 2
- 3
三、启动GitLab
- 1
- 1
注意事项以及异常故障排查
①按照该方式,我安装了一个确实没问题,只不过是英文版。没有经过汉化。
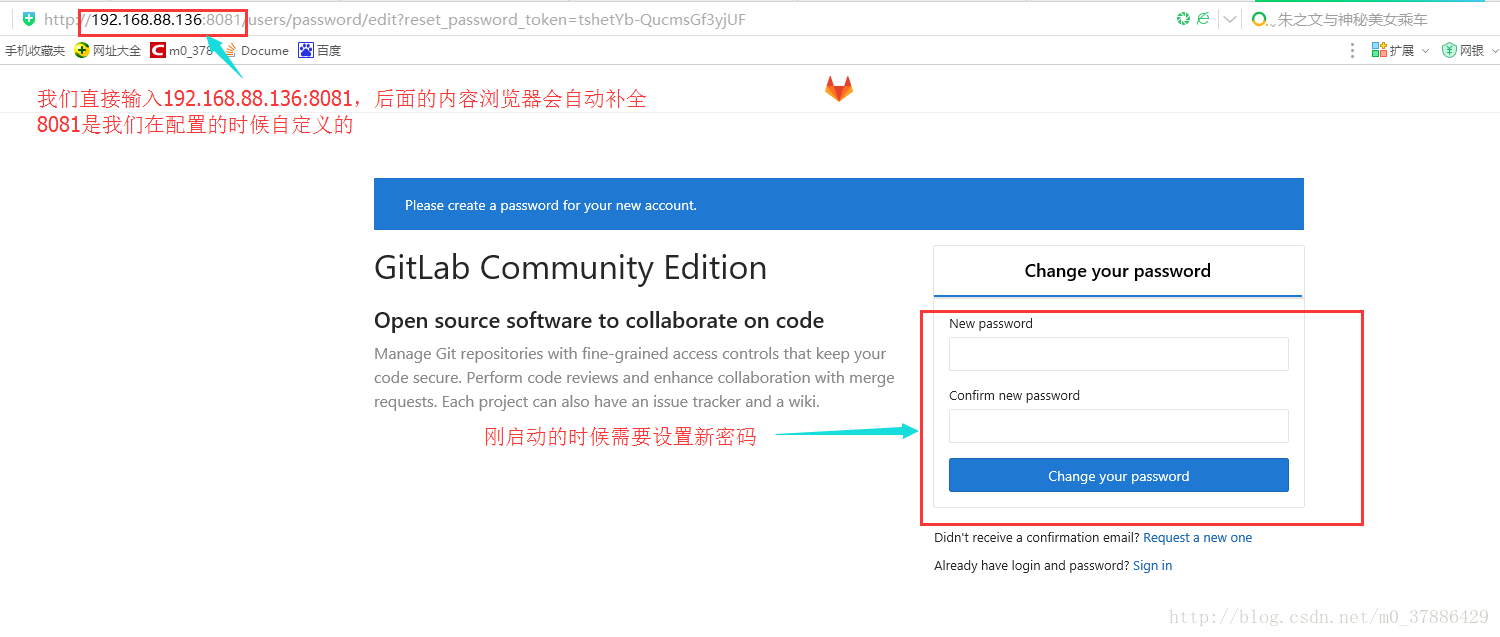
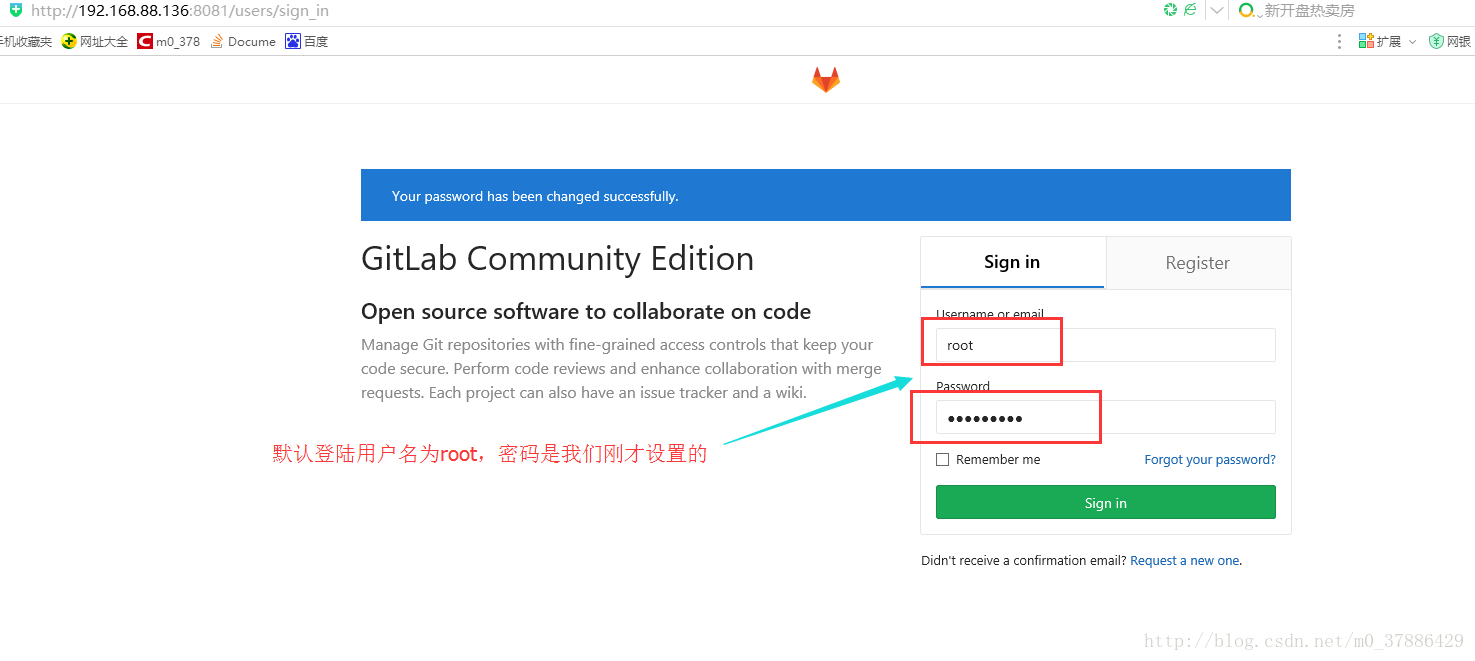
②默认安装登录需要重置root密码。可以自己单独设置一个复杂密码后登录。
③gitlab本身采用80端口,如安装前服务器有启用80,安装完访问会报错。需更改gitlab的默认端口。
- 1
- 2
- 1
- 2
④unicorn本身采用8080端口,如安装前服务器有启用8080,安装完访问会报错。需更改unicorn的默认端口。
- 1
- 2
- 3
- 1
- 2
- 3

⑤每次重新配置,都需要执行 gitlab-ctl reconfigure 使之生效。
⑥日志位置:/var/log/gitlab 可以进去查看访问日志以及报错日志等,供访问查看以及异常排查。
- 1
- 2
- 1
- 2
四、gitlab中文汉化【如不清楚gitlab版本以及Git,请不要操作,否则gitlab瘫痪】
1、下载汉化包
- 1
- 2
- 3
- 1
- 2
- 3
2、停止当前gitlab
- 1
- 2
- 1
- 2
其中有两个提示我们可以忽略:
- 1
- 2
- 1
- 2
3、日常管理
- 1
- 1


 6399
6399

 被折叠的 条评论
为什么被折叠?
被折叠的 条评论
为什么被折叠?
 到【灌水乐园】发言


