


1.什么是spring
spring 是分层的JavaSE/EE轻量级应用开源框架,已控制反转IOC和面向切面编程AOP为核心,提供了展现层SpringMVC,和持久层Srping JDBC以及事务管理等。
spring是一个开源框架,为了解决企业应用开发的复杂性而创建的,但现在不止应用于企业应用。
同时是一个轻量级的控制反转ioc和面向切面编程的容器框架
轻量:从大小与开销对于spring都是轻量的
通过控制反转ioc的技术达到松耦合
提供面向切面编程的丰富支持,允许通过分离应用的业务逻辑与系统服务进行内聚性的开发
包含并管理应用对象的配置和生命周期,这个意义是容器
将简单的组件配置组合成复杂的应用,这个意义是框架
框架:框架就是定制一套规范或者规则(思想),大家在该规范或思想下进行工作,或者说
使用别人打好的舞台,你来做表演
框架于类库的区别
框架一般是封装了逻辑的,高内聚的,类库则是松散的工具集合
框架一般似乎专注于某一领域,类库则是更通用的
spring带来了复杂的JavaEE的春天
2.特点
方便解耦,简化开发spring提供ioc容器,可以将对象之间的依赖关系交给spring控制,避免硬编码所造成的过度程序耦合。
AOP编程支持
通过spring提供的aop功能,用户可以轻松的进行面向切面编程
声明事务的支持
用户可以通过spring来管理事务,提升开发效率
方便程序的测试
可以使用非容器的依赖的编程方式进行几乎所有的测试工作,在spring中,测试不再是
昂贵的操作,而是随手可做的事
方便集成各种优秀的框架
spring不排斥各种优秀的框架,相反spring可以降低各种框架的使用难度。如可以集成(struts、Hibernate)
降低JavaEE API的使用难度
如JDBC、JavaMail、远程调用等
spring源码设计精妙、结构清晰,研究源码可以快速提升Java技术水平和开发应用水平
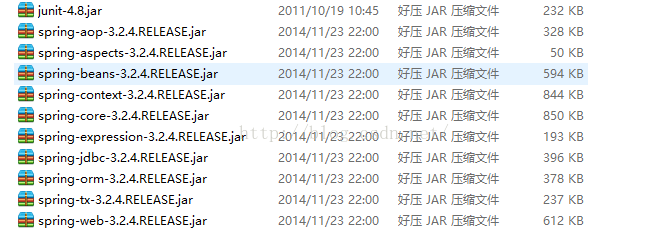
3.案例中使用的jar
4.直入主题IOC
4.1小案例
将对象的依赖交给配置文件来配置(配置文件的名字是可以任意的,不过一般写一个比较规范的名字),这里使用IOC特性对类中的属性进行初始化
使用junit来进行测试单元测试(注意:单元测试一些老的版本可能会存在bug,如calssNotFound...,建议下载新的junit版本)
User.java 用户bean类
package com.xxx.spring.ioc.bean;

import java.io.Serializable;

public class User implements Serializable {
	private static final long serialVersionUID = 1L;
	private int id; //用户编号
	private String name; //用户名
	private int age; //用户年龄
	private String gender; //用户性别

	public User() {}

	public User(int id, String name, int age, String gender) {
		super();
		this.id = id;
		this.name = name;
		this.age = age;
		this.gender = gender;
	}

	public int getId() {
		return id;
	}

	public void setId(int id) {
		this.id = id;
	}

	public String getName() {
		return name;
	}

	public void setName(String name) {
		this.name = name;
	}

	public int getAge() {
		return age;
	}

	public void setAge(int age) {
		this.age = age;
	}

	public String getGender() {
		return gender;
	}

	public void setGender(String gender) {
		this.gender = gender;
	}

	@Override
	public String toString() {
		return "User [id=" + id + ", name=" + name + ", age=" + age
				+ ", gender=" + gender + "]";
	}

}
Spring中bean的配置:
这里说的Spring中的Bean概念,跟我们写JavaBean类不是一个概念,Spring中所有配置在xml中或使用spring来初始化的都叫Bean(dao,service,javaBean,Controller...)
IOC控制反转,控制权的转移,应用程序本身不负责依赖对象的创建和维护,而是有外部容器的创建和维护
(就像我们需要房子,不是自己去画图纸,建房子而是去请开发商去做,或房屋中介住房)
什么被反转了呢——————》获的对象的过程被反转了,依赖注入
set.xml配置文件初始化User.java中的相关属性,可以使用junit对其进行单元测试
<?xml version="1.0" encoding="UTF-8"?>
<beans xmlns="http://www.springframework.org/schema/beans"
xmlns:xsi="http://www.w3.org/2001/XMLSchema-instance"
xsi:schemaLocation="http://www.springframework.org/schema/beans
http://www.springframework.org/schema/beans/spring-beans-3.2.xsd">
<!-- name中的user可以取别名    scope="prototype" 或singleton="false"可以设置为非单例模式 -->
	<bean name="user,user2" class="com.xxx.spring.ioc.bean.User">
		<property name="id" value="1"/>
		<property name="name" value="tom"/>
		<property name="age" value="20"/>
		<property name="gender" value="male"/>
	</bean>

</beans>
测试:
import org.junit.AfterClass;
import org.junit.BeforeClass;
import org.junit.Test;
import org.springframework.beans.factory.BeanFactory;
import org.springframework.beans.factory.xml.XmlBeanFactory;
import org.springframework.context.ApplicationContext;
import org.springframework.context.support.ClassPathXmlApplicationContext;
import org.springframework.context.support.FileSystemXmlApplicationContext;
import org.springframework.core.io.ClassPathResource;

import com.briup.spring.aop.bean.AwareTest;
import com.briup.spring.ioc.UserService;
import com.briup.spring.ioc.bean.Car;
import com.briup.spring.ioc.bean.Coll;
import com.briup.spring.ioc.bean.Life;
import com.briup.spring.ioc.bean.Student;
import com.briup.spring.ioc.bean.Teacher;
import com.briup.spring.ioc.bean.User;


public class SpringTest {

	@BeforeClass
	public static void setUpBeforeClass() throws Exception {
		System.out.println("BeforeClass 标注的方法 会最先先被执行");
	}

	@AfterClass
	public static void tearDownAfterClass() throws Exception {
		System.out.println("AfterClass 标注的方法 会最后执行");
	}

	@Test
	public void test() {
		System.out.println("test");
		//路经比较特殊
		BeanFactory factory = new ClassPathXmlApplicationContext("com/xx/spring/chap1/ioc.xml");
		UserService service = (UserService) factory.getBean("service");
		service.getUserDao().save();
	}
	@Test
	public void test2() {
		BeanFactory factory = new ClassPathXmlApplicationContext("com/xxx/spring/chap1/set.xml");
		//User user = (User) factory.getBean("user");
		//User user = (User) factory.getBean("user",User.class);
		//User user = (User) factory.getBean(User.class); //只有唯一的bean的时候才使用这种方式
		//System.out.println(user);
		System.out.println(factory.getType("user")); //获取user实例的类型
		User user = (User) factory.getBean("user");
		User user2 = (User) factory.getBean("user");
		System.out.println(user == user2);//true -- 单例  --这是可以控制的在配置文件中 bean scope="prototype"-->会变成原型模式 这时结果会是false
		System.out.println(factory.isPrototype("user"));//是否为原型     false
		System.out.println(factory.isSingleton("user"));//是否为单例     true

		System.out.println(factory.isTypeMatch("user", User.class));//判断 user实例是否为这种类型 true

		String[] str = factory.getAliases("user"); //获取别名
		for(int i=0;i<str.length;i++){
			System.out.println(str[i]);//user2
		}
	}
}
上边的案例factory.getBean("user",User.class);第一参数是set.xml文件中对应bean的name值或id值.
System.out.println(user == user2);//true 4.2Bean容器的初始化
Bean容器的初始化
两个基础包:
org.springframework.beans
org.springframework.context
BeanFactory提供配置结构和基本功能,加载并初始化Bean
ApplicationContext保存了Bean对象并在spring中被广泛使用
集中常用的使用场景:
常用的文件初始化方式:
FileSystemXmlApplicationContext context = new FileSystemXmlApplicationContext("F:/workspace/appcontext.xml");
ApplicationContext ac = new ClassPathXmlApplicationContext("com/xxx/spring/chap1/coll.xml");
BeanFactory factory = new ClassPathXmlApplicationContext("com/xxxspring/chap1/ioc.xml");
在webapp中的我们一般配置到web.xml文件中
1.
       <!-- 配置contextConfigLocation指定spring将要使用的配置文件 -->
	<context-param>
		<param-name>contextConfigLocation</param-name>
		<param-value>classpath:action.xml,classpath:dao.xml,classpath:service.xml</param-value>
	</context-param>
	<!--  配置listner让spring读取配置文件-->
	<listener>
		<listener-class>org.springframework.web.context.ContextLoaderListener</listener-class>
	</listener>
2.load-on-startup标签指定启动顺序,1为指在启动服务器的时候初始化容器
      <listener>
         <listener-class>org.springframework.web.context.ContextLoaderListener</listener-class>
      </listener>

	<servlet>
		<servlet-name>remoting</servlet-name>
		<servlet-class>org.springframework.web.servlet.DispatcherServlet</servlet-class>
		<init-param>
			<param-name>contextConfigLocation</param-name>
			<param-value>classpath:spring-remoting-servlet.xml</param-value>
		</init-param>
		<load-on-startup>1</load-on-startup>
    </servlet>
4.3Bean的两种注入方式
a.设置值注入
b.构造注入
设置值注入案例:
基本类型的注入: 通过<property name="属性名", value="属性值/">为对应类对象初始化的值,这种方式必须在类中为对应的属性提供getxxx,setxx方法
<?xml version="1.0" encoding="UTF-8"?>
<beans xmlns="http://www.springframework.org/schema/beans"
xmlns:xsi="http://www.w3.org/2001/XMLSchema-instance"
xsi:schemaLocation="http://www.springframework.org/schema/beans
http://www.springframework.org/schema/beans/spring-beans-3.2.xsd">
	<bean name="user,user2" class="com.xxx.spring.ioc.bean.User">
		<property name="id" value="1"/>
		<property name="name" value="tom"/>
		<property name="age" value="20"/>
		<property name="gender" value="male"/>
	</bean>
</beans>
引用类型的注入:<property name="属性名" ref="引用的bean"></property>,被引入的bean和引入处可以不在同一个xml文件中,因为所有bean都会被
容器初始化并保存到容器中
<?xml version="1.0" encoding="UTF-8"?>
<beans xmlns="http://www.springframework.org/schema/beans"
xmlns:xsi="http://www.w3.org/2001/XMLSchema-instance"
xsi:schemaLocation="http://www.springframework.org/schema/beans
http://www.springframework.org/schema/beans/spring-beans-3.2.xsd">
	<bean name="memberService" class="com.xxx.run.service.impl.IMemberServiceImpl">
		<property name="memberDao" ref="memberDao"></property>
	</bean>
		<bean name="memberDao" class="com.xxx.run.dao.impl.IMemberDaoImpl">
	</bean>
</beans>
构造注入
顾名思义,使用构造器对对象的初始化注入对应的值,实现方式有如下3种
<?xml version="1.0" encoding="UTF-8"?>
<beans xmlns="http://www.springframework.org/schema/beans"
xmlns:xsi="http://www.w3.org/2001/XMLSchema-instance"
xsi:schemaLocation="http://www.springframework.org/schema/beans
http://www.springframework.org/schema/beans/spring-beans-3.2.xsd">
	<bean name="teacher" class="com.xxx.spring.ioc.bean.Teacher">
		<!--  1.按照属性名赋值 ,调用有参数的构造器,顺序是参数顺序-->
		<constructor-arg name="id" value="1"/> <!-- person(int id,String name, String gender) -->
		<constructor-arg name="name" value="tom"/>
		<constructor-arg name="gender" value="male"/>
		<!-- 2.index从0开始,按照属性在构造器中出现的顺序赋值 索引值是构造器中的属性顺序 -->
		<!-- <constructor-arg index="0" value="2"/>
		<constructor-arg index="1" value="jack"/>
		<constructor-arg index="2" value="male"/> -->
		<!-- 3.按照类型进行赋值,如果出现相同的类型,按照属性在构造器中出现的顺序进行复制 -->
	<!-- 	<constructor-arg type="int" value="3"/>
		<constructor-arg type="String" value="rose"/>
		<constructor-arg type="String" value="female"/> -->
	</bean>
</beans>
Teacher.java
public class Teacher implements Serializable{
	private static final long serialVersionUID = 1L;
	private int id;
	private String name;
	private String gender;

	public Teacher(int id, String name, String gender) {
		super();
		this.id = id;
		this.name = name;
		this.gender = gender;
	}

	@Override
	public String toString() {
		return "Teacher [id=" + id + ", name=" + name + ", gender=" + gender
				+ "]";
	}
}
	@Test
	public void test3() throws Exception {
		ApplicationContext ac = new ClassPathXmlApplicationContext("com/xxx/spring/chap1/constructor.xml");
		Teacher teacher = (Teacher) ac.getBean("teacher");
		System.out.println(teacher);//Teacher [id=1, name=tom, gender=male]
	}
5.Bean
Bean的生命周期
Bean的自动装配
Resources和ResourceLoader
5.1Bean的生命周期
import org.springframework.beans.BeansException;
import org.springframework.beans.factory.BeanFactory;
import org.springframework.beans.factory.BeanFactoryAware;
import org.springframework.beans.factory.BeanNameAware;

public class Life implements BeanNameAware,BeanFactoryAware{
	private String name;

	public Life(){//一加载就会调到用
		System.out.println("调用无参构造器");
	}

	public String getName() {
		return name;
	}

	public void setName(String name) {
		System.out.println("调用setName方法");
		this.name = name;
	}

	public void myInit() {
		System.out.println("调用myInit方法");
	}

	public void myDestory(){
		System.out.println("调用myDestory方法");
	}

	@Override
	public void setBeanFactory(BeanFactory arg0) throws BeansException {
		System.out.println("调用setBeanFactory方法");

	}

	@Override
	public void setBeanName(String arg0) {
		System.out.println("调用setBeanName方法");
	}
}
life.xml文件配置
<?xml version="1.0" encoding="UTF-8"?>
<beans xmlns="http://www.springframework.org/schema/beans"
       xmlns:xsi="http://www.w3.org/2001/XMLSchema-instance"
       xmlns:u="http://www.springframework.org/schema/util"
       xsi:schemaLocation="http://www.springframework.org/schema/beans
           http://www.springframework.org/schema/beans/spring-beans-3.2.xsd
           http://www.springframework.org/schema/util
           http://www.springframework.org/schema/util/spring-util-3.2.xsd">
           <!-- 调用set方法赋值后会调用myInit方法    myDestory方法最后调用-->
	<bean name="life" class="com.xxx.spring.ioc.bean.Life" init-method="myInit" destroy-method="myDestory">
		<property name="name" value="tom"></property>
	</bean>
</beans> @Test
public void life(){//springBean的生命周期
ClassPathXmlApplicationContext ac = new ClassPathXmlApplicationContext("com/xxx/spring/chap2/life.xml");
Life life = ac.getBean("life",Life.class);
System.out.println(life);
ac.destroy();
}结果:
调用setName方法
调用setBeanName方法
调用setBeanFactory方法
调用myInit方法
com.briup.spring.ioc.bean.Life@4f0b5b
调用myDestory方法
AfterClass 标注的方法 会最后执行
5.2Bean作用域
this.address = address;
}
<?xml version="1.0" encoding="UTF-8"?>
<beans xmlns="http://www.springframework.org/schema/beans"
xmlns:xsi="http://www.w3.org/2001/XMLSchema-instance"
xsi:schemaLocation="http://www.springframework.org/schema/beans
http://www.springframework.org/schema/beans/spring-beans-3.2.xsd">
	<bean name="student" class="com.xxx.spring.ioc.bean.Student" autowire="constructor"><!-- byName byType  constructor(一定要提供一个单参数的构造器)-->
		<property name="name" value="tom"/>
		<property name="age" value="20"/>
	<!-- 	<property name="address" ref="address"/> -->
	</bean>
	<bean name="address" class="com.briup.spring.ioc.bean.Address">
		<property name="country" value="中国"></property>
		<property name="province" value="江苏"></property>
		<property name="city" value="苏州"></property>
	</bean>
</beans>5.3 Aware
<?xml version="1.0" encoding="UTF-8"?>
<beans xmlns="http://www.springframework.org/schema/beans"
xmlns:xsi="http://www.w3.org/2001/XMLSchema-instance"
xsi:schemaLocation="http://www.springframework.org/schema/beans
http://www.springframework.org/schema/beans/spring-beans-3.2.xsd">
	<bean name="applicationAawareTest" class="com.xxx.spring.aop.bean.AwareTest"></bean>
</beans>import org.springframework.beans.BeansException;
import org.springframework.beans.factory.BeanNameAware;
import org.springframework.context.ApplicationContext;
import org.springframework.context.ApplicationContextAware;
public class AwareTest implements ApplicationContextAware,BeanNameAware{
@Override
public void setApplicationContext(ApplicationContext applicationContext) throws BeansException {
System.out.println(applicationContext.getBean(AwareTest.class));
}
@Override
public void setBeanName(String beanName) {
System.out.println(beanName);
}
} @Test
public void AwareTest(){
ClassPathXmlApplicationContext ac = new ClassPathXmlApplicationContext("com/xxx/spring/chap1/aware.xml");
AwareTest awareTest = ac.getBean("applicationAawareTest",AwareTest.class);
System.out.println(awareTest);
}结果:
com.xxx.spring.aop.bean.AwareTest@1d8fe20
com.xxx.spring.aop.bean.AwareTest@1d8fe20
5.4Resource统一文件资源接口
Resources针对文件的统一接口,用于操作本地资源或网络资源,或其他
-UrlResource:URL对应的资源,根据一个URL地址既可以构建
-ClassPathResource:获取类路径下的资源文件
-FileSystemResource:获取文件系统中的资源文件
-ServletContextResource:ServletContext封装资源,用于访问ServletContext环境下的资源
-InputStreamResource:针对输入流封装的资源
-ByteArrayResource:针对字节数组封装的资源
ResourceLoader
-所用的application context 实现了ResourceLoader接口
spring中ResourceLoader定义如下:
 public interface ResourceLoader{
	 		Resource getResource(String location);
}
getResource中location的写法有如下几种
prefix前缀 案例 说明
classpath: classpath:com/briup/spring/chap2/life.xml 从classpath中加载
file: file:/data/life.xml用URL从文件系统中加载
http: http://myserver/logoo.png通过URL从网络加载
(none) /spring/chap2/life.xml 这种相对路径的写法依赖于ApplicationContext
spring中的使用
Resource template = ctx.getResource("some/resource/path/myTemplate.txt");
Resource template = ctx.getResource("classpath:some/resource/path/myTemplate.txt");
Resource template = ctx.getResource("file:some/resource/path/myTemplate.txt");
案例:
resources.xml
<?xml version="1.0" encoding="UTF-8"?>
<beans xmlns="http://www.springframework.org/schema/beans"
xmlns:xsi="http://www.w3.org/2001/XMLSchema-instance"
xsi:schemaLocation="http://www.springframework.org/schema/beans
http://www.springframework.org/schema/beans/spring-beans-3.2.xsd">
	<bean name="resourcetest" class="com.briup.spring.aop.bean.ResourceTest"/>
</beans>
由于spring中所有的applicationcontext实现了ContextLoader接口, 所以我们实现applicationContext即有了ResourceLoader的能力
下边:classpath:在eclipse中会加载src下的config.txt文件
import java.io.IOException;

import org.springframework.beans.BeansException;
import org.springframework.context.ApplicationContext;
import org.springframework.context.ApplicationContextAware;
import org.springframework.core.io.Resource;


//所有的ApplicationContext实现了ResourceLoader接口
public class ResourceTest implements ApplicationContextAware{

	private ApplicationContext ApplicationContext;

	@Override
	public void setApplicationContext(ApplicationContext applicationContext) throws BeansException {
		this.ApplicationContext = applicationContext;
	}

	public void resource() throws IOException{
		//Resource resource = ApplicationContext.getResource("config.txt");//默认为classpath
		//Resource resource = ApplicationContext.getResource("classpath:config.txt");
		//Resource resource = ApplicationContext.getResource("file:D:\\workspace\\xnxy_spring\\src\\config.txt");
		Resource resource = ApplicationContext.getResource("url:http://repo.springsource.org/libs-release-local/org/springframework/spring/3.2.4.RELEASE/spring-framework-3.2.4.RELEASE-dist.zip");
		System.out.println(resource.getFilename());//获取文件名
		System.out.println(resource.contentLength()); //获取文件长度
		System.out.println(resource.getInputStream());//获取输入流
	}
}
测试:
@Test
	public void ResourceTest(){
		ClassPathXmlApplicationContext ac = new ClassPathXmlApplicationContext("com/briup/spring/chap1/resources.xml");
		ResourceTest resourceTest = ac.getBean("resourcetest",ResourceTest.class);
		try {
			resourceTest.resource();
		} catch (IOException e) {
			e.printStackTrace();
		}
	}
6.Bean容器的注解实现
Classpath扫描与组件管理
类的自动检测与注册Bean
<context:annotation-config/>
@Component, @Repository, @Service, @Constroller
@Required
@Autowired
@Qualifier
@Resource
6.1classpath扫描与组件管理
@Configuration, @Bean, @Import, @DependsOn
@Component是Spring中的一个通用注解,可以用于任何Bean,相当于注解的超类,如果不知道位于那个层,一般使用该注解
@Repository, @Service, @Controller是更具有针对性的注解
- @Repository,通常用于注解DAO,即持久层的注解
- @Service,通常用于追注解Service类,即服务层
- @Controller通常用于注解Controller,即控制层(MVC)
6.2类的自动检测与注册Bean
<context:component-scan base-package="spring.aop.bean.annotation"></context:component-scan>使用@Component, @Repository, @Service, @Constroller其中之一的注解
或者使用基于@Component的自定义注解
可以通过过滤器修改上边的行为,如下边的例子XML配置忽略所有@Repository注解并用“stub”代替
-->
   <context:component-scan base-package="spring.aop.bean.annotation">
       		<!--  -->
       		<context:include-filter type="regex" expression=".*Stub.*Repository"/>
       		<!-- 排除@Repository注解 -->
       		<context:exclude-filter type="annotation" expression="org.springframework.stereotype.Repository"/>
       </context:component-scan>
6.3使用注解管理bean
都会有个name属性用于显示设置BeanName)
@Service("myMoveLister")
public class simpleLlister{
//..
}
Dao
//设置beanName默认使用类名,首字母小写作为beanName
@Repository
public class MovieFinderImpl implements MovieFinder{
}
6.3.1 作用域scope
作用域的注解Scope
通常情况下自动查找的Spring组件,其Scope是singleton,其Spring2.5提供了Scope的注解 @Scope
@Scope("prototype") //括号中指定Scope的范围,默认
@Repository
public class MovieFinderImpl implements MovieFinder{
}
也可以自定义scope策略,实现ScopeMetadataResolver接口并提供一无参数的构造器
<context:component-scan base-package="spring.aop.bean.MyScopeResolver"></context:component-scan>
6.3.2注解的具体案例使用
//由于不知道其作用于DAO或Service所以使用通用注解,如果知道具体作用在那层,我们一班使用更具体注解方式如@Service,@Repository等
//@Component -->默认使用类名小写作为bean的name
@Scope("prototype") //括号中为Scope的范围,这里设置为原型模式
@Component("beanAnnotation")
public class BeanAnnotation {

	public void say(String arg){
		System.out.println("BeanAnnotation: "+arg);
	}
}
@Test
public void testAnnotation(){
	ClassPathXmlApplicationContext ac = new ClassPathXmlApplicationContext("com/xxx/spring/chap4/annotation.xml");
	//@Component没有value值的话,默认使用类名首字母小写作为bean的id,指定value以value值为准作为id
	BeanAnnotation beanAnnotation1  = ac.getBean("beanAnnotation",BeanAnnotation.class);
	BeanAnnotation beanAnnotation2  = ac.getBean("beanAnnotation",BeanAnnotation.class);
	System.out.println(beanAnnotation1);
	System.out.println(beanAnnotation2);
	//结果
	//com.xxx.spring.aop.bean.annotation.BeanAnnotation@1598d5f
	//com.xxx.spring.aop.bean.annotation.BeanAnnotation@505fd8
}
6.3.3一个不常用的注解@Required
这个注解仅仅标识,受影响的bean属性必须在配置时被填充,通过bean定义或通过自动装配一个明确的属性值
private MoiveFinder movieFinder;
@Required
public void setMovieFinder(MovieFinder movieFinder){
this.movieFinder = movieFinder;
}
//..
}
6.3.4@Autowired
这个注解相当于我们之前在xml文件中配置的autowire="constructor/byName/byType",只不过我们这里使用@Autowired方式注解方式,且默认是通过类型判断,意思就是不使用byName,和construtor。通过@Autowired注解,spring会自动去容器中查找对应的类型,注入到该属性中,且bean类中,使用@Autowired注解其属性,我们可以不用提供getter,setter方法
使用@Autowired
@Autowried对属性进行注解的时候,我们可以省略getter,setter方法,通过对应的bean的类型,对属性值注入
@Autowried对seter方法进行注解的时候,可以注入对应的值
@Autowried对构造器进行注解的时候,可以通过类型找到对应的bean注入
@Autowried可以将 @Autowried为”传统“的setter方法代替 @Required
@Autowried自动注入,会去容器中按照类型查找对应的bean注入
案例:
setter中使用
pulic class simpleMovieLister{

		private MoiveFinder movieFinder;

		@Autowried
		public void setMovieFinder(MovieFinder movieFinder){
			this.movieFinder  = movieFinder;
		}
		//..
}
pulic class MovieRreCommender{

		成员变量中
		@Autowried
		private MovieCatalog movieCatalog;

		private CustomerPreferenceDao customerPreferenceDao;

		//构造器中
		@Autowried
		public MovieRreCommender(CustomerPreferenceDao customerPreferenceDao){
			this.CustomerPreferenceDao  = CustomerPreferenceDao;
		}
}
@Autowired(requried=false), @Qualifie("beanName)指定@Autowired注入那个bean实例
6.3.5@Autowried(requried=false)
默认情况下,如果因找不到合适的bean将会导致autowiring失败抛出异常,可以通过下边
这种方式避免
pulic class simpleMovieLister{
private MoiveFinder movieFinder;
@Autowried(requried=false)//指明该属性不是必须的,找不到的情况下不会抛出异常
public void setMovieFinder(MovieFinder movieFinder){
this.movieFinder = movieFinder;
}
//..
}
提示:每一类中只能有一个构造器被标记为requried=ture建议将 @Autowired的必要属性时,使用 @Requried注解
6.3.6@Qualifier--配合 @Autowired
注解缩小注解范围(或指定唯一),也可以用于指定单独的构造参数的方法参数
可以适用于注解集合类型的变量
案例:
public class MovieRecommander{
	@Autowired
	@Qualifier("beanName")
	private MovieCatalog movieCatalog;

	private CustomerPreferenceDao customerPreferenceDao;
<span style="white-space:pre">	</span>//@Qualifier也可以实现参数的注入
	public void prepare(@Qualifier("beanName")CustomerPreferenceDao customerPreferenceDao){
		this.customerPreferenceDao = customerPreferenceDao;
	}
}
上边的案例:假设MovieCatalog在容器中存在多个相同的类型的情况下,可以结合使用 @Qualifier("beanName")
指定一个bean的id注入到该属性中,可以在方法的参数中使用
6.3.7@Autowired注解可以方便的注解那些众所周知的解析依赖性接口
比如说:BeanFacotry,ApplicationContext,Environment,ResourceLoader,ApplicaiontEventPublisher, MessageSource等
	pulic class simpleMovieLister{

		@Autowired
		private AplicationContext context;

		public simpleMovieLister(){}

	}
上边的案例使用autowired注解ApplicationContext,这样我们就可以活ApplicatioinContext容器总的bean对象
6.3.8@Autowired将容器中相关类型的bean注入到一个集合或数组中
public interface BeanInterface {


}@Order(1)
@Component
public class BeanImplOne implements BeanInterface {
}@Order(2) //Order排序注解只对list,或数组集合有效括号里边是排序顺序
@Component
public class BeanImplTwo implements BeanInterface {
}import java.util.List;
import java.util.Map;
import java.util.Map.Entry;
import java.util.Set;
import org.springframework.beans.factory.annotation.Autowired;
import org.springframework.stereotype.Component;
@Component
public class BeanInvoker {
@Autowired //该注解会将所有的BeanInterface类型的bean注入到该list中
//如果bean有 @Order注解可以实现排序
private List<BeanInterface> list;
//该注解会将所有的BeanInterface类型的bean注入到该map中,key值为bean的名字
//是String类型,map类型无排序可言
@Autowired
private Map<String, BeanInterface> map;
public void print(){
if(list != null && 0 != list.size()){
System.out.println("list...");
for(BeanInterface beanInterface:list){
System.out.println(beanInterface.getClass().getName());
}
}
if(map != null && 0 != map.size()){
System.out.println("map...");
Set<Entry<String, BeanInterface>> entrySet = map.entrySet();
for(Entry<String, BeanInterface> entry: entrySet){
System.out.println(entry.getKey()+"--"+entry.getValue().getClass().getName());
}
}
}
}@Test
public void testAutowired2(){
ClassPathXmlApplicationContext ac = new ClassPathXmlApplicationContext("com/xxx/spring/chap4/annotation.xml");
BeanInvoker beanInvoker = (BeanInvoker) ac.getBean("beanInvoker");
beanInvoker.print();
}结果:
com.xxx.spring.aop.bean.annotation.BeanImplOne
com.xxx.spring.aop.bean.annotation.BeanImplTwo
map...
beanImplOne--com.xxx.spring.aop.bean.annotation.BeanImplOne
beanImplTwo--com.xxx.spring.aop.bean.annotation.BeanImplTwo
6.4@Bean注解的使用
@Configuration   //相当于配置文件
public class Appconfig{

	@Bean("myservice")//假如bean的name属性没有指定名字的话,注入的是id为方法名的bean,一般我们指定name属性不容易出错
	public Myservice myservice(){
		return new MyServiceImpl();
	}
	/*
		对比基于XML文件中的配置效果类似
		<bean id="myservice" class="com.xxx.service.MyserviceImpl"></bean>
	*/
}
@Bean中的其他他几个属性
<bean name="life" class="com.briup.spring.ioc.bean.Life" init-method="myInit" destroy-method="myDestory">
		<property name="name" value="tom"></property>
</bean>
我们使@Bean配置也可以实现上边这种效果
public class Foo{
	public void init(){

	}
}

public class Bar{
	public void cleanup(){

	}
}
@Configuration
public class Appconfig{

	@Bean(name="life")  //定义bean的name
	public Life life(){
		return new Life();
	}

	@Bean(initMethod="init") //在初始化Foo的时候,会调用Foo.java中的init方法
	public Foo foo(){
		return new Foo();
	}

	@Bean(destoryMethod=“cleanup”) //在销毁Bar的时候会调用Bar.java中的cleanup中的方法
	public Bar bar(){
		return new Bar();
	}
}
6.5使用注解模拟连接数据库
jdbc.url=jdbc:oracle:thin:@localhost:1521:XE
jdbc.username=caojx
jdbc.password=caojx
<?xml version="1.0" encoding="UTF-8"?>
<beans xmlns="http://www.springframework.org/schema/beans"
 xmlns:context="http://www.springframework.org/schema/context"
 xmlns:xsi="http://www.w3.org/2001/XMLSchema-instance"
 xsi:schemaLocation="http://www.springframework.org/schema/beans
      http://www.springframework.org/schema/beans/spring-beans-3.0.xsd
      http://www.springframework.org/schema/context
      http://www.springframework.org/schema/context/spring-context.xsd" >
       <!-- 加载db.properties文件 -->
       <context:property-placeholder location="classpath:db.properties"/>
       <!--context:component-scan包含context:annotation-config的全部功能,通常使用前者后,不再使用后者
       <context:component-scan base-package="com.briup.spring.aop.bean.annotation"></context:component-scan>

</beans>public class MyDriverManager {
public MyDriverManager(String url, String userName, String password){
System.out.println("url :"+url);
System.out.println("userName :"+userName);
System.out.println("password :"+password);
}
}
@Configuration
@ImportResource("classpath:com/xxx/spring/chap4/config.xml")  //指定配置文件的路径
public class MyConnection {


	@Value("${jdbc.url}")  //基本类型的变量使用@Value注解(括号里边是注入的值)  ,这是使用${是读取配db.properties中的值}
	private String url;

	@Value("${jdbc.username}")  //如果db.properties中写法为username默认取的是当前操作系统用户的名称,可以在db.properties定义username的时候使用jdbc.username
	private String userName;

	@Value("${jdbc.password}")
	private String password;

	@Bean(name="myDriverManager")

	public MyDriverManager MyDriverManager(){
		return new MyDriverManager(url,userName,password);
	}

}ClassPathXmlApplicationContext ac = new ClassPathXmlApplicationContext("com/xxx/spring/chap4/annotation.xml");
System.out.println(ac.getBean("myDriverManager"));
结果:
url :jdbc:oracle:thin:@localhost:1521:XE
userName :caojx
password :caojx
com.briup.spring.aop.bean.annotation.MyDriverManager@152b54b
同时:@Bean注解也可以配置@Scope使用
@Bean(name="myDriverManager")
@Scope("prototype")
public MyDriverManager MyDriverManager(){
	return new MyDriverManager(url,userName,password);
}

@Bean(name="myDriverManager")
@Scope("singleton")
public MyDriverManager MyDriverManager(){
	return new MyDriverManager(url,userName,password);
}
提示:spring配置数据库连接,或事务管理这一块,将会专门使用一篇来说明。
6.6Spring对JSR的注解支持
JSR常见的注解有如下
@Resource等效于@Autowired与@Inject
@PostConstrct 初始化回掉
@PreDetory 销毁回调用
@Inject 等效于 @Autowired
@Named 与 @Compenet等效
6.6.1@Resource
而@Resource默认按 byName自动注入罢了。
@Resource有两个属性是比较重要的,分是name和type,
Spring将@Resource注解的name属性解析为bean的名字,而type属性则解析为bean的类型。
所以如果使用name属性,则使用byName的自动注入策略,而使用type属性时则使用byType自动注入策略。如果既不指定name也不指定type属性,这时将通过反射机制使用byName自动注入策略。
@Resource装配顺序
1. 如果同时指定了name和type,则从Spring上下文中找到唯一匹配的bean进行装配,找不到则抛出异常
2. 如果指定了name,则从上下文中查找名称(id)匹配的bean进行装配,找不到则抛出异常
3. 如果指定了type,则从上下文中找到类型匹配的唯一bean进行装配,找不到或者找到多个,都会抛出异常
4. 如果既没有指定name,又没有指定type,则自动按照byName方式进行装配;如果没有匹配,则回退为一个原始类型进行匹配,如果匹配则自动装配;
5. 如果 @Resource用于方法中,默认使用方法名作为beanName,指定名字则使用名字
案例:
DAO
import org.springframework.stereotype.Repository;

@Repository
public class JsrDAO {

	public void save(){
		System.out.println("JsrDao invoker");
	}

}
Service
import javax.annotation.PostConstruct;
import javax.annotation.PreDestroy;
import javax.annotation.Resource;

import org.springframework.stereotype.Service;

import com.briup.spring.aop.bean.annotation.dao.JsrDAO;

@Service
public class JsrService {

	@Resource
	private JsrDAO jsrDAO;

	@Resource  //作用与上边一样,二选一都可以
	public void setJsrDAO(JsrDAO jsrDAO){
		this.jsrDAO = jsrDAO;
	}

	public void save(){
		jsrDAO.save();
	}

	@PostConstruct
	public void init(){
		System.out.println("jsr Service init");
	}

	@PreDestroy
	public void destory(){
		System.out.println("jsr Service destory");
	}

}
提示:
@Resource的处理是由ApplicationContext中的CommonAnnotationBeanPostProecssor发现并处理的
CommonAnnotationBeanPostProecssor不仅支持 @Resource注解,还支持 @PostConstruct初始回调
和 @PreDestory销毁回调,前提是CommonAnnotationBeanPostProecssor是在ApplicationContext中注册的
测试结果:
@Test
public void testJsr(){
ClassPathXmlApplicationContext ac = new ClassPathXmlApplicationContext("com/briup/spring/chap4/annotation.xml");
System.out.println(ac.getBean("jsrService"));
ac.destroy();
}
结果:
jsr Service init
com.briup.spring.aop.bean.annotation.service.JsrService@7dc4cb
jsr Service destory
@Resource是一个比比较常用的JSR注解,对于JSR中的其他注解,这里不进行详细的介绍。


 4030
4030

 被折叠的 条评论
为什么被折叠?
被折叠的 条评论
为什么被折叠?
 到【灌水乐园】发言


