


本编辑器提取于开源项目:Vue JSON Schema Form
其中的编辑器部分
提取出来是为了方便二次开发使用及学习
原作者:柳俊
官方网站:https://vue-json-schema-form.lljj.me/
源码地址:https://github.com/yongjiu8/vue-editor
主要目录结构:
├─router vue路由目录
│ └─routes
└─views
└─editor
├─assets 资源目录
│ └─img
├─common 公用的
├─components vue组件
│ └─skeleton
├─config 编辑器的原始数据js 打开页面是根据原始数据加载页面模块 重要
├─fieldComponents
│ └─linkImgField 覆盖默认field 做个性商品选择和链接输入
├─viewComponents PC端的组件 重要
│ ├─AllGoodsList
│ │ └─component
│ ├─CarouselImg
│ ├─CategoryGoods
│ ├─Coupon
│ │ └─component
│ ├─FlashSaleGoodsList
│ ├─MultipleImg1_3
│ │ └─component
│ ├─MultipleImg2_3
│ ├─MultipleImg5
│ ├─RecommendedGoodsList
│ │ └─component
│ ├─Text
│ └─_commonConfig
│ ├─error
│ └─ui
└─viewComponentsM 移动端的组件 重要
├─CarouselImg
├─CategoryList
├─RecommendGoods
├─Test
└─Text
主要注意红色部分的目录
现在开始一个简单示例:
我们新添加一个PC端的textGride示例
我们在pc的组件目录viewComponents 创建文件夹 textGride
然后再文件夹下创建我们布局组件:View.vue
写一个简单网格的布局 这是我们组件的页面部分
根据自己的需求,写成什么样子都由自己决定
这里只是简单举个实例
注意这个组件的名字:TextGrideView 后边一定要加上View 否则编辑器在注册组件的时候将找不到组件
<template>
    <div class="box-home">
        <div
            v-for="(it, index) in formData.texts"
            :key="index"
            class="item"
        >
            {{ index + ':' + it }}
        </div>
    </div>
</template>

<script>
export default {
    name: 'TextGrideView',
    props: {
        formData: {
            type: Object,
            default: () => ({})
        }
    }
};
</script>

<style lang="css" scoped>
.box-home {
  width: 100%;
  height: 300px;
  display: flex;
  flex-direction: row;
  flex-wrap: wrap;
  justify-items: center;
  justify-content: space-evenly;
  align-items: center;
  align-content: space-evenly;
}
.item {
  width: 26%;
  height: 50px;
  text-align: center;
  line-height: 50px;
  vertical-align: middle;
  font-size: 30px;
  color: #999999;
  border: 1px solid orange;
}
</style>
然后在创建:propsSchema.json
这个是用于生成表单数据的json
就是这部分:

{
  "$schema": "http://json-schema.org/draft-07/schema#",
  "id": "TextGride",
  "type": "object",
  "properties": {
    "texts": {
      "title": "配置多文本",
      "description": "配置多文本,最多10个",
      "type": "array",
      "minItems": 1,
      "maxItems": 10,
      "items": {
        "title": "文本配置",
        "type": "string",
        "default": "默认"
      },
      "required": ["items"]
    }
  }
}
这里的具体配置意思请看官方指南:https://vue-json-schema-form.lljj.me/zh/guide/
总之这个配置就是为了生成表单
然后再创建一个 uiSchema.js
这个用来配置我们生成表单界面的配置
export default {
    texts: {
        'ui:options': {
            showIndexNumber: true
        }
    }
};
我这里只配置了显示索引号 就是图中箭头所指部分
更多配置 请看官方指南:https://vue-json-schema-form.lljj.me/zh/guide/basic-config.html#ui-schema

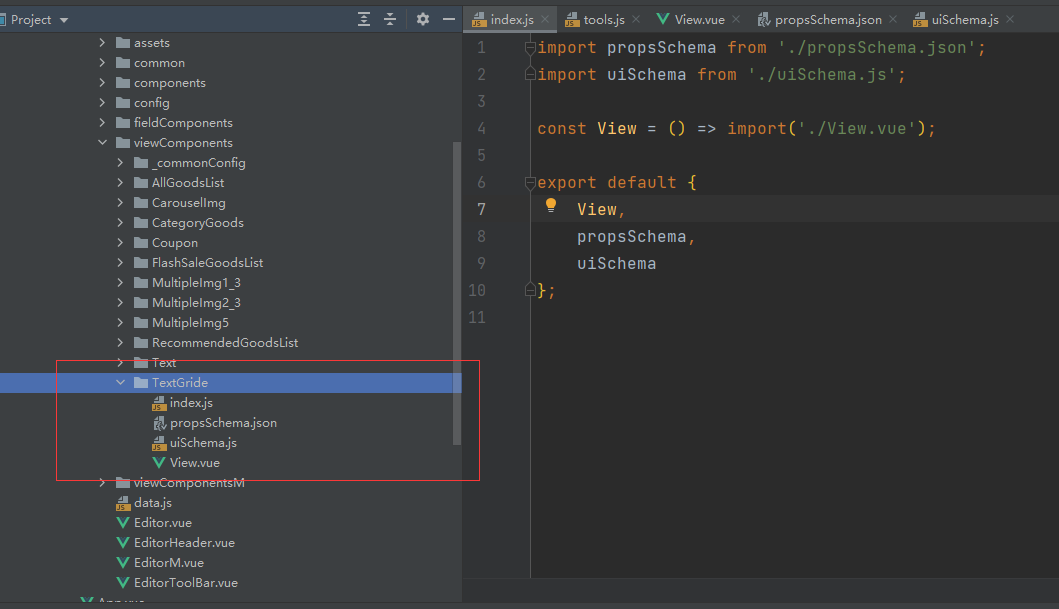
最后创建 index.js
用于暴露出我们的view 和 数据
import propsSchema from './propsSchema.json';
import uiSchema from './uiSchema.js';

const View = () => import('./View.vue');

export default {
    View,
    propsSchema,
    uiSchema
};
这里注意暴露出的 View propsSchema uiSchema 名称不能改变 否则编辑器将读取不到数据 报错
到这里我们的组件就编写完毕了
目录结构图示:
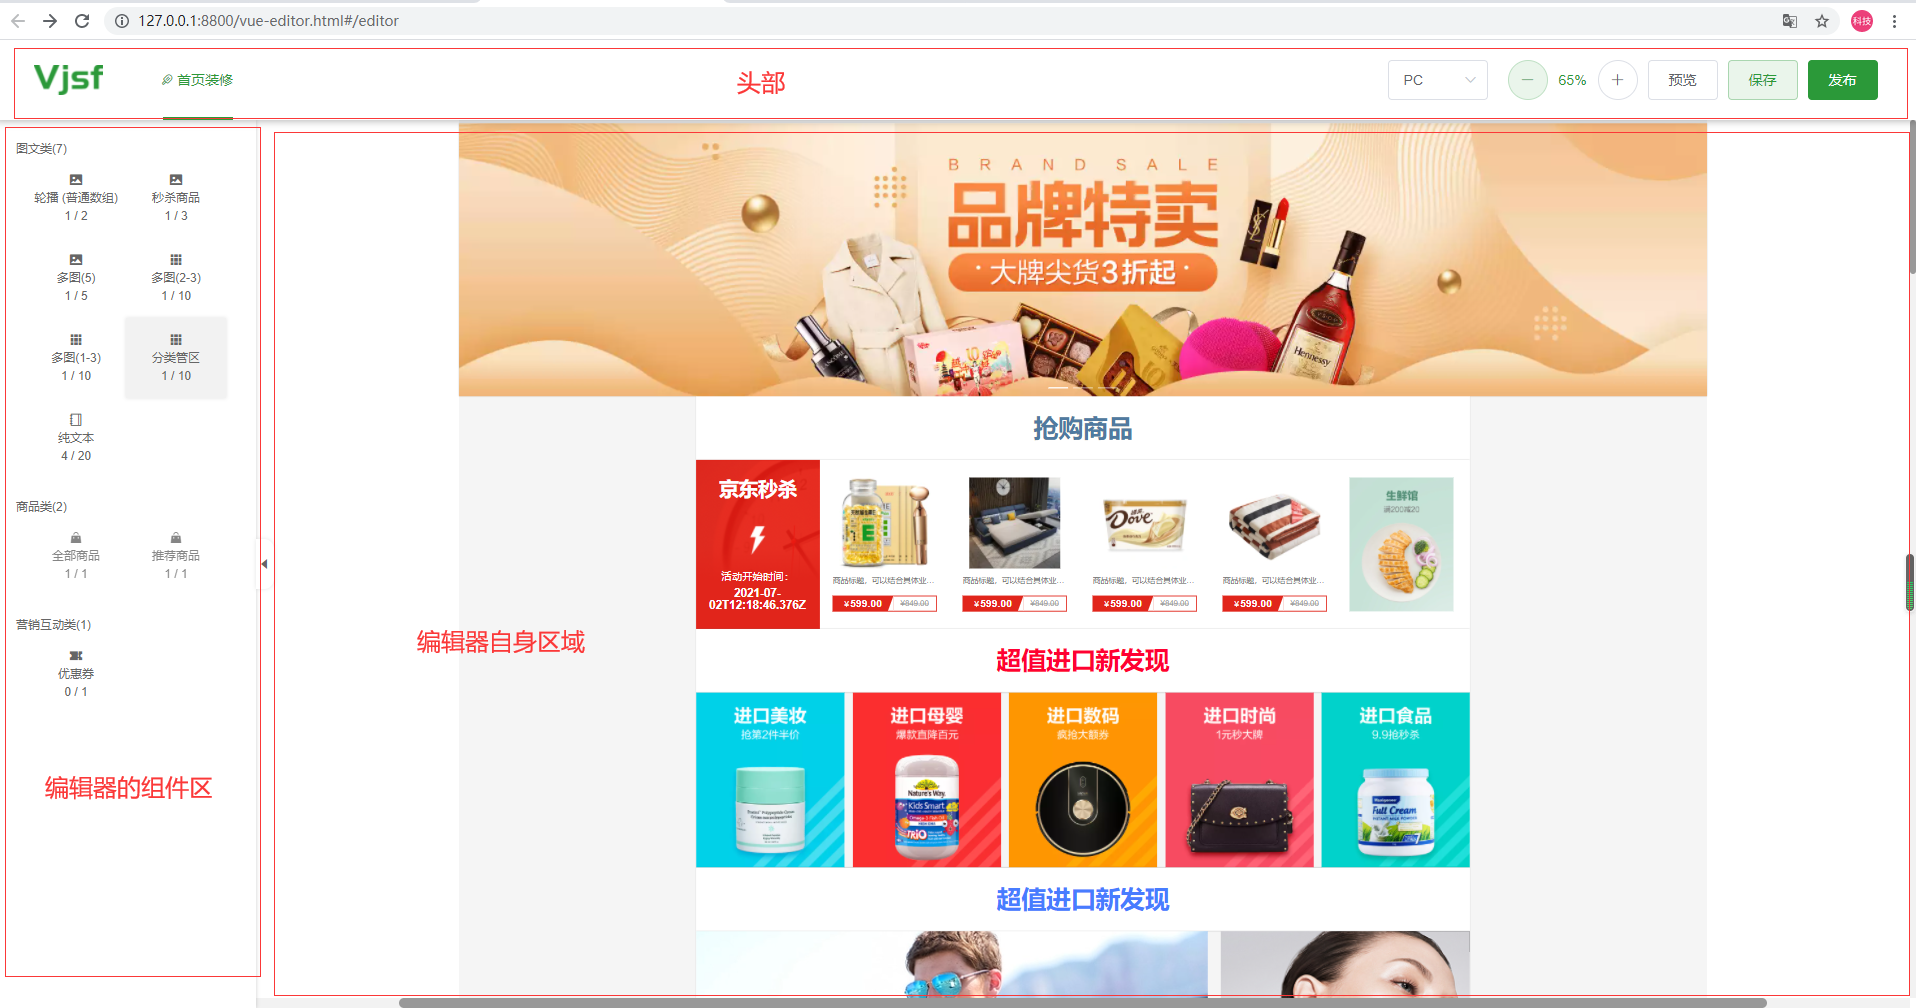
最后我们要把写好组件添加到组件区
就是图片所示区域
这里我们只需要两步即可:
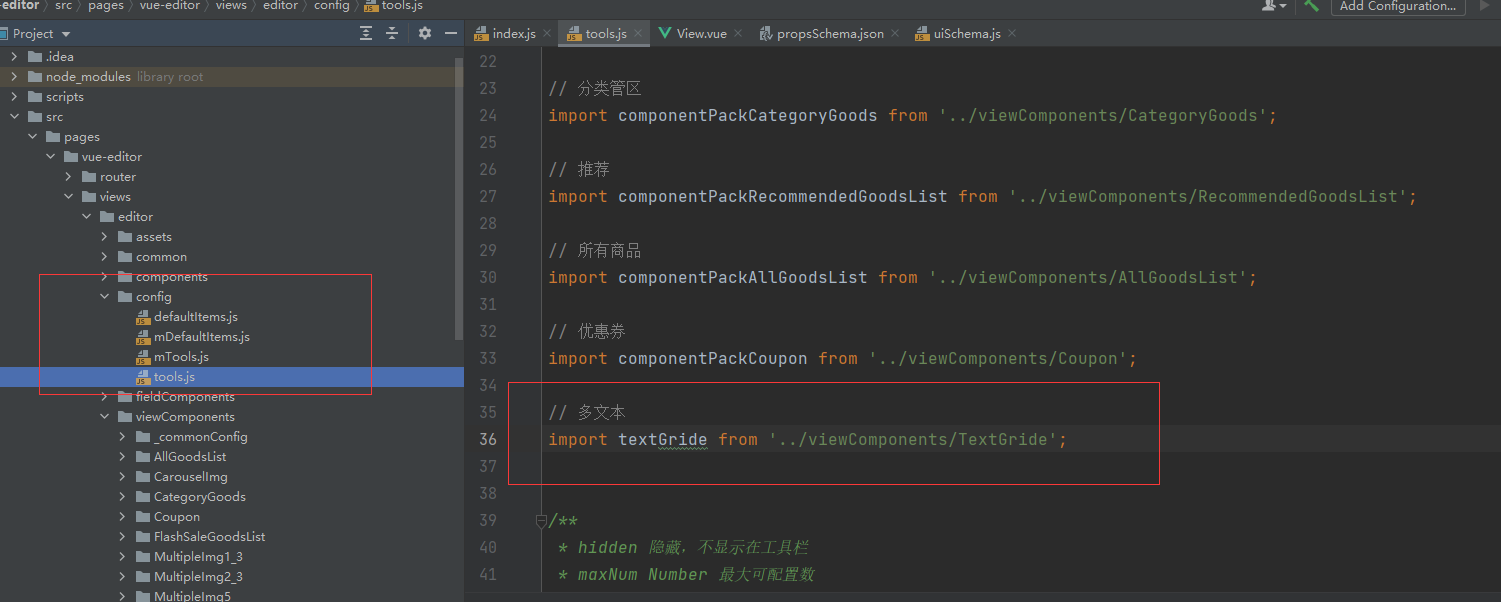
1.编辑config下的tools.js
先导入我们的组件
// 多文本
import textGride from '../viewComponents/TextGride';
2.然后在下面的数组数据里面加上我们组件的配置:
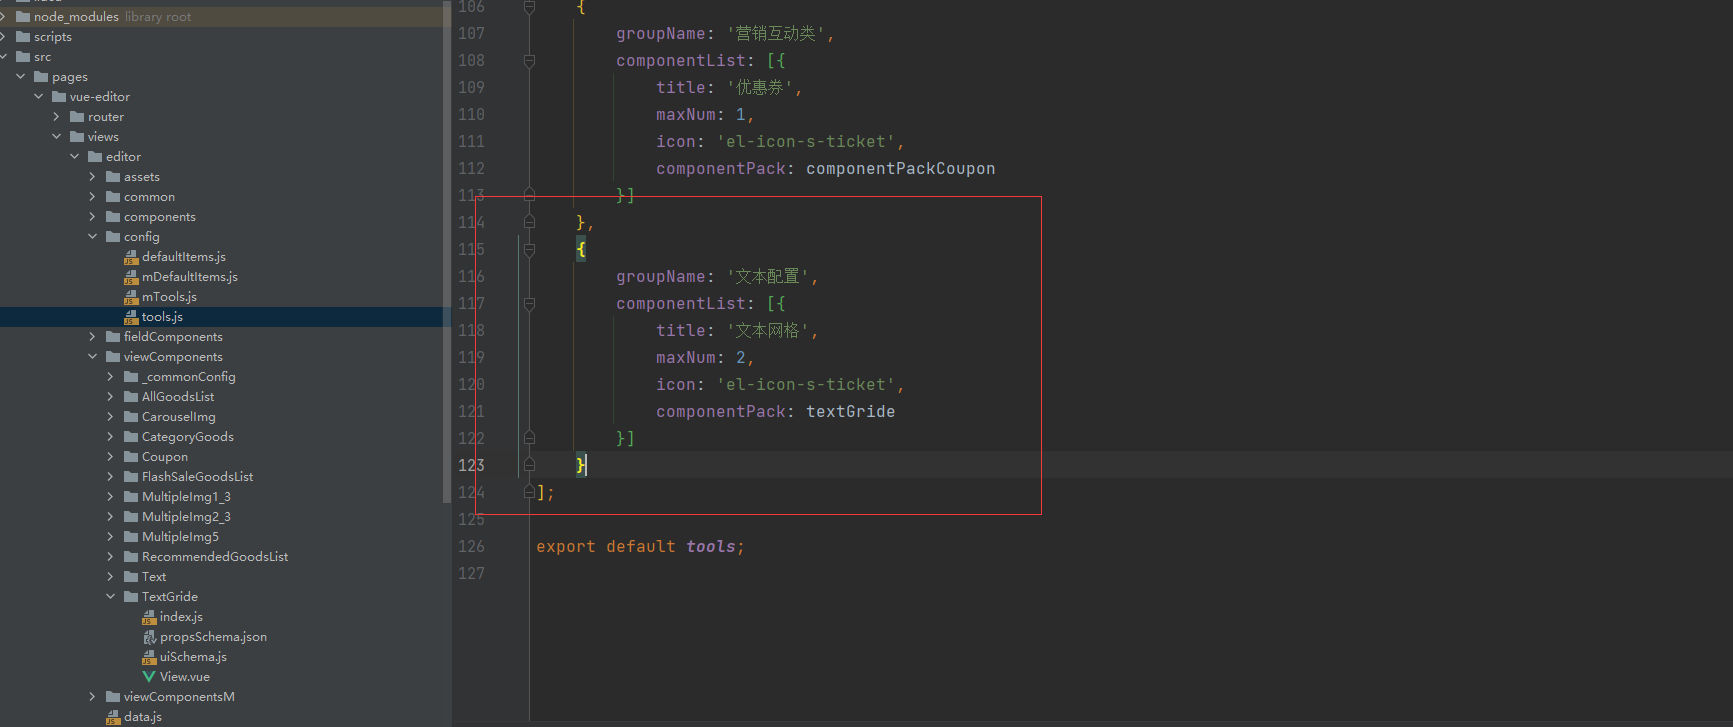
title:组件的标题 maxNum:最多能在编辑器里面放的个数 icon:elementUi的图标 componentPack:我们写的组件
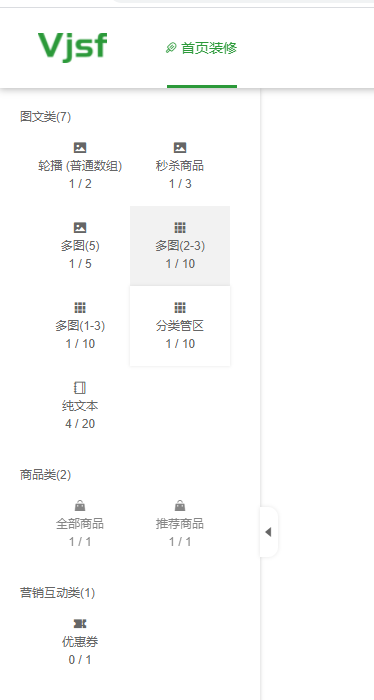
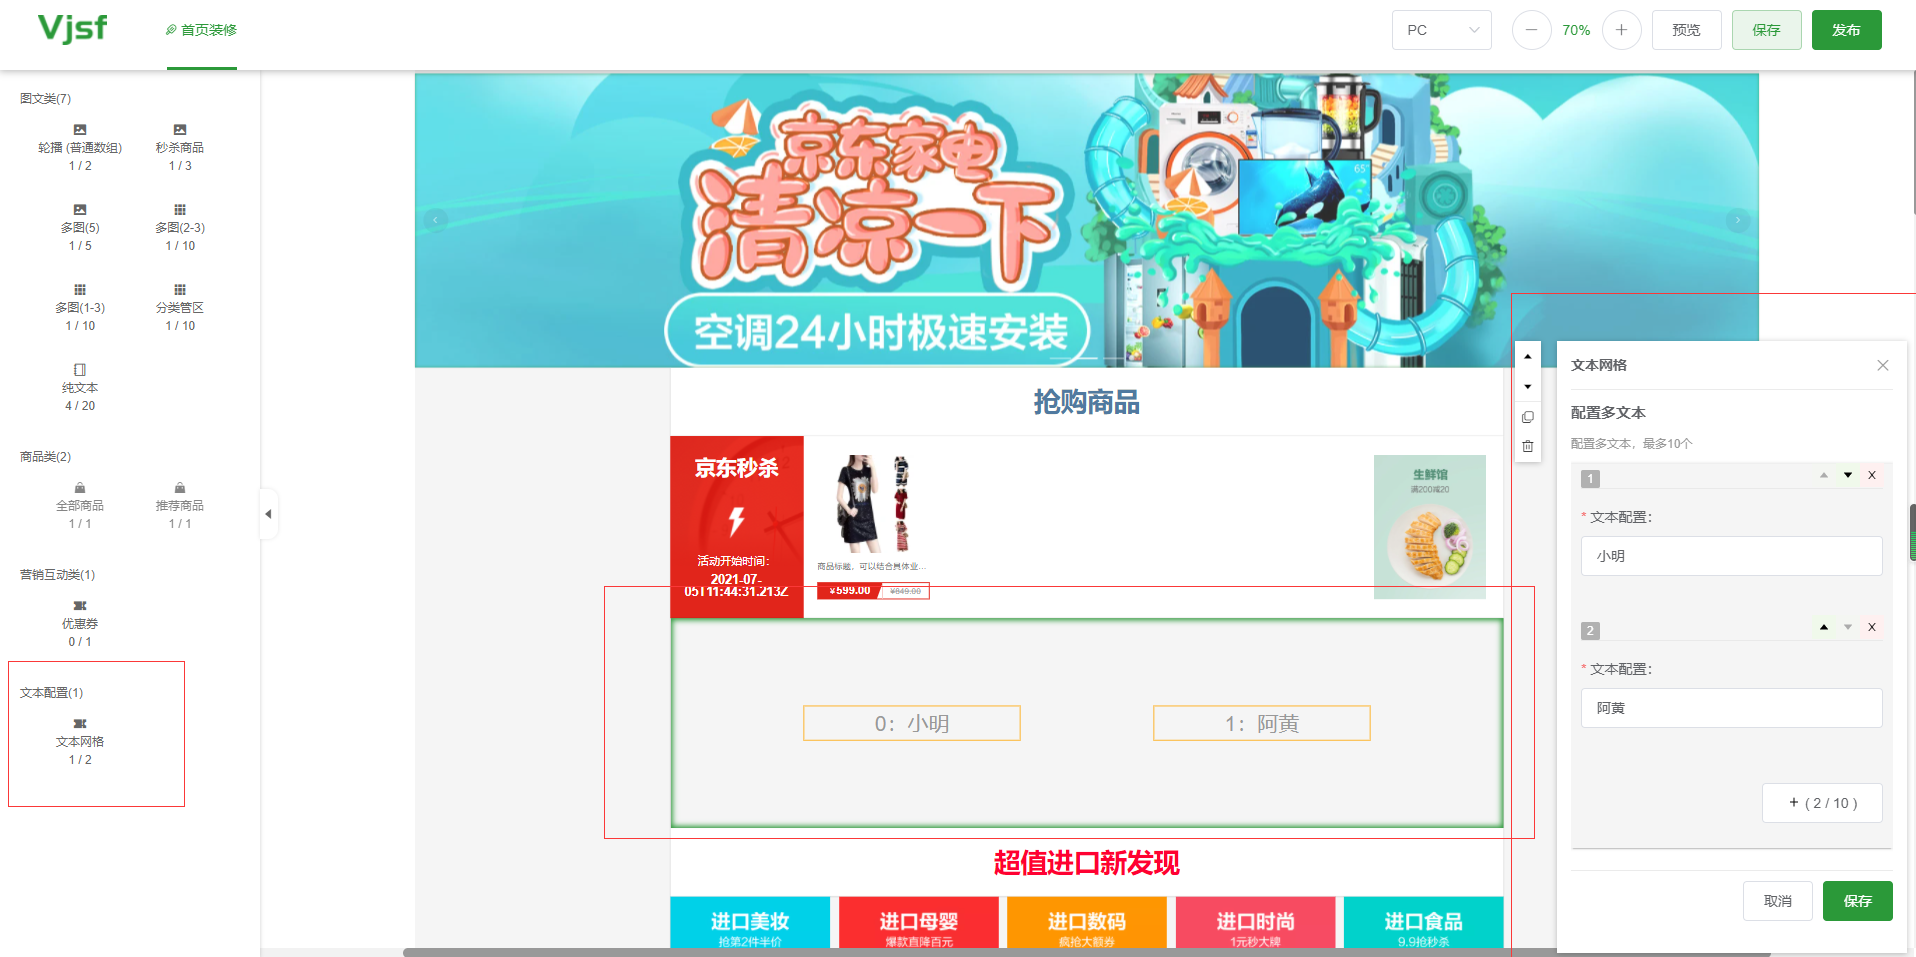
运行之后我们就能看到:
然后我们把组件拖到 编辑器里面 可以正常使用 大功告成
最后我们再来看一下提交的数据正不正确:
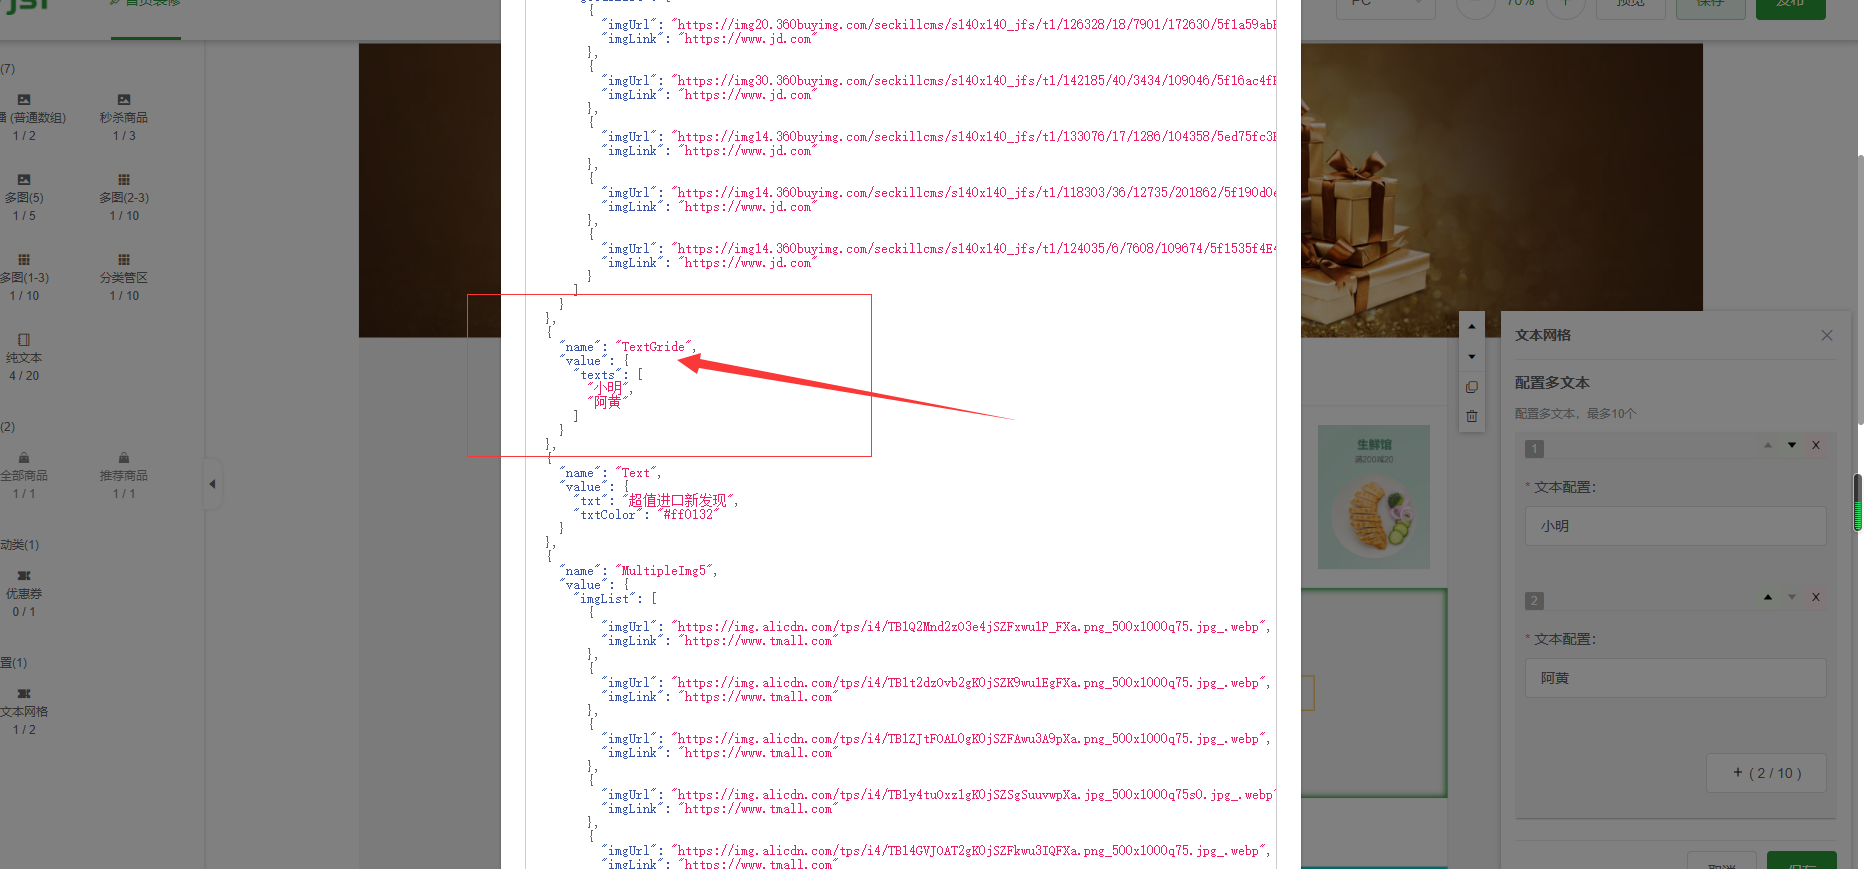
ok一切正常
以上只是简单的实例
更复杂的操作,请阅读官方指南
官方QQ交流群:146845780


 644
644


 被折叠的 条评论
为什么被折叠?
被折叠的 条评论
为什么被折叠?
 到【灌水乐园】发言


