


最近在研究redis,集成到springboot踩了很多坑,现将查询资料和见解记录下来
一、2x与1x的区别
创建缓存管理器方式如下方式,
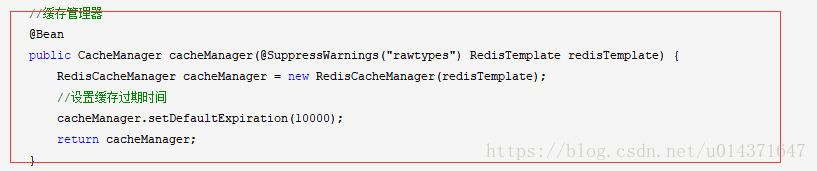
但是在2x中去掉了new RedisCacheManager(redisTemplate)这个构造器,只提供RedisConnectionFactory构造方式
2、发布订阅实现方式实现方式
1)创建Receiver类
blic class Receiver {

    private CountDownLatch latch;

    @Autowired
    public Receiver(CountDownLatch latch) {
        this.latch = latch;
    }

    public void receiveMessage(String message) {
        System.err.println("监听得到返回值: <" + message + ">");
        latch.countDown();
    }
}
2)创建Application类
@SpringBootApplication
public class Application {
/*
 * Redis消息监听器容器
 * 这个容器加载了RedisConnectionFactory和消息监听器
 */
@Bean
RedisMessageListenerContainer container(RedisConnectionFactory connectionFactory,MessageListenerAdapter listenerAdapter){
    RedisMessageListenerContainer container = new RedisMessageListenerContainer();
    container.setConnectionFactory(connectionFactory);
    container.addMessageListener(listenerAdapter, new PatternTopic("sprinboot-redis-messaage"));
    return container;
}

/*
 * 将Receiver注册为一个消息监听器,并指定消息接收的方法(receiveMessage)
 * 如果不指定消息接收的方法,消息监听器会默认的寻找Receiver中的handleMessage这个方法作为消息接收的方法
 */
@Bean
MessageListenerAdapter listenerAdapter(Receiver receiver){
    return new MessageListenerAdapter(receiver, "receiveMessage");
}

/*
 * Receiver实例
 */
@Bean
Receiver receiver(CountDownLatch latch){
    return new Receiver(latch);
}

@Bean
CountDownLatch latch(){
    return new CountDownLatch(1);
}

/*
 * Redis Template 用来发送消息
 */
@Bean
StringRedisTemplate template(RedisConnectionFactory connectionFactory){
    return new StringRedisTemplate(connectionFactory);
}

/*
 * 测试
 */
public static void main(String[] args) {
    ApplicationContext ctx = SpringApplication.run(Application.class, args);

    StringRedisTemplate template = ctx.getBean(StringRedisTemplate.class);
    System.err.println("Sending message......");

    template.convertAndSend("sprinboot-redis-messaage", "Hello, SpringBoot redis message!!!!");
}
}
3、监听实现方式
1)Application类中container.addMessageListener(listenerAdapter, new PatternTopic("sprinboot-redis-messaage"));改为
container.addMessageListener(listenerAdapter, new PatternTopic("__keyevent@0__:expired"));
2)将redis安装目录下redis.xxx.conf文件中notify-keyspace-events "" 改为 notify-keyspace-events Ex
3)测试
public static void main(String[] args) throws Exception {
    ApplicationContext ctx = SpringApplication.run(Application.class, args);

    StringRedisTemplate template = ctx.getBean(StringRedisTemplate.class);
    System.err.println("Sending message......");

    //添加监听数据
    template.opsForValue().set("expired","expired"+i,5,TimeUnit.SECONDS);
}


 8867
8867


 被折叠的 条评论
为什么被折叠?
被折叠的 条评论
为什么被折叠?
 到【灌水乐园】发言


