


1、创建java maven项目,命名为jtarsclient
2、将服务端的tars文件复制到相同位置
3、修改pom.xml文件,与服务端略有不同,<servant> 标签里是 false
<project xmlns="http://maven.apache.org/POM/4.0.0" xmlns:xsi="http://www.w3.org/2001/XMLSchema-instance"
  xsi:schemaLocation="http://maven.apache.org/POM/4.0.0 http://maven.apache.org/xsd/maven-4.0.0.xsd">
  <modelVersion>4.0.0</modelVersion>

  <groupId>com.pt</groupId>
  <artifactId>jtarsclient</artifactId>
  <version>0.0.1-SNAPSHOT</version>
  <packaging>jar</packaging>

  <name>jtarsclient</name>
  <url>http://maven.apache.org</url>

  <properties>
    <project.build.sourceEncoding>UTF-8</project.build.sourceEncoding>
  </properties>

  <dependencies>
    <dependency>
      <groupId>junit</groupId>
      <artifactId>junit</artifactId>
      <version>3.8.1</version>
      <scope>test</scope>
    </dependency>

    <dependency>
			<groupId>com.tencent.tars</groupId>
			<artifactId>tars-client</artifactId>
			<version>1.0.3</version>
			<type>jar</type>
		</dependency>
  </dependencies>

  <build>
    <finalName>jtarsclient</finalName>
    <plugins>
			<plugin>
				<groupId>com.tencent.tars</groupId>
				<artifactId>tars-maven-plugin</artifactId>
				<version>1.0.3</version>
				<configuration>
					<tars2JavaConfig>
						<!-- tars文件位置 -->
						<tarsFiles>
							<tarsFile>${basedir}/src/main/resources/runs.tars</tarsFile>
						</tarsFiles>
						<!-- 源文件编码 -->
						<tarsFileCharset>UTF-8</tarsFileCharset>
						<!-- 生成服务端代码 -->
						<servant>false</servant>
						<!-- 生成源代码编码 -->
						<charset>UTF-8</charset>
						<!-- 生成的源代码目录 -->
						<srcPath>${basedir}/src/main/java</srcPath>
						<!-- 生成源代码包前缀 -->
						<packagePrefixName>com.pt.</packagePrefixName>
					</tars2JavaConfig>
				</configuration>
			</plugin>
		</plugins>
  </build>


</project>
4、在工程根目录下执行mvn tars:tars2java
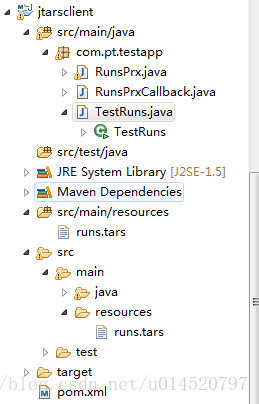
执行之后会在项目下生成代码
5、建带main方法的测试类TestRuns
package com.pt.testapp;
import com.qq.tars.client.Communicator;
import com.qq.tars.client.CommunicatorConfig;
import com.qq.tars.client.CommunicatorFactory;
/**
* @author: py
* @version:2018年7月4日 下午10:54:57
* com.pt.testapp.TestRuns.java
* @Desc
*/
public class TestRuns {
public static void main(String[] args) {
CommunicatorConfig cfg = new CommunicatorConfig();
//构建通信器
Communicator communicator = CommunicatorFactory.getInstance().getCommunicator(cfg);
//通过通信器,生成代理对象
RunsPrx proxy = communicator.stringToProxy(RunsPrx.class, "TestApp.jtarsserver.RunsObj@tcp -h 121.2.1.0 -p 10026");
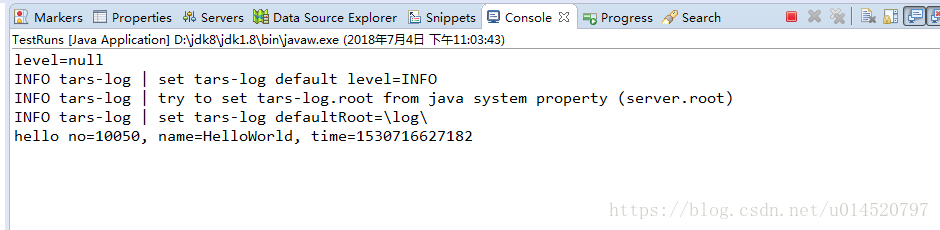
String ret = proxy.runs(10050, "HelloWorld");
System.out.println(ret);
}
}客户端项目结构:
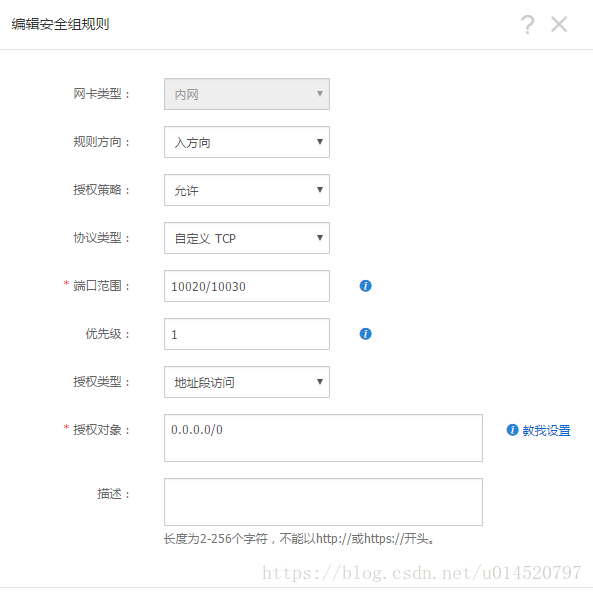
6、如果是阿里云,记得安全组添加端口,因为我的端口是10026
7、运行main方法,成功调用java tars服务端


 1913
1913


 被折叠的 条评论
为什么被折叠?
被折叠的 条评论
为什么被折叠?
 到【灌水乐园】发言


