


docker实战(一):centos7 yum安装docker
一、Docker 镜像介绍
Docker镜像构建分为两种,一种是手动构建,另一种是Dockerfile(自动构建)
Docker镜像手动构建案例:
我们基于centos镜像进行构建,制作nginx镜像
[root@docker-02 ~]# docker container ls -a
CONTAINER ID IMAGE COMMAND CREATED STATUS PORTS NAMES
664d9c96d5a2 nginx "nginx -g 'daemon ..." About an hour ago Up About an hour abbcdocker_host1
dd706a712964 mysql:5.7 "docker-entrypoint..." 2 hours ago Up 2 hours 3306/tcp, 33060/tcp abcdocker
5c7b37d5c51f centos "/bin/bash" 42 hours ago Exited (0) 21 hours ago my-test
[root@docker-02 ~]# docker run --name yhdocker -it centos
看看容器是否能连接外网
[root@45e8a2fe08bc /]# ping www.baidu.com
PING www.a.shifen.com (220.181.38.149) 56(84) bytes of data.
64 bytes from 220.181.38.149 (220.181.38.149): icmp_seq=1 ttl=127 time=7.68 ms
64 bytes from 220.181.38.149 (220.181.38.149): icmp_seq=2 ttl=127 time=7.55 ms
[root@45e8a2fe08bc /]# yum install wget -y
[root@45e8a2fe08bc /]# wget -O /etc/yum.repos.d/epel.repo http://mirrors.aliyun.com/repo/epel-7.repo
--2020-04-27 05:47:34-- http://mirrors.aliyun.com/repo/epel-7.repo
Resolving mirrors.aliyun.com (mirrors.aliyun.com)... 27.185.4.242, 27.185.4.246, 1.71.146.248, ...
Connecting to mirrors.aliyun.com (mirrors.aliyun.com)|27.185.4.242|:80... connected.
HTTP request sent, awaiting response... 200 OK
Length: 664 [application/octet-stream]
Saving to: '/etc/yum.repos.d/epel.repo'
/etc/yum.repos.d/epel.repo 100%[=================================================================================================================================================================>] 664 --.-KB/s in 0s
2020-04-27 05:47:34 (83.1 MB/s) - '/etc/yum.repos.d/epel.repo' saved [664/664]
安装最新版的nginx
[root@45e8a2fe08bc /]# yum install nginx -y
我们需要修改nginx配置文件,让他运行在前台
[root@45e8a2fe08bc /]# vi /etc/nginx/nginx.conf
...
daemon off;
...
修改完之后我们退出

我们修改完之后需要commit
[root@docker-02 ~]# docker commit -m "My Nginx" 45e8a2fe08bc yhdocker/abcdocker:v1
sha256:534b0a4cc9a5d0e486e280de2ed5df2c814559ce9aef2f290176d3efe2a60fb2
[root@docker-02 ~]# docker images
REPOSITORY TAG IMAGE ID CREATED SIZE
yhdocker/abcdocker v1 534b0a4cc9a5 37 seconds ago 361 MB
docker.io/nginx latest 602e111c06b6 3 days ago 127 MB
docker.io/mysql 5.7 5d9483f9a7b2 4 days ago 455 MB
docker.io/centos latest 470671670cac 3 months ago 237 MB
docker.io/nginx 1.15 53f3fd8007f7 11 months ago 109 MB
#注释
-m 描述
容器ID
第一个abcdocker是仓库的名称
第二个abcdocker是镜像的名称
v1 标签,如果是最后一个版本我们可以打latest我们现在启动制作好的nginx镜像
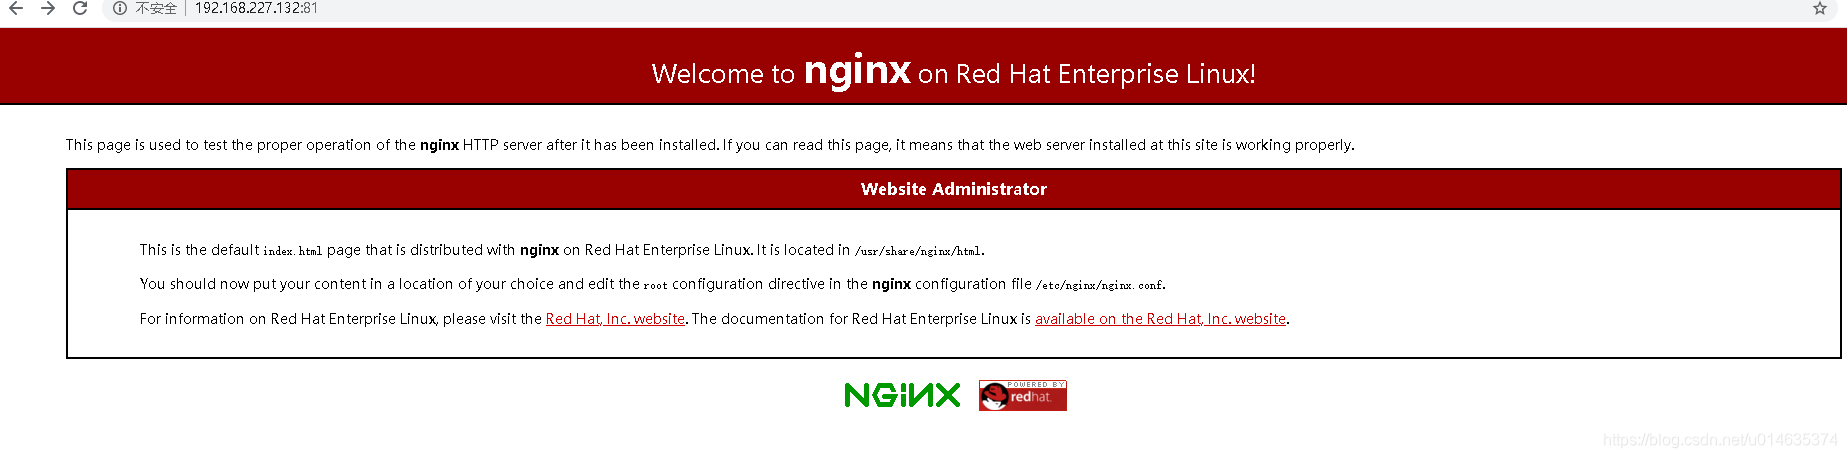
[root@docker-02 ~]# docker run --name nginxv1 -d -p 81:80 yhdocker/abcdocker:v1 nginx
8df1234c163cb87187d283529009704ee1c2c1d850727e170cd191a34a309c0d
我们要写镜像全称,带上标签
http://192.168.227.132:81/
[root@docker-02 ~]# docker ps
CONTAINER ID IMAGE COMMAND CREATED STATUS PORTS NAMES
8df1234c163c yhdocker/abcdocker:v1 "nginx" 7 minutes ago Up 7 minutes 0.0.0.0:81->80/tcp nginxv1
664d9c96d5a2 nginx "nginx -g 'daemon ..." About an hour ago Up About an hour abbcdocker_host1
dd706a712964 mysql:5.7 "docker-entrypoint..." 2 hours ago Up 2 hours 3306/tcp, 33060/tcp abcdocker
进入容器nginxv1
[root@docker-02 ~]# docker exec -it nginxv1 /bin/bash
查看nginx的日志
[root@8df1234c163c /]# tail -f /var/log/nginx/access.log
192.168.227.1 - - [27/Apr/2020:06:02:26 +0000] "GET / HTTP/1.1" 200 4057 "-" "Mozilla/5.0 (Windows NT 10.0; Win64; x64) AppleWebKit/537.36 (KHTML, like Gecko) Chrome/80.0.3987.163 Safari/537.36" "-"
192.168.227.1 - - [27/Apr/2020:06:02:26 +0000] "GET /nginx-logo.png HTTP/1.1" 200 368 "http://192.168.227.132:81/" "Mozilla/5.0 (Windows NT 10.0; Win64; x64) AppleWebKit/537.36 (KHTML, like Gecko) Chrome/80.0.3987.163 Safari/537.36" "-"
192.168.227.1 - - [27/Apr/2020:06:02:26 +0000] "GET /poweredby.png HTTP/1.1" 200 4148 "http://192.168.227.132:81/" "Mozilla/5.0 (Windows NT 10.0; Win64; x64) AppleWebKit/537.36 (KHTML, like Gecko) Chrome/80.0.3987.163 Safari/537.36" "-"
192.168.227.1 - - [27/Apr/2020:06:02:26 +0000] "GET /favicon.ico HTTP/1.1" 404 3971 "http://192.168.227.132:81/" "Mozilla/5.0 (Windows NT 10.0; Win64; x64) AppleWebKit/537.36 (KHTML, like Gecko) Chrome/80.0.3987.163 Safari/537.36" "-"
192.168.227.1 - - [27/Apr/2020:06:02:32 +0000] "GET / HTTP/1.1" 304 0 "-" "Mozilla/5.0 (Windows NT 10.0; Win64; x64) AppleWebKit/537.36 (KHTML, like Gecko) Chrome/80.0.3987.163 Safari/537.36" "-"
192.168.227.1 - - [27/Apr/2020:06:04:30 +0000] "GET / HTTP/1.1" 304 0 "-" "Mozilla/5.0 (Windows NT 10.0; Win64; x64) AppleWebKit/537.36 (KHTML, like Gecko) Chrome/80.0.3987.163 Safari/537.36" "-"
192.168.227.1 - - [27/Apr/2020:06:04:31 +0000] "GET / HTTP/1.1" 304 0 "-" "Mozilla/5.0 (Windows NT 10.0; Win64; x64) AppleWebKit/537.36 (KHTML, like Gecko) Chrome/80.0.3987.163 Safari/537.36" "-"
192.168.227.1 - - [27/Apr/2020:06:04:31 +0000] "GET / HTTP/1.1" 304 0 "-" "Mozilla/5.0 (Windows NT 10.0; Win64; x64) AppleWebKit/537.36 (KHTML, like Gecko) Chrome/80.0.3987.163 Safari/537.36" "-"
192.168.227.1 - - [27/Apr/2020:06:04:31 +0000] "GET / HTTP/1.1" 304 0 "-" "Mozilla/5.0 (Windows NT 10.0; Win64; x64) AppleWebKit/537.36 (KHTML, like Gecko) Chrome/80.0.3987.163 Safari/537.36" "-"
以上就是手动构建nginx镜像
Dockerfile是由一行命令和语句组成的
Dockerfile构建步骤:
[root@docker-02 ~]# mkdir /dockerfile
[root@docker-02 ~]# cd /dockerfile
[root@docker-02 dockerfile]# mkdir nginx
[root@docker-02 dockerfile]# cd nginx/
[root@docker-02 nginx]# pwd
/dockerfile/nginx
[root@docker-02 nginx]#
我们要在nginx目录上自动化创建一个nginx镜像
注意:D需要大写,当我们构建dockerfile的时候,docker默认会在我们当前目录读取一个名为Dockerfile的文件。这时候的D必须大写
https://www.cnblogs.com/zhhuihui/p/docker_z.html 参照这篇文章构建镜像文件
[root@docker-02 nginx]# vi Dockerfile
# This Dockerfile
# My Name is yanghong
# Base image
FROM centos
#Commands
RUN rpm -ivh http://mirrors.aliyun.com/epel/epel-release-latest-7.noarch.rpm
RUN yum install -y nginx && yum clean all
RUN echo "daemon off;" >>/etc/nginx/nginx.conf
ADD index.html /usr/share/nginx/html/index.html
EXPOSE 80
CMD ["nginx"]
===================================构建的内容结束=========================
#井号代表注释
#Base image 除了注释的第一行,必须是FROM,意思就是我们需要告诉dockerfile基础镜像是什么
#Maintainer 维护信息
#Commands 命令
#ADD index.html 这个文件需要我们在当前目录下有才可以,我们配置我们可以准备好,然后使用ADD命令进行添加或修改# # EXPOSE 对外端口号
#CMD [“nginx”] 它要启动的命令是nginx (就算是nginx服务)
我们写好dockerfile还需要一个index.html
[root@docker-02 nginx]# echo www.abcdocker.com >index.html
[root@docker-02 nginx]# ll
总用量 8
-rw-r--r--. 1 root root 795 4月 27 15:00 Dockerfile
-rw-r--r--. 1 root root 18 4月 27 15:00 index.html
[root@docker-02 nginx]# docker build -t mynginx:v2 .
Sending build context to Docker daemon 3.584 kB
Step 1/10 : FROM centos
---> 470671670cac
Step 2/10 : MAINTAINER yhdocker xxx@gmail.com
---> Running in 7a38a99ec11e
---> 7aea344757b7
....................................................................................
---> Running in 511c68a366f5
---> 167af9aa6bd9
Removing intermediate container 511c68a366f5
Successfully built 167af9aa6bd9 ---- 构建成功
构建完成后我们就知道我们配置的都是那些
[root@docker-02 nginx]# docker images
REPOSITORY TAG IMAGE ID CREATED SIZE
mynginx v2 167af9aa6bd9 11 seconds ago 316 MB
yhdocker/abcdocker v1 534b0a4cc9a5 About an hour ago 361 MB
docker.io/nginx latest 602e111c06b6 3 days ago 127 MB
docker.io/mysql 5.7 5d9483f9a7b2 4 days ago 455 MB
docker.io/centos latest 470671670cac 3 months ago 237 MB
docker.io/nginx 1.15 53f3fd8007f7 11 months ago 109 MB
启动镜像
[root@docker-02 nginx]# docker run --name mynginxtest -d -p 82:80 mynginx:v2
0570e0660c934a10124d0df671a449f7029e76b4c74b47ebbc434376e5ab3962
#mynginx:v2是docker images查看到的镜像名称
Dockerfile参数解释
FROM 指定基础镜像
MAINTAINER 指定维护者信息
RUN 在命令前面加上RUN
ADD COPY文件,会自动解压
WORKDIR 设置当前工作目录,类似于cd
VOLUME 设置卷,挂载主机目录
EXPOSE 指定对外的端口
CMD 指定容器启动后要干的事情
======================构建本地仓库=======================
二、Docker仓库
Docker的仓库是DockerHub,类似于github,github有一个开源的软件叫gitlab。Docker也有一个开源软件docker registry
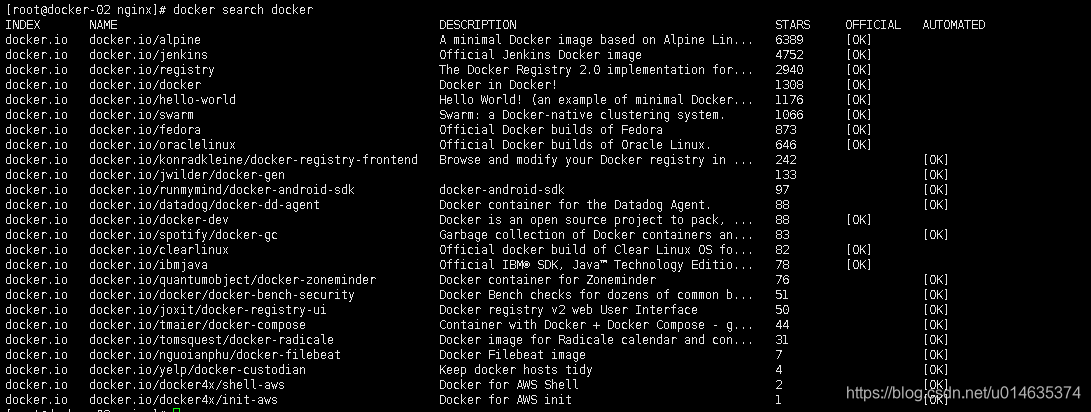
[root@docker-02 nginx]# docker search docker
我们可以通过docker pull 来下载一个
[root@docker-02 nginx]# docker pull registry
Using default tag: latest
Trying to pull repository docker.io/library/registry ...
latest: Pulling from docker.io/library/registry
486039affc0a: Pull complete
ba51a3b098e6: Pull complete
8bb4c43d6c8e: Pull complete
6f5f453e5f2d: Pull complete
42bc10b72f42: Pull complete
Digest: sha256:7d081088e4bfd632a88e3f3bcd9e007ef44a796fddfe3261407a3f9f04abe1e7
Status: Downloaded newer image for docker.io/registry:latest
[root@docker-02 nginx]# docker images

默认占用5000端口,我们查看是否存在5000端口
[root@docker-02 nginx]# netstat -lntup

我们开始运行容器
[root@docker-02 nginx]# docker run -d -p 5000:5000 registry
92c2351607f9b6309c5d5857148c50caaaee1ad757d906476790eaad66ef7a90

提示:docker比较老的版本运行起来就可以运行,1.7之后都不可以
我们新打一个标签
[root@docker-02 nginx]# docker images
REPOSITORY TAG IMAGE ID CREATED SIZE
mynginx v2 167af9aa6bd9 About an hour ago 316 MB
yhdocker/abcdocker v1 534b0a4cc9a5 3 hours ago 361 MB
docker.io/nginx latest 602e111c06b6 3 days ago 127 MB
docker.io/mysql 5.7 5d9483f9a7b2 4 days ago 455 MB
docker.io/registry latest 708bc6af7e5e 3 months ago 25.8 MB
docker.io/centos latest 470671670cac 3 months ago 237 MB
docker.io/nginx 1.15 53f3fd8007f7 11 months ago 109 MB
[root@docker-02 nginx]# docker tag yhdocker/abcdocker:v1 192.168.227.132:5000/abc/mynginx:latest
#我们将以前的abcdocker打一个标签到5000端口
因为Docker从1.3.X之后默认docker registry使用的是https,所以当用docker pull命令下载远程镜像时,如果远程docker registry是非https的时候就会报上面的错误。
[root@docker-02 nginx]# docker push 192.168.227.132:5000/abc/mynginx:latest
The push refers to a repository [192.168.227.132:5000/abc/mynginx]
Get https://192.168.227.132:5000/v1/_ping: http: server gave HTTP response to HTTPS client
提示:解决方法有2种,一种是去沃通或腾讯申请免费ssl,或者我们本地修改配置文件
解决Https问题
安装nginx,制作https
[root@docker-02 nginx]# yum install nginx -y
[root@docker-02 nginx]# vim /etc/nginx/nginx.conf
…
    include /etc/nginx/conf.d/*.conf;
…
因为在配置文件中已经指定了目录,只有放在/etc/nginx/conf.d/*下面才会识别到
配置如下:
cd /etc/nginx/conf.d/
upstream docker-registry {
server 127.0.0.1:5000;
}
server {
listen 443;
server_name registry.abcdocker.com
ssl on;
ssl_certificate /etc/ssl/nginx.crt;
ssl_certificate_key /etc/ssl/nginx.key;
proxy_set_header Host $http_host;
proxy_set_header X-Real-IP $remote_addr;
client_max_body_size 0;
chunked_transfer_encoding on;
location / {
auth_basic "Docker";
auth_basic_user_file /etc/nginx/conf.d/docker-registry.htpasswd;
proxy_pass http://docker-registry;
}
location /_ping {
auth_basic off;
proxy_pass http://docker-registry;
}
location /v1/_ping {
auth_basic off;
proxy_pass http://docker-registry;
}
}
我们需要生成一个证书,可以申请一个沃通或者腾讯的免费ssl
以下如果有沃通的免费ssl就不需要设置
我们先设置一个根密钥,生产上直接使用沃通的免费ssl配置就可以了
[root@docker-02 ~]# cd /etc/pki/CA/
[root@docker-02 CA]# touch ./{serial,index.txt}
[root@docker-02 CA]# echo "00" >serial
[root@docker-02 CA]# openssl genrsa -out private/cakey.pem 2048
Generating RSA private key, 2048 bit long modulus
............+++
...............................................+++
e is 65537 (0x10001)
[root@docker-02 CA]# openssl req -new -x509 -key private/cakey.pem -days 3650 -out cacert.pem
You are about to be asked to enter information that will be incorporated
into your certificate request.
What you are about to enter is what is called a Distinguished Name or a DN.
There are quite a few fields but you can leave some blank
For some fields there will be a default value,
If you enter '.', the field will be left blank.
-----
Country Name (2 letter code) [XX]:CN
State or Province Name (full name) []:BeiJing
Locality Name (eg, city) [Default City]:BeiJing
Organization Name (eg, company) [Default Company Ltd]:yhdocker
Organizational Unit Name (eg, section) []:docker
Common Name (eg, your name or your server's hostname) []:rg.yhdocker.com
Email Address []:cyh@yhdocker.com
以上步骤是生成一个根证书
我们现在需要生产一个nginx的证书(生产可以直接使用运营商颁发的证书,不需要生成)
[root@docker-02 CA]# cd /et/ssl/
-bash: cd: /et/ssl/: 没有那个文件或目录
[root@docker-02 CA]# cd /etc/ssl
[root@docker-02 ssl]# openssl genrsa -out nginx.key 2048
Generating RSA private key, 2048 bit long modulus
...............................................................................................+++
......................................+++
e is 65537 (0x10001)
[root@docker-02 ssl]# openssl req -new -key nginx.key -out nginx.csr
You are about to be asked to enter information that will be incorporated
into your certificate request.
What you are about to enter is what is called a Distinguished Name or a DN.
There are quite a few fields but you can leave some blank
For some fields there will be a default value,
If you enter '.', the field will be left blank.
-----
Country Name (2 letter code) [XX]:CN
State or Province Name (full name) []:BeiJing
Locality Name (eg, city) [Default City]:BeiJing
Organization Name (eg, company) [Default Company Ltd]:yhdocker
Organizational Unit Name (eg, section) []:docker
Common Name (eg, your name or your server's hostname) []:rg.yhdocker.com
Email Address []:cyh@yhdocker.com
Please enter the following 'extra' attributes
to be sent with your certificate request
A challenge password []:
An optional company name []:
#最后2个直接回车
签发证书
[root@docker-02 ssl]# openssl ca -in nginx.csr -days 365 -out nginx.crt
Using configuration from /etc/pki/tls/openssl.cnf
Check that the request matches the signature
Signature ok
Certificate Details:
Serial Number: 0 (0x0)
Validity
Not Before: Apr 27 13:15:45 2020 GMT
Not After : Apr 27 13:15:45 2021 GMT
Subject:
countryName = CN
stateOrProvinceName = BeiJing
organizationName = yhdocker
organizationalUnitName = docker
commonName = rg.yhdocker.com
emailAddress = cyh@yhdocker.com
X509v3 extensions:
X509v3 Basic Constraints:
CA:FALSE
Netscape Comment:
OpenSSL Generated Certificate
X509v3 Subject Key Identifier:
2F:6D:5A:29:03:97:81:F4:D6:CD:A9:1D:C6:F4:8F:27:C6:CE:80:0C
X509v3 Authority Key Identifier:
keyid:32:2D:53:E7:84:7C:4D:44:93:FB:15:E1:E8:C4:E5:46:CB:BC:CE:01
Certificate is to be certified until Apr 27 13:15:45 2021 GMT (365 days)
Sign the certificate? [y/n]:y
1 out of 1 certificate requests certified, commit? [y/n]y
Write out database with 1 new entries
Data Base Updated
因为我们设置的是自签证书,要让系统允许
[root@docker-02 ~]# cat /etc/pki/CA/cacert.pem >> /etc/pki/tls/certs/ca-bundle.crt
nginx 安装无htpasswd命令
yum -y install httpd-tools
我们创建一个用来验证的账号密码
[root@docker-02 ~]# htpasswd -c /etc/nginx/conf.d/docker-registry.htpasswd yhdocker # 账号
New password: yhdocker #---密码
Re-type new password: yhdocker #---密码
Adding password for user yhdocker
#这个路径要跟nginx配置文件中的路径对应上(/etc/nginx/conf.d/docker-registry.htpasswd)
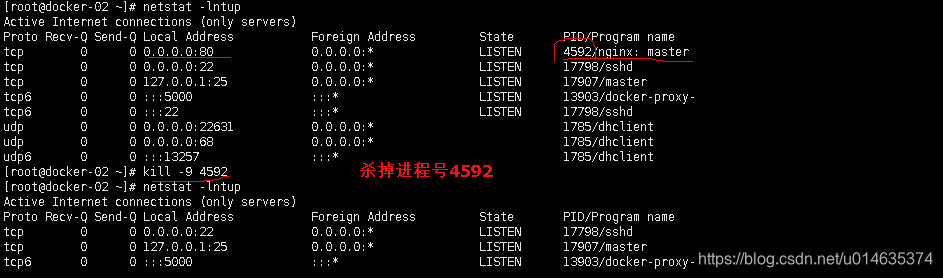
[root@docker-02 ~]# systemctl start nginx
80端口被占用
用netstat -ltunp命令,可以看到80端口被nginx占用了,因为之前安过一次,现在再安了一次,冲突了。

[root@docker-02 ~]# docker stop mynginxtest
mynginxtest
[root@docker-02 ~]# docker stop nginxv1
nginxv1
[root@docker-02 ~]# docker ps
CONTAINER ID IMAGE COMMAND CREATED STATUS PORTS NAMES
92c2351607f9 registry "/entrypoint.sh /e..." 4 hours ago Up 4 hours 0.0.0.0:5000->5000/tcp jolly_lalande
664d9c96d5a2 nginx "nginx -g 'daemon ..." 9 hours ago Up 9 hours abbcdocker_host1
dd706a712964 mysql:5.7 "docker-entrypoint..." 10 hours ago Up 10 hours 3306/tcp, 33060/tcp abcdocker
重新启动nginx
[root@docker-02 ~]# systemctl start nginx
[root@docker-02 ~]# systemctl status nginx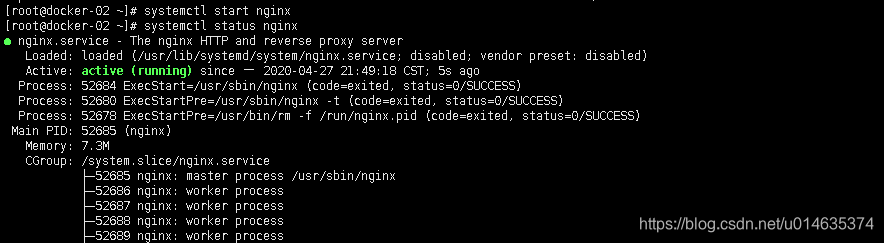
即可.
查看是否有443端口
[root@docker-02 ~]# netstat -lntup
Active Internet connections (only servers)
Proto Recv-Q Send-Q Local Address Foreign Address State PID/Program name
tcp 0 0 0.0.0.0:80 0.0.0.0:* LISTEN 52685/nginx: master
tcp 0 0 0.0.0.0:22 0.0.0.0:* LISTEN 17798/sshd
tcp 0 0 127.0.0.1:25 0.0.0.0:* LISTEN 17907/master
tcp 0 0 0.0.0.0:443 0.0.0.0:* LISTEN 52685/nginx: master
tcp6 0 0 :::5000 :::* LISTEN 13903/docker-proxy-
tcp6 0 0 :::80 :::* LISTEN 52685/nginx: master
tcp6 0 0 :::22 :::* LISTEN 17798/sshd
udp 0 0 0.0.0.0:22631 0.0.0.0:* 1785/dhclient
udp 0 0 0.0.0.0:68 0.0.0.0:* 1785/dhclient
udp6 0 0 :::13257 :::* 1785/dhclient
还需要做一个绑定,设置host解析
[root@docker-02 ~]# cat /etc/hosts
127.0.0.1 localhost localhost.localdomain localhost4 localhost4.localdomain4
::1 localhost localhost.localdomain localhost6 localhost6.localdomain6
192.168.227.131 docker-01
192.168.227.132 docker-02 rg.yhdocker.com
192.168.227.133 docker-03
192.168.227.134 docker-04
192.168.227.135 docker-05
修改配置文件
[root@docker-02 ~]# vim /etc/sysconfig/docker
# Modify these options if you want to change the way the docker daemon runs
OPTIONS='--selinux-enabled=false --insecure-registry 192.168.227.132:5000 --log-driver=journald --signature-verification=false'


 1394
1394


 被折叠的 条评论
为什么被折叠?
被折叠的 条评论
为什么被折叠?
 到【灌水乐园】发言


