


前言
资源:布局、颜色、字符串、图片等等
android把常用的资源同一放在res目录下
字符串资源
1、定义字符串资源文件
2、使用字符串资源:在xml文件中使用,在java文件中使用
默认字符串资源文件:res/values/strings.xml
<resources>
    <string name="app_name">jiyujianting</string>
    <string name="showme">showme</string>
</resources>
在xml中使用字符串资源
<Button
    android:layout_width="match_parent"
    android:layout_height="wrap_content"
    android:id="@+id/button_1"
    android:text="@string/showme" />
在java中使用字符串资源 - 一般动态设置的时候
 Button button = findViewById(R.id.button_1);
 button.setText(R.string.showme);
 button.setText(getResources().getString(R.string.showme));
一个实例
<resources>
    <string name="app_name">Windows Phone 10.1</string>
    <string name="textView1">微信</string>
    <string name="textView2">通讯录</string>
    <string name="textView3">QQ</string>
    <string name="textView4">相机</string>
    <string name="textView5">时钟</string>
    <string name="textView6">备忘录</string>
    <string name="textView7">音乐</string>
    <string name="textView8">互联网</string>
    <string name="textView9">邮件</string>
</resources>
<?xml version="1.0" encoding="utf-8"?>
<LinearLayout
    xmlns:android="http://schemas.android.com/apk/res/android"
    xmlns:tools="http://schemas.android.com/tools"
    android:layout_width="match_parent"
    android:layout_height="match_parent"
    android:background="@drawable/bg"
    android:orientation="vertical"
    android:paddingBottom="80dp"
    android:paddingLeft="@dimen/activity_horizontal_margin"
    android:paddingRight="@dimen/activity_horizontal_margin"
    android:paddingTop="80dp"
    tools:context="com.mingrisoft.MainActivity">
    <!-- 第一行的线性布局管理器 -->
    <LinearLayout
        android:layout_width="match_parent"
        android:layout_height="match_parent"
        android:layout_weight="1"
        android:orientation="horizontal">

        <TextView
            android:id="@+id/textView1"
            android:layout_width="match_parent"
            android:layout_height="match_parent"
            android:layout_weight="1"
            android:background="@color/textView1"
            android:gravity="center"
            android:text="@string/textView1"
            android:textColor="@color/wordcolor"
            android:textSize="@dimen/wordsize"
            />

        <TextView
            android:id="@+id/textView2"
            android:layout_width="match_parent"
            android:layout_height="match_parent"
            android:layout_marginLeft="@dimen/margin"
            android:layout_weight="1"
            android:background="@color/textView2"
            android:gravity="center"
            android:text="@string/textView2"
            android:textColor="@color/wordcolor"
            android:textSize="@dimen/wordsize"
            />

        <TextView
            android:id="@+id/textView3"
            android:layout_width="match_parent"
            android:layout_height="match_parent"
            android:layout_marginLeft="@dimen/margin"
            android:layout_weight="1"
            android:background="@color/textView3"
            android:gravity="center"
            android:text="@string/textView3"
            android:textColor="@color/wordcolor"
            android:textSize="@dimen/wordsize"
            />

    </LinearLayout>
    <!-- 第二行的线性布局管理器 -->
    <LinearLayout
        android:layout_width="match_parent"
        android:layout_height="match_parent"
        android:layout_marginTop="@dimen/margin"
        android:layout_weight="1"
        android:orientation="horizontal">

        <TextView
            android:id="@+id/textView4"
            android:layout_width="match_parent"
            android:layout_height="match_parent"
            android:layout_weight="1"
            android:background="@color/textView4"
            android:gravity="center"
            android:text="@string/textView4"
            android:textColor="@color/wordcolor"
            android:textSize="@dimen/wordsize"
            />

        <TextView
            android:id="@+id/textView5"
            android:layout_width="match_parent"
            android:layout_height="match_parent"
            android:layout_marginLeft="@dimen/margin"
            android:layout_weight="1"
            android:background="@color/textView5"
            android:gravity="center"
            android:text="@string/textView5"
            android:textColor="@color/wordcolor"
            android:textSize="@dimen/wordsize"
            />

        <TextView
            android:id="@+id/textView6"
            android:layout_width="match_parent"
            android:layout_height="match_parent"
            android:layout_marginLeft="@dimen/margin"
            android:layout_weight="1"
            android:background="@color/textView6"
            android:gravity="center"
            android:text="@string/textView6"
            android:textColor="@color/wordcolor"
            android:textSize="@dimen/wordsize"
            />
    </LinearLayout>
    <!-- 第三行的线性布局管理器 -->
    <LinearLayout
        android:layout_width="match_parent"
        android:layout_height="match_parent"
        android:layout_marginTop="@dimen/margin"
        android:layout_weight="1"
        android:orientation="horizontal">

        <TextView
            android:id="@+id/textView7"
            android:layout_width="match_parent"
            android:layout_height="match_parent"
            android:layout_weight="1"
            android:background="@color/textView7"
            android:gravity="center"
            android:text="@string/textView7"
            android:textColor="@color/wordcolor"
            android:textSize="@dimen/wordsize"
            />

        <TextView
            android:id="@+id/textView8"
            android:layout_width="match_parent"
            android:layout_height="match_parent"
            android:layout_marginLeft="@dimen/margin"
            android:layout_weight="1"
            android:background="@color/textView8"
            android:gravity="center"
            android:text="@string/textView8"
            android:textColor="@color/wordcolor"
            android:textSize="@dimen/wordsize"
            />

        <TextView
            android:id="@+id/textView9"
            android:layout_width="match_parent"
            android:layout_height="match_parent"
            android:layout_marginLeft="@dimen/margin"
            android:layout_weight="1"
            android:background="@color/textView9"
            android:gravity="center"
            android:text="@string/textView9"
            android:textColor="@color/wordcolor"
            android:textSize="@dimen/wordsize"
            />
    </LinearLayout>
</LinearLayout>
颜色资源
通过透明度 + 红绿蓝值
# 透明度 R G B
透明度 00 - FF  : FF表示完全不透明,透明度也可以省略
默认在res/values/colors.xml中定义颜色资源
定义颜色资源
<?xml version="1.0" encoding="utf-8"?>
<resources>
    <color name="colorPrimary">#3F51B5</color>
    <color name="colorPrimaryDark">#303F9F</color>
    <color name="colorAccent">#FF4081</color>
    <color name="wordcolor">#FFFFFF</color>
</resources>
在xml中使用颜色资源
   <TextView
       android:id="@+id/textView1"
       android:layout_width="match_parent"
       android:layout_height="match_parent"
       android:layout_weight="1"
       android:gravity="center"
       android:textColor="@color/wordcolor"
       android:textSize="@dimen/wordsize"
       />
在java中使用颜色资源
TextView tv=(TextView)findViewById(tvid[i]);
tv.setBackgroundColor(getResources().getColor(R.color.wordcolor));
尺寸资源
android中常用的尺寸单位
dp : 设备独立像素 - 用于设置边距和组件大小
sp :可伸缩像素 - 用于设置字体
默认定义尺寸文件 res/values/dimens.xml
<resources>
    <!-- Default screen margins, per the Android Design guidelines. -->
    <dimen name="activity_horizontal_margin">16dp</dimen>
    <dimen name="activity_vertical_margin">16dp</dimen>
    <dimen name="wordsize">18sp</dimen>
    <dimen name="margin">5dp</dimen>

</resources>
在xml中使用尺寸资源
   <TextView
       android:id="@+id/textView1"
       android:layout_width="match_parent"
       android:layout_height="match_parent"
       android:layout_weight="1"
       android:gravity="center"
       android:textColor="@color/wordcolor"
       android:textSize="@dimen/wordsize"
       />
在java中使用哦尺寸资源
button.setTextSize(getResources().getDimension(R.dimen.small));
布局资源
layout布局文件就是布局资源
在java中设置布局资源
setContentView(R.layout.activity_main);
在布局文件中使用布局资源
先定义一个images布局管理器
在其他布局管理器中通过include引用images布局管理器
<?xml version="1.0" encoding="utf-8"?>
<LinearLayout xmlns:android="http://schemas.android.com/apk/res/android"
    xmlns:app="http://schemas.android.com/apk/res-auto"
    xmlns:tools="http://schemas.android.com/tools"
    android:layout_width="match_parent"
    android:layout_height="match_parent"
    tools:context=".MainActivity">

    <Button
        android:layout_width="match_parent"
        android:layout_height="wrap_content"
        android:id="@+id/button_1"
        android:text="@string/showme" />
    <include layout="@layout/images">
    </include>

</LinearLayout>
数组资源
定义资源数组
- array : 定义尺寸资源
- integer-array : 定义整形数组
- string-array : 定义字符串数组
<?xml version="1.0" encoding="utf-8"?>
<resources>
    <integer-array name="bgcolor">
        <item>0xBBE24A83</item>
        <item>0xBB318AD6</item>
        <item>0xBBD73943</item>
        <item>0xBBE69A08</item>
        <item>0xBBBD9663</item>
        <item>0xBBD45ABC</item>
        <item>0xBB4AA6D6</item>
        <item>0xBB8064D2</item>
        <item>0xBBF7A81E</item>
    </integer-array>
    <string-array name="word">
        <item>微信</item>
        <item>通讯录</item>
        <item>QQ</item>
        <item>相机</item>
        <item>时钟</item>
        <item>备忘录</item>
        <item>音乐</item>
        <item>互联网</item>
        <item>邮件</item>
    </string-array>
</resources>
在xml中的ListView显示数组资源的数据
<ListView
        android:layout_width="wrap_content"
        android:layout_height="wrap_content"
        android:id="@+id/showthis"
        android:entries="@array/word" />
在java中获取数组资源文件
 int[] color=getResources().getIntArray(R.array.bgcolor);		//获取保存背景颜色的数组
 String[] word=getResources().getStringArray(R.array.word);		//获取保存显示文字的数组
图片资源
Drawable资源
通常放置在res/drawable目录下,为了分辨率的不同,放置在不同的分辨率下
图片资源
- png、jpg、gif、9.png(通过drwa9patch.bat来生成)
StateListDrawable资源
定义在XML文件中的Drawable对象,如按钮按下时变大
如编辑框,在获取焦点和不获取焦点时文字的颜色
1、在drawable目录下创建edittor.xml,设置获取焦点时失去焦点时的颜色
<?xml version="1.0" encoding="utf-8"?>
<selector xmlns:android="http://schemas.android.com/apk/res/android">
    <item android:state_focused="true" android:color="#F60" />
    <item android:state_focused="false" android:color="#F0A0" />
</selector>
2、在xml中使用该StateListDrawable资源
<EditText
        android:layout_width="match_parent"
        android:layout_height="wrap_content"
        android:textColor="@drawable/edittor" />
mipmap资源
应用程序启动图标
主题和样式资源
主题资源
设置应用窗口的整体样子
默认在res/values/themes.xml文件中
<resources xmlns:tools="http://schemas.android.com/tools">
    <!-- Base application theme. -->
    <style name="Theme.MyApplication" parent="Theme.MaterialComponents.DayNight.DarkActionBar">
        <!-- Primary brand color. -->
        <item name="colorPrimary">@color/purple_500</item>
        <item name="colorPrimaryVariant">@color/purple_700</item>
        <item name="colorOnPrimary">@color/white</item>
        <!-- Secondary brand color. -->
        <item name="colorSecondary">@color/teal_200</item>
        <item name="colorSecondaryVariant">@color/teal_700</item>
        <item name="colorOnSecondary">@color/black</item>
        <!-- Status bar color. -->
        <item name="android:statusBarColor" tools:targetApi="l">?attr/colorPrimaryVariant</item>
        <!-- Customize your theme here. -->
    </style>
</resources>
android:windowNoTitle 是否有标题栏
android:windowBackground 设置背景图片
在哪里使用使用主题资源
1、在AndroidManifest.xml
可以为整个app设置主题
android:theme="@style/Theme.MyApplication"
也可以为单个Activity设置主题
在Java中指定主题
    protected void onCreate(Bundle savedInstanceState) {
        super.onCreate(savedInstanceState);
        setTheme(R.style.Theme_MyApplication);
        setContentView(R.layout.activity_main); // 需要在这一行之前设置主题
样式资源
比如说文字样式
也是在res/values/themes.xml文件中中进行设置
主题:设置整个APP或窗口样式
样式:设置组件的样式
    <style name="title">
        <item name="android:textSize">30sp </item>
        <item name="android:textColor">#06F</item>

    </style>
在title样式的基础上进行修改
    <style name="title">
        <item name="android:textSize">30sp</item>
        <item name="android:textColor">#06F</item>
    </style>

    <style name="content" parent="title">
        <item name="android:textSize">10sp</item>
    </style>
使用样式资源
    <EditText
        android:layout_width="match_parent"
        android:layout_height="wrap_content"
        style="@style/title"
        android:text="this abc"
        android:textColor="@drawable/edittor" />
菜单资源
菜单资源
在res目录下创建menu目录,再创建菜单资源文件
<?xml version="1.0" encoding="utf-8"?>
<menu xmlns:android="http://schemas.android.com/apk/res/android">
    <item
        android:id="@+id/settings"
        android:title="@string/menu_title_settings"></item>
    <item
        android:id="@+id/regard"
        android:title="@string/menu_title_regard"></item>
</menu>
选项资源菜单
在java中使用菜单资源文件用作选项资源菜单
public class MainActivity extends AppCompatActivity {

    @Override
    protected void onCreate(Bundle savedInstanceState) {
        super.onCreate(savedInstanceState);
        setContentView(R.layout.activity_main);
    }

    @Override
    public boolean onCreateOptionsMenu(Menu menu) {
        MenuInflater menuInflater = new MenuInflater(this);  //实例化一个MenuInflater对象
        menuInflater.inflate(R.menu.menu, menu);   //解析菜单文件
        return super.onCreateOptionsMenu(menu);
    }

    @Override
    public boolean onOptionsItemSelected(MenuItem item) {
        switch (item.getItemId()) { //获取选中菜单id
            case R.id.settings: //通过选中id跳转指定页面
                Intent intent = new Intent(MainActivity.this, Settings.class);
                startActivity(intent);
                break;
            case R.id.regard:  //通过选中id跳转指定页面
                Intent intent1 = new Intent(MainActivity.this, Regard.class);
                startActivity(intent1);
                break;
        }
        return super.onOptionsItemSelected(item);
    }
}
上下文菜单
在某个组件上长按时,创建的菜单
步骤:
1、为组件注册上下文菜单
2、添加上下文菜单
3、指定菜单项被选中时所应做出的处理
<?xml version="1.0" encoding="utf-8"?>
<menu xmlns:android="http://schemas.android.com/apk/res/android">
    <item
        android:id="@+id/menu_book_collect"
        android:title="@string/book_collect"></item>
    <item
        android:id="@+id/menu_book_report"
        android:title="@string/book_report"></item>
</menu>
public class MainActivity extends Activity {
    TextView introduce;  //定义TextView组件

    @Override
    protected void onCreate(Bundle savedInstanceState) {
        super.onCreate(savedInstanceState);
        setContentView(R.layout.activity_main);
        introduce = (TextView) findViewById(R.id.introduce);  //获取介绍TextView组件
        registerForContextMenu(introduce);        //为文本框注册上下文菜单
    }


    @Override
    //创建上下文菜单
    public void onCreateContextMenu(ContextMenu menu, View v, ContextMenu.ContextMenuInfo menuInfo) {
            MenuInflater inflater = new MenuInflater(this); //实例化一个MenuInflater对象
            inflater.inflate(R.menu.introduce_menu, menu);    //解析菜单文件
    }

    @Override
    public boolean onContextItemSelected(MenuItem item) {
        switch (item.getItemId()) {
            case R.id.menu_copy: //选中介绍文字菜单中的复制时
                Toast.makeText(MainActivity.this, "已复制", Toast.LENGTH_SHORT).show();
                break;
            case R.id.menu_collect: //选中介绍文字菜单中的收藏时
                Toast.makeText(MainActivity.this,"已收藏",Toast.LENGTH_SHORT).show();
                break;
        }
        return true;
    }
}
Android程序国际化
Internationalization - I18N
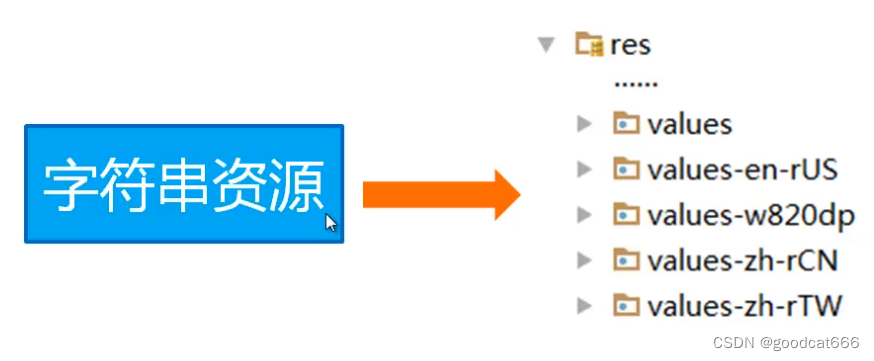
使用不同的values文件夹就可以了


 8555
8555


 被折叠的 条评论
为什么被折叠?
被折叠的 条评论
为什么被折叠?
 到【灌水乐园】发言


