


说明
- 网上关于caffe的安装教程非常多,但是关于每一步是否操作成功,出现了什么样的错误又该如何处理没有给出说明。因为大家的操作系统的环境千差万别,按照博客中的教程一步步的安装,最后可能失败——这是很常见的哦。有的教程甚至省略了一些细节部分,让小白更不知道如何判断每一步是否操作成功,如何处理出现的错误。
- 作者花费了很长时间才成功地将caffe装完,期间遇到好多错误,多次重装操作系统。现在将经验写下来,一方面为了和大家分享,讨论;另一方面是为了记录一下下~~~
环境
操作系统:Ubuntu 14.04
GCC/G++:4.7.x
OpenCV:2.4.11和3.0.0
Matlab :R2014b(a)
Python:2.7
安装步骤
- 综述
- 0.准备工作
- 1.安装GCC4.7和G++4.7并降级
- 2.安装显卡驱动
- 3.安装cuda和cudnn
- 4.安装Matlab
- 5.安装OpenCV
- 6.安装Python依赖包
- 7.安装caffe
介绍
0.准备工作
- 安装Ubuntu 14.04(15.04),最好安装较新版本的Ubuntu。为什么选择Ubuntu呢?一方面,个人使用习惯,感觉Ubuntu安装软件等特别方便,使用特别顺手;另一方面,caffe项目最初貌似在Ubuntu上开发的,原生嘛。
- 安装过程需要下载东东,因此需要联网。
- 安装
1.安装GCC4.7和G++4.7并降级
- 为什么要先安装GCC和G++,并需要降级呢?
- Ubuntu14.04版本默认的GCC和G++都是4.8。而Matlab默认支持的mex编译器是GCC4.7.x和G++4.7.x。因此需要额外安装GCC4.7和G++4.7并降级。
- 为什么需要先安装编译器GCC和G++,而不是先安装显卡驱动和cuda等等呢?
- 首先,先安装显卡驱动,后安装GCC并降级的安装顺序过程中,遇到了很多问题。比如,在安装CUDA SAMPLES的过程中,遇到了问题/usr/bin/ld: cannot find –lGL,后面通过网上教程,重新连接该库文件,仍然不能通过OpenCV的编译。但是,先安装GCC,再安装显卡驱动,就不会遇到这个问题了。
-
其次,请先看下图。这是在成功地安装完显卡驱动之后,查看加载的显卡的版本信息时返回的结果。注意,包含了GCC4.7.3。说明,显卡安装过程中,会和GCC的版本产生联系。。。。这也就不不难理解为什么在编译Cuda Samples过程中会遇到上面的问题。
-
所以,请先安装GCC4.7和G++4.7,然后在执行下面的步骤。

2.安装NVIDIA显卡驱动
- 为什么需要安装NVIDIA显卡驱动,Ubuntu没有自带的显卡驱动吗?
- Ubuntu自带的显卡驱动是开源的Nouveau,据说是一个比较烂的东东。而且,最关键的是cuda不支持Nouveau。如果想使用cuda进行GPU计算,必须安装NVIDIA显卡驱动。
- 选择哪个版本的显卡驱动呢
- 这个问题需要结合操作系统,显卡和个人需求来讨论。
- 操作系统影响显卡驱动的版本。比如,我在Ubuntu14.04 Server上安装NVIDIA-352显卡驱动,说是由于dkms,安装失败。目前,通过apt-get方式可以安装的最新NVIDIA显卡驱动是NVIDIA-346。
- 显卡嘛,硬件当然要和驱动适应才行
- 个人需求,主要从cuda的角度考虑。比如cuda7.5需要显卡驱动最低版本是nvidia-352;cuda7.0需要显卡驱动最低版本是nvidia-336;cuda6.5需要显卡驱动最低版本是nvidia-33*;其他的记不清楚啦。。。
- 显卡驱动的安装方式有哪些
- 方法一:去NVIDIA官网下载相应的驱动二进制安装包,然后安装。
- 方法二:通过
apt-get来安装。 - 区别:apt-get安装方便,但是不能安装最新的显卡驱动,目前ubuntu14.04通过apt-get可以安装nvidia-346显卡。
- 安装过程中注意事项:①需要关闭显示管理器,②二进制安装需要修改文件,并重启。
3.安装cuda和cudnn
- 安装cuda的方式有哪些?
- 方法一:官网下载cuda开发包的二进制安装包进行安装。
- 方法二:官网下载cuda开发包的deb文件进行安装。
- cuda版本的选择问题?
- 根据个人需求和操作系统来决定,显卡驱动版本。
- cuda6.5是一个分界点,cuda6.5支持compute_11,compute_12. etc. compute_1X系列架构;从cuda7.0开始,不支持compute_1X系列架构,最低是compute_20架构。
- cuda对显卡驱动有要求。比如cuda7.5需要显卡驱动最低版本是nvidia-352;cuda7.0需要显卡驱动最低版本是nvidia-336;cuda6.5需要显卡驱动最低版本是nvidia-33*;其他的记不清楚啦。因此,结合自己操作系统可以安装的NVIDIA显卡驱动来决定选择哪个版本的cuda。
- 为什么安装cudnn?
- cudnn可以简单的理解为
CUDa cNN,即在GPU上做卷积运算。最近几年,深度学习很火,尤其是CNN(卷积神经网络)。通过cudnn,可以极大的提高CNN训练速度。简单的说,实用GPU是为了快,实用cudnn是为了更快。
4.安装Matlab
- 在Ubuntu中安装Matlab比较简单,除了几个注意事项,和Windows中安装没有区别。
- 为什么需要安装Matlab?
- caffe有Matlab的接口,因此如果需要使用Matlab调用caffe,进行编程,就需要安装Matlab。如果你觉得使用C或Python编程比较难,就请安装Matlab。当然如果不需要,并且后面不会编译caffe生成Matlab的接口,就不需要安装Matlab了。这个纯粹根据个人需求来定。
- Matlab是商业软件,请自行百度下载。。。【主要是太大了,不方便提供】
5.安装OpenCV
- 为什么需要安装OpenCV?
- caffe是用来做深度学习的,深度学习的一大应用对象就是图像和视频。而OpenCV是目前最火的开源计算机视觉库,非常多的项目多用到了OpenCV,当然caffe也依赖OpenCV。所以,需要安装OpenCV,否则无法使用caffe哦。。。
- OpenCV安装简单吗?
- 答案是因人而异。有的人觉得简单,可以自己弄,有的人觉得难,没关系,大神们有写的安装脚本点此*下载,运行一下就OK了。
- 但是,使用别人脚本安装的方法,也会遇到一些问题。如果遇到问题,请Google解决。
- 最简单的方式是使用我修改过的脚本,按照顺序执行12345个脚本,基本不需要修改就能成功安装。
- 最后提醒,安装OpenCV是挺麻烦的,请耐心安装,编译不过的话,查看错误Google,解决了再编译,一遍遍的尝试,最后就能解决问题了。
- 应该安装OpenCV哪个版本呢?
- OpenCV的版本和cuda的版本最好匹配。这样子安排的目的是为了减少错误出现的概率。比如,我无错误编译成功的组合有【cuda7.0 + opencv3.0】,【cuda6.5+opencv2.11】。
- 应该安装最新的,又不该安装最新的。呵呵,好别扭哦。针对于低版本的cuda,最好安装opencv2.x。而且是opencv2.x中最新的。
- 低版本cuda安装opencv2.x的原因是,opencv的一些文件中涉及一些关于cuda架构的设置,opencv2.x中有支持相应的架构的配置。从这个角度看,cuda6.5是最保险的, 因为它既支持compute_1x,也支持更高的架构。
6.安装Python相关依赖
- 为什么要安装python相关依赖???
- 首先,python在linux中应用非常的广泛,很多项目都会涉及python,caffe也不例外。
- 其次,caffe提供了python的接口,为了后面使用,也需要这些依赖。
- 这些依赖都可以通过apt-get安装吗?
- 答案是否定的。
- 首先,google一下
apt-get vs pip,查看两者区别。 - 其次,安装theano的时候,发现apt-get安装的numPy和sciPy无法通过测试,并且造成theano测试失败。使用pip安装成功。参考《Ubuntu14.04安装Theano详细教程》。
- 最后,在安装caffe的过程中,发现有几个python依赖包必须通过pip安装(即自行编译),否则无法成功地编译caffe。
6.安装caffe
- 再重复一遍,请在上面所有步骤成功执行的前提下,安装caffe,否则编译肯定不会通过的。
- caffe源代码能不能直接拿过来编译呢?
- 不能。至少需要修改一个文件Makefile.config。该文件给caffe编译提供了必要的信息。
- 如果opencv的版本是3.0,还需要修改其他项。
- 其他的请参考安装caffe的教程
总结
- 至此,ubuntu下安装caffe的工作已经结束了。如果你完全按照本教程操作,相信你一定已经成功安装caffe了,并且对caffe有了一定的了解。
- 世上无难事只怕有坚持,安装过程虽然很复杂,但是只要坚持,不断的Google解决它,caffe就一定能安装。
- 错误不可怕,它是成功的障碍,同时也为我们成长提供了阶梯——所谓的能力,很大一部分是通过不断解决问题来获取的。
- 下面开始学习如何使用caffe做深度学习的研究喽,祝大家学习愉快。。。
参考
《Caffe + Ubuntu 15.04 + CUDA 7.0 新手安装配置指南》——欧新宇
这个教程很好,请查看本教程的过程中,结合欧新宇的教程一并查看。
《caffe - GitHub主页》
网络结构在线可视化工具
http://ethereon.github.io/netscope/#/editor
参考主页:
caffe 可视化的资料可在百度云盘下载
链接: http://pan.baidu.com/s/1jIRJ6mU
提取密码:xehi
http://cs.stanford.edu/people/karpathy/cnnembed/
http://lijiancheng0614.github.io/2015/08/21/2015_08_21_CAFFE_Features/
http://nbviewer.ipython.org/github/BVLC/caffe/blob/master/examples/00-classification.ipynb
http://www.cnblogs.com/platero/p/3967208.html
http://caffe.berkeleyvision.org/gathered/examples/feature_extraction.html
http://caffecn.cn/?/question/21
caffe程序是由c++语言写的,本身是不带数据可视化功能的。只能借助其它的库或接口,如OpenCV, Python或matlab。使用python接口来进行可视化,因为python出了个比较强大的东西:ipython notebook, 最新版本改名叫jupyter notebook,它能将python代码搬到浏览器上去执行,以富文本方式显示,使得整个工作可以以笔记的形式展现、存储,对于交互编程、学习非常方便。
使用CAFFE( http://caffe.berkeleyvision.org )运行CNN网络,并提取出特征,将其存储成lmdb以供后续使用,亦可以对其可视化
使用已训练好的模型进行图像分类在 http://nbviewer.ipython.org/github/BVLC/caffe/blob/master/example/00-classification.ipynb 中已经很详细地介绍了怎么使用已训练好的模型对测试图像进行分类了。由于CAFFE不断更新,这个页面的内容和代码也会更新。以下只记录当前能运行的主要步骤。下载CAFFE,并安装相应的dependencies,说白了就是配置好caffe。
1. 下载CAFFE,并安装相应的dependencies,说白了就是配置好caffe运行环境。

2. 配置好 python ipython notebook,具体可参考网页:
http://blog.csdn.net/jiandanjinxin/article/details/50409448
3. 在caffe_root下运行./scripts/download_model_binary.py models/bvlc_reference_caffenet获得预训练的CaffeNet。获取CaffeNet网络并储存到models/bvlc_reference_caffenet目录下。
- 1
- 2
- 1
- 2
4. 在python文件夹下进入ipython模式(或python,但需要把部分代码注释掉)运行以下代码
- 1
- 2
- 1
- 2
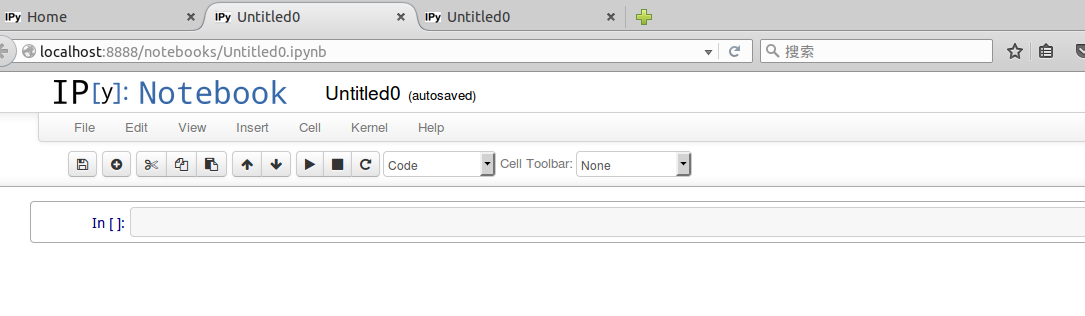
在命令行输入 ipython notebook,会出现一下画面
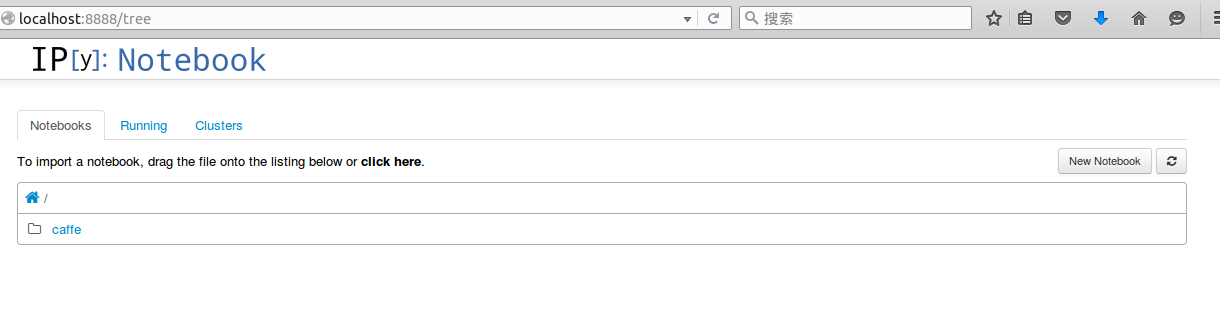
接着 点击 New Notebook,就可以输入代码,按 shift+enter 执行
python环境不能单独配置,必须要先编译好caffe,才能编译python环境。
安装jupyter
- 1
- 1
安装成功后,运行notebook
- 1
- 1
输入下面代码:
- 1
- 2
- 3
- 4
- 5
- 6
- 7
- 8
- 9
- 10
- 11
- 12
- 13
- 14
- 15
- 16
- 17
- 18
- 19
- 20
- 21
- 22
- 23
- 24
- 25
- 26
- 27
- 28
- 29
- 30
- 31
- 32
- 33
- 34
- 35
- 36
- 37
- 38
- 39
- 40
- 41
- 42
- 43
- 44
- 45
- 46
- 47
- 48
- 49
- 50
- 51
- 52
- 53
- 54
- 55
- 56
- 57
- 58
- 59
- 60
- 61
- 62
- 63
- 64
- 65
- 66
- 67
- 68
- 69
- 70
- 71
- 72
- 73
- 74
- 75
- 76
- 77
- 78
- 79
- 80
- 81
- 82
- 83
- 84
- 85
- 86
- 87
- 88
- 89
- 90
- 91
- 92
- 93
- 94
- 95
- 96
- 97
- 98
- 99
- 100
- 101
- 102
- 103
- 104
- 105
- 106
- 107
- 108
- 109
- 110
- 111
- 112
- 113
- 114
- 115
- 116
- 117
- 118
- 119
- 120
- 121
- 122
- 123
- 124
- 125
- 126
- 127
- 128
- 129
- 130
- 131
- 132
- 133
- 134
- 135
- 136
- 137
- 138
- 139
- 140
- 141
- 142
- 143
- 144
- 145
- 146
- 147
- 148
- 149
- 150
- 151
- 152
- 153
- 154
- 155
- 156
- 157
- 158
- 159
- 160
- 161
- 162
- 163
- 164
- 165
- 166
- 167
- 168
- 169
- 170
- 171
- 172
- 173
- 174
- 175
- 176
- 177
- 178
- 179
- 180
- 181
- 182
- 183
- 184
- 185
- 186
- 187
- 188
- 189
- 190
- 191
- 192
- 193
- 194
- 195
- 196
- 197
备注:用 caffe 的 python 接口提取和保存特征到text文本下
- 1
- 2
- 1
- 2
现在Caffe的Matlab接口 (matcaffe3) 和python接口都非常强大, 可以直接提取任意层的feature map以及parameters, 所以本文仅仅作为参考, 更多最新的信息请参考:
http://caffe.berkeleyvision.org/tutorial/interfaces.html
提取特征并储存
CAFFE提供了一个提取特征的tool,见 http://caffe.berkeleyvision.org/gathered/examples/feature_extraction.html 。
数据模型与准备
安装好Caffe后,在examples/images文件夹下有两张示例图像,本文即在这两张图像上,用Caffe提供的预训练模型,进行特征提取,并进行可视化。
1. 选择需要特征提取的图像
./examples/_temp
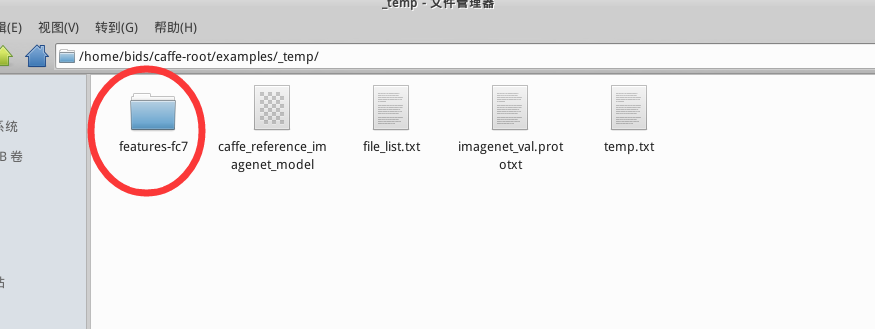
(1) 进入caffe根目录(本文中caffe的根目录都为caffe-root),创建临时文件夹,用于存放所需要的临时文件
- 1
- 1
(2) 根据examples/images文件夹中的图片,创建包含图像列表的txt文件,并添加标签(0)
- 1
- 2
- 1
- 2
(3) 执行下列脚本,下载imagenet12图像均值文件,在后面的网络结构定义prototxt文件中,需要用到该文件 (data/ilsvrc212/imagenet_mean.binaryproto).下载模型以及定义prototxt。
- 1
- 1
(4) 将网络定义prototxt文件复制到_temp文件夹下
- 1
- 1
使用特征文件进行可视化
参考 http://www.cnblogs.com/platero/p/3967208.html 和 lmdb的文档 https://lmdb.readthedocs.org/en/release ,读取lmdb文件,然后转换成mat文件,再用matlab调用mat进行可视化。
使用caffe的 extract_features.bin 工具提取出的图像特征存为lmdb格式, 为了方便观察特征,我们将利用下列两个python脚本将图像转化为matlab的.mat格式 (请先安装caffe的python依赖库)。extract_features.bin的运行参数为
- 1
- 1
上面不是执行代码,只是运行参数,不需要执行上式。
下面给出第一个例子是提取特征并储存。
(1) 安装CAFFE的python依赖库,并使用以下两个辅助文件把lmdb转换为mat。在caffe 根目录下创建feat_helper_pb2.py 和lmdb2mat.py,直接copy 下面的python程序即可。
- 1
- 2
- 3
- 1
- 2
- 3
需要添加的内容如下
feat_helper_pb2.py:
- 1
- 2
- 3
- 4
- 5
- 6
- 7
- 8
- 9
- 10
- 11
- 12
- 13
- 14
- 15
- 16
- 17
- 18
- 19
- 20
- 21
- 22
- 23
- 24
- 25
- 26
- 27
- 28
- 29
- 30
- 31
- 32
- 33
- 34
- 35
- 36
- 37
- 38
- 39
- 40
- 41
- 42
- 43
- 44
- 45
- 46
- 47
- 48
- 49
- 50
- 51
- 52
- 53
- 54
- 55
- 56
- 57
- 58
- 59
- 60
- 61
- 62
- 63
- 64
- 65
- 66
- 67
- 68
- 69
- 70
- 71
- 72
- 73
- 74
- 75
- 76
- 77
- 78
- 79
- 80
- 81
- 82
- 83
- 84
- 85
- 86
./lmdb2mat.py
- 1
- 2
- 3
- 4
- 5
- 6
- 7
- 8
- 9
- 10
- 11
- 12
- 13
- 14
- 15
- 16
- 17
- 18
- 19
- 20
- 21
- 22
- 23
- 24
- 25
- 26
- 27
- 28
- 29
- 30
- 31
- 32
- 33
- 34
- 35
- 36
- 37
- 38
- 39
- 40
- 1
- 2
- 3
- 4
- 5
- 6
- 7
- 8
- 9
- 10
- 11
- 12
- 13
- 14
- 15
- 16
- 17
- 18
- 19
- 20
- 21
- 22
- 23
- 24
- 25
- 26
- 27
- 28
- 29
- 30
- 31
- 32
- 33
- 34
- 35
- 36
- 37
- 38
- 39
- 40
备注:用 caffe 的 python 接口提取和保存特征到text文本下
- 1
- 2
- 1
- 2
(2) 在caffe 根目录下创建脚本文件extract_feature_example1.sh, 并执行,将在examples/_temp文件夹下得到lmdb文件(features_conv1)和.mat文件(features_conv1.mat)
下载已经生成的模型
- 1
- 2
- 1
- 2
添加编辑内容如下:
- 1
- 2
- 3
- 4
- 5
- 6
- 7
- 8
- 9
- 10
- 11
- 12
- 13
- 14
- 15
- 16
- 17
- 18
- 19
- 20
- 21
- 22
- 23
- 24
- 25
- 26
- 27
- 28
- 1
- 2
- 3
- 4
- 5
- 6
- 7
- 8
- 9
- 10
- 11
- 12
- 13
- 14
- 15
- 16
- 17
- 18
- 19
- 20
- 21
- 22
- 23
- 24
- 25
- 26
- 27
- 28
- 1
- 2
- 1
- 2
需要添加的内容如下:
- 1
- 2
- 3
- 4
- 5
- 6
- 7
- 8
- 9
- 10
- 11
- 12
- 13
- 14
- 15
- 16
- 1
- 2
- 3
- 4
- 5
- 6
- 7
- 8
- 9
- 10
- 11
- 12
- 13
- 14
- 15
- 16
执行之后,
- 1
- 2
- 1
- 2
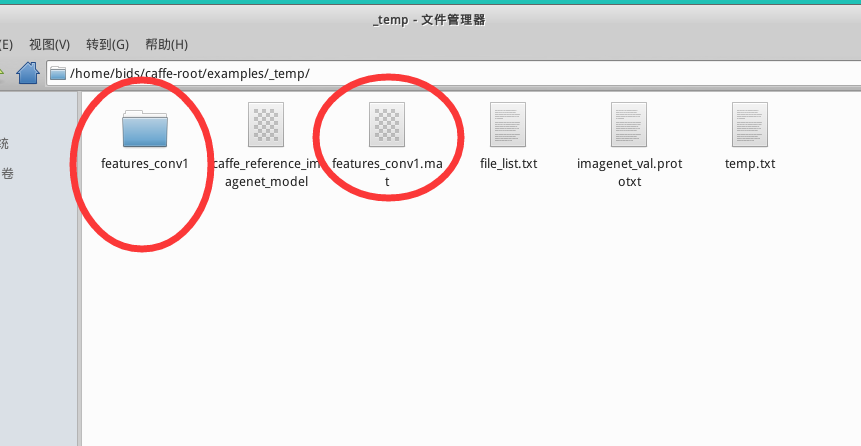
你会在/examples/_temp/ 下发现多了两个文件:文件夹 features_conv1,文件features_conv1.mat
如果执行出现lmdb2mat.py的相关问题,有可能是没有安装lmdb,可在caffe 根目录下执行下面的程式安装。具体问题具体分析。
Lmdb的安装
- 1
- 1
特别备注:在执行一次 sh extract_feature_example1.sh 之后,在文件夹 _temp里面就会出现文件夹features_conv1和文件features_conv1.mat。若再次执行一次,会出现报错,可将文件夹 _temp中的文件夹features_conv1和文件features_conv1.mat 都删除,即可通过编译。
(3). 参考UFLDL里的display_network函数,对mat文件里的特征进行可视化。
在/examples/_temp/ 中创建 display_network.m
- 1
- 2
- 1
- 2
需要添加的内容如下:
display_network.m
- 1
- 2
- 3
- 4
- 5
- 6
- 7
- 8
- 9
- 10
- 11
- 12
- 13
- 14
- 15
- 16
- 17
- 18
- 19
- 20
- 21
- 22
- 23
- 24
- 25
- 26
- 27
- 28
- 29
- 30
- 31
- 32
- 33
- 34
- 35
- 36
- 37
- 38
- 39
- 40
- 41
- 42
- 43
- 44
- 45
- 46
- 47
- 48
- 49
- 50
- 51
- 52
- 53
- 54
- 55
- 56
- 57
- 58
- 59
- 60
- 61
- 62
- 63
- 64
- 65
- 66
- 67
- 68
- 69
- 70
- 71
- 72
- 73
- 74
- 75
- 76
- 77
- 78
- 79
- 80
- 81
- 82
- 83
- 84
- 85
- 86
- 87
- 88
- 89
- 90
- 91
- 92
- 93
- 94
- 95
- 96
- 97
- 98
- 99
- 100
- 101
(4)在matlab里运行以下代码:
首先要进入 /examples/_temp/ 在执行下面的matlab程序。
在caffe 根目录下输入
- 1
- 2
- 1
- 2
在matlab 中输入下面的命令
- 1
- 2
- 3
- 4
- 5
- 6
- 7
- 8
- 9
- 10
- 11
- 12
- 13
- 14
- 15
- 1
- 2
- 3
- 4
- 5
- 6
- 7
- 8
- 9
- 10
- 11
- 12
- 13
- 14
- 15
执行之后将会出现一下结果:

在python中读取mat文件
在python中,使用scipy.io.loadmat()即可读取mat文件,返回一个dict()。
- 1
- 2
- 3
- 1
- 2
- 3
下面给出第二个例子:
(1) 在caffe 根目录下创建脚本文件extract_feature_example2.sh, 并执行,将在examples/_temp文件夹下得到lmdb文件(features_fc7)和.mat文件(features_fc7.mat)
- 1
- 2
- 1
- 2
需要添加的内容如下:
- 1
- 2
- 3
- 4
- 5
- 6
- 7
- 8
- 9
- 10
- 11
- 12
- 13
- 14
- 15
- 16
- 17
- 18
- 1
- 2
- 3
- 4
- 5
- 6
- 7
- 8
- 9
- 10
- 11
- 12
- 13
- 14
- 15
- 16
- 17
- 18
执行之后,
- 1
- 2
- 1
- 2
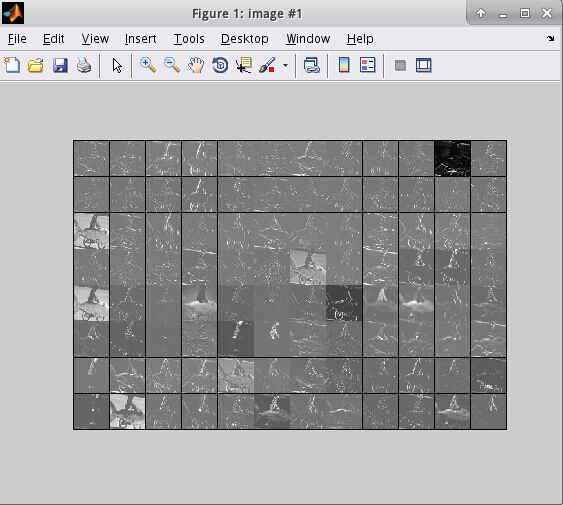
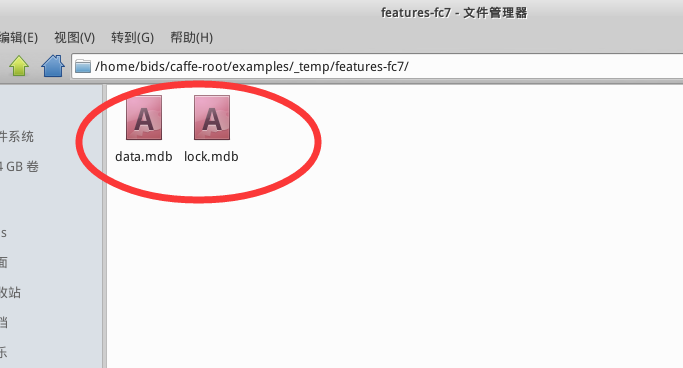
执行之后,你会在 examples/_temp/ 下多出一个文件夹 features-fc7,里面含有data.mdb, lock.mdb 两个文件,还会得到features-fc7.mat,如下图所示
(2). 参考UFLDL里的display_network函数,对mat文件里的特征进行可视化。
在/examples/_temp/ 中创建 display_network.m
- 1
- 2
- 1
- 2
(3)在matlab里运行以下代码:
首先要进入 /examples/_temp/ 在执行下面的matlab程序。
在caffe 根目录下输入
- 1
- 2
- 1
- 2
在matlab 中输入下面的命令
- 1
- 2
- 3
- 4
- 5
- 6
- 7
- 8
- 9
- 10
- 11
- 12
- 13
- 14
- 15
- 1
- 2
- 3
- 4
- 5
- 6
- 7
- 8
- 9
- 10
- 11
- 12
- 13
- 14
- 15
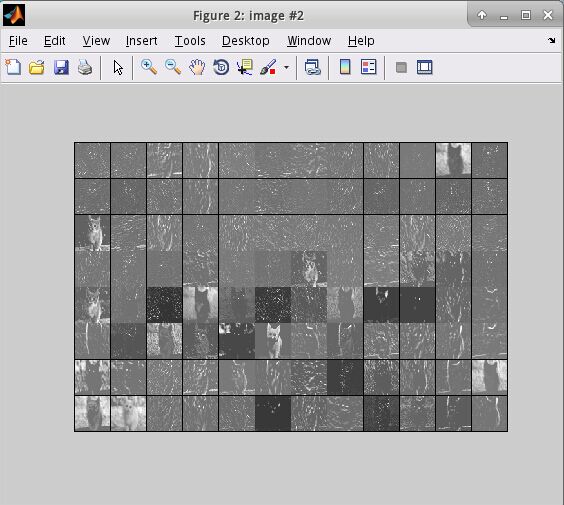
执行之后将会出现一下结果:
在python中读取mat文件
在python中,使用scipy.io.loadmat()即可读取mat文件,返回一个dict()。
import scipy.io
matfile = ‘features_fc7.mat’
data = scipy.io.loadmat(matfile)
使用自己的网络
只需把前面列出来的文件与参数修改成自定义的即可。
使用Model Zoo里的网络
根据 https://github.com/BVLC/caffe/wiki/Model-Zoo 的介绍,选择自己所需的网络,并下载到相应位置即可。
如VGG-16:
- 1
- 2
- 3
- 1
- 2
- 3


 1万+
1万+

 被折叠的 条评论
为什么被折叠?
被折叠的 条评论
为什么被折叠?
 到【灌水乐园】发言


