


本文主要参考:黑马程序员(itheima) java进阶教程之webservice深入浅出。
本文使用Spring 整合 ApacheCXF 实现 WebService(Jax-ws)(不是spring boot!!)
1.服务端
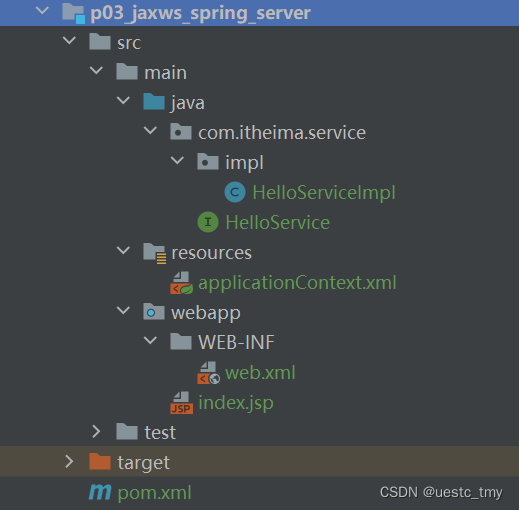
创建服务端模块p03_jaxws_spring_server。
项目 结构:
在web.xml 配置CXFServlet。
官方资料的文件回报错,提示元素内容的顺序不正确。按照错误提示调换 servlet,context-param,listener的顺序即可。
<!DOCTYPE web-app PUBLIC
        "-//Sun Microsystems, Inc.//DTD Web Application 2.3//EN"
        "http://java.sun.com/dtd/web-app_2_3.dtd" >

<web-app>
    <display-name>Archetype Created Web Application</display-name>
    <!--注意子项目的顺序!!-->
    <!--     Spring容器初始化-->
    <!--    2.spring容器配置-->
    <context-param>
        <param-name>contextConfigLocation</param-name>
        <param-value>classpath:applicationContext.xml</param-value>
    </context-param>
    <!--    监听器 -->
    <listener>
        <listener-class>org.springframework.web.context.ContextLoaderListener</listener-class>
    </listener>

    <!--1.cxfsevlet配置-->
    <!-- webservice服务端,发布服务需要配置CXFServlet ‐‐>
    <!‐‐ 这里配置的servlet路径,最为最终服务路径的一部分: ‐‐>
    <!‐‐ 服务访问路径:http://localhost:8080/web.xml配置路径/spring配置的路径 -->
    <servlet>
        <servlet-name>cxfservlet</servlet-name>
        <servlet-class>org.apache.cxf.transport.servlet.CXFServlet</servlet-class>
    </servlet>
    <servlet-mapping>
        <servlet-name>cxfservlet</servlet-name>
        <url-pattern>/ws/*</url-pattern>
    </servlet-mapping>


</web-app>
服务接口HelloService。
package com.itheima.service;

import javax.jws.WebService;

/**
 * 对外发布服务的接口
 */
@WebService
public interface HelloService {
    /**
     * 对外发布服务的接口的方法
     */
    public String sayHello(String name);
}
接口实现类HelloServiceImpl。
package com.itheima.service.impl;

import com.itheima.service.HelloService;

public class HelloServiceImpl implements HelloService{
@Override
    public String sayHello(String name) {

        return name+", Welcome to itheima!";
    }
}
Spring 整合 ApacheCXF,在resource文件夹下编写applicationContext.xml。
<?xml version="1.0" encoding="UTF-8"?>
<beans xmlns="http://www.springframework.org/schema/beans"
xmlns:xsi="http://www.w3.org/2001/XMLSchema-instance"
xmlns:cxf="http://cxf.apache.org/core"
xmlns:jaxws="http://cxf.apache.org/jaxws"
xsi:schemaLocation="
http://www.springframework.org/schema/beans
http://www.springframework.org/schema/beans/spring-beans.xsd
http://cxf.apache.org/core
http://cxf.apache.org/schemas/core.xsd
http://cxf.apache.org/jaxws
http://cxf.apache.org/schemas/jaxws.xsd"
>
<!--
SPRING 整合CXF发布服务,关键点:
1.服务地址
2.服务类
服务完整访问地址:
http://localhost:8080/ws/hello
-->
<jaxws:server address="/hello">
<jaxws:serviceBean>
<bean class=" com.itheima.service.impl.HelloServiceImpl"></bean>
</jaxws:serviceBean>
</jaxws:server>
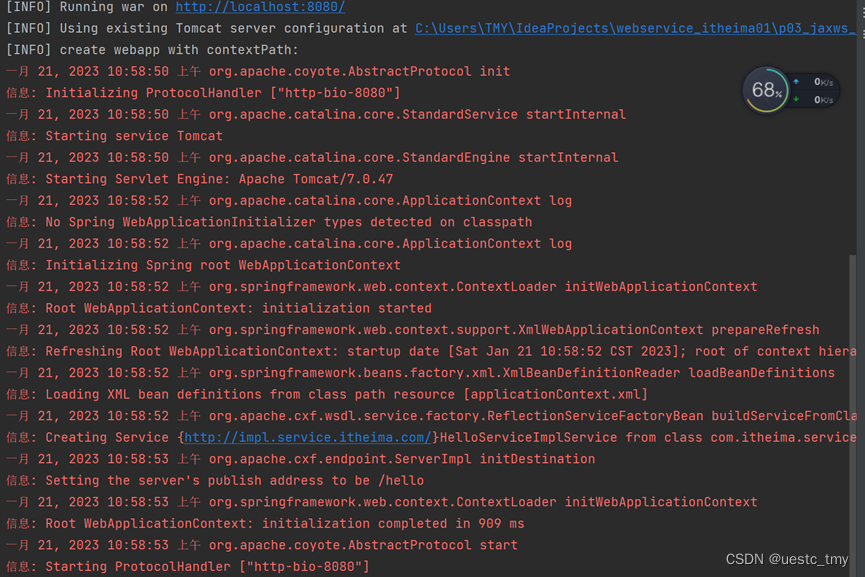
</beans>启动服务,发布服务。
点击tomcat7:run 选项。

本人在创建webapp文件夹的WEB-INF文件夹时,使用了自定义的名字,导致了错误,尝试很久才蒙对。(这是个大坑)
注意webapp文件夹需要设置web属性。
控制台出现以下提示表示服务启动成功。
浏览器输入地址:localhost:8080/ws/hello?wsdl
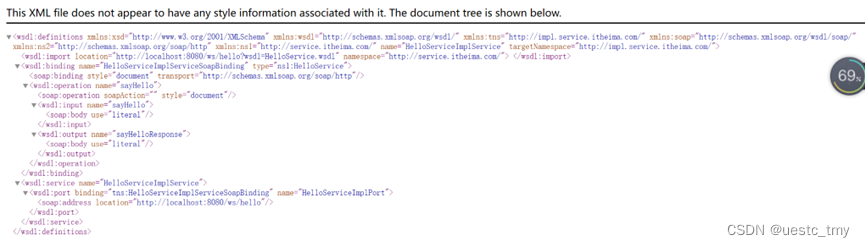
服务发布成功。
-------
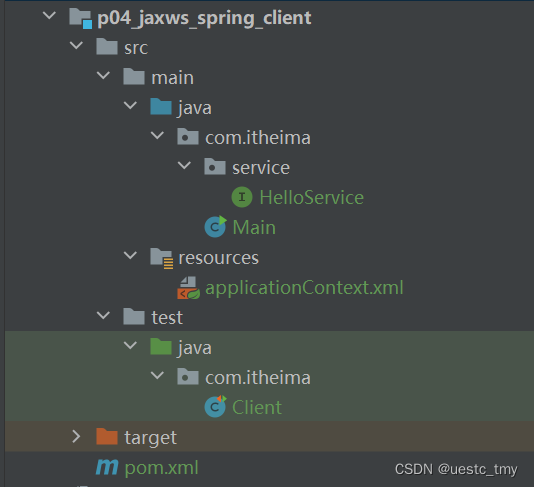
2.客户端
客户端模块结构如下:
依赖,服务接口和服务端保持一致。
Spring 整合 ApacheCXF 配置:application.xml.
<?xml version="1.0" encoding="UTF-8"?>
<beans xmlns="http://www.springframework.org/schema/beans"
       xmlns:xsi="http://www.w3.org/2001/XMLSchema-instance"
       xmlns:cxf="http://cxf.apache.org/core"
       xmlns:jaxws="http://cxf.apache.org/jaxws"

       xsi:schemaLocation="
        http://www.springframework.org/schema/beans
        http://www.springframework.org/schema/beans/spring-beans.xsd
        http://cxf.apache.org/core
        http://cxf.apache.org/schemas/core.xsd
        http://cxf.apache.org/jaxws
        http://cxf.apache.org/schemas/jaxws.xsd"
        >
    <!--
    SPRING 整合CXF发布服务,关键点:
    1.服务地址  http://localhost:8080/ws/hello
    2.服务接口类型

    -->
    <jaxws:client
            id="helloService"
            serviceClass="com.itheima.service.HelloService"
            address="http://localhost:8080/ws/hello">
    </jaxws:client>

</beans>
使用junit测试,, 创建测试类,src/test/java/com/itheima/Client.java
package com.itheima;
import com.itheima.service.HelloService;
import org.junit.Test;
import org.junit.runner.RunWith;
import org.springframework.test.context.ContextConfiguration;
import org.springframework.test.context.junit4.SpringJUnit4ClassRunner;
import javax.annotation.Resource;
@RunWith(SpringJUnit4ClassRunner.class)
@ContextConfiguration("classpath:applicationContext.xml")
public class Client {
//注入对象
@Resource
private HelloService helloService;
@Test
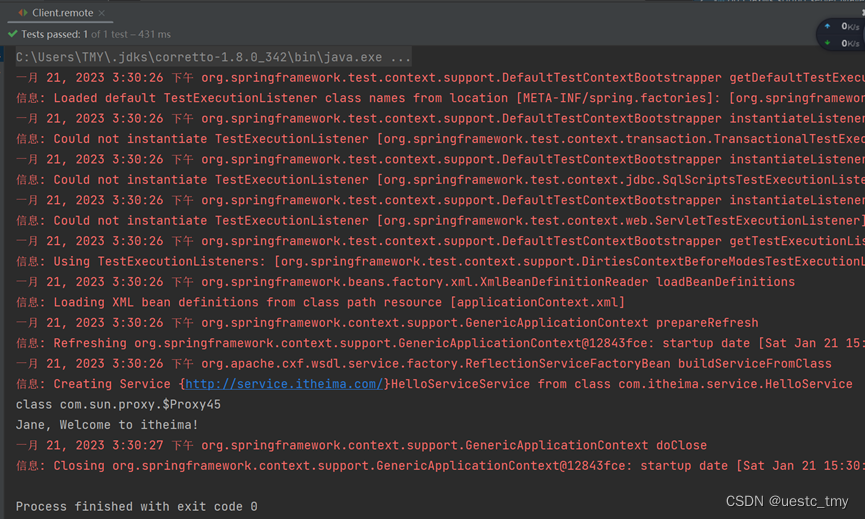
public void remote(){
//查看接口的代理对象类型
System.out.println(helloService.getClass()); //class com.sun.proxy.$Proxy45
System.out.println(helloService.sayHello("Jane"));
}
}
启动Client的remote()方法。(服务端正在运行)
控制台输出接口的代理对象类型,返回请求数据。
总之,使用springng 整合 ApacheCXF 实现 WebService过程比较繁琐,容易出错。spring boot2大大简化了开发过程。


 571
571


 被折叠的 条评论
为什么被折叠?
被折叠的 条评论
为什么被折叠?
 到【灌水乐园】发言


