


文章目录
一. 整合Mybatis
1. 创建boot项目,确保项目能正常运行
使用@SpringBootApplication注解配置默认不加载数据库
@SpringBootApplication(exclude = DataSourceAutoConfiguration.class)
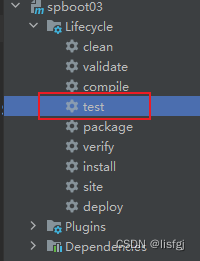
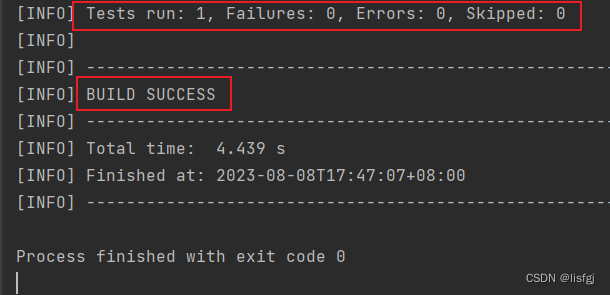
使用Maven插件test进行测试
2. 添加MySQL依赖
这里使用5.7以前的版本,5.7以后的数据库也可以使用5.7以前的版本的依赖
5.7以前的版本 com.mysql.jdbc.Driver5.7以后的版本 com.mysql.cj.jdbc.Driver
<dependency>
    <groupId>mysql</groupId>
    <artifactId>mysql-connector-java</artifactId>
    <version>5.1.44</version>
</dependency>
3. 配置yml
根据需要更改 项目名,实体路径,端口等配置信息
mybatis:
  mapper-locations: classpath:mappers/**/*.xml
  type-aliases-package: com.zk.spboot03.entity
server:
  port: 80
spring:
  application:
    name: spboot03
  datasource:
    driver-class-name: com.mysql.jdbc.Driver
    url: jdbc:mysql://localhost:3306/ssm?useUnicode=true&characterEncoding=UTF-8
    password: root
    username: root
logging:
  level:
    com.zk.spboot03: debug
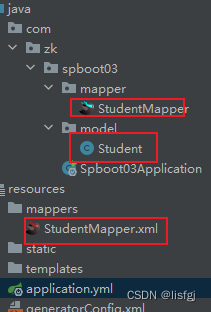
4. 代码生成插件Mybatis-generator
1. jdbc.properties
使用这个插件需要jdbc.properties数据库配置文件,我自己进行连接时需要加上&useSSL=false
jdbc.driver=com.mysql.jdbc.Driver
jdbc.url=jdbc:mysql://localhost:3306/mybatis_ssm?useUnicode=true&characterEncoding=UTF-8
jdbc.username=root
jdbc.password=root
2. generatorConfig.xml
根据需要更改
- 配置文件
- jdbc驱动jar包的位置(本地位置)
- 文件生成位置
- 数据库中的表
- 生成的实体的名称
注: 需要在resources中创建mappers文件夹
<?xml version="1.0" encoding="UTF-8" ?>
<!DOCTYPE generatorConfiguration PUBLIC "-//mybatis.org//DTD MyBatis Generator Configuration 1.0//EN"
"http://mybatis.org/dtd/mybatis-generator-config_1_0.dtd" >
<generatorConfiguration>
<!-- 引入配置文件 -->
<properties resource="jdbc.properties"/>
<!--指定数据库jdbc驱动jar包的位置-->
<classPathEntry location="E:\\apache-maven\\repository\\mysql\\mysql-connector-java\\5.1.44\\mysql-connector-java-5.1.44.jar"/>
<!-- 一个数据库一个context -->
<context id="infoGuardian">
<!-- 注释 -->
<commentGenerator>
<property name="suppressAllComments" value="true"/><!-- 是否取消注释 -->
<property name="suppressDate" value="true"/> <!-- 是否生成注释代时间戳 -->
</commentGenerator>
<!-- jdbc连接 -->
<jdbcConnection driverClass="${jdbc.driver}"
connectionURL="${jdbc.url}" userId="${jdbc.username}" password="${jdbc.password}"/>
<!-- 类型转换 -->
<javaTypeResolver>
<!-- 是否使用bigDecimal, false可自动转化以下类型(Long, Integer, Short, etc.) -->
<property name="forceBigDecimals" value="false"/>
</javaTypeResolver>
<!-- 01 指定javaBean生成的位置 -->
<!-- targetPackage:指定生成的model生成所在的包名 -->
<!-- targetProject:指定在该项目下所在的路径 -->
<javaModelGenerator targetPackage="com.zk.spboot03.model"
targetProject="src/main/java">
<!-- 是否允许子包,即targetPackage.schemaName.tableName -->
<property name="enableSubPackages" value="false"/>
<!-- 是否对model添加构造函数 -->
<property name="constructorBased" value="true"/>
<!-- 是否针对string类型的字段在set的时候进行trim调用 -->
<property name="trimStrings" value="false"/>
<!-- 建立的Model对象是否 不可改变 即生成的Model对象不会有 setter方法,只有构造方法 -->
<property name="immutable" value="false"/>
</javaModelGenerator>
<!-- 02 指定sql映射文件生成的位置 -->
<sqlMapGenerator targetPackage="/"
targetProject="src/main/resources/mappers">
<!-- 是否允许子包,即targetPackage.schemaName.tableName -->
<property name="enableSubPackages" value="false"/>
</sqlMapGenerator>
<!-- 03 生成XxxMapper接口 -->
<!-- type="ANNOTATEDMAPPER",生成Java Model 和基于注解的Mapper对象 -->
<!-- type="MIXEDMAPPER",生成基于注解的Java Model 和相应的Mapper对象 -->
<!-- type="XMLMAPPER",生成SQLMap XML文件和独立的Mapper接口 -->
<javaClientGenerator targetPackage="com.zk.spboot03.mapper"
targetProject="src/main/java" type="XMLMAPPER">
<!-- 是否在当前路径下新加一层schema,false路径com.oop.eksp.user.model, true:com.oop.eksp.user.model.[schemaName] -->
<property name="enableSubPackages" value="false"/>
</javaClientGenerator>
<!-- 配置表信息 -->
<!-- schema即为数据库名 -->
<!-- tableName为对应的数据库表 -->
<!-- domainObjectName是要生成的实体类 -->
<!-- enable*ByExample是否生成 example类 -->
<!--<table schema="" tableName="t_book" domainObjectName="Book"-->
<!--enableCountByExample="false" enableDeleteByExample="false"-->
<!--enableSelectByExample="false" enableUpdateByExample="false">-->
<!--<!– 忽略列,不生成bean 字段 –>-->
<!--<!– <ignoreColumn column="FRED" /> –>-->
<!--<!– 指定列的java数据类型 –>-->
<!--<!– <columnOverride column="LONG_VARCHAR_FIELD" jdbcType="VARCHAR" /> –>-->
<!--</table>-->
<table schema="" tableName="student" domainObjectName="Student"
enableCountByExample="false" enableDeleteByExample="false"
enableSelectByExample="false" enableUpdateByExample="false">
</table>
</context>
</generatorConfiguration>
3. pom.xml
<plugin>
	<groupId>org.mybatis.generator</groupId>
	<artifactId>mybatis-generator-maven-plugin</artifactId>
	<version>1.3.2</version>
	<dependencies>
		<!--使用Mybatis-generator插件不能使用太高版本的mysql驱动 -->
		<dependency>
			<groupId>mysql</groupId>
			<artifactId>mysql-connector-java</artifactId>
			<version>5.1.44</version>
		</dependency>
	</dependencies>
	<configuration>
		<overwrite>true</overwrite>
	</configuration>
</plugin>
4. 使用插件进行生成
双击使用插件
注意,不能生成同一个文件两次

5. 启动类
@MapperScan 注解mapper目录,使目录下的mapper接口都生成bean(在使用这个注解后,在注入时会爆红,但是不影响使用)
@EnableTransactionManagement 开启事务
@MapperScan("com.zk.spboot03.mapper")
@EnableTransactionManagement
@SpringBootApplication
public class Spboot03Application {

	public static void main(String[] args) {
		SpringApplication.run(Spboot03Application.class, args);
	}

}
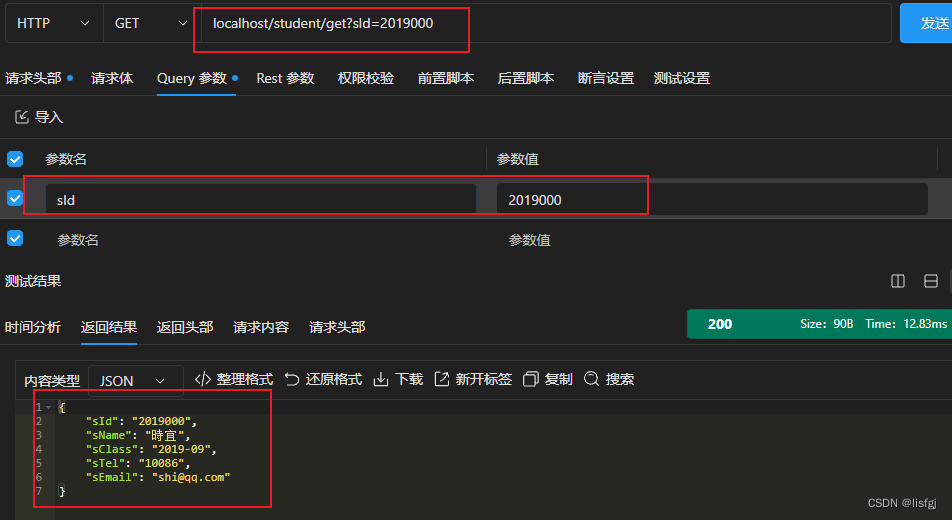
6. 测试
@RestController
@RequestMapping("/student")
public class StudentController {

	@Autowired
	public StudentMapper studentMapper;

	@GetMapping("/get")
	public Student list(String sId){
		return studentMapper.selectByPrimaryKey(sId);
	}

	@DeleteMapping("/delete")
	public int delete(String sId){
		return studentMapper.deleteByPrimaryKey(sId);
	}

	@PostMapping("/add")
	public int add(Student student){
		return studentMapper.insertSelective(student);
	}
}
二. 整合MybatisPlus(MP)
1. 官网
https://baomidou.com/
2. pom.xml
注: plus一般不会和mybatis同时存在
<dependency>
	<groupId>com.baomidou</groupId>
	<artifactId>mybatis-plus-boot-starter</artifactId>
	<version>3.4.2</version>
</dependency>
<dependency>
	<groupId>com.baomidou</groupId>
	<artifactId>mybatis-plus-generator</artifactId>
	<version>3.4.1</version>
</dependency>
<dependency>
	<groupId>org.freemarker</groupId>
	<artifactId>freemarker</artifactId>
	<version>2.3.31</version>
</dependency>
3. application.yml
mybatis-plus:
  mapper-locations: classpath:mappers/**/*.xml
  type-aliases-package: com.zk.spboot03.model
server:
  port: 80
spring:
  application:
    name: spboot03
  datasource:
    driver-class-name: com.mysql.jdbc.Driver
    url: jdbc:mysql://localhost:3306/ssm?useUnicode=true&characterEncoding=UTF-8&useSSL=false
    password: root
    username: root
logging:
  level:
    com.zk.spboot03: debug
4. Mybatis-plus代码生成类
根据需要更改
- 项目目录
- 数据源
- 生成位置
运行main
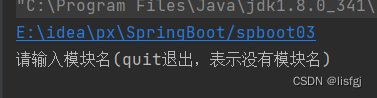
输入模块名,没有就输入quit退出
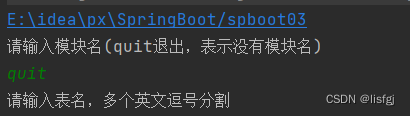
输入要生成的表


/**
 * mybatis-plus代码生成
 */
public class MPGenerator {

    /**
     * <p>
     * 读取控制台内容
     * </p>
     */
    public static String scanner(String tip) {
        Scanner scanner = new Scanner(System.in);
        StringBuilder help = new StringBuilder();
        help.append("请输入" + tip);
        System.out.println(help.toString());
        if (scanner.hasNext()) {
            String ipt = scanner.next();
            if (StringUtils.isNotBlank(ipt)) {
                if ("quit".equals(ipt)) return "";
                return ipt;
            }
        }
        throw new MybatisPlusException("请输入正确的" + tip + "!");
    }

    public static void main(String[] args) {
        // 代码生成器
        AutoGenerator mpg = new AutoGenerator();

        // 1.全局配置
        GlobalConfig gc = new GlobalConfig();
        String projectPath = System.getProperty("user.dir") + "/spboot03";
        System.out.println(projectPath);

        gc.setOutputDir(projectPath + "/src/main/java");
        gc.setOpen(false);
        gc.setBaseResultMap(true);//生成BaseResultMap
        gc.setActiveRecord(false);// 不需要ActiveRecord特性的请改为false
        gc.setEnableCache(false);// XML 二级缓存
        gc.setBaseResultMap(true);// XML ResultMap
        gc.setBaseColumnList(true);// XML columList
        //gc.setSwagger2(true); //实体属性 Swagger2 注解
        gc.setAuthor("lky");

        // 自定义文件命名,注意 %s 会自动填充表实体属性!
        gc.setMapperName("%sMapper");
        gc.setXmlName("%sMapper");
        gc.setServiceName("%sService");
        gc.setServiceImplName("%sServiceImpl");
        gc.setControllerName("%sController");

        gc.setIdType(IdType.AUTO);
        mpg.setGlobalConfig(gc);

        // 2.数据源配置
        DataSourceConfig dsc = new DataSourceConfig();
        dsc.setDbType(DbType.MYSQL);
        dsc.setUrl("jdbc:mysql://localhost:3306/ssm?useUnicode=true&characterEncoding=UTF-8");
        dsc.setDriverName("com.mysql.jdbc.Driver");
        dsc.setUsername("root");
        dsc.setPassword("root");
        mpg.setDataSource(dsc);

        // 3.包配置
        PackageConfig pc = new PackageConfig();
        String moduleName = scanner("模块名(quit退出,表示没有模块名)");
        if (StringUtils.isNotBlank(moduleName)) {
            pc.setModuleName(moduleName);
        }
        pc.setParent("com.zk.spboot03")
                .setMapper("mapper")
                .setService("service")
                .setController("controller")
                .setEntity("model");
        mpg.setPackageInfo(pc);

        // 4.自定义配置
        InjectionConfig cfg = new InjectionConfig() {
            @Override
            public void initMap() {
                // to do nothing
            }
        };

        // 如果模板引擎是 freemarker
        String templatePath = "/templates/mapper.xml.ftl";
        // 自定义输出配置
        List<FileOutConfig> focList = new ArrayList<>();
        // 自定义配置会被优先输出
        focList.add(new FileOutConfig(templatePath) {
            @Override
            public String outputFile(TableInfo tableInfo) {
                // 自定义输出文件名 , 如果你 Entity 设置了前后缀、此处注意 xml 的名称会跟着发生变化!!
                if (StringUtils.isNotBlank(pc.getModuleName())) {
                    return projectPath + "/src/main/resources/mappers/" + pc.getModuleName() + "/" + tableInfo.getEntityName() + "Mapper" + StringPool.DOT_XML;
                } else {
                    return projectPath + "/src/main/resources/mappers/" + tableInfo.getEntityName() + "Mapper" + StringPool.DOT_XML;
                }
            }
        });
        cfg.setFileOutConfigList(focList);
        mpg.setCfg(cfg);
        // 配置模板
        TemplateConfig templateConfig = new TemplateConfig();
        templateConfig.setXml(null);
        mpg.setTemplate(templateConfig);

        // 5.策略配置
        StrategyConfig strategy = new StrategyConfig();
        // 表名生成策略(下划线转驼峰命名)
        strategy.setNaming(NamingStrategy.underline_to_camel);
        // 列名生成策略(下划线转驼峰命名)
        strategy.setColumnNaming(NamingStrategy.underline_to_camel);
        // 是否启动Lombok配置
        strategy.setEntityLombokModel(true);
        // 是否启动REST风格配置
        strategy.setRestControllerStyle(true);
        // 自定义实体父类strategy.setSuperEntityClass("com.baomidou.mybatisplus.extension.activerecord.Model");
        // 自定义service父接口strategy.setSuperServiceClass("com.baomidou.mybatisplus.extension.service.IService");
        // 自定义service实现类strategy.setSuperServiceImplClass("com.baomidou.mybatisplus.extension.service.impl.ServiceImpl");
        // 自定义mapper接口strategy.setSuperMapperClass("com.baomidou.mybatisplus.core.mapper.BaseMapper");
        strategy.setSuperEntityColumns("id");

        // 写于父类中的公共字段plus
        strategy.setSuperEntityColumns("id");
        strategy.setInclude(scanner("表名,多个英文逗号分割").split(","));
        strategy.setControllerMappingHyphenStyle(true);

        //表名前缀(可变参数):“t_”或”“t_模块名”,例如:t_user或t_sys_user
        strategy.setTablePrefix("t_", "t_sys_");
        //strategy.setTablePrefix(scanner("请输入表前缀"));
        mpg.setStrategy(strategy);
        mpg.setTemplateEngine(new FreemarkerTemplateEngine());
        // 执行
        mpg.execute();
    }
}
5. 测试
注意MP的id生成策略
/**
* <p>
* 前端控制器
* </p>
*
* @author lky
* @since 2023-08-08
*/
@RestController
@RequestMapping("/bills")
public class BillsController {
@Autowired
private BillsService billsService;
// 查询所有
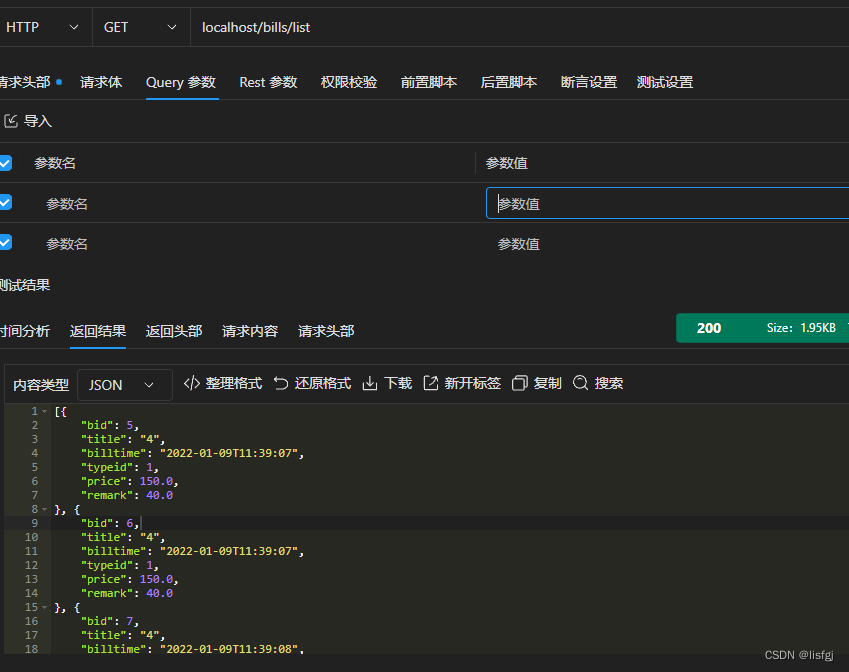
@GetMapping("/list")
public List<Bills> list(){
return billsService.list();
}
// 按条件查询
@GetMapping("/ListByCondition")
public List<Bills> ListByCondition(Bills bills){
QueryWrapper w = new QueryWrapper();
w.like("title",bills.getTitle());
return billsService.list(w);
}
// 查询单个
@GetMapping("/load")
public Bills load(Bills bills){
QueryWrapper w = new QueryWrapper();
w.like("bid",bills.getBid());
return billsService.getOne(w);
}
// 增加
@PostMapping("/add")
public boolean add(Bills bills){
boolean save = billsService.save(bills);
return save;
}
// 修改
@PostMapping("/update")
public boolean update(Bills bills){
boolean save = billsService.saveOrUpdate(bills);
return save;
}
// 删除
@DeleteMapping("/delete")
public boolean delete(Bills bills){
boolean save = billsService.removeById(bills.getBid());
return save;
}
// 连表查询
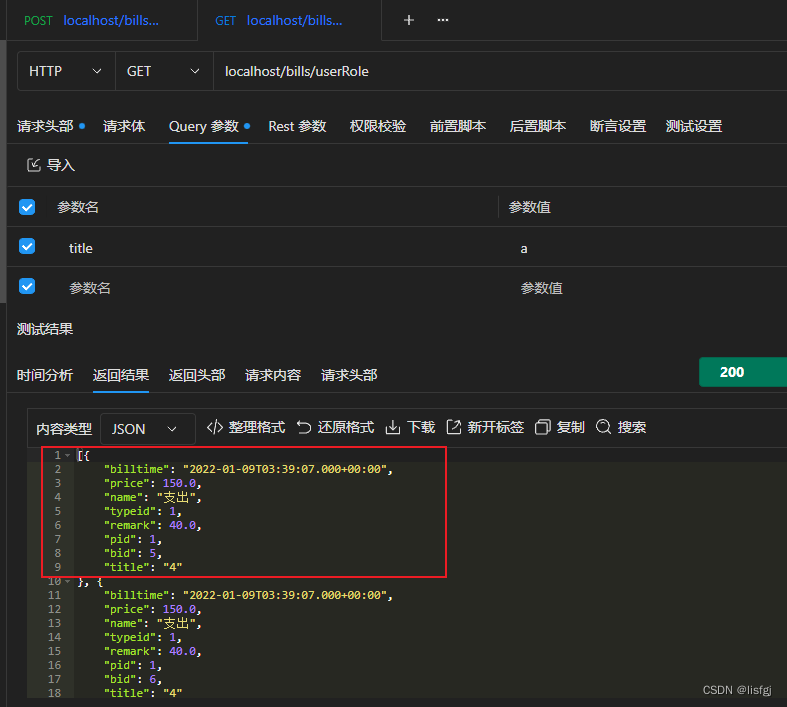
@GetMapping("/userRole")
public List<Map> userRole(String uname){
Map map = new HashMap();
map.put("username",uname);
List<Map> maps = billsService.queryUserRole(map);
return maps;
}
}
6. 多表联查
创建新的方法在mapper的接口上使用注解
/**
 * <p>
 *  Mapper 接口
 * </p>
 *
 * @author lky
 * @since 2023-08-08
 */
public interface BillsMapper extends BaseMapper<Bills> {

	@Select("select * from bills b,billtype t where b.typeid=t.pid")
	List<Map> queryUserRole(Map map);
}
或者在xml中
<select id="queryUserRole" resultType="java.util.Map">
    select * from bills b,billtype t where b.typeid=t.pid
</select>


 578
578


 被折叠的 条评论
为什么被折叠?
被折叠的 条评论
为什么被折叠?
 到【灌水乐园】发言


