


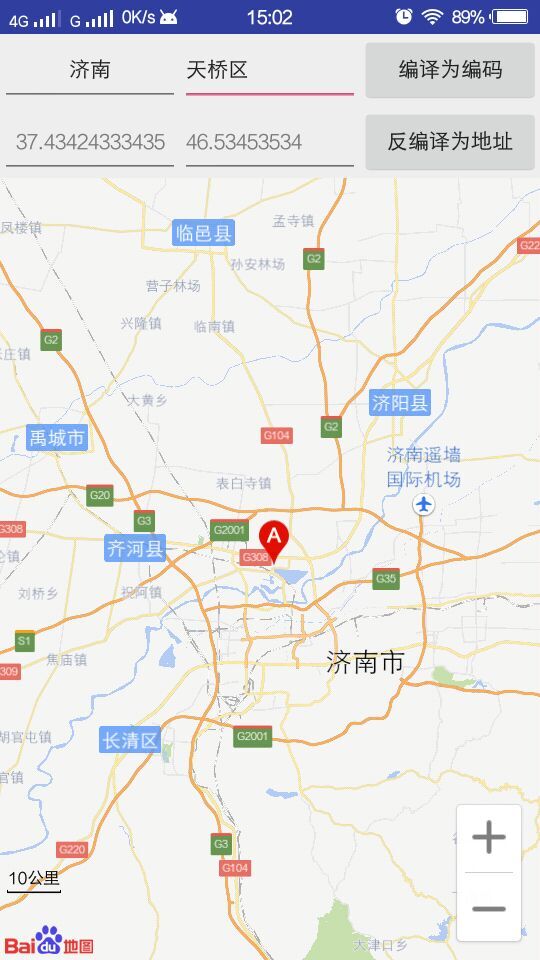
今天我们来看一下百度地图的地理编码功能,首先我们来看一下效果
我来说一下实现这个效果的思路:实现地理编码的效果,我们的activity会继承OnGetGeoCoderResultListener这个接口,实现接口的onGetGeoCodeResult(GeoCodeResult geoCodeResult) 、onGetReverseGeoCodeResult(ReverseGeoCodeResult reverseGeoCodeResult) 两个方法,对按钮做不同的动作监听即可,下面我们来看一下代码。
(1) 通过效果图片我们可以看到布局中的控件:四个EditText、两个Button、一个MapView,我们来看一下布局文件:
<?xml version="1.0" encoding="utf-8"?>
<LinearLayout xmlns:android="http://schemas.android.com/apk/res/android"
    xmlns:tools="http://schemas.android.com/tools"
    android:layout_width="match_parent"
    android:layout_height="match_parent"
    android:orientation="vertical"
    tools:context="com.sanji.myexample.GeoCoderActivity">

    <LinearLayout
        android:layout_width="match_parent"
        android:layout_height="wrap_content"
        android:orientation="horizontal">

        <EditText
            android:id="@+id/city"
            android:layout_width="0dp"
            android:layout_height="wrap_content"
            android:layout_weight="1"
            android:gravity="center"
            android:hint="北京"
            android:textSize="14sp" />

        <EditText
            android:id="@+id/geocodekey"
            android:layout_width="0dp"
            android:layout_height="wrap_content"
            android:layout_weight="1"
            android:hint="海淀区"
            android:textSize="14sp" />

        <Button
            android:onClick="search"
            android:id="@+id/geo"
            android:layout_width="0dp"
            android:layout_height="wrap_content"
            android:layout_weight="1"
            android:text="编译为编码" />
    </LinearLayout>

    <LinearLayout
        android:layout_width="match_parent"
        android:layout_height="wrap_content"
        android:orientation="horizontal">

        <EditText
            android:id="@+id/map_latitude"
            android:layout_width="0dp"
            android:layout_height="wrap_content"
            android:layout_weight="1"
            android:gravity="center"
            android:hint="37.43424333435"
            android:textSize="14sp" />

        <EditText
            android:id="@+id/map_longitude"
            android:layout_width="0dp"
            android:layout_height="wrap_content"
            android:layout_weight="1"
            android:hint="46.53453534"
            android:textSize="14sp" />

        <Button
            android:onClick="search"
            android:id="@+id/revserGeo"
            android:layout_width="0dp"
            android:layout_height="wrap_content"
            android:layout_weight="1"
            android:text="反编译为地址" />
    </LinearLayout>

    <com.baidu.mapapi.map.MapView
        android:id="@+id/geo_mapView"
        android:layout_width="match_parent"
        android:layout_height="match_parent" />
</LinearLayout>
(2) 我们来看一下在onCreate()方法里调用的方法
    @Bind(R.id.city)
    EditText city;
    @Bind(R.id.geocodekey)
    EditText geocodekey;
    @Bind(R.id.map_latitude)
    EditText map_latitude;
    @Bind(R.id.map_longitude)
    EditText map_longitude;
    @Bind(R.id.geo_mapView)
    MapView mapView = null;
    @Bind(R.id.geo)
    Button geo;
    @Bind(R.id.revserGeo)
    Button revserGeo;

    BaiduMap baiduMap = null;
    GeoCoder mSearch;

    @Override
    protected void onCreate(Bundle savedInstanceState) {
        super.onCreate(savedInstanceState);
        SDKInitializer.initialize(getApplicationContext());
        setContentView(R.layout.activity_geo_coder);
        ButterKnife.bind(this);
//        CharSequence title = "地理编码功能";
//        setTitle(title);
        //地图的初始化
        baiduMap = mapView.getMap();
        //初始化搜索模块,注册监听事件
        mSearch = GeoCoder.newInstance();
        mSearch.setOnGetGeoCodeResultListener(this);

    }
我们可以看到,在onCreate()方法里,就是进行了地图、搜索模块的初始化和监听。
(3) 让不同的按钮做不同的动作,是在布局文件里定义了同一个方法名,所以对id进行判断
//当点击按钮时,执行的操作
    public void search(View v) {
        if (v.getId() == R.id.geo) {
            // Geo搜索
            mSearch.geocode(new GeoCodeOption()
                    .city(city.getText().toString())
                    .address(geocodekey.getText().toString()));
        }
        if (v.getId() == R.id.revserGeo) {
            LatLng pCenter = new LatLng(Float.valueOf(map_latitude.getText().toString()), Float.valueOf(map_longitude.getText().toString()));
            // 反Geo搜索
            mSearch.reverseGeoCode(new ReverseGeoCodeOption().location(pCenter));
        }
    }
(4)实现接口的两个方法
//搜索
    @Override
    public void onGetGeoCodeResult(GeoCodeResult geoCodeResult) {
        if (geoCodeResult == null || geoCodeResult.error != SearchResult.ERRORNO.NO_ERROR) {
            Toast.makeText(GeoCoderActivity.this, "抱歉,没有找到结果", Toast.LENGTH_SHORT).show();
            return;
        }
        baiduMap.clear();
        baiduMap.addOverlay(new MarkerOptions().position(geoCodeResult.getLocation()).icon(BitmapDescriptorFactory.fromResource(R.mipmap.icon_marka)));
        baiduMap.setMapStatus(MapStatusUpdateFactory.newLatLng(geoCodeResult.getLocation()));
        String str = String.format("经度 %f ,纬度 %f ", geoCodeResult.getLocation().latitude, geoCodeResult.getLocation().longitude);
        Toast.makeText(GeoCoderActivity.this, str, Toast.LENGTH_SHORT).show();
    }

    @Override
    public void onGetReverseGeoCodeResult(ReverseGeoCodeResult reverseGeoCodeResult) {
        if (reverseGeoCodeResult == null && reverseGeoCodeResult.error != SearchResult.ERRORNO.NO_ERROR) {
            Toast.makeText(GeoCoderActivity.this, "抱歉,没有找到结果", Toast.LENGTH_SHORT).show();
            return;
        }
        baiduMap.clear();
        baiduMap.addOverlay(new MarkerOptions().position(reverseGeoCodeResult.getLocation()).icon(BitmapDescriptorFactory.fromResource(R.mipmap.icon_marka)));
        baiduMap.setMapStatus(MapStatusUpdateFactory.newLatLng(reverseGeoCodeResult.getLocation()));
        Toast.makeText(GeoCoderActivity.this, reverseGeoCodeResult.getAddress(), Toast.LENGTH_SHORT).show();
    }
百度地图的地理编码就到这里结束了。
总结:
一提到百度地图,我首先想到的是MapView、BaiduMap,baiduMap、mapView、lat 是 根据不同类型提前定义好的变量
百度地图的初始化:baiduMap=mapView.getMap();
百度地图添加覆盖物:baiduMap.addOverlay(new MarkerOptions().position(LatLng lat).icon(BitmapDescriptorFactory.fromResource(R.drawable.icon_marka)));
- 百度地图更新状态: baiduMap.setMapStatus(MapStatusUpdateFactory.newLatLng(LatLng lat );


 1万+
1万+


 被折叠的 条评论
为什么被折叠?
被折叠的 条评论
为什么被折叠?
 到【灌水乐园】发言


