


大家好, Capybara 继续与大家一起学习Vue框架。书读百遍其义自见。
day06
路由进阶
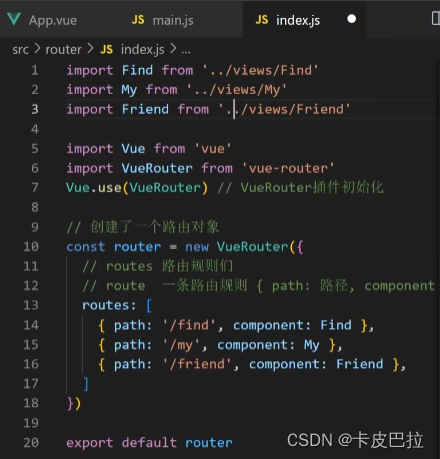
路由模块封装
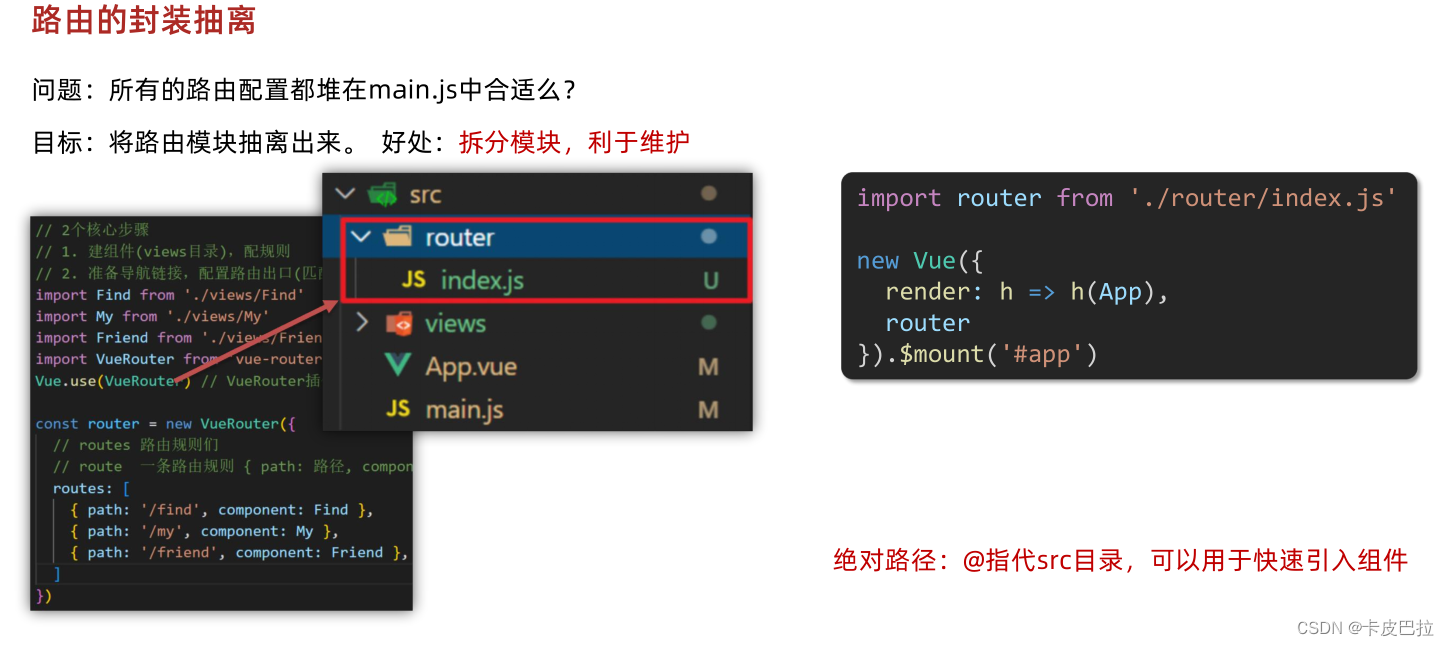
router/index.js
所抽离内容包括:导入组件、(额外需要)导入Vue、导入VueRouter插件、
创建路由对象、导出路由对象
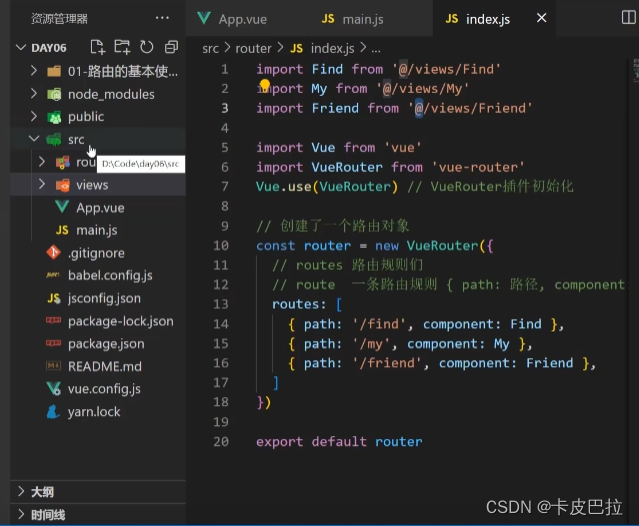
需要注意路径写法(推荐使用绝对路径 @代表当前src目录)
效果:

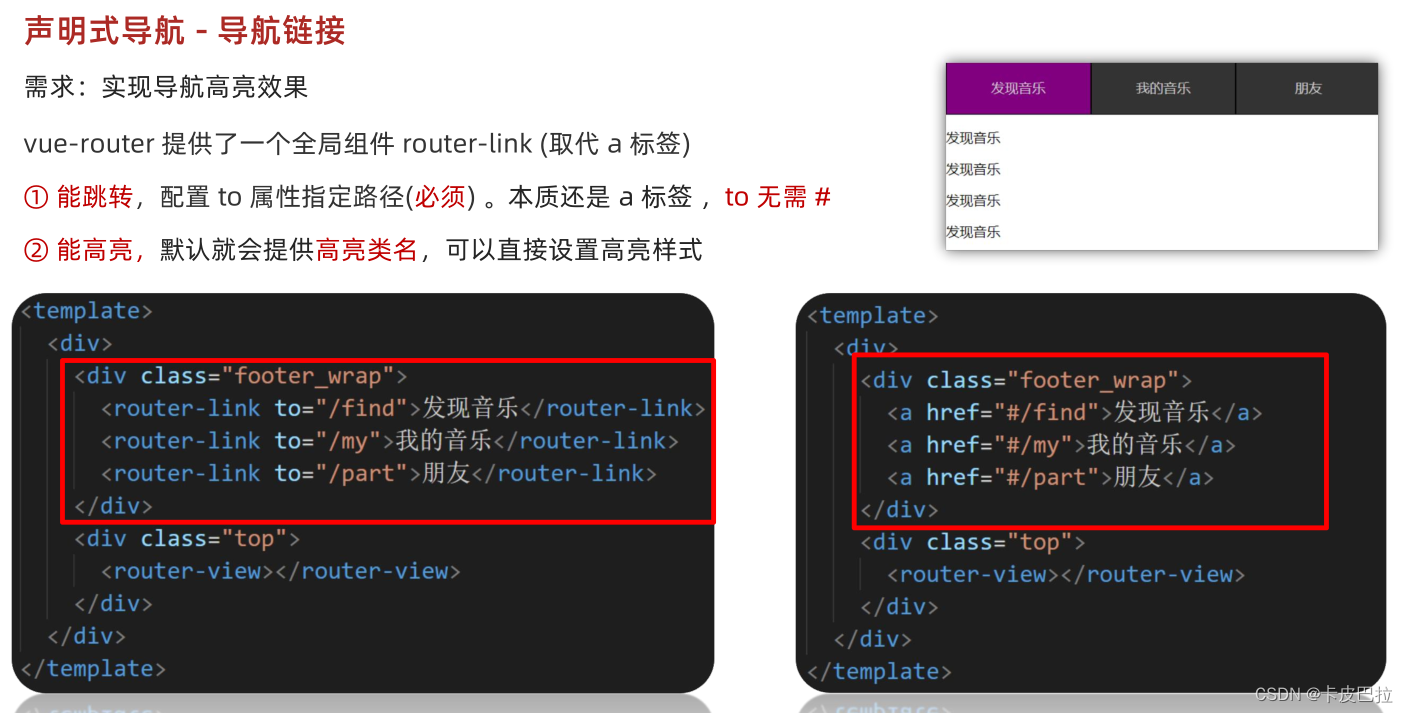
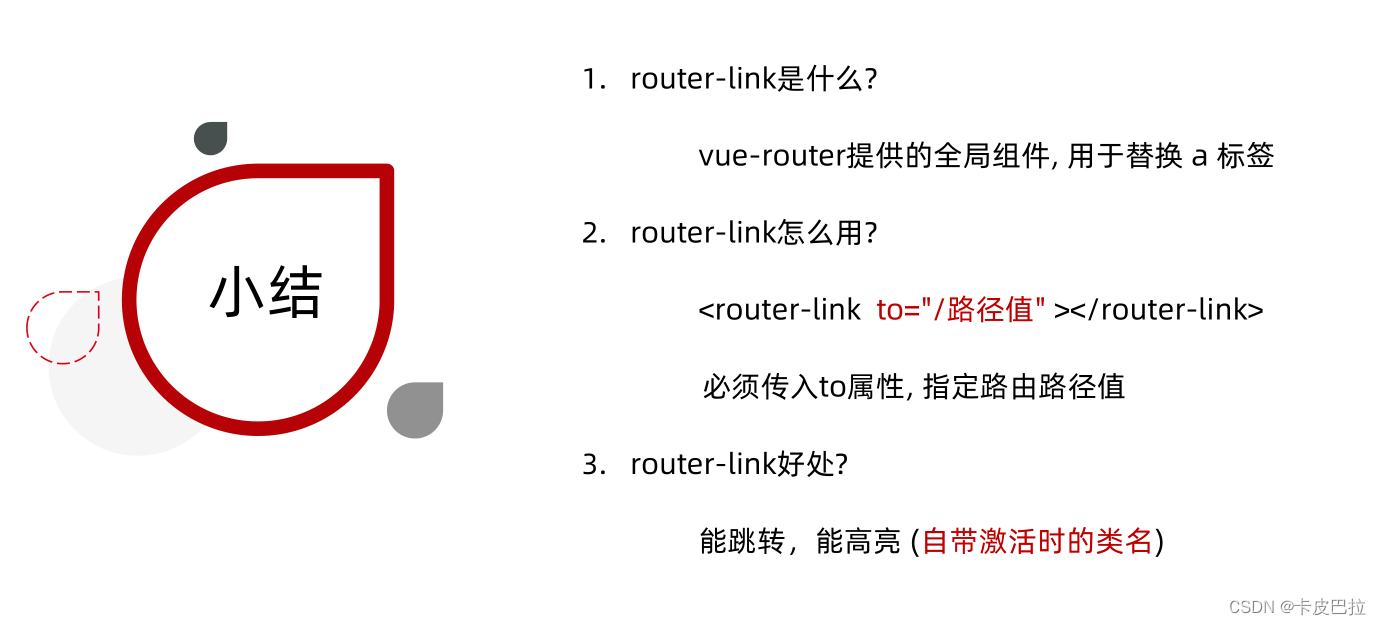
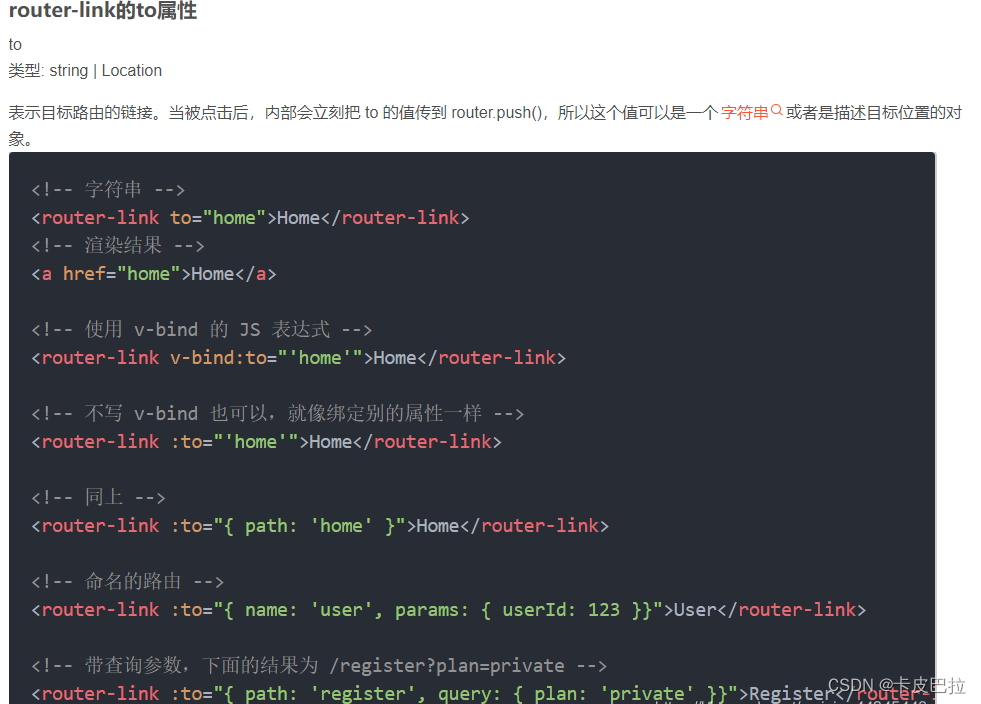
使用router-link替代a标签实现高亮
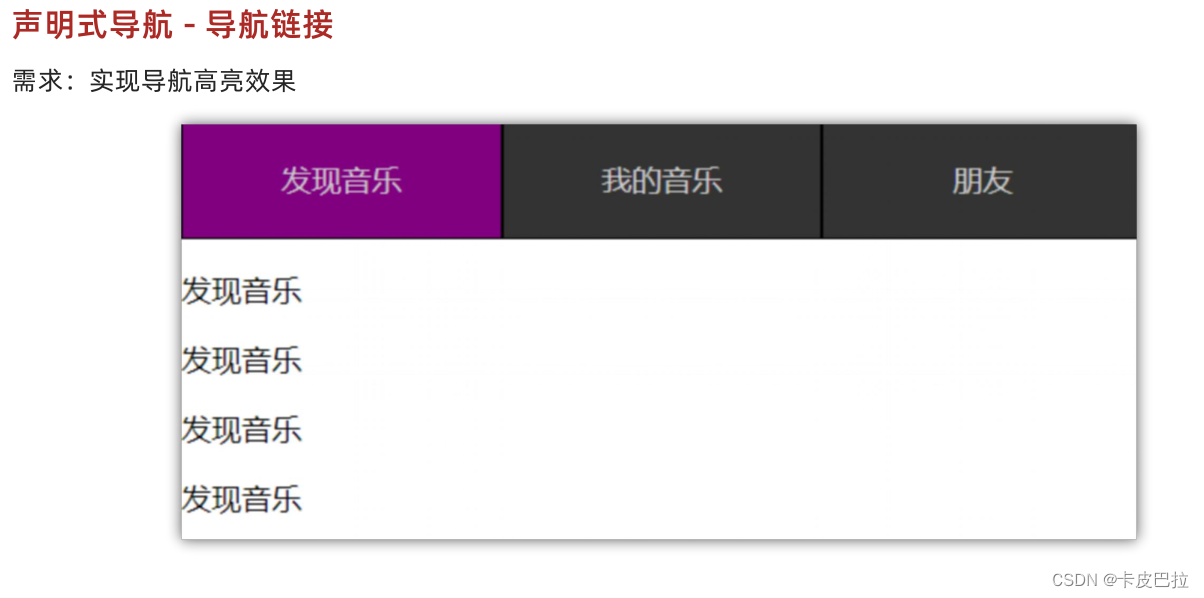
本质渲染还是a标签,to无需#,且能高亮
代码:
<template>
  <div>
    <div class="footer_wrap">
      <router-link to="/find">发现音乐</router-link>
      <router-link to="/my">我的音乐</router-link>
      <router-link to="/friend">朋友</router-link>
    </div>
    <div class="top">
      <!-- 路由出口 → 匹配的组件所展示的位置 -->
      <router-view></router-view>
    </div>
  </div>
</template>
……
效果:
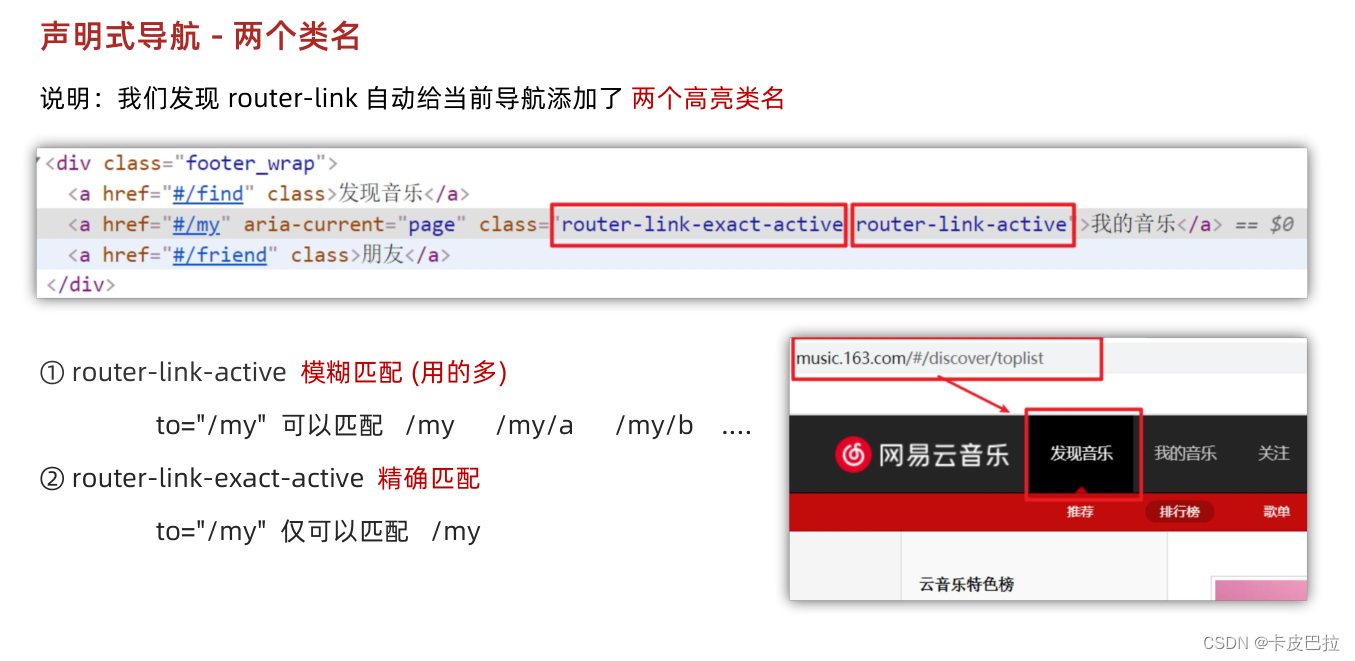
本质是a元素

自带两个可使用高亮类名:

选中时更改背景颜色:

小结:
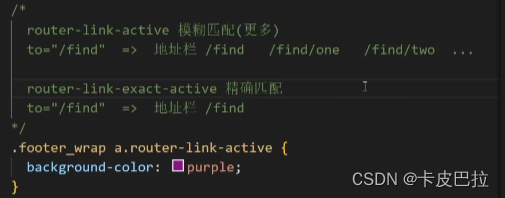
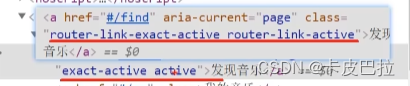
精确匹配&模糊匹配
关于两个类名
在url后加上one,仍然匹配(router-link-active)
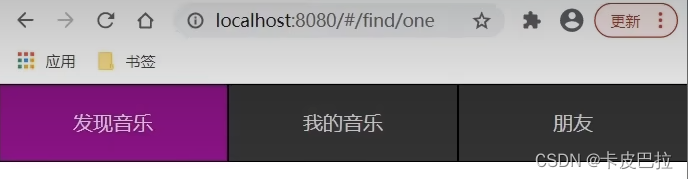
设置 .router-link-active
小结:

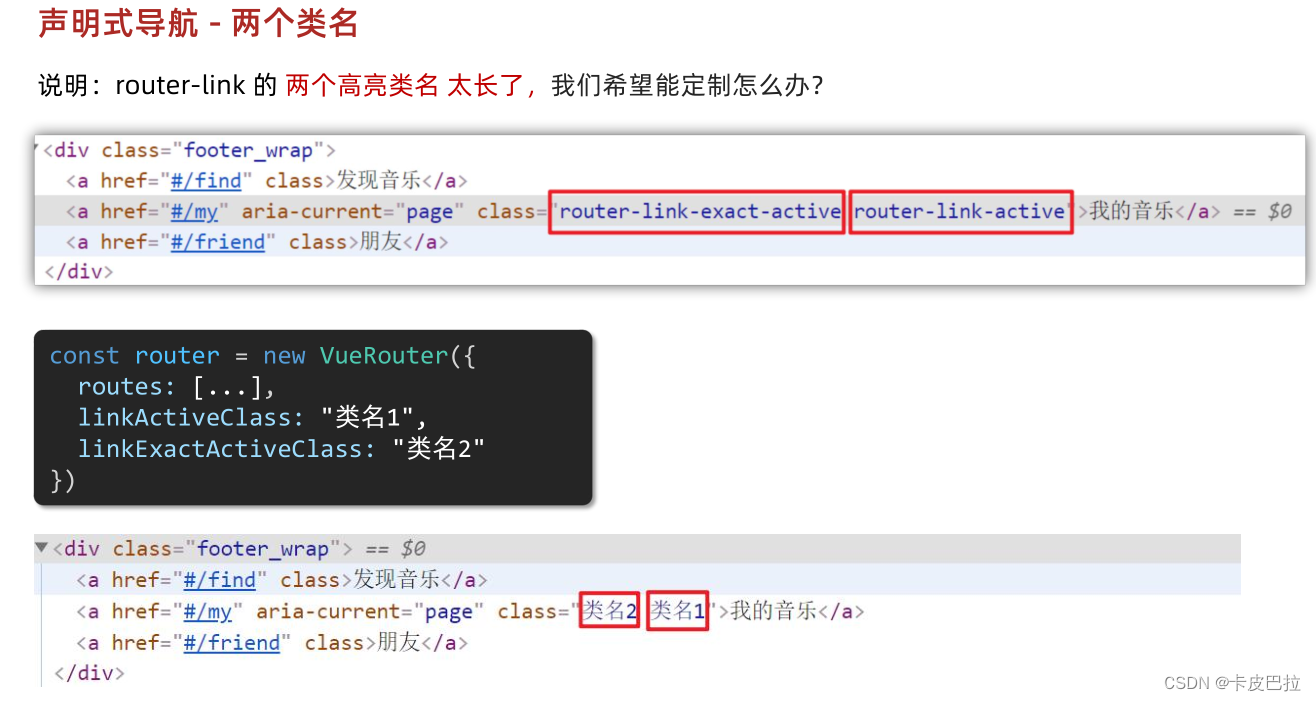
自定义匹配的类名
长有长的好处,不容易重名。
配置代码(router/index.js):
import Find from '@/views/Find'
import My from '@/views/My'
import Friend from '@/views/Friend'

import Vue from 'vue'
import VueRouter from 'vue-router'
Vue.use(VueRouter) // VueRouter插件初始化

// 创建了一个路由对象
const router = new VueRouter({
  // routes 路由规则们
  // route  一条路由规则 { path: 路径, component: 组件 }
  routes: [
    { path: '/find', component: Find },
    { path: '/my', component: My },
    { path: '/friend', component: Friend },
  ],
  // link自定义高亮类名
  linkActiveClass: 'active', // 配置模糊匹配的类名
  linkExactActiveClass: 'exact-active' // 配置精确匹配的类名
})

export default router
浏览器可看到,类名发送变化:
小结:

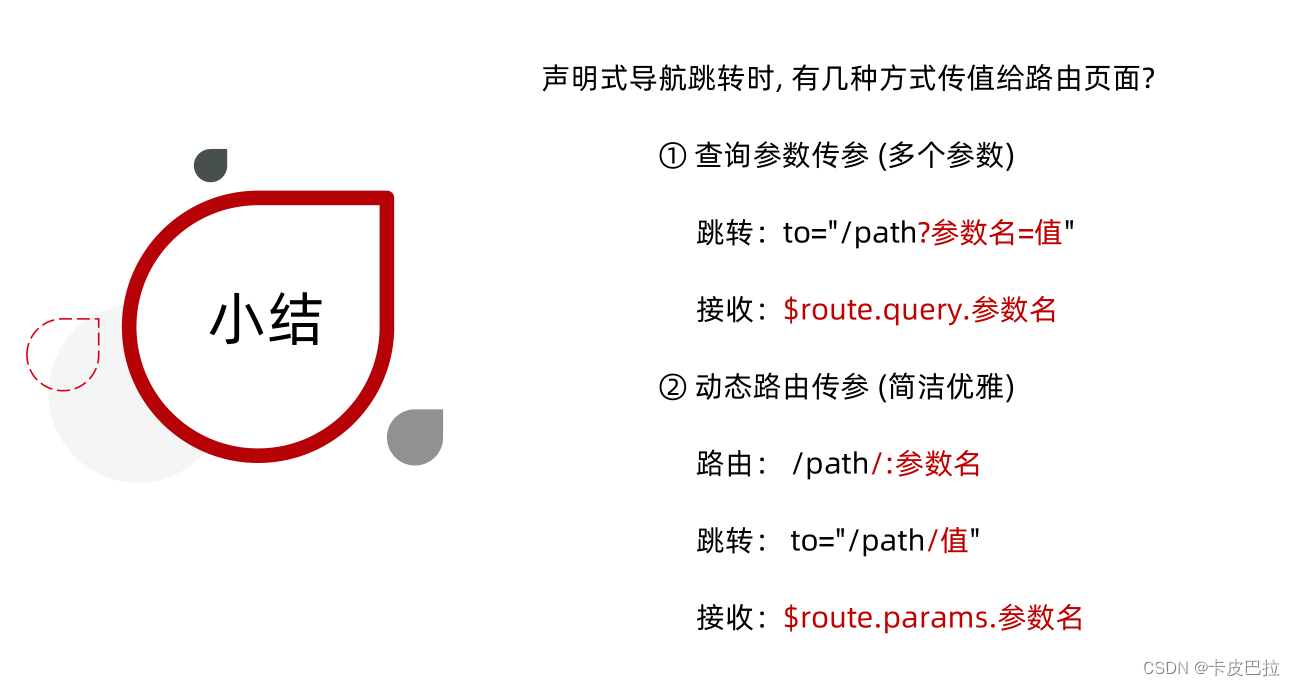
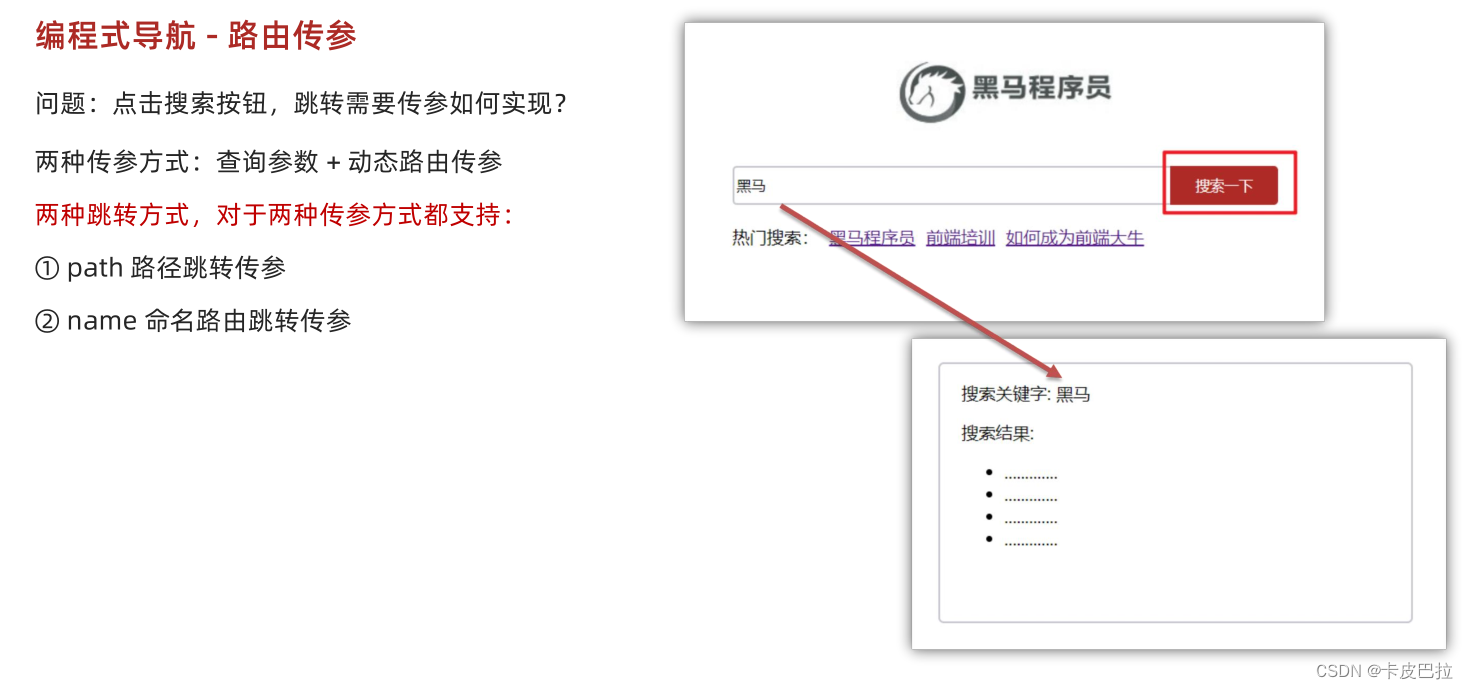
声明式导航-跳转传参

传参方式有两种:
1.查询参数传参
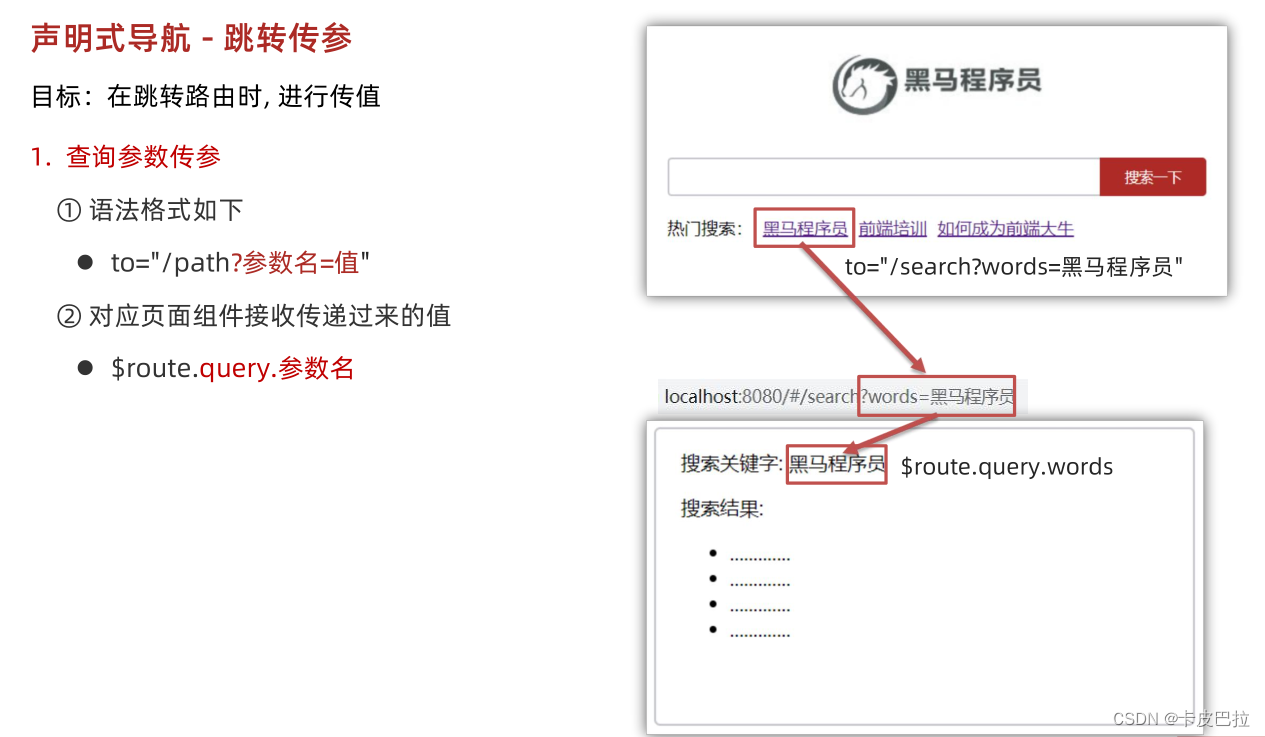
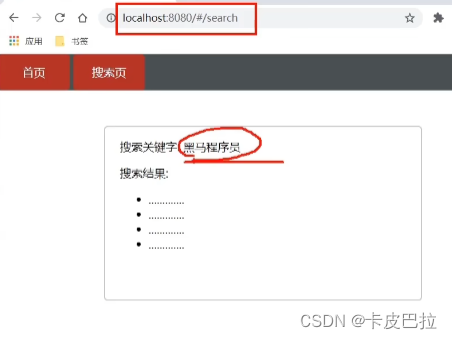
点击链接,从首页跳转到搜索页,希望把链接信息传过去
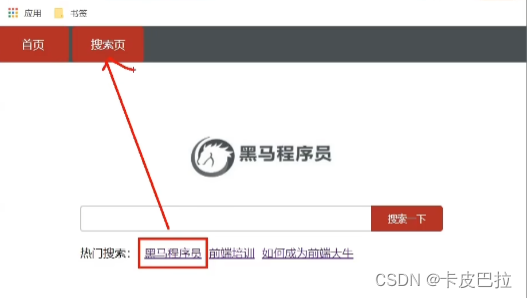
直接跳转
(不带参数)关键字写死
携带查询参数:
在页面获取参数:
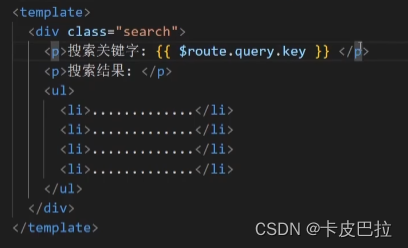
页面显示参数:

如果想要基于参数去发送请求?
在哪发?—— created
获取参
数?this.$route.query.key
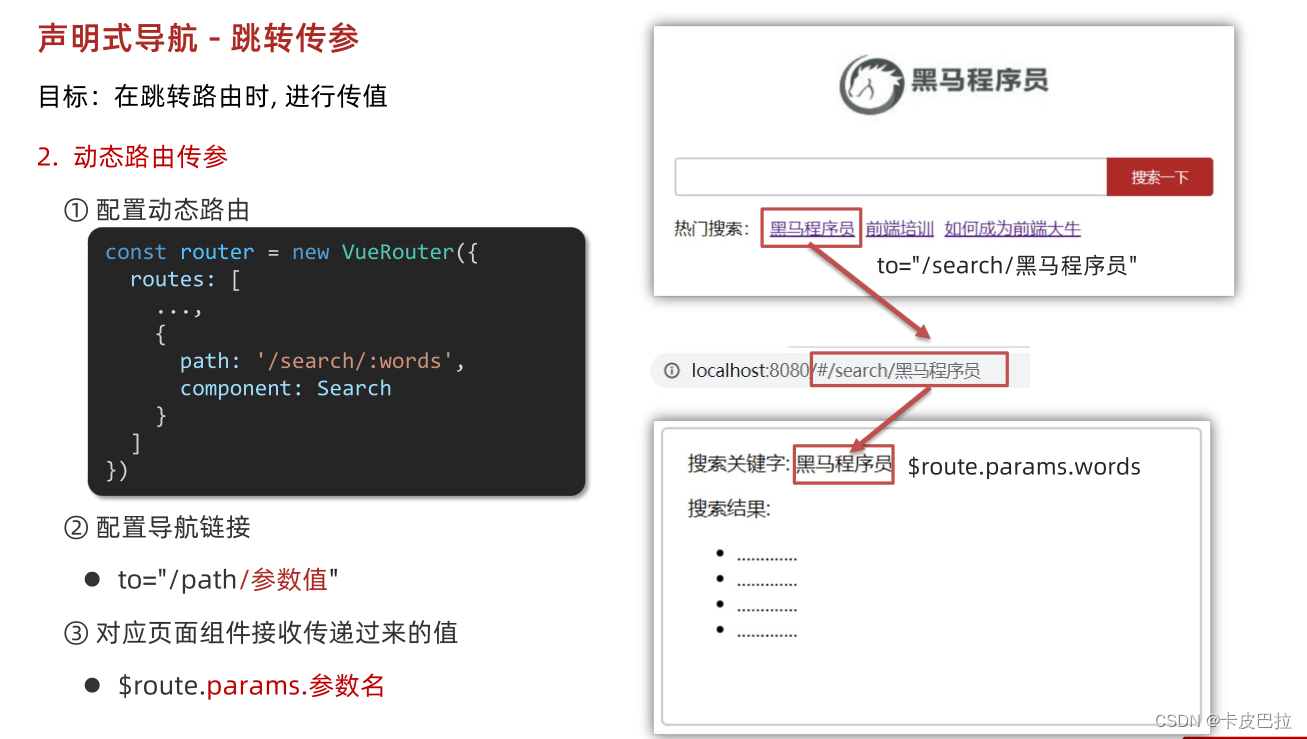
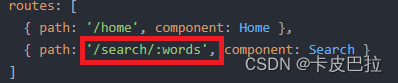
2.动态路由传参
代码:
(router/index.js)
import Home from '../views/Home.vue'
import Search from '../views/Search.vue'
import Vue from 'vue'
import VueRouter from 'vue-router'
Vue.use(VueRouter) // VueRouter插件初始化

// 创建了一个路由对象
const router = new VueRouter({
  routes: [
    { path: '/home', component: Home },
    { path: '/search/:words', component: Search }
  ]
})

export default router
home.vue

<template>
<div class="home">
<div class="logo-box"></div>
<div class="search-box">
<input type="text">
<button>搜索一下</button>
</div>
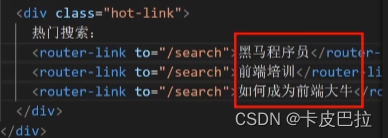
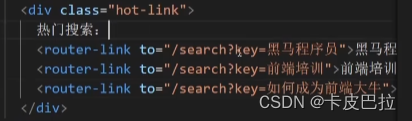
<div class="hot-link">
热门搜索:
<router-link to="/search/黑马程序员">黑马程序员</router-link>
<router-link to="/search/前端培训">前端培训</router-link>
<router-link to="/search/如何成为前端大牛">如何成为前端大牛</router-link>
</div>
</div>
</template>
<script>
export default {
name: 'FindMusic'
}
</script>
<style>
.logo-box {
height: 150px;
background: url('../assets/logo.jpeg') no-repeat center;
}
.search-box {
display: flex;
justify-content: center;
}
.search-box input {
width: 400px;
height: 30px;
line-height: 30px;
border: 2px solid #c4c7ce;
border-radius: 4px 0 0 4px;
outline: none;
}
.search-box input:focus {
border: 2px solid #ad2a26;
}
.search-box button {
width: 100px;
height: 36px;
border: none;
background-color: #ad2a26;
color: #fff;
position: relative;
left: -2px;
border-radius: 0 4px 4px 0;
}
.hot-link {
width: 508px;
height: 60px;
line-height: 60px;
margin: 0 auto;
}
.hot-link a {
margin: 0 5px;
}
</style>效果:

两种传参方式的区别

小结:
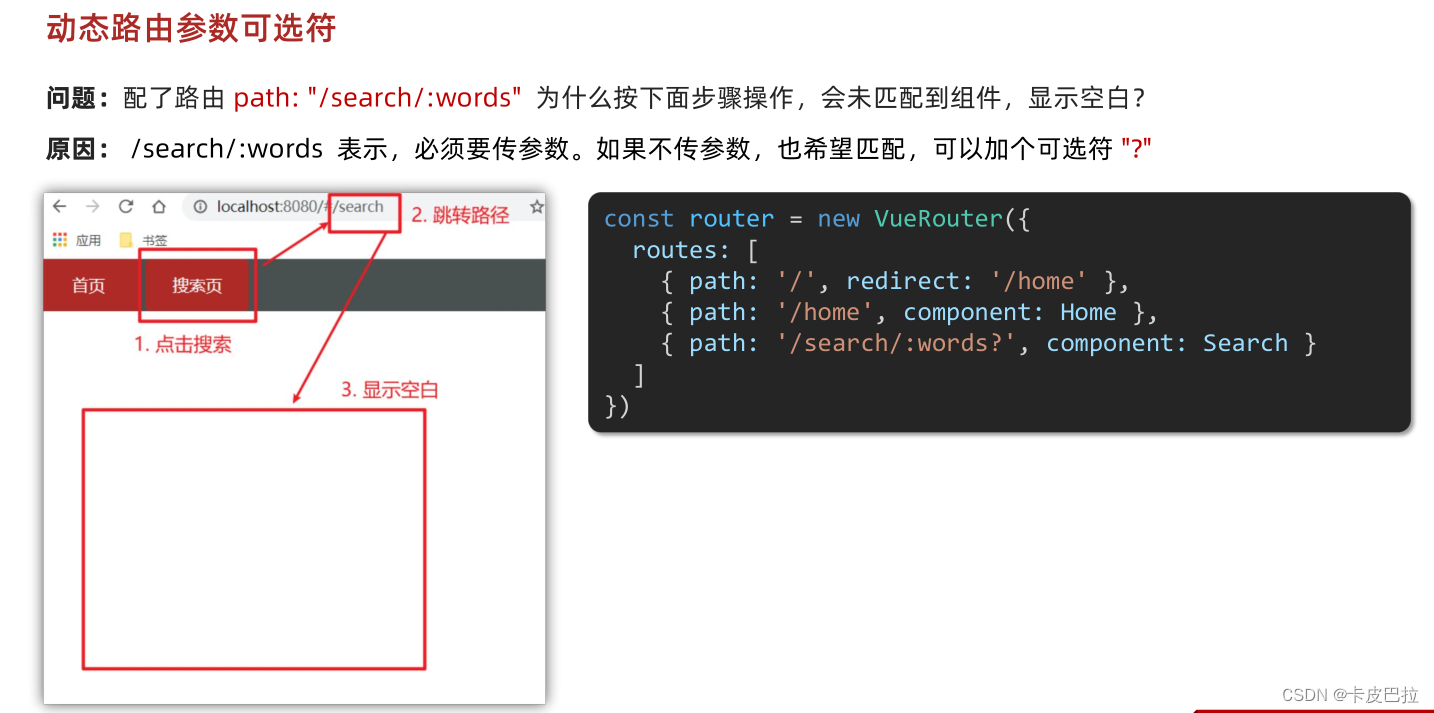
动态路由参数可选符
路由重定向
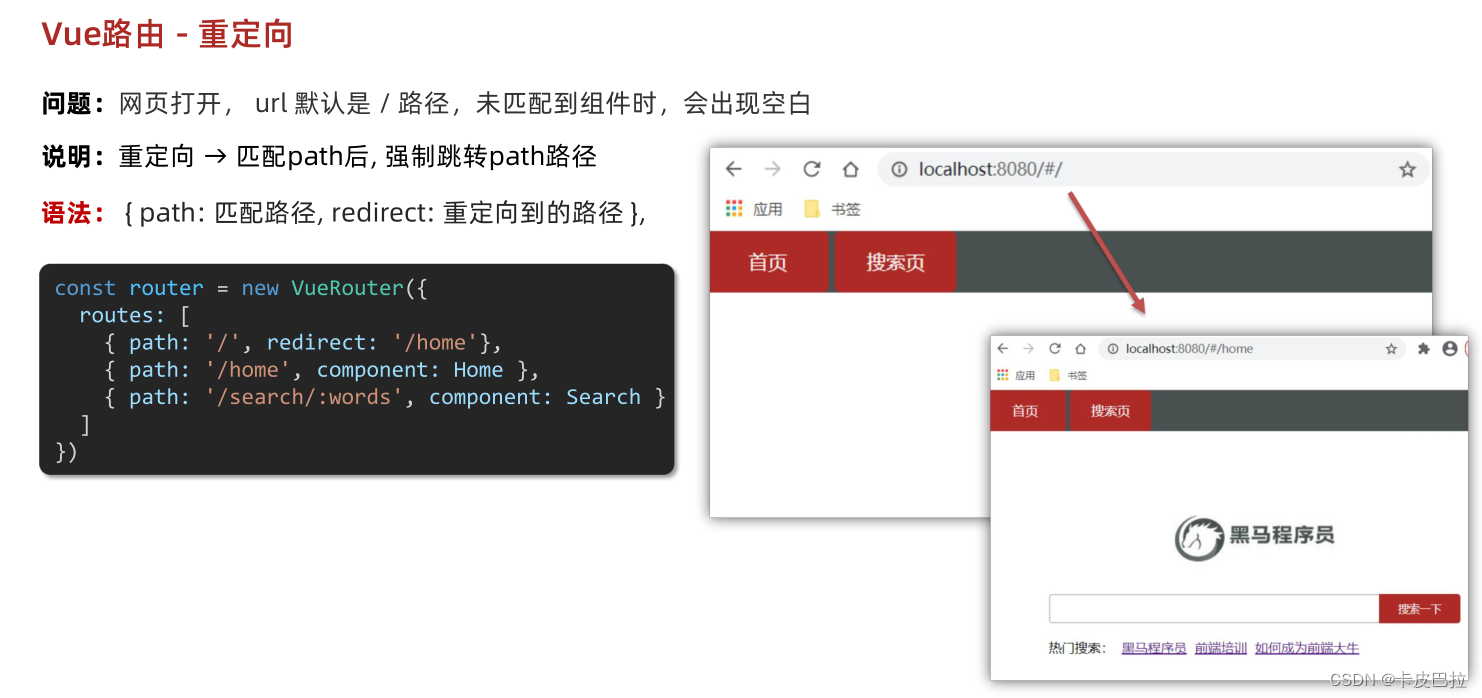
redirect
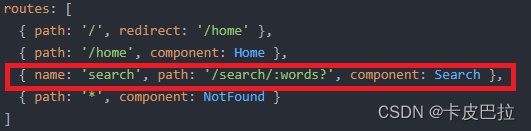
路由404
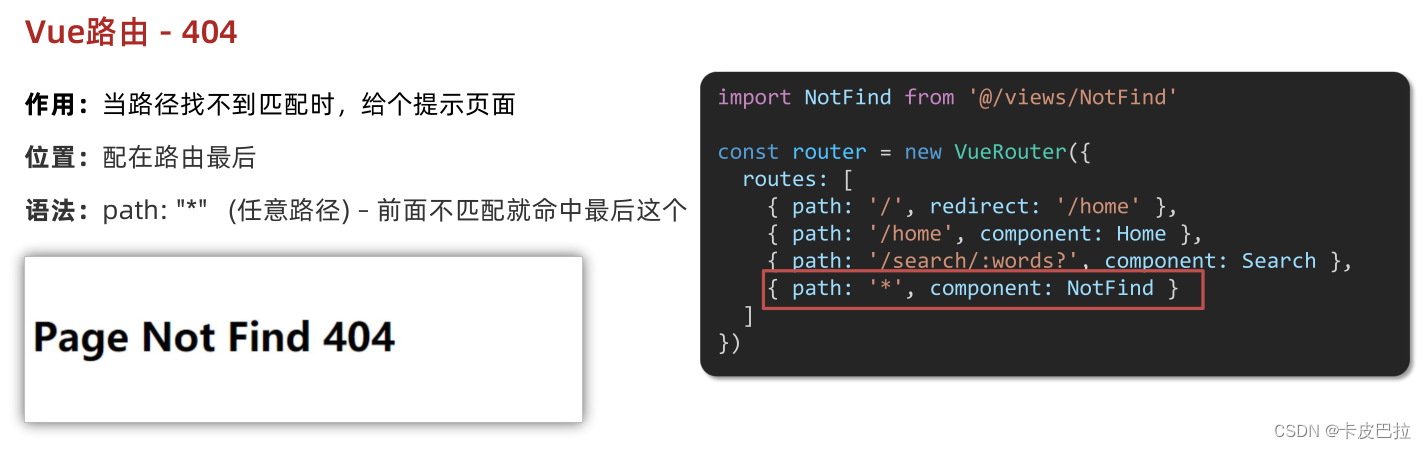
添加一个NotFound组件
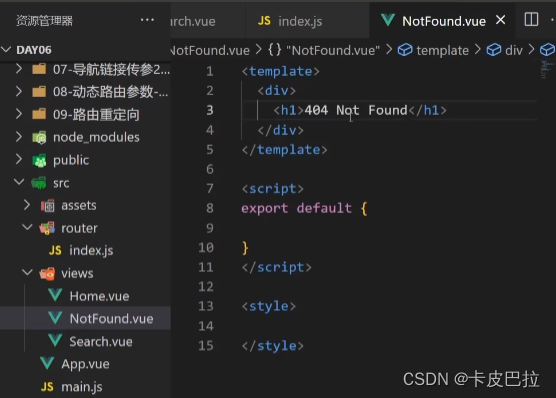
router/index.js
import Home from '@/views/Home'
import Search from '@/views/Search'
import NotFound from '@/views/NotFound'
import Vue from 'vue'
import VueRouter from 'vue-router'
Vue.use(VueRouter) // VueRouter插件初始化
// 创建了一个路由对象
const router = new VueRouter({
routes: [
{ path: '/', redirect: '/home' },
{ path: '/home', component: Home },
{ path: '/search/:words?', component: Search },
{ path: '*', component: NotFound }
]
})
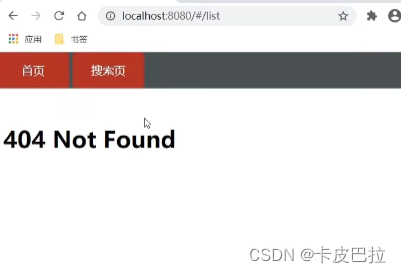
export default router效果(访问 list 无匹配):
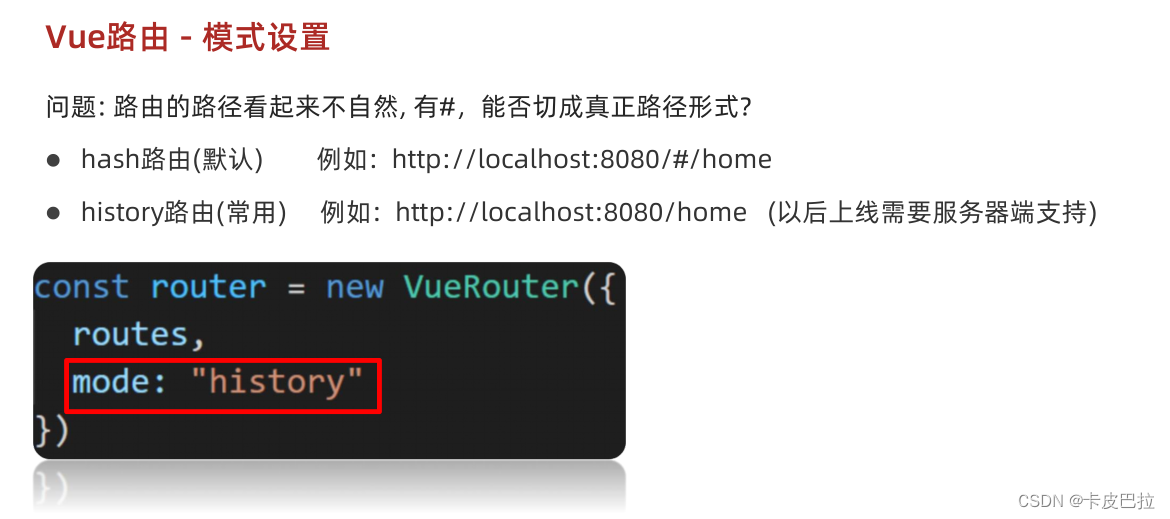
路由模式
router/index.js
import Home from '@/views/Home'
import Search from '@/views/Search'
import NotFound from '@/views/NotFound'
import Vue from 'vue'
import VueRouter from 'vue-router'
Vue.use(VueRouter) // VueRouter插件初始化

// 创建了一个路由对象
const router = new VueRouter({
  // 注意:一旦采用了 history 模式,地址栏就没有 #,需要后台配置访问规则
  mode: 'history',
  routes: [
    { path: '/', redirect: '/home' },
    { path: '/home', component: Home },
    { name: 'search', path: '/search/:words?', component: Search },
    { path: '*', component: NotFound }
  ]
})

export default router
编程式导航
用JS代码来进行跳转
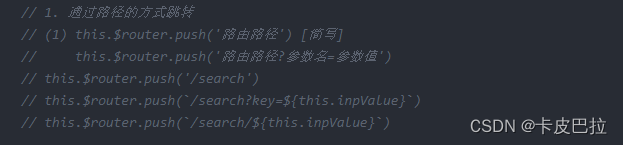
1. 通过路径的方式跳转
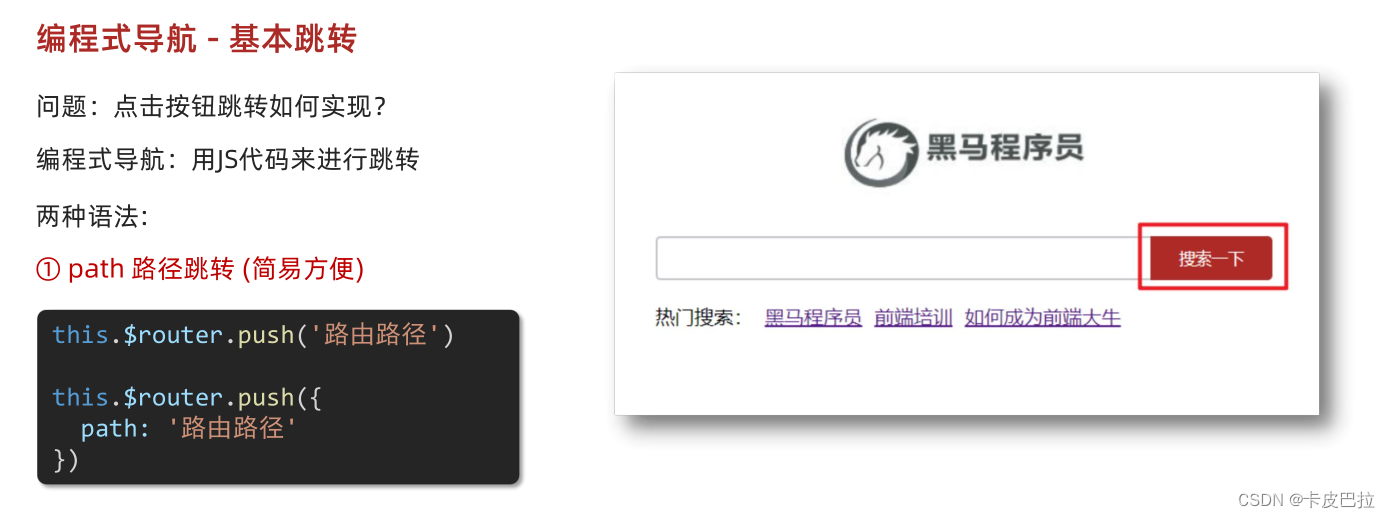
// (1) this.$router.push('路由路径') [简写]
// this.$router.push('/search')
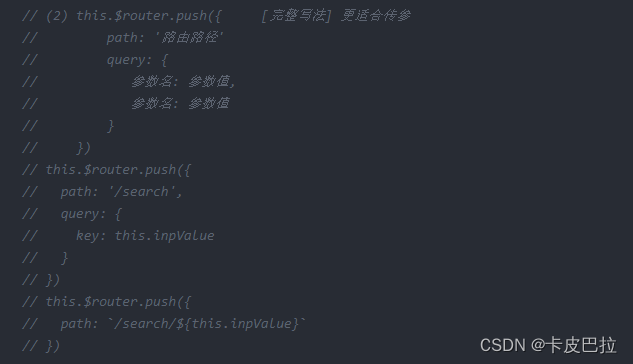
// (2) this.$router.push({ [完整写法]
// path: '路由路径'
// })
// this.$router.push({
// path: '/search'
// })
2. 通过命名路由的方式跳转
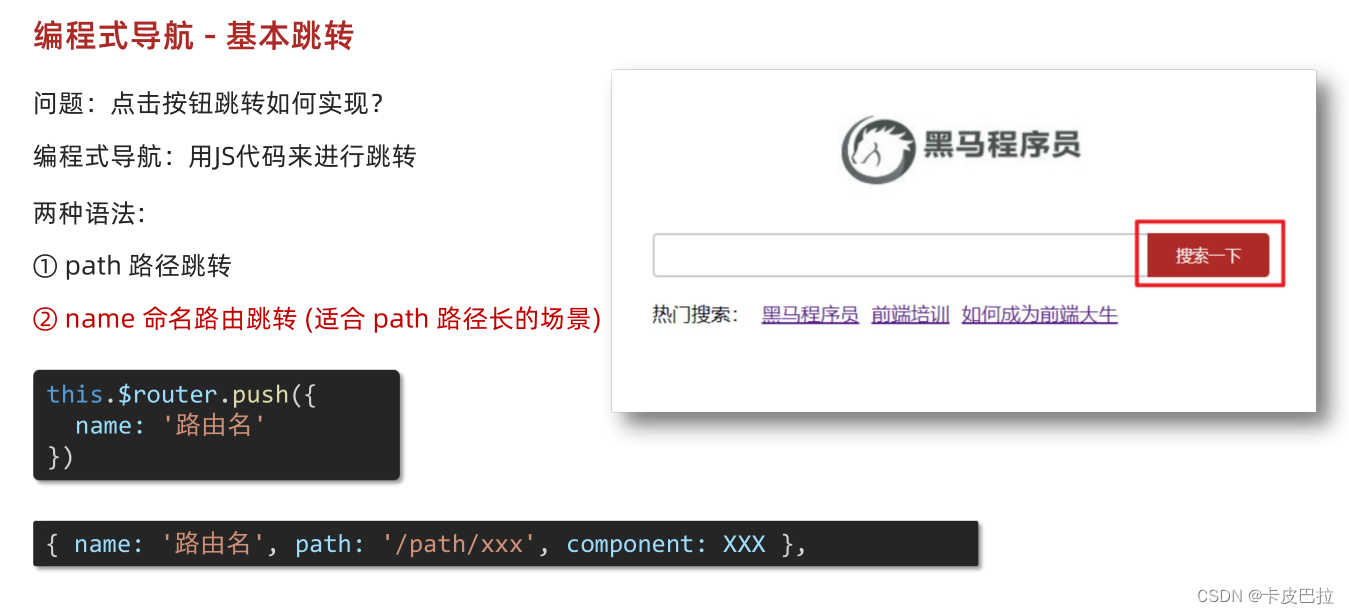
(需要给路由起名字) 适合长路径
// this.$router.push({
// name: '路由名'
// })
router/index.js
import Home from '@/views/Home'
import Search from '@/views/Search'
import NotFound from '@/views/NotFound'
import Vue from 'vue'
import VueRouter from 'vue-router'
Vue.use(VueRouter) // VueRouter插件初始化

// 创建了一个路由对象
const router = new VueRouter({
  // 注意:一旦采用了 history 模式,地址栏就没有 #,需要后台配置访问规则
  mode: 'history',
  routes: [
    { path: '/', redirect: '/home' },
    { path: '/home', component: Home },
    { name: 'search', path: '/search/:words?', component: Search },
    { path: '*', component: NotFound }
  ]
})

export default router
Home.vue
<template>
<div class="home">
<div class="logo-box"></div>
<div class="search-box">
<input type="text">
<button @click="goSearch">搜索一下</button>
</div>
<div class="hot-link">
热门搜索:
<router-link to="/search/黑马程序员">黑马程序员</router-link>
<router-link to="/search/前端培训">前端培训</router-link>
<router-link to="/search/如何成为前端大牛">如何成为前端大牛</router-link>
</div>
</div>
</template>
<script>
export default {
name: 'FindMusic',
methods: {
goSearch () {
// 1. 通过路径的方式跳转
// (1) this.$router.push('路由路径') [简写]
// this.$router.push('/search')
// (2) this.$router.push({ [完整写法]
// path: '路由路径'
// })
// this.$router.push({
// path: '/search'
// })
// 2. 通过命名路由的方式跳转 (需要给路由起名字) 适合长路径
// this.$router.push({
// name: '路由名'
// })
this.$router.push({
name: 'search'
})
}
}
}
</script>
<style>
.logo-box {
height: 150px;
background: url('@/assets/logo.jpeg') no-repeat center;
}
.search-box {
display: flex;
justify-content: center;
}
.search-box input {
width: 400px;
height: 30px;
line-height: 30px;
border: 2px solid #c4c7ce;
border-radius: 4px 0 0 4px;
outline: none;
}
.search-box input:focus {
border: 2px solid #ad2a26;
}
.search-box button {
width: 100px;
height: 36px;
border: none;
background-color: #ad2a26;
color: #fff;
position: relative;
left: -2px;
border-radius: 0 4px 4px 0;
}
.hot-link {
width: 508px;
height: 60px;
line-height: 60px;
margin: 0 auto;
}
.hot-link a {
margin: 0 5px;
}
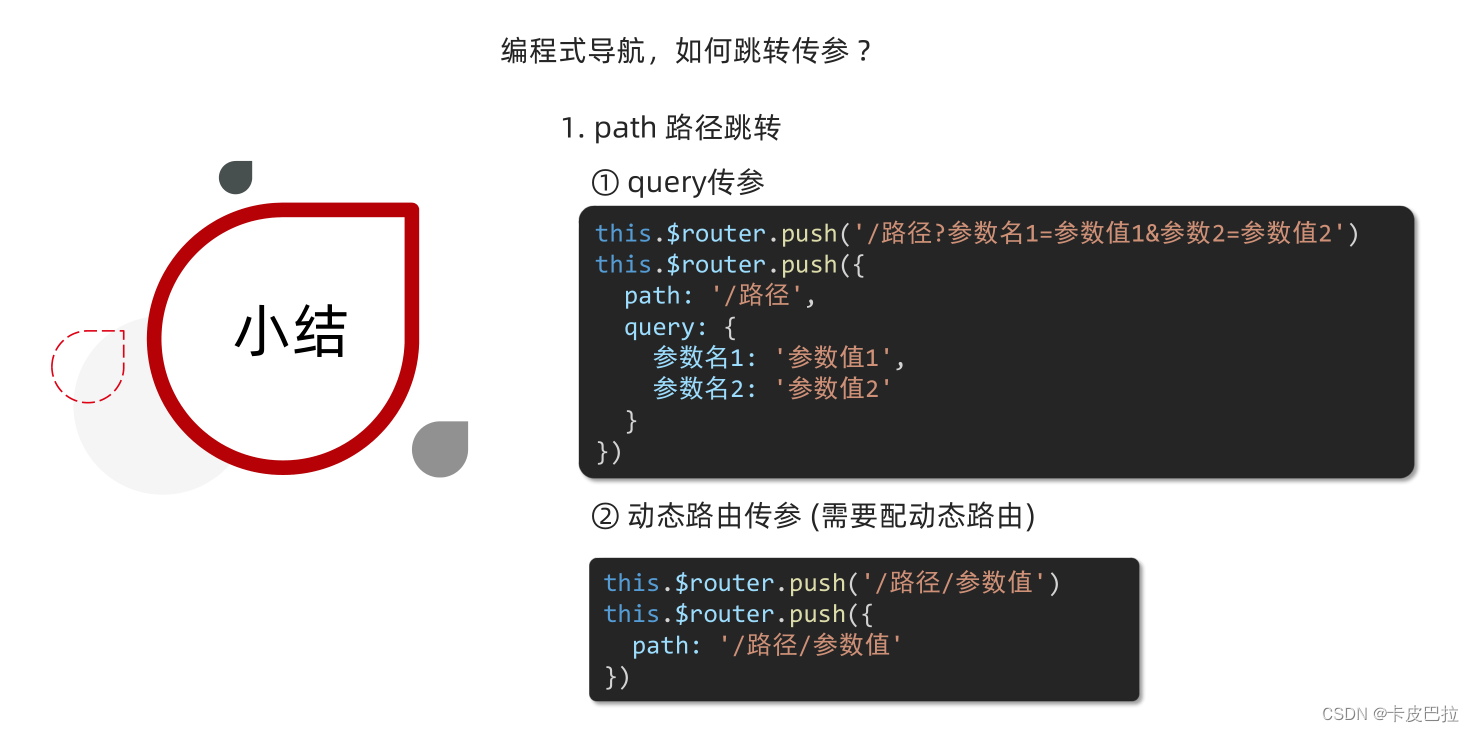
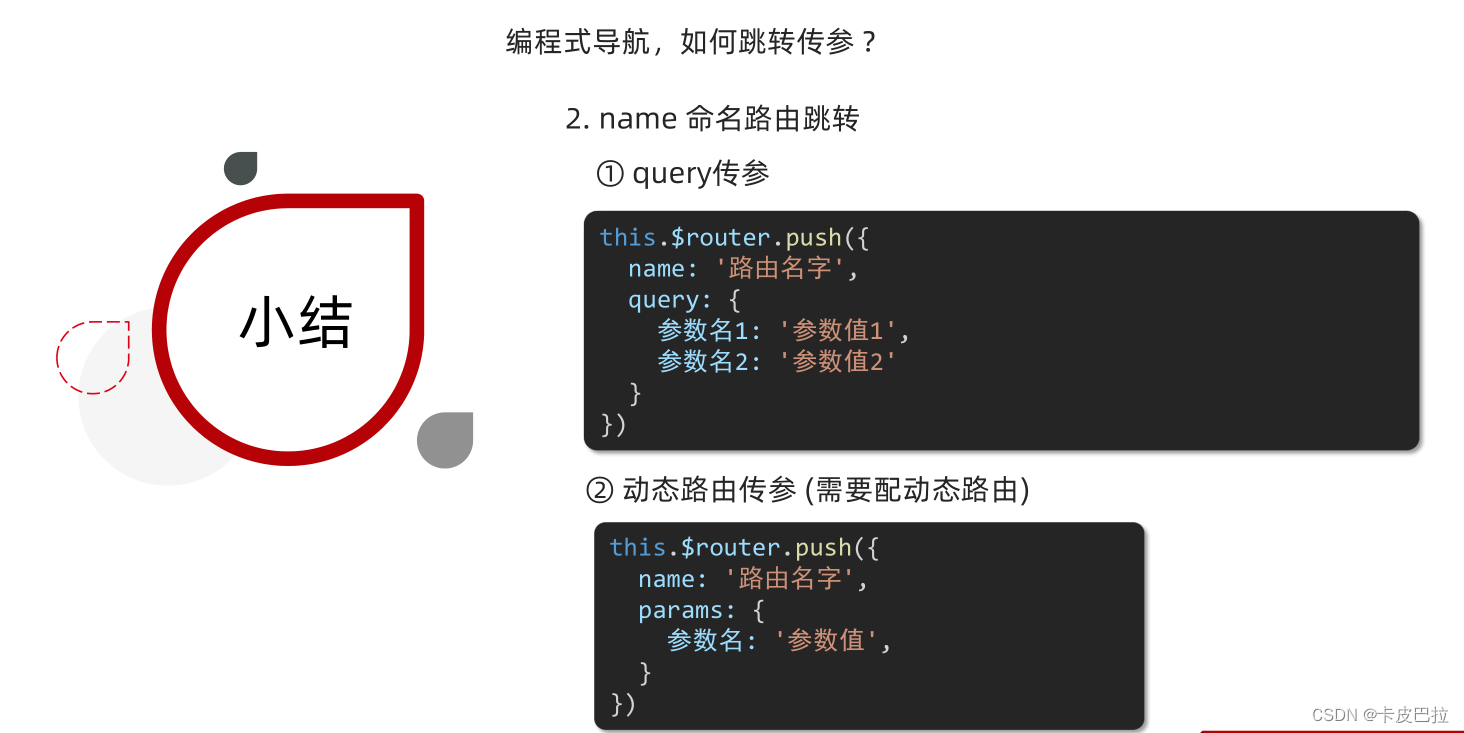
</style>小结:
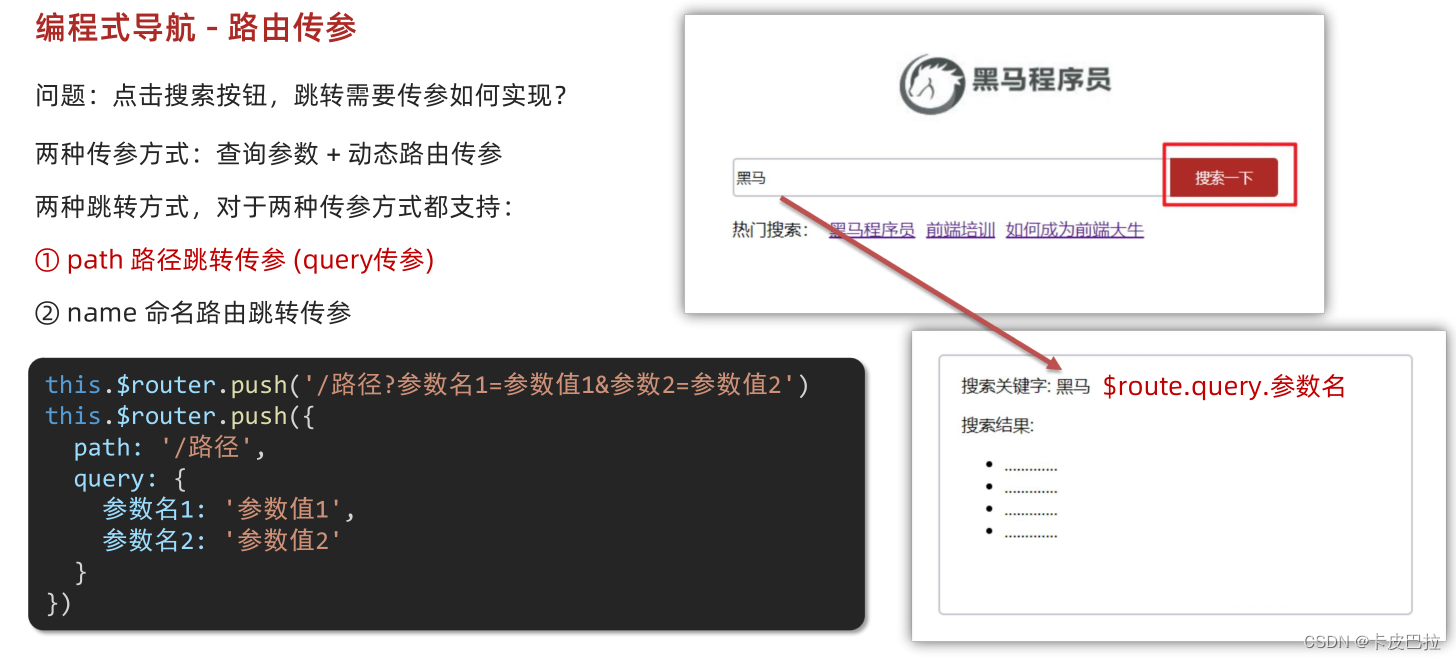
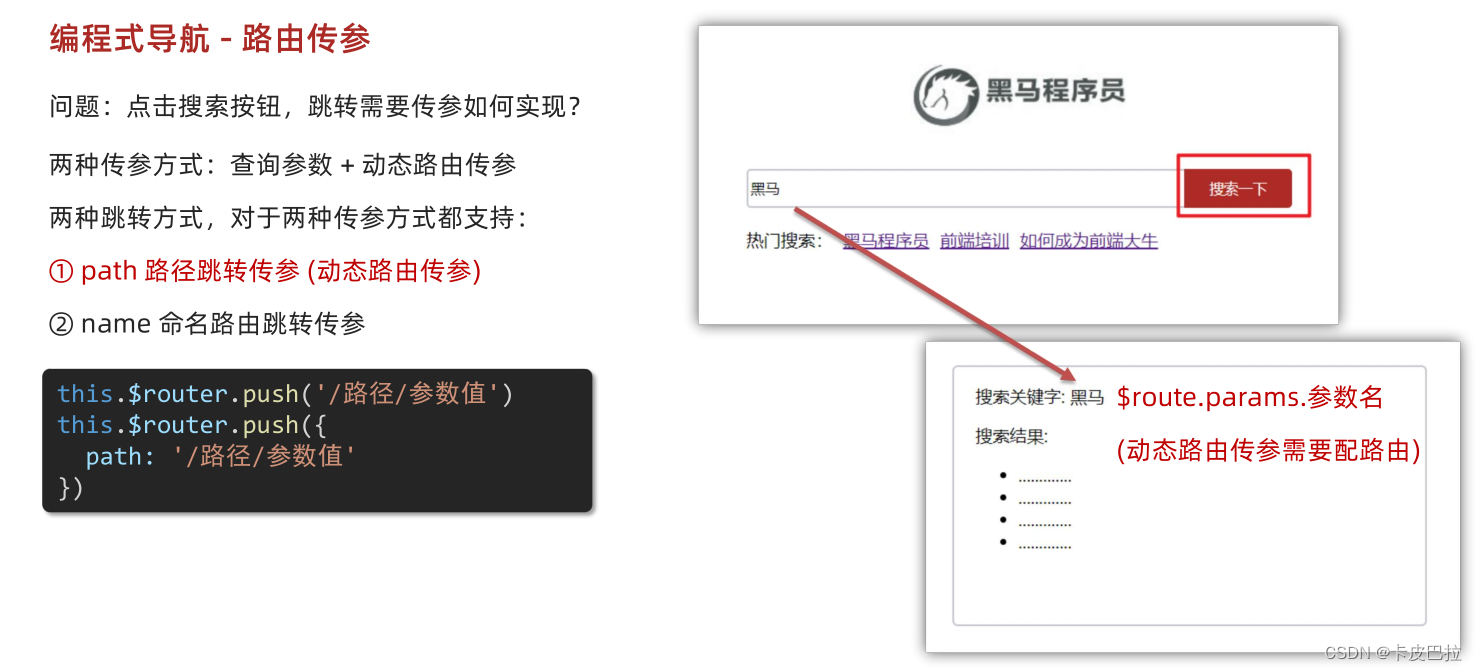
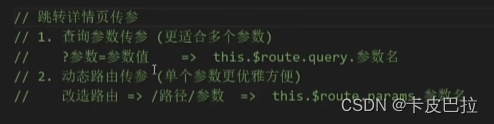
编程式导航传参 ( 查询参数传参 & 动态路由传参 )
path路径跳转传参
传入输入框内容:
![]()
两种传参方式:查询参数传参和动态路由传参 都支持
完整写法更适合多参数情况(不用一个一个拼接)
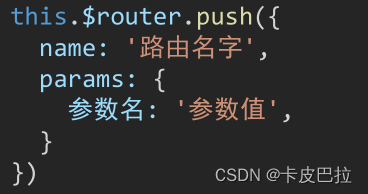
name命名路由跳转传参
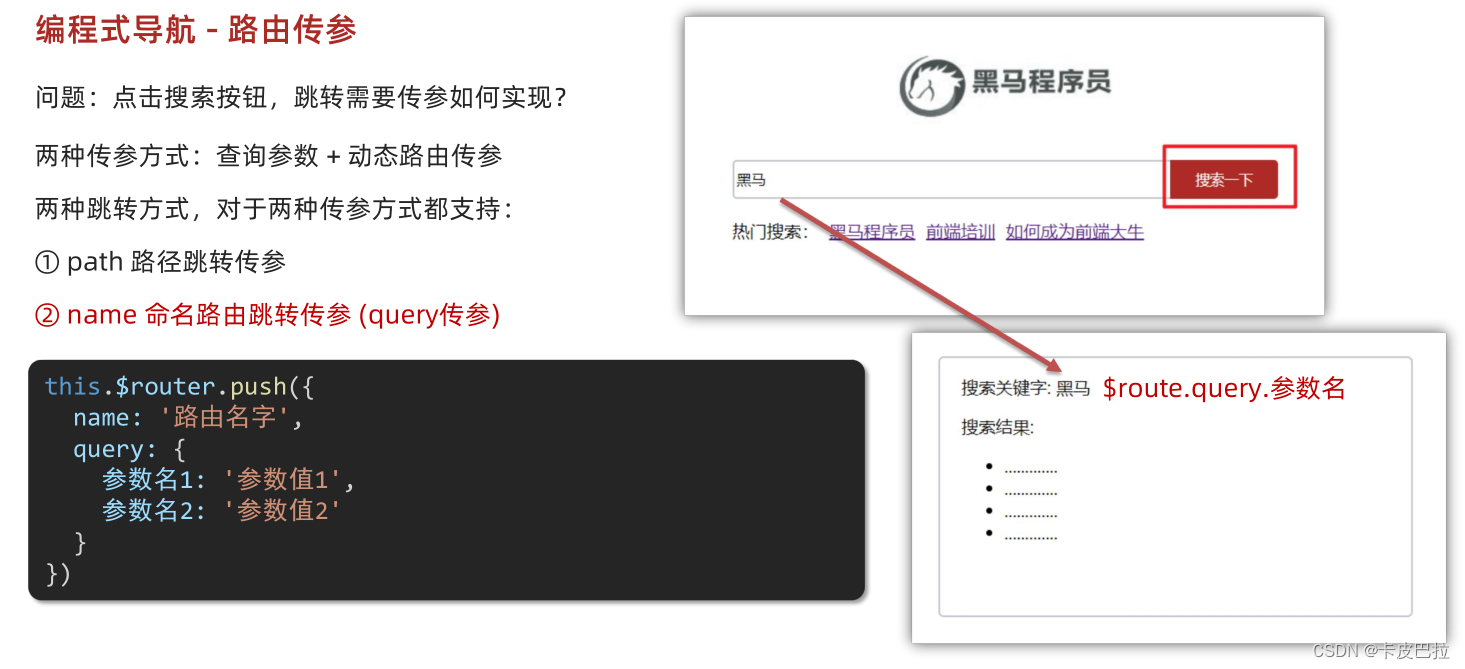
在路由中配置动态路由
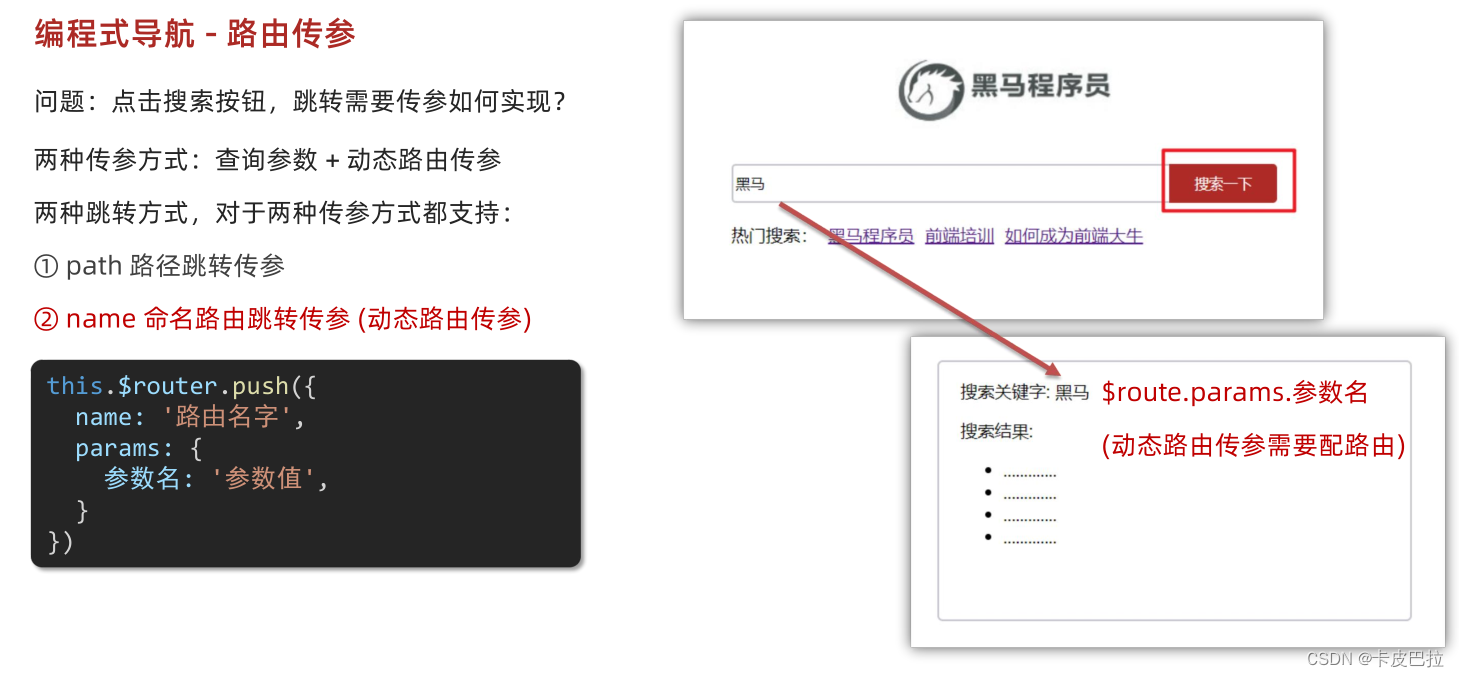
使用params传参
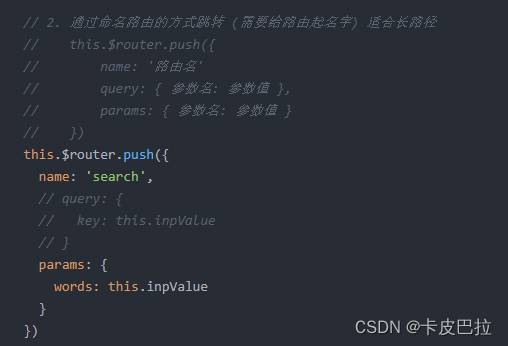
在所跳转的组件中,通过 $route.params.参数名 获取传入参数值

代码:
router/index.js
import Home from '@/views/Home'
import Search from '@/views/Search'
import NotFound from '@/views/NotFound'
import Vue from 'vue'
import VueRouter from 'vue-router'
Vue.use(VueRouter) // VueRouter插件初始化

// 创建了一个路由对象
const router = new VueRouter({
  // 注意:一旦采用了 history 模式,地址栏就没有 #,需要后台配置访问规则
  mode: 'history',
  routes: [
    { path: '/', redirect: '/home' },
    { path: '/home', component: Home },
    { name: 'search', path: '/search/:words?', component: Search },
    { path: '*', component: NotFound }
  ]
})

export default router
Home.vue
<template>
<div class="home">
<div class="logo-box"></div>
<div class="search-box">
<input v-model="inpValue" type="text">
<button @click="goSearch">搜索一下</button>
</div>
<div class="hot-link">
热门搜索:
<router-link to="/search/黑马程序员">黑马程序员</router-link>
<router-link to="/search/前端培训">前端培训</router-link>
<router-link to="/search/如何成为前端大牛">如何成为前端大牛</router-link>
</div>
</div>
</template>
<script>
export default {
name: 'FindMusic',
data () {
return {
inpValue: ''
}
},
methods: {
goSearch () {
// 1. 通过路径的方式跳转
// (1) this.$router.push('路由路径') [简写]
// this.$router.push('路由路径?参数名=参数值')
// this.$router.push('/search')
// this.$router.push(`/search?key=${this.inpValue}`)
// this.$router.push(`/search/${this.inpValue}`)
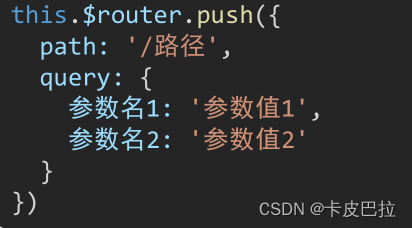
// (2) this.$router.push({ [完整写法] 更适合传参
// path: '路由路径'
// query: {
// 参数名: 参数值,
// 参数名: 参数值
// }
// })
// this.$router.push({
// path: '/search',
// query: {
// key: this.inpValue
// }
// })
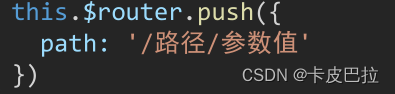
// this.$router.push({
// path: `/search/${this.inpValue}`
// })
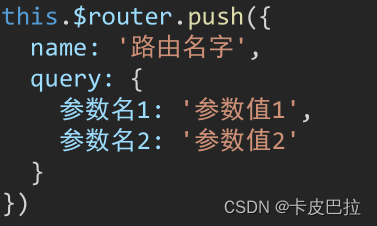
// 2. 通过命名路由的方式跳转 (需要给路由起名字) 适合长路径
// this.$router.push({
// name: '路由名'
// query: { 参数名: 参数值 },
// params: { 参数名: 参数值 }
// })
this.$router.push({
name: 'search',
// query: {
// key: this.inpValue
// }
params: {
words: this.inpValue
}
})
}
}
}
</script>
……
小结:
个人总结
路由导航 传参 跳转 三问:
1.哪种路由导航?
2.传参方式是什么?
3.如果是编程式导航,跳转方式是什么?
路由导航的种类有两种:
1.声明式导航——使用router-link组件,点击后跳转 路由跳转的方法:<router-link to=" ">
2.编程式导航——触发事件,用JS代码来进行跳转 路由跳转的方法: this.$router.push()
路由传参方式也有两种:
1.查询参数传参——在路由中拼接查询参数 形式:?key=value
传过去的参数,通过 this.$route.query.key 获取
2.动态路由传参——在路由中直接拼接参数 形式:/value (前提:在router中配置动态路由 '…/:key' )
传过去的参数,通过 this.$route.params.key 获取
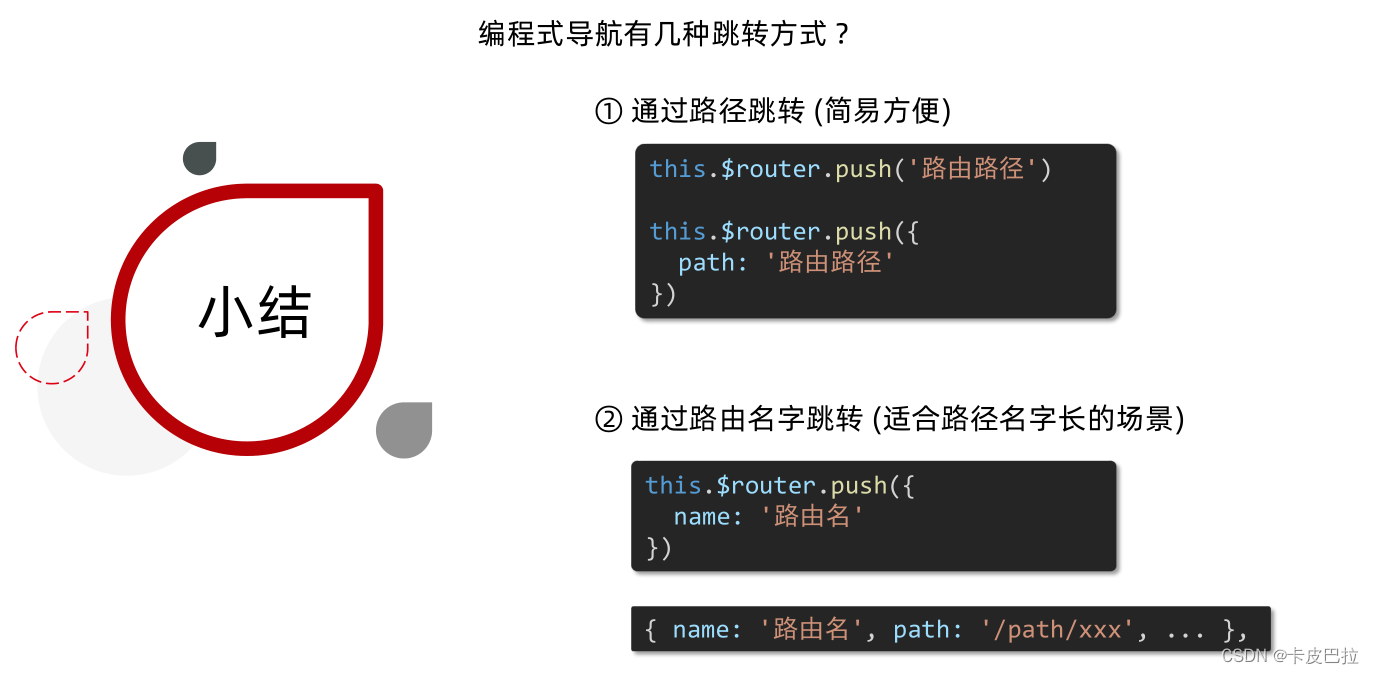
编程式导航的跳转方式有两种:
① path 路径跳转
② name 命名路由跳转
传参方式 和 跳转方式 可以两两组合,实现 携带参数的路由跳转
其中 $router.push() 方法的实参有两种写法:($router.push() ——> 编程式导航 )
1.简写:$router.push('路由路径')
①编程式导航-查询参数传参-path路径跳转
![]()
②编程式导航-动态路由传参-path路径跳转
![]()
2.完整写法(更适合传参,不用一个一个参数拼接)
其中,命名路由跳转只能使用完整写法:
①编程式导航-查询参数传参-path路径跳转
②编程式导航-动态路由传参-path路径跳转
③编程式导航-查询参数传参-name命名跳转
④编程式导航-动态路由传参-name命名跳转
根据查询
声明式导航 也可以使用 命名路由跳转 方式
个人认为:
在元素(router-link)的属性写一个对象(JS代码)阅读性较差,故少用
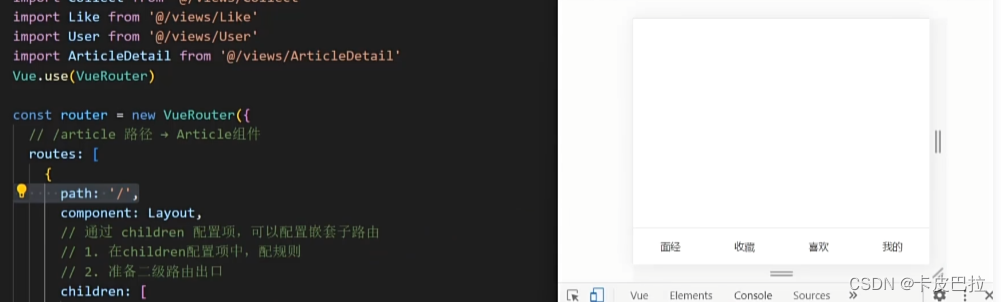
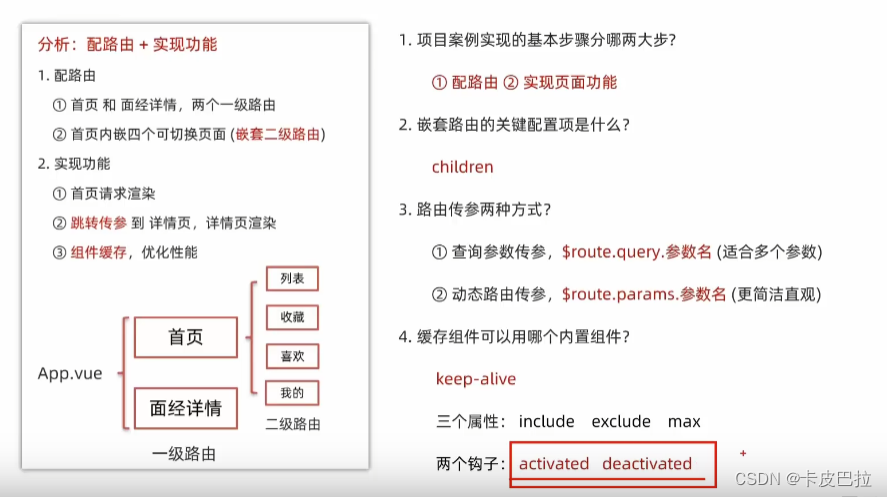
综合案例:面经基础版
案例分析:
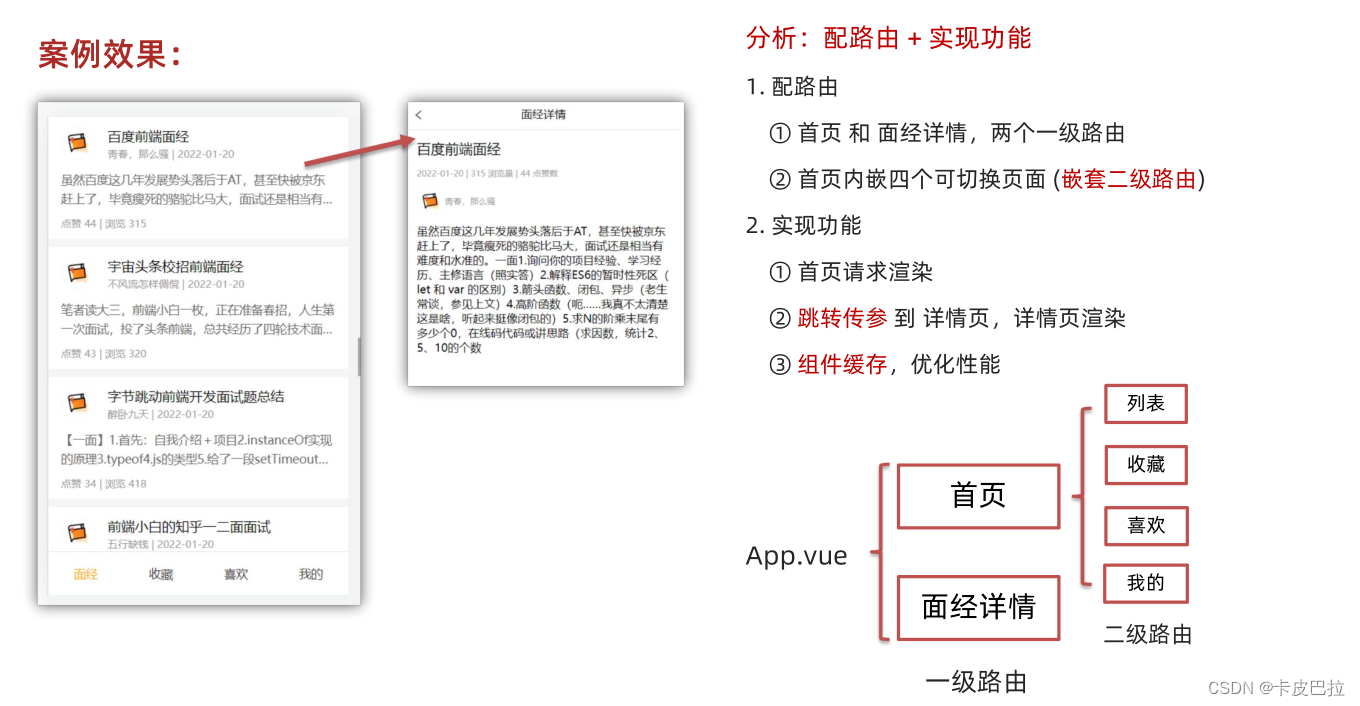
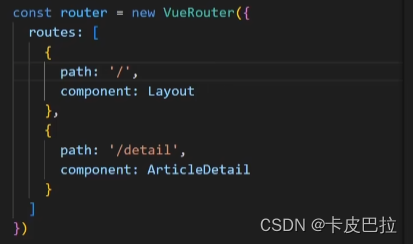
面经基础版-路由配置
一级路由
二级路由(还要准备第二级路由出口)
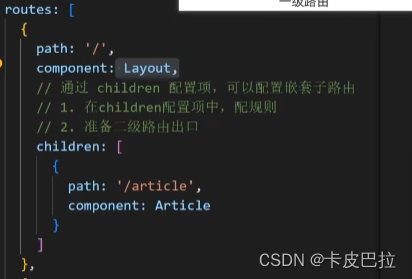
二级路由出口

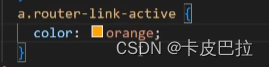
高亮,a换成router-link,推荐使用模糊匹配类名,router-link-active
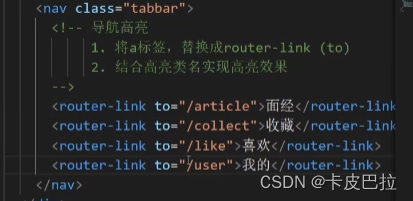
加上高亮样式
效果:

面经基础版-首页请求渲染
步骤:
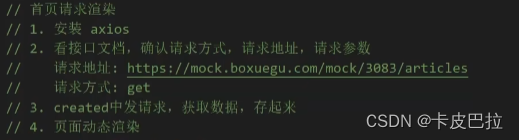
请求数据:
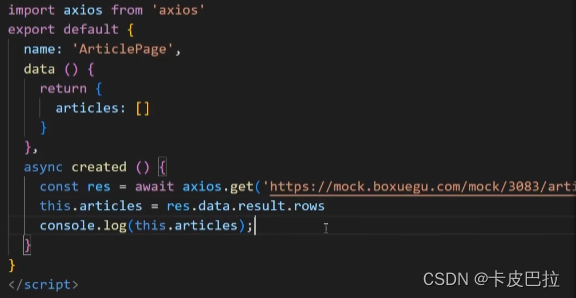
然后在模板中渲染即可。
面经基础版-传参(查询参数&动态路由)
注册点击事件:
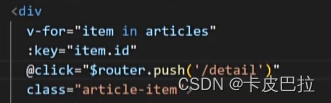
传参方式:

查询参数传参:
![]()
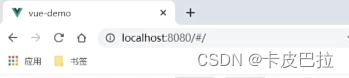
地址栏处会带上id:
![]()
动态路由传参(单个参数更优雅方便):
配置动态路由
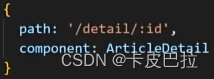
不用写上 id=

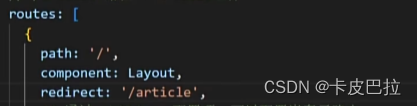
修复小bug
回到首页时:
出现空白(因为没有匹配到任何二级路由)
解决办法:重定向
给头部导航的返回小箭头添加返回功能( $router.back() ):

面经基础版-详情页渲染
发送请求获取数据:

插值语法渲染:
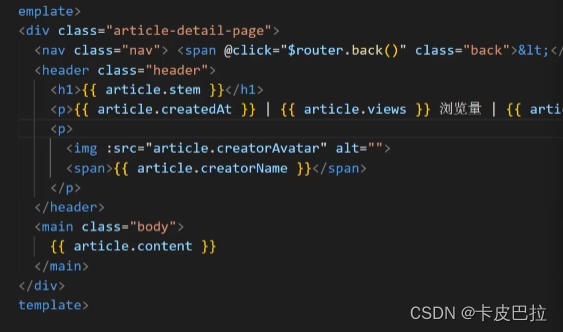
有时候出现空白:
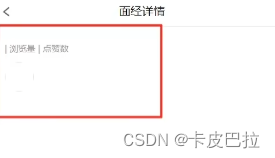
有的内容没渲染出来
为什么?发请求需要时间,有一小段时间,article为空。
解决方法:加上v-if,有内容才去渲染
![]()
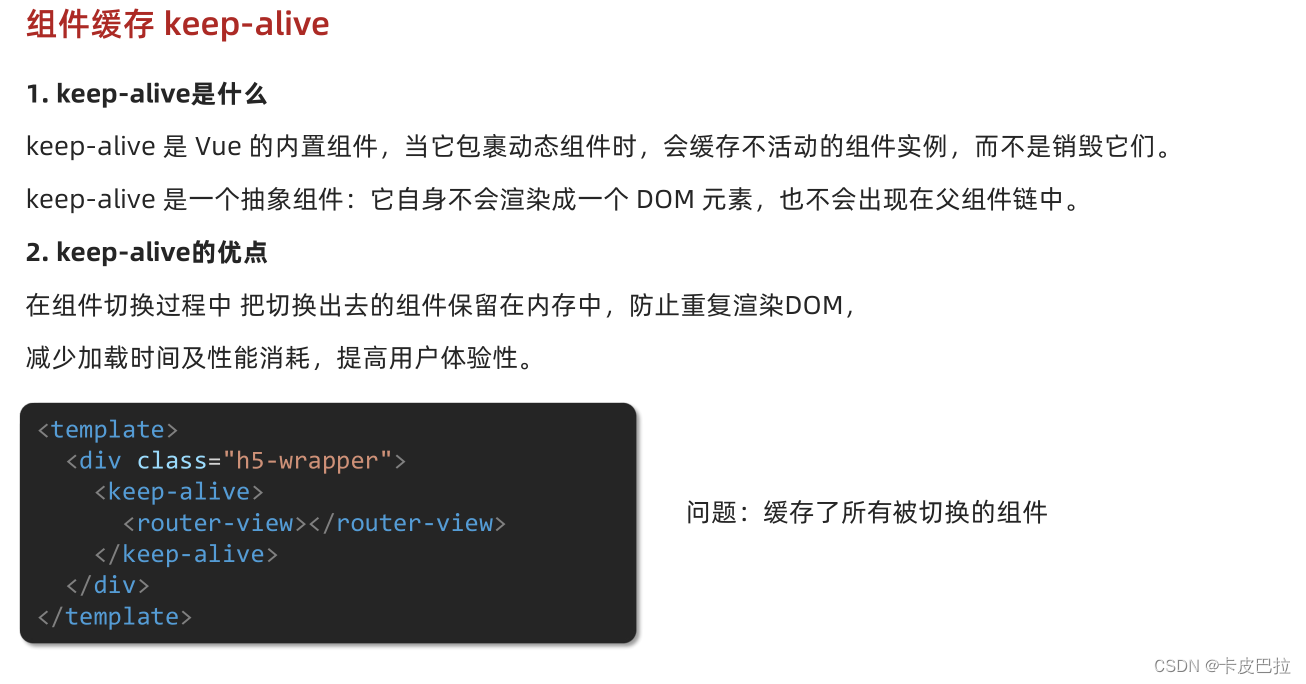
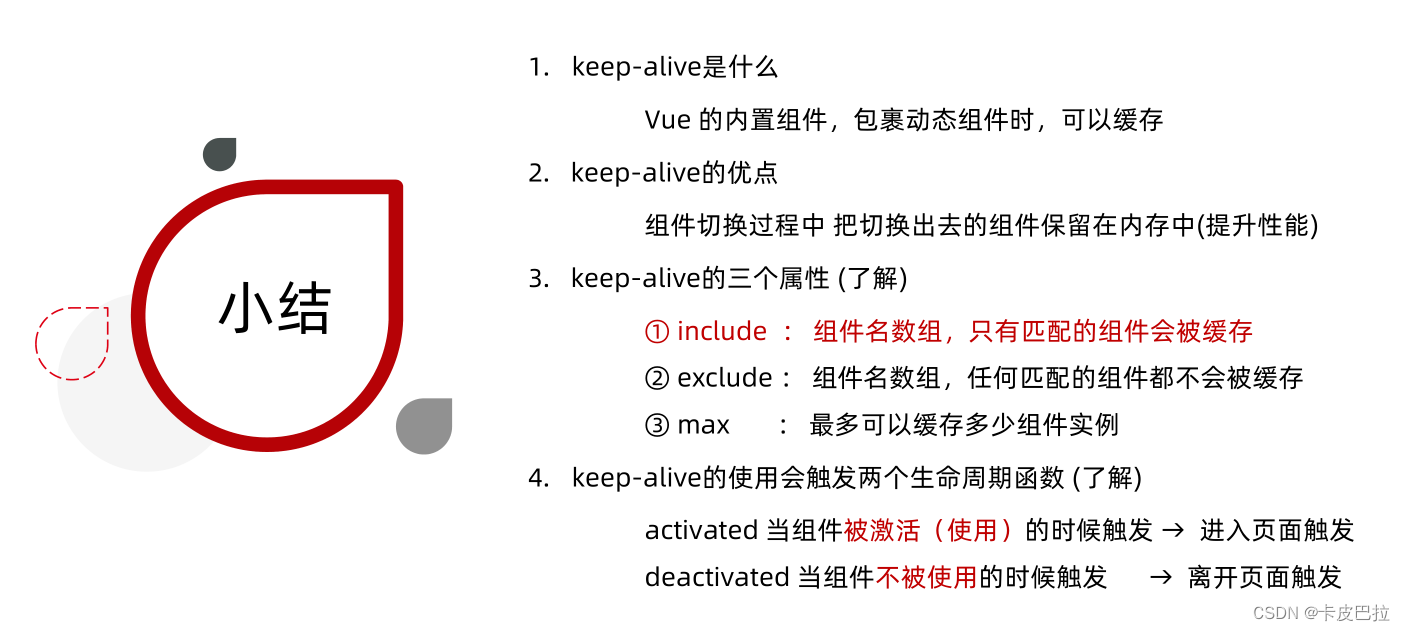
面经基础版-缓存组件
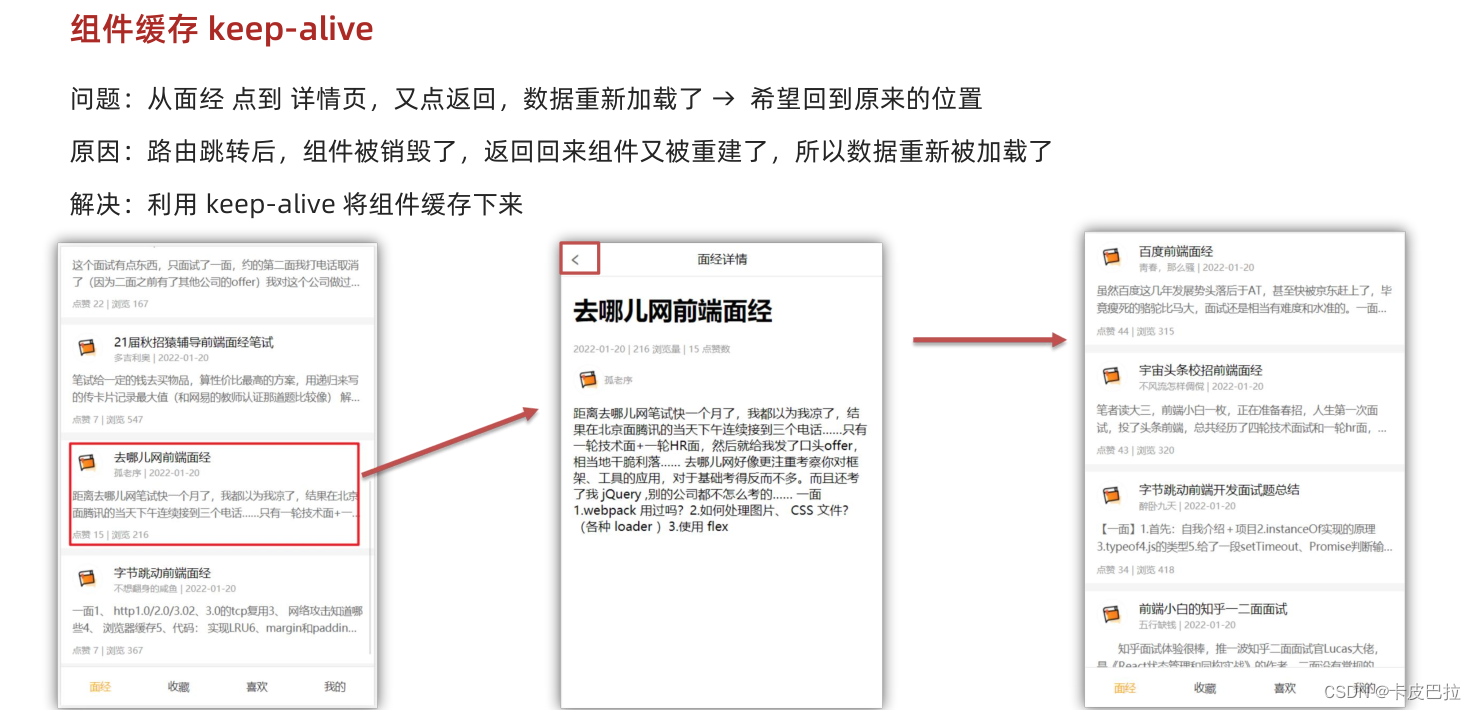
keep-alive
实操:
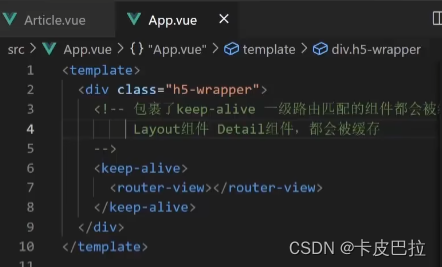
detail也被缓存了(不需要被缓存)
注意:name优先级更高
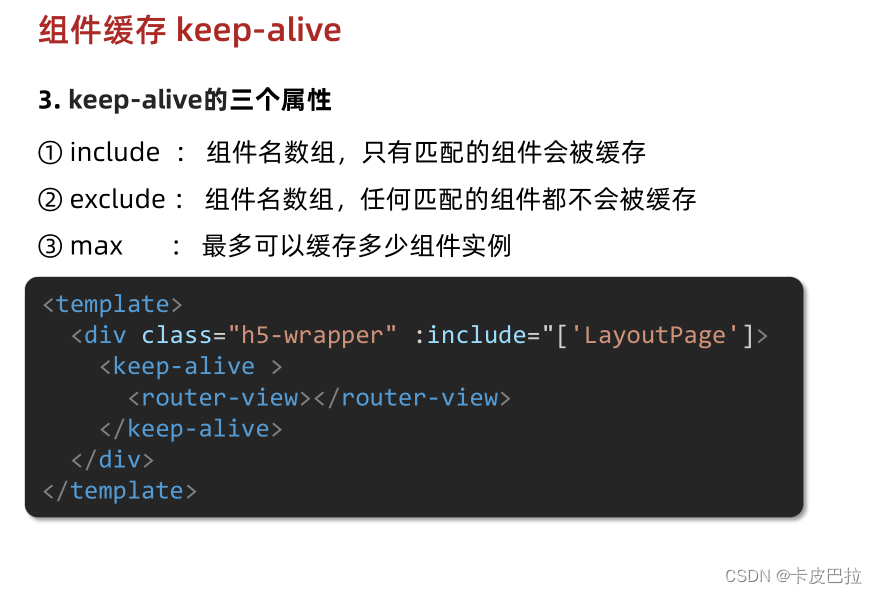
使用keep-alive的include属性

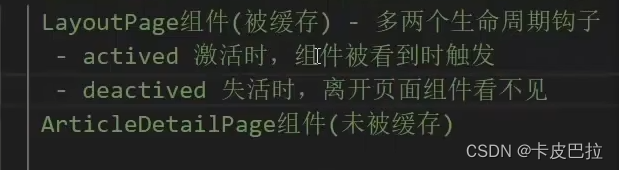
被缓存组件多两个生命周期钩子
实操:
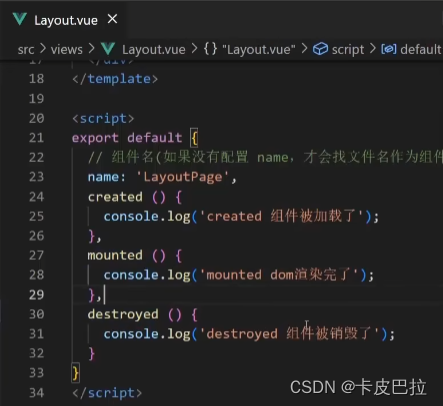
进入时:
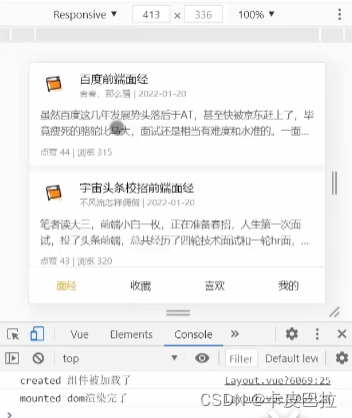
点击面经进入详情页面后,再返回,created mounted destroyed不会再被触发。
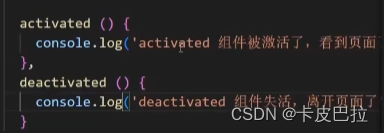
如果希望回到首页有提示等,在哪实现?
提供了actived deactived
小结:
自定义创建项目
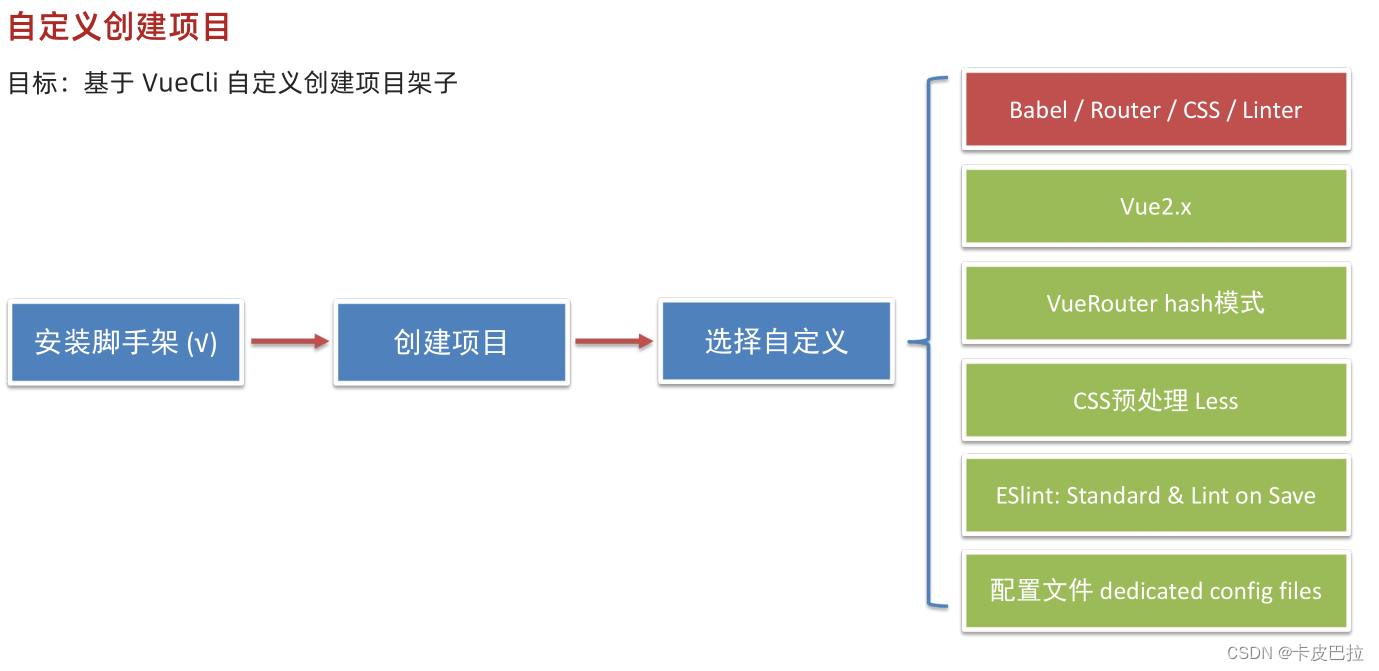
1.安装脚手架 (已安装)
npm i @vue/cli -g2.创建项目
vue create hm-exp-mobile-
选项
Vue CLI v5.0.8
? Please pick a preset:
  Default ([Vue 3] babel, eslint)
  Default ([Vue 2] babel, eslint)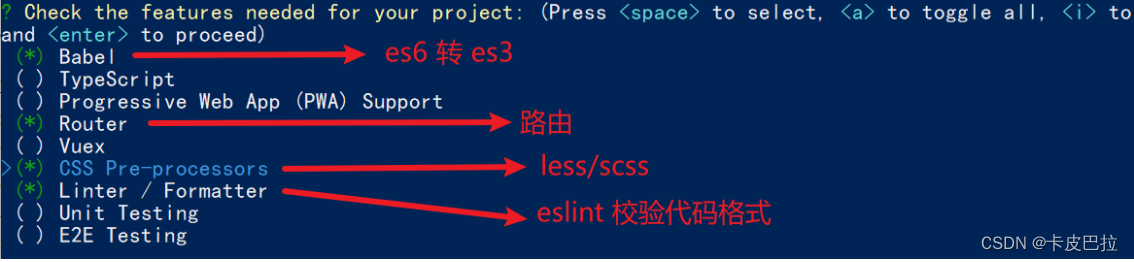
> Manually select features 选自定义-
手动选择功能
-
选择vue的版本
  3.x
> 2.x-
是否使用history模式

-
选择css预处理

-
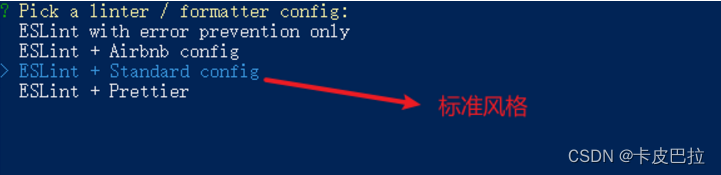
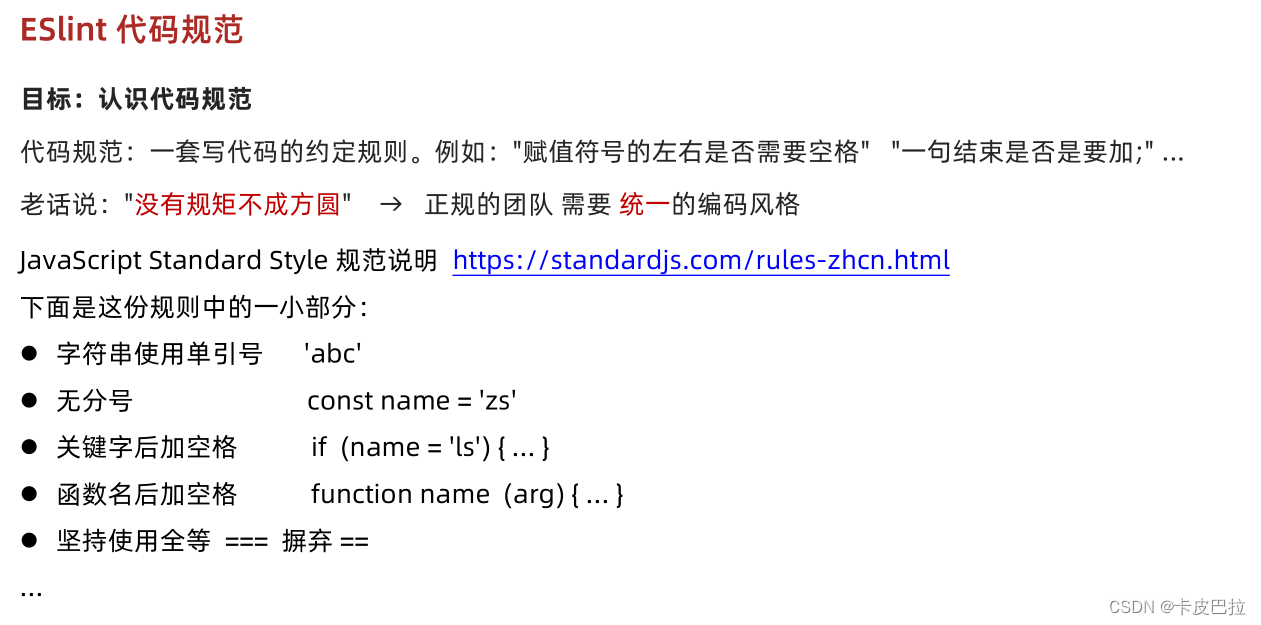
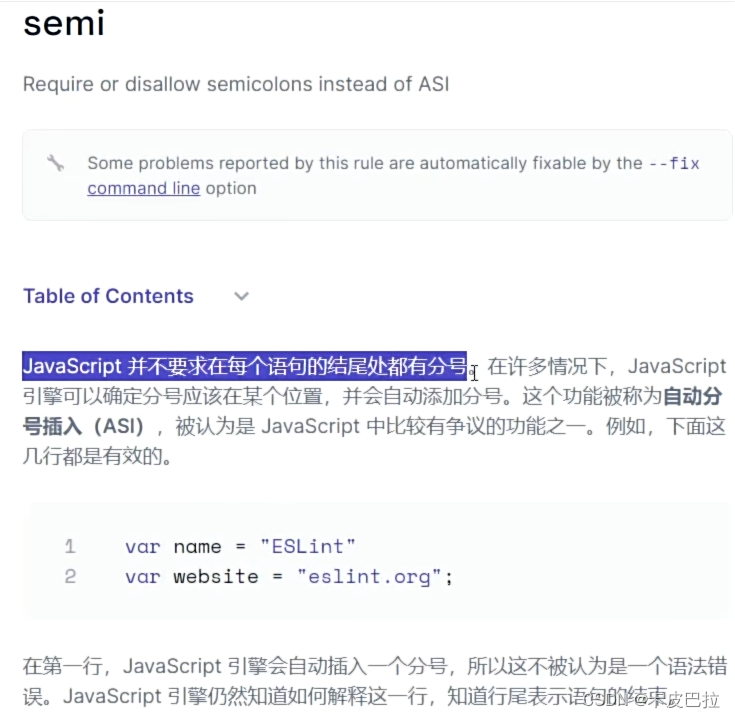
选择eslint的风格 (eslint 代码规范的检验工具,检验代码是否符合规范)
-
比如:const age = 18; => 报错!多加了分号!后面有工具,一保存,全部格式化成最规范的样子
-
选择校验的时机 (直接回车)

-
选择配置文件的生成方式 (直接回车)

-
是否保存预设,下次直接使用? => 不保存,输入 N
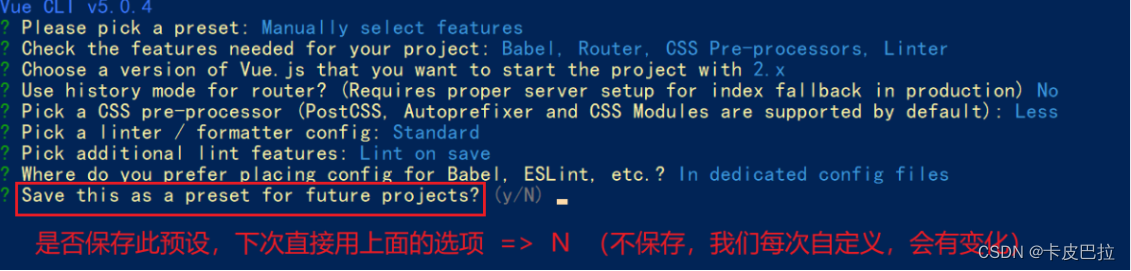
-
等待安装,项目初始化完成
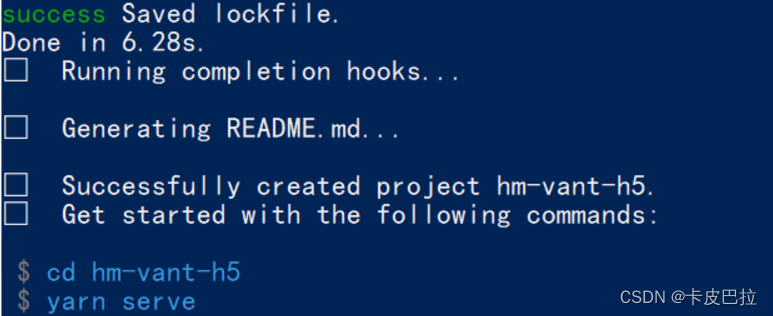
-
启动项目
cd
npm run serve
ESLint手动修正代码规范错误
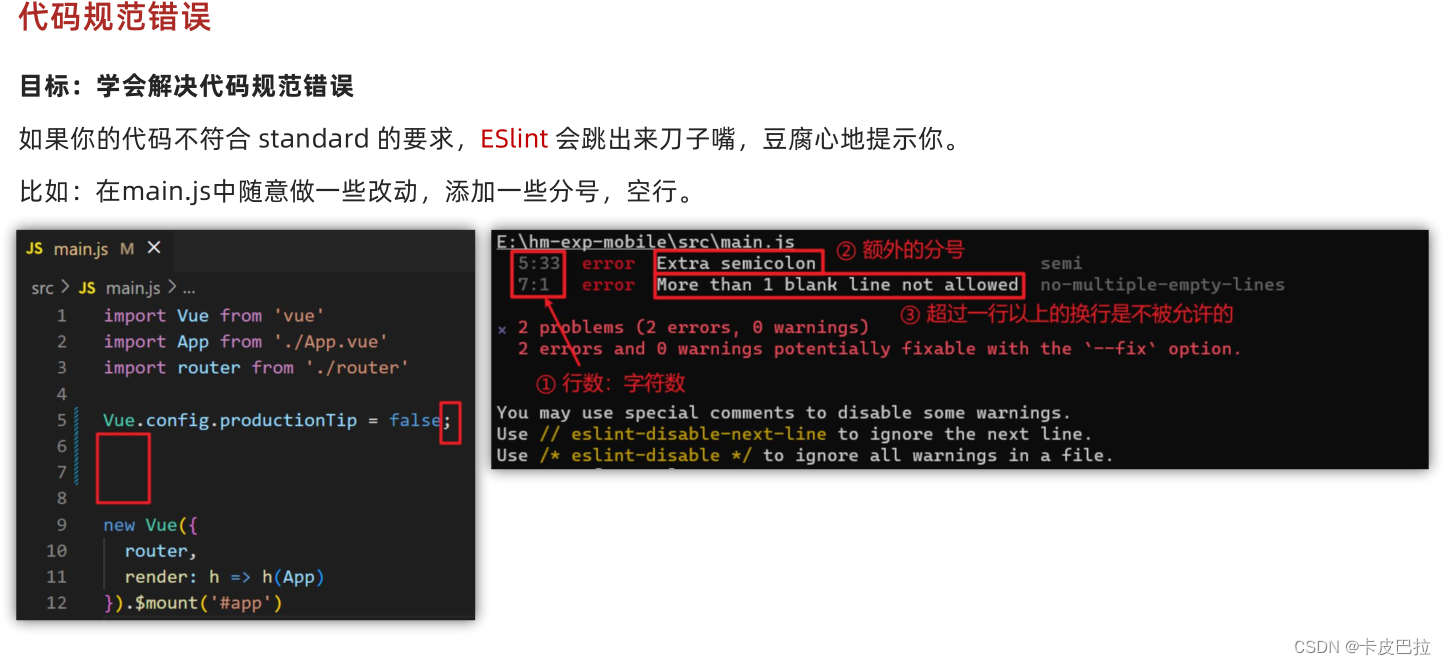
举例:

使用注意:
以 vue create 的文件夹(目录)作为根目录
运行报错:
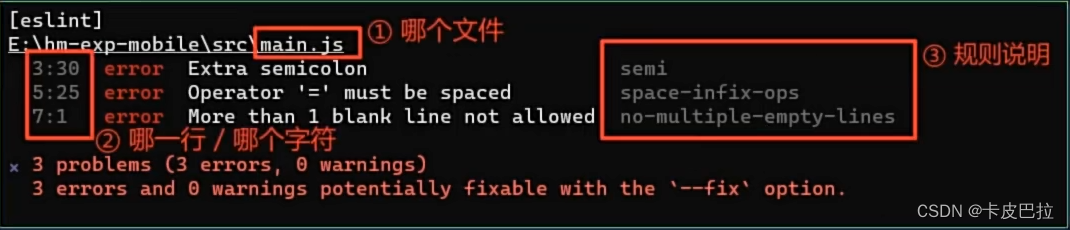
根据规范说明找错:
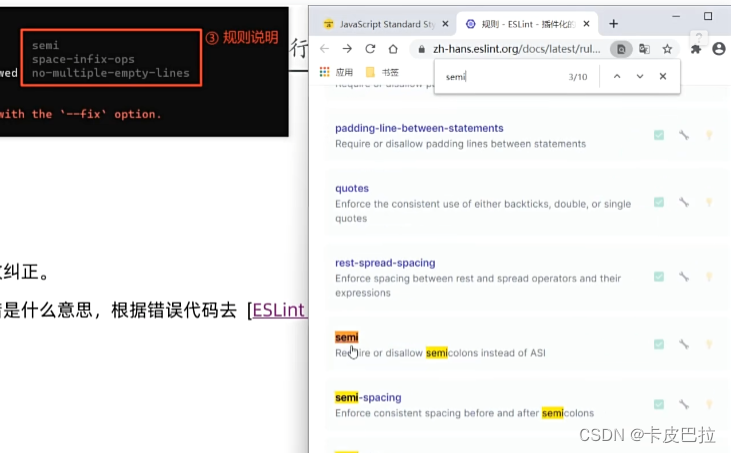
理解错误:
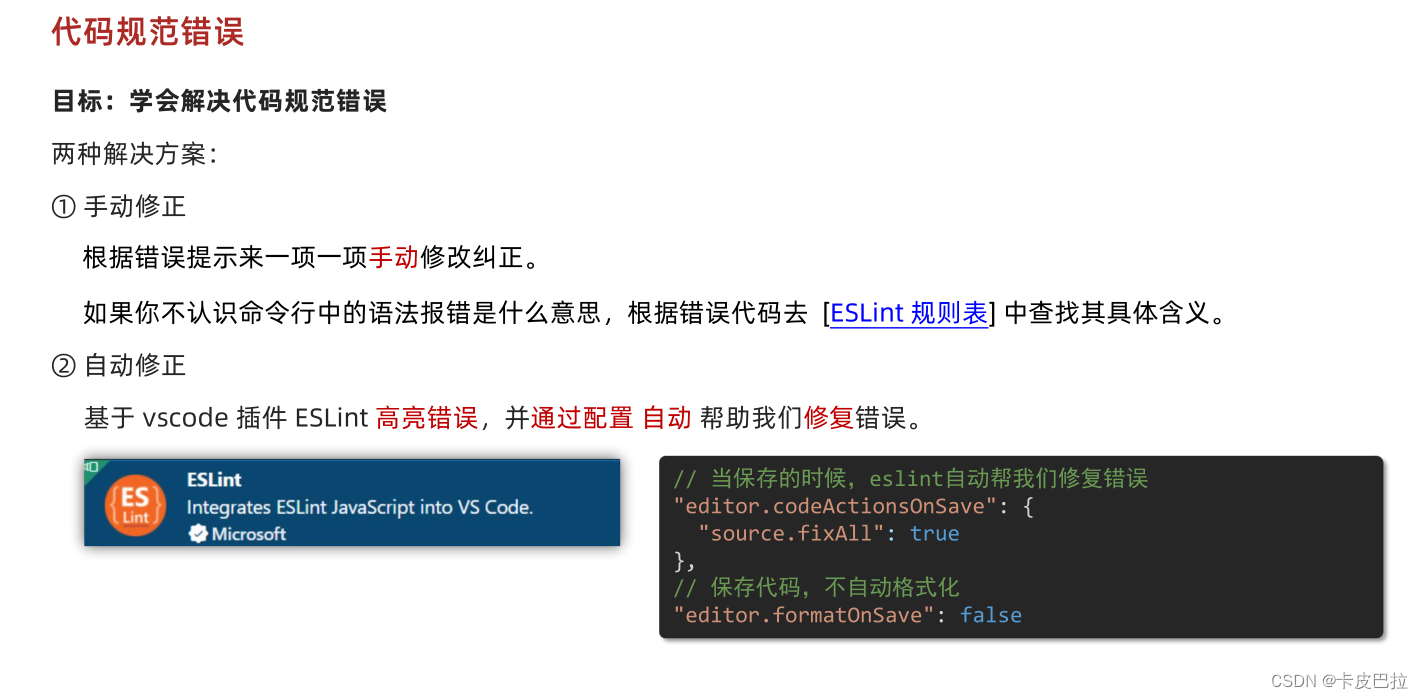
ESLint自动修正代码规范错误
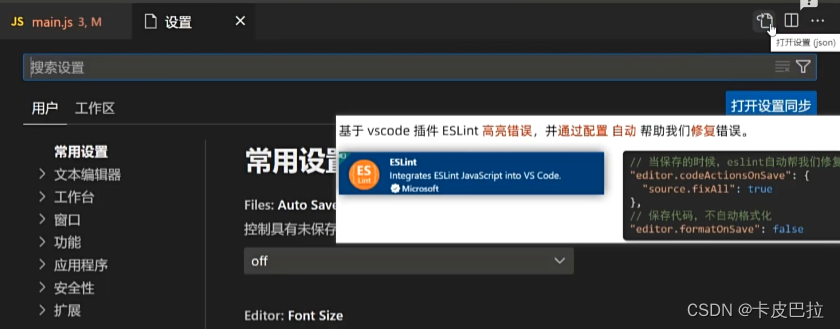
设置——>打开设置


 2748
2748


 被折叠的 条评论
为什么被折叠?
被折叠的 条评论
为什么被折叠?
 到【灌水乐园】发言


