


在实际应用中,并不是单一的使用本地缓存或者redis,更多是组合使用来满足不同的业务场景。
jetcache组件实现了优雅的组合本地缓存和远程缓存。
支持多种缓存类型:本地缓存、分布式缓存、多级缓存。
官网地址:https://github.com/alibaba/jetcache
官方文档:https://github.com/alibaba/jetcache/tree/master/docs/CN
一、依赖
非SpringBoot项目参考官网配置
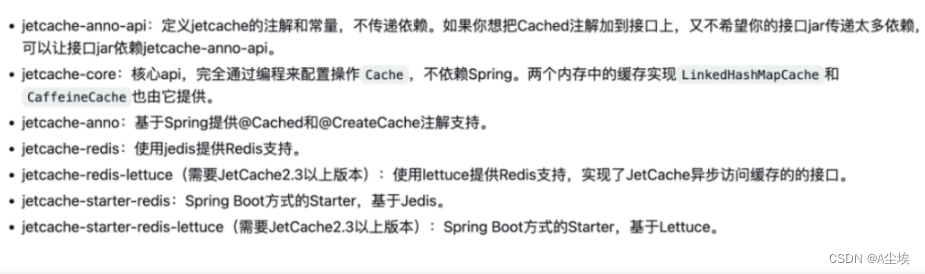
SpringBoot依赖
<dependency>
    <groupId>com.alicp.jetcache</groupId>
    <artifactId>jetcache-starter-redis</artifactId>
    <version>2.7.0</version>
</dependency>

<!--  jetcache2.7.x版本需要额外添加该依赖-->
<dependency>
    <groupId>redis.clients</groupId>
    <artifactId>jedis</artifactId>
    <version>4.3.1</version>
</dependency>
二、修改配置文件,配置redis地址和线程数
jetcache:
  ## 统计间隔,0表示不统计,开启后定期在控制台输出缓存信息
  statIntervalMinutes: 15
  ## 是否把cacheName作为远程缓存key前缀
  areaInCacheName: false
  ## 本地缓存配置
  local:
    default: ## default表示全部生效,也可以指定某个cacheName
      ## 本地缓存类型,其他可选:caffeine/linkedhashmap
      type: linkedhashmap
      keyConvertor: fastjson
  ## 远程缓存配置
  remote:
    default: ## default表示全部生效,也可以指定某个cacheName
      type: redis
      ## key转换器方式n
      keyConvertor: fastjson
      broadcastChannel: projectA
      ## redis序列化方式
      valueEncoder: java
      valueDecoder: java
      ## redis线程池
      poolConfig:
        minIdle: 5
        maxIdle: 20
        maxTotal: 50
      ## redis地址与端口
      host: 127.0.0.1
      port: 6379
三、启动类添加注解@EnableCreateCacheAnnotation开启缓存
@EnableMethodCache(basePackages = “com.example.jetcachedemo”)注解,配置缓存方法扫描路径
四、使用缓存,通过三种方式
方式一:AOP模式,通过@Cached,@CacheUpdate,@CacheInvalidate
@RestController
@RequestMapping("user")
public class UserController{

	@GetMapping("getRemote")
	@Cached(name="userCache:",key="#id",expire=3600,timeUnit=TimeUnit.SECONDS,cacheType = CacheType.REMOTE)
	public User getRemote(Long id){
		//直接新建用户,模拟从数据库获取数据
		User user = new User();
		user.setId(id);
        user.setName("用户remote"+id);
        user.setAge(23);
        user.setSex(1);
        System.out.println("第一次获取数据,未走缓存:"+id);
        return user;
	}

	@GetMapping("getLocal")
	@Cached(name="userCache:", key = "#id", expire = 3600, timeUnit = TimeUnit.SECONDS, cacheType = CacheType.LOCAL)
	public User getLocal(Long id){
		// 直接新建用户,模拟从数据库获取数据
        User user = new User();
        user.setId(id);
        user.setName("用户local"+id);
        user.setAge(23);
        user.setSex(1);
        System.out.println("第一次获取数据,未走缓存:"+id);
        return user;
	}

	 @GetMapping("getBoth")
    @Cached(name="userCache:", key = "#id", expire = 3600, timeUnit = TimeUnit.SECONDS, cacheType = CacheType.BOTH)
    public User getBoth(Long id){
        // 直接新建用户,模拟从数据库获取数据
        User user = new User();
        user.setId(id);
        user.setName("用户both"+id);
        user.setAge(23);
        user.setSex(1);
        System.out.println("第一次获取数据,未走缓存:"+id);
        return user;
    }

	@PostMapping("updateUser")
    @CacheUpdate(name = "userCache:", key = "#user.id", value = "#user")
    public Boolean updateUser(@RequestBody User user){
        // TODO 更新数据库
        return true;
    }

    @PostMapping("deleteUser")
    @CacheInvalidate(name = "userCache:", key = "#id")
    public Boolean deleteUser(Long id){
        // TODO 从数据库删除
        return true;
    }
}
实体类User一定要实现序列化,即声明Serializable
@Data
public class User implements Serializable {

    private Long id;
    private String name;
    private Integer age;
    private Integer sex;
}
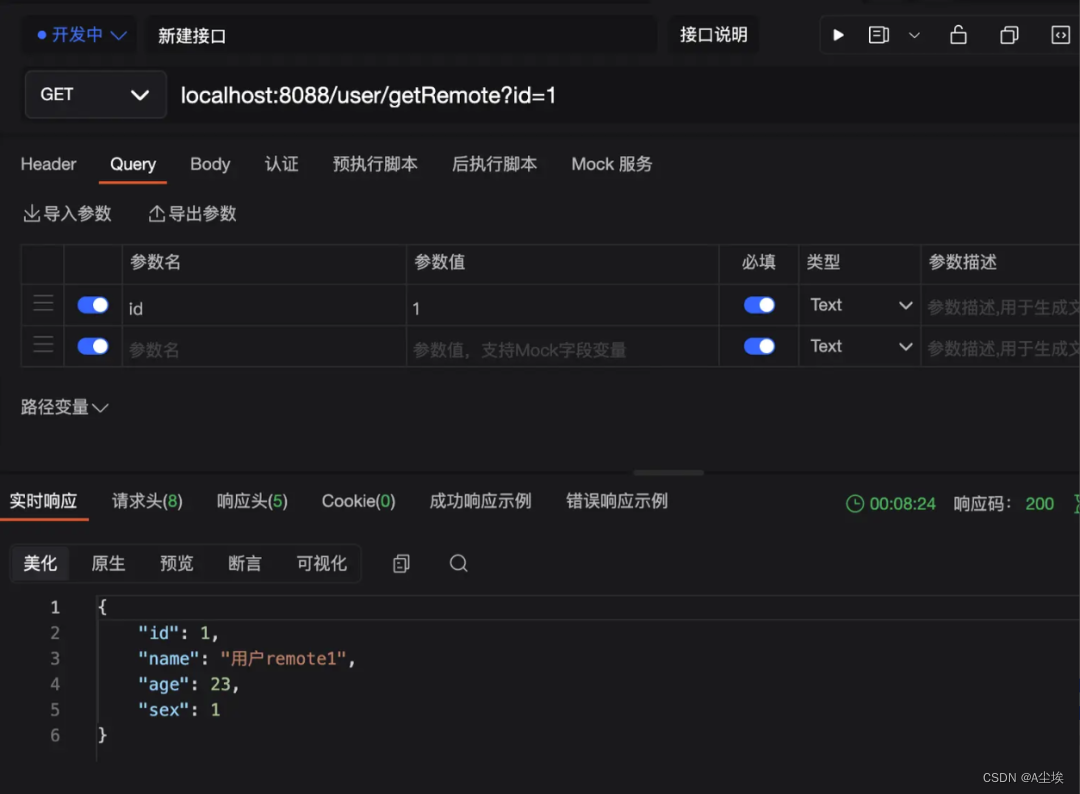
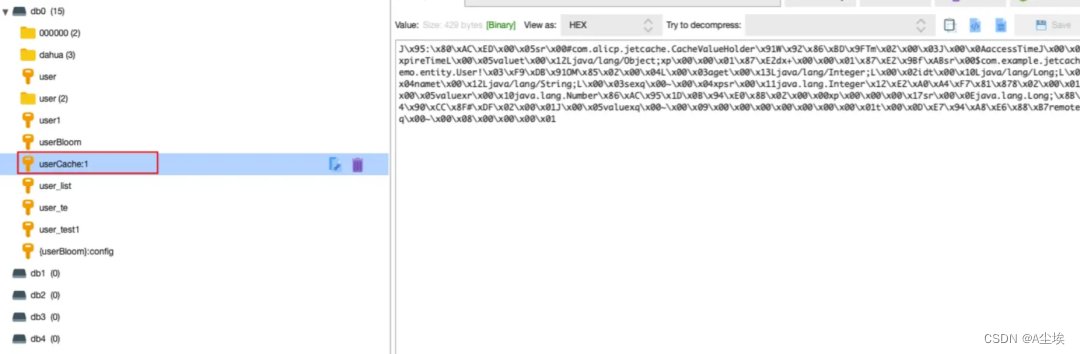
访问localhost:8088/user/getRemote?id=1
因为配置的是远程缓存,在redis中也能看到对应的key
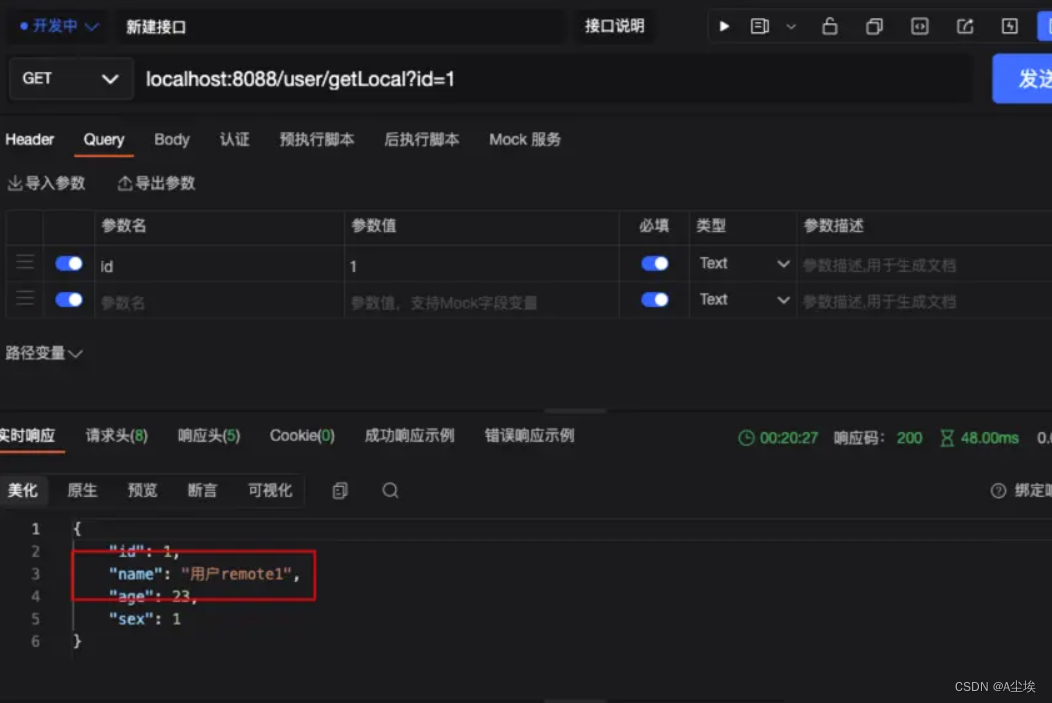
访问localhost:8088/user/getLocal?id=1,这个方法是从本地缓存获取的,现在只有远程缓存上有数据,我们调用发现缓存数据还是拿到了,这说明当我们在配置文件中配置了本地缓存和远程缓存后,方式一中本地缓存和远程缓存会自动相互调用
比如本地缓存有这个key,redis中没有,通过远程缓存方式访问时,会先从redis获取,如果没有会自动获取本地缓存,但是数据还是存储在本地缓存,并不会同步到redis上,这样更加灵活的实现了多级缓存架构
方式二,API模式,通过@CreateCache,注:在jetcache 2.7 版本CreateCache注解已废弃,不推荐使用
@RestController
@RequestMapping("user2")
public class User2Controller {

    @CreateCache(name= "userCache:", expire = 3600, timeUnit = TimeUnit.SECONDS, cacheType = CacheType.BOTH)
    private Cache<Long, Object> userCache;

    @GetMapping("get")
    public User get(Long id){
        if(userCache.get(id) != null){
            return (User) userCache.get(id);
        }
        User user = new User();
        user.setId(id);
        user.setName("用户both"+id);
        user.setAge(23);
        user.setSex(1);
        userCache.put(id, user);
        System.out.println("第一次获取数据,未走缓存:"+id);
        return user;
    }

    @PostMapping("updateUser")
    public Boolean updateUser(@RequestBody User user){
        // TODO 更新数据库
        userCache.put(user.getId(), user);
        return true;
    }

    @PostMapping("deleteUser")
    public Boolean deleteUser(Long id){
        // TODO 从数据库删除
        userCache.remove(id);
        return true;
    }

}
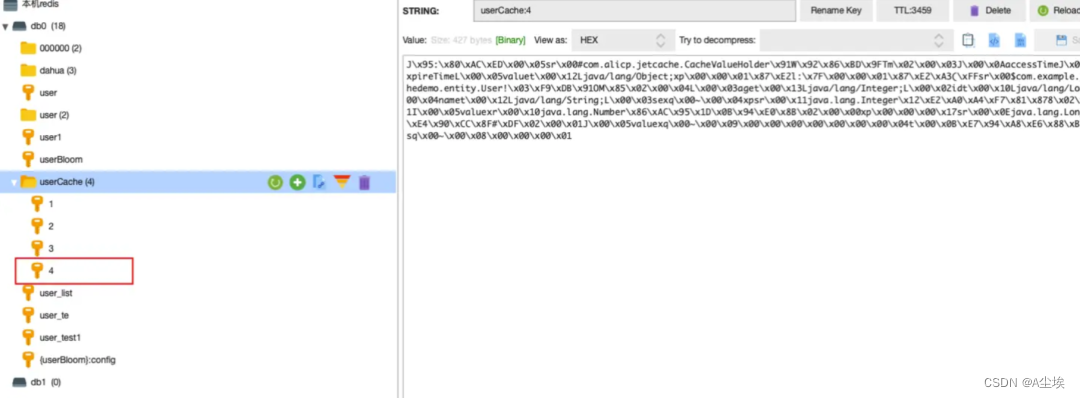
测试下CreateCache的形式:localhost:8088/user2/get?id=4
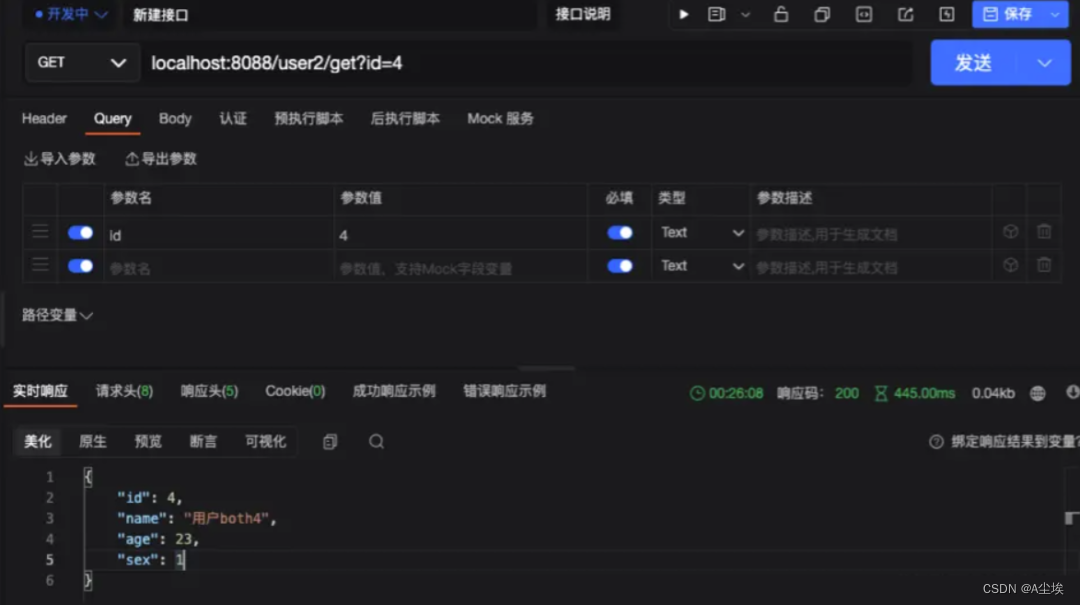
正常获取了,并且redis中也有了对应的值
而当我们把缓存方式更改为LOCAL后,再访问localhost:8088/user2/get?id=5
@CreateCache(name= "userCache:", expire = 3600, timeUnit = TimeUnit.SECONDS, cacheType = CacheType.LOCAL)
会发现redis中就没有对应缓存了,只在本地缓存存在,说明我们指定本地缓存的形式成功了

方式三,高级API模式:通过CacheManager,2.7 版本才可使用
①、添加依赖
<dependency>
    <groupId>com.alibaba</groupId>
    <artifactId>fastjson</artifactId>
    <version>2.0.25</version>
</dependency>
②、配置类
@Configuration
public class JetcacheConfig{

	@Autowired
	private CacheManager cacheManager;
	private Cache<Long,Object> userCache;

	@PostConstruct
	public void init(){
		QuickConfig qc = QuickConfig.newBuilder("userCache:")
			.expire(Duration.ofSeconds(3600))
			.cacheType(CacheType.BOTH)
			//本地缓存更新后,将在所有的节点中删除缓存,以保持强一致性
			.syncLocal(false)
			.build();
		userCache = cacheManager.getOrCreateCache(qc);
	}

	@Bean
	public Cache<Long,Object> getUserCache(){
		return userCache;
	}
}
③、调用
@RestController
@RequestMapping("user")
public class UserController{

	@Autowired
	JetcheConfig jetcacheConfig;
	@Autowired
	private Cache<Long,Object> userCache;

	@GetMapping("get")
    public User get(Long id){
        if(userCache.get(id) != null){
            return (User) userCache.get(id);
        }
        User user = new User();
        user.setId(id);
        user.setName("用户both"+id);
        user.setAge(23);
        user.setSex(1);
        userCache.put(id, user);
        System.out.println("第一次获取数据,未走缓存:"+id);
        return user;
    }

	@PostMapping("updateUser")
    public Boolean updateUser(@RequestBody User user){
        // TODO 更新数据库
        userCache.put(user.getId(), user);
        return true;
    }

    @PostMapping("deleteUser")
    public Boolean deleteUser(Long id){
        // TODO 从数据库删除
        userCache.remove(id);
        return true;
    }

}
多级缓存的形式,会先从本地缓存获取数据,本地获取不到会从远程缓存获取;
④、启动redis
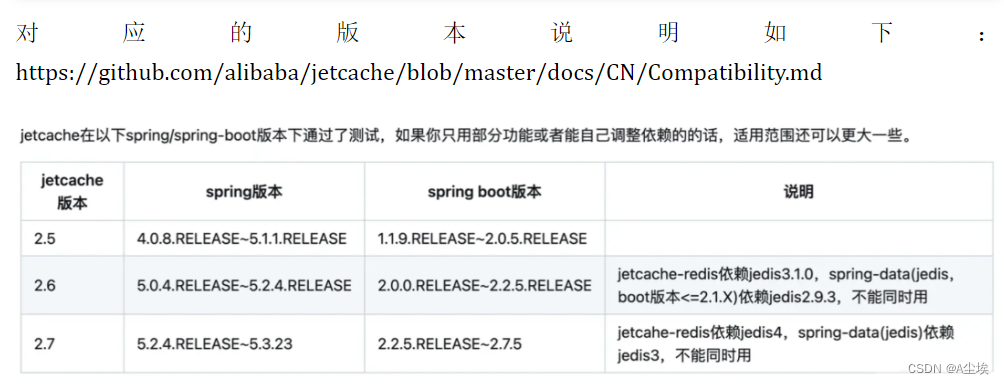
如果启动出现NoClassDefFoundError: redis/clients/util/Pool或NoClassDefFoundError: redis/clients/jedis/UnifiedJedis报错,说明springboot与jetcache版本不一致,对应关系可参考上述第一步中的说明 同时如果使用的是jetcache2.7.x版本,因为该版本中有jedis包的依赖,需要额外添加如下依赖,或者将jetcache版本将至2.6.5以下
<dependency>
    <groupId>redis.clients</groupId>
    <artifactId>jedis</artifactId>
    <version>4.3.1</version>
</dependency>
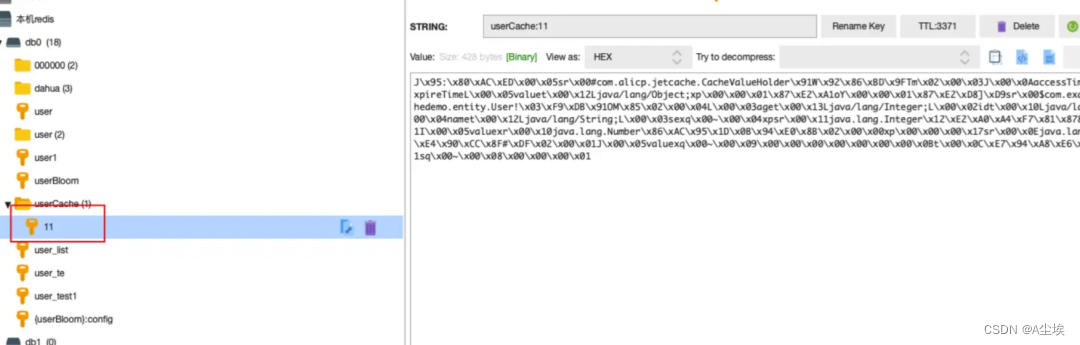
调用localhost:8088/user/get?id=11
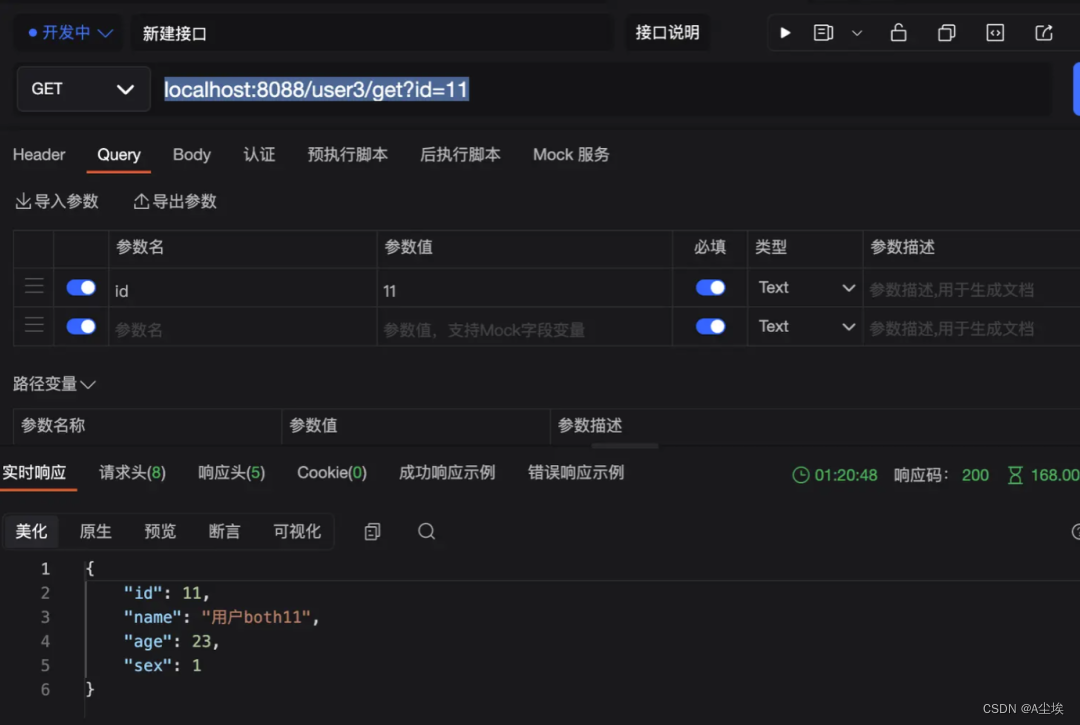
redis中缓存设置成功!
常见打的报错
1、ClassNotFoundException: com.alibaba.fastjson.JSON 解决:添加依赖
<dependency>
    <groupId>com.alibaba</groupId>
    <artifactId>fastjson</artifactId>
    <version>2.0.25</version>
</dependency>
2、NoClassDefFoundError: redis/clients/jedis/UnifiedJedis 解决:添加依赖
<dependency>
    <groupId>redis.clients</groupId>
    <artifactId>jedis</artifactId>
    <version>4.3.1</version>
</dependency>
或者将jetcache版本降低至2.6.5以下。
本地缓存Caffeine
官方:https://github.com/ben-manes/caffeine
基于Java 1.8的高性能本地缓存库,由Guava改进而来,而且在Spring5开始的默认缓存实现就将Caffeine代替原来的Google Guava
实际上Caffeine这样的本地缓存和ConcurrentMap很像,即支持并发,并且支持O(1)时间复杂度的数据存取。
区别:
- ConcurrentMap将存储所有存入的数据,直到你显式将其移除
- Caffeine将通过给定的配置,自动移除“不常用”的数据,以保持内存的合理占用
一、依赖
<dependency>
    <groupId>com.github.ben-manes.caffeine</groupId>
    <artifactId>caffeine</artifactId>
    <version>3.0.5</version>
</dependency>
二、缓存加载策略
①、Cache手动创建
Cache<Object,Object> cache = Caffeine.newBuilder()
	.initialCapacity(10)//初始化数据
	.maximumSize()//最大条数
	.expireAfterWriter(1,TimeUnit.SECONDS)//最后一次写操作经过指定时间过期
	.expireAfterAccess(1,TimeUnit.SECONDS)//最后一次读或写操作经过指定时间过期(两者同时存在,以expireAfterWrite为准)
	.removalListener((key,val,removalCause) -> {})//监听缓存被移除
	.recordStats()//记录命中
	.build();

cache.put("1","张三");//手动调用put()进行加载,对于已存在的key将进行覆盖
//而若另一线程调用getIfPresent()方法,则会立即返回null,不会被阻塞。
System.out.println(cache.getIfPresent("1"));
//存储的是默认值,如果有另一个线程同时调用本方法进行竞争,则后一线程会被阻塞,直到前一线程更新缓存完成;
System.out.println(cache.get("2",o -> "默认值"));//在获取缓存值时,如果想要在缓存值不存在时,原子地将值写入缓存
②、Loading Cache自动创建
一种自动加载的缓存。其和普通缓存不同的地方在于,当缓存不存在/缓存已过期时,若调用get()方法,则会自动调用CacheLoader.load()方法加载最新值。
调用getAll()方法将遍历所有的key调用get(),除非实现了CacheLoader.loadAll()方法。使用LoadingCache时,需要指定CacheLoader,并实现其中的load()方法供缓存缺失时自动加载。
在多线程情况下,当两个线程同时调用get(),则后一线程将被阻塞,直至前一线程更新缓存完成。
LoadingCache<String,String> loadingCache = Caffeine.newBuilder()
	.refreshAfterWrite(10,TimeUnit.SECONDS)
	.expireAfterWrite(10,TimeUnit.SECONDS)
	.expireAfterAccess(10,TimeUnit.SECONDS)
	.maximumSize(10)
	//根据key查询数据库里面的值
	.build(key -> new Date().toString());
③、Async Cache异步获取
AsyncCache是Cache的一个变体,其响应结果均为CompletableFuture
默认情况下,缓存计算使用ForkJoinPool.commonPool()作为线程池,如果想要指定线程池,则可以覆盖并实现Caffeine.executor(Executor)方法。
synchronous()提供了阻塞直到异步缓存生成完毕的能力,它将以Cache进行返回。
在多线程情况下,当两个线程同时调用get(key, k -> value),则会返回同一个CompletableFuture对象。由于返回结果本身不进行阻塞,可以根据业务设计自行选择阻塞等待或者非阻塞。
AsyncLoadingCache<String,String> asyncLoadingCache = Caffeine.newBuilder()
	.refreshAfterWrite(1, TimeUnit.SECONDS)
	.expireAfterWrite(1, TimeUnit.SECONDS)
    .expireAfterAccess(1, TimeUnit.SECONDS)
    .maximumSize(10)
    //根据key查询数据库里面的值
    .buildAsync(key -> {
    	Thread.sleep(1000);
    	return new Date().toString();
    });

//异步缓存返回的是CompletableFuture
CompletableFuture<String> future = asyncLoadingCache.get("1");
future.thenAccept(System.out::println);
三、驱逐策略
驱逐策略在创建缓存的时候进行指定。
常用的有基于容量的驱逐和基于时间的驱逐:
- 基于容量的驱逐需要指定缓存容量的最大值,当缓存容量达到最大时,Caffeine将使用LRU策略对缓存进行淘汰;
- 基于时间的驱逐策略如字面意思,可以设置在最后访问/写入一个缓存经过指定时间后,自动进行淘汰。
驱逐策略可以组合使用,任意驱逐策略生效后,该缓存条目即被驱逐
- LRU 最近最少使用,淘汰最长时间没有被使用的页面
- LFU 最不经常使用,淘汰一段时间内使用次数最少的页面
- FIFO 先进先出
Caffeine有4种缓存淘汰设置
- 大小 (LFU算法进行淘汰)
- 权重 (大小与权重 只能二选一)
- 时间
- 引用 (不常用,本文不介绍)
@Slf4j
public class CacheTest{

	@Test
	public void maximumSizeTest()throws InterruptdException{

		/**
			缓存大小淘汰
		*/
		Cache<Integer, Integer> cache = Caffeine.newBuilder()
                //超过10个后会使用W-TinyLFU算法进行淘汰
                .maximumSize(10)
                .evictionListener((key, val, removalCause) -> {
                    log.info("淘汰缓存:key:{} val:{}", key, val);
                })
                .build();

        for (int i = 1; i < 20; i++) {
            cache.put(i, i);
        }
        Thread.sleep(500);//缓存淘汰是异步的

        // 打印还没被淘汰的缓存
        System.out.println(cache.asMap());
	}

	/**
		权重淘汰
	*/
	@Test
	public void maximumWeightTest()throws InterruptedException{

		Cache<Integer, Integer> cache = Caffeine.newBuilder()
                //限制总权重,若所有缓存的权重加起来>总权重就会淘汰权重小的缓存
                .maximumWeight(100)
                .weigher((Weigher<Integer, Integer>) (key, value) -> key)
                .evictionListener((key, val, removalCause) -> {
                    log.info("淘汰缓存:key:{} val:{}", key, val);
                })
                .build();

        //总权重其实是=所有缓存的权重加起来
        int maximumWeight = 0;
        for (int i = 1; i < 20; i++) {
            cache.put(i, i);
            maximumWeight += i;
        }
        System.out.println("总权重=" + maximumWeight);
        Thread.sleep(500);//缓存淘汰是异步的

        // 打印还没被淘汰的缓存
        System.out.println(cache.asMap());
	}

	/**
		访问后到期(每次访问都会重置时间,也就是说如果一直被访问就不会被淘汰)
	*/
	@Test
	public void expireAfterAccessTest() throws InterruptedException {

		Cache<Integer, Integer> cache = Caffeine.newBuilder()
                .expireAfterAccess(1, TimeUnit.SECONDS)
                //可以指定调度程序来及时删除过期缓存项,而不是等待Caffeine触发定期维护
                //若不设置scheduler,则缓存会在下一次调用get的时候才会被动删除
                .scheduler(Scheduler.systemScheduler())
                .evictionListener((key, val, removalCause) -> {
                    log.info("淘汰缓存:key:{} val:{}", key, val);

                })
                .build();
        cache.put(1, 2);
        System.out.println(cache.getIfPresent(1));
        Thread.sleep(3000);
        System.out.println(cache.getIfPresent(1));//null
	}

	/**
		写入后到期
	*/
	@Test
	public void expireAfterWriteTest() throws InterruptedException {
        Cache<Integer, Integer> cache = Caffeine.newBuilder()
                .expireAfterWrite(1, TimeUnit.SECONDS)
                //可以指定调度程序来及时删除过期缓存项,而不是等待Caffeine触发定期维护
                //若不设置scheduler,则缓存会在下一次调用get的时候才会被动删除
                .scheduler(Scheduler.systemScheduler())
                .evictionListener((key, val, removalCause) -> {
                    log.info("淘汰缓存:key:{} val:{}", key, val);
                })
                .build();
        cache.put(1, 2);
        Thread.sleep(3000);
        System.out.println(cache.getIfPresent(1));//null
    }
}
四、刷新机制
refreshAfterWrite()表示x秒后自动刷新缓存的策略可以配合淘汰策略使用,注意的是刷新机制只支持LoadingCache和AsyncLoadingCache
private static int NUM = 0;

@Test
public void refreshAfterWriteTest() throws InterruptedException {
    LoadingCache<Integer, Integer> cache = Caffeine.newBuilder()
            .refreshAfterWrite(1, TimeUnit.SECONDS)
            //模拟获取数据,每次获取就自增1
            .build(integer -> ++NUM);

    //获取ID=1的值,由于缓存里还没有,所以会自动放入缓存
    System.out.println(cache.get(1));// 1

    // 延迟2秒后,理论上自动刷新缓存后取到的值是2
    // 但其实不是,值还是1,因为refreshAfterWrite并不是设置了n秒后重新获取就会自动刷新
    // 而是x秒后&&第二次调用getIfPresent的时候才会被动刷新
    Thread.sleep(2000);
    System.out.println(cache.getIfPresent(1));// 1

    //此时才会刷新缓存,而第一次拿到的还是旧值
    System.out.println(cache.getIfPresent(1));// 2
}
五、统计
LoadingCache<String, String> cache = Caffeine.newBuilder()
        //创建缓存或者最近一次更新缓存后经过指定时间间隔,刷新缓存;refreshAfterWrite仅支持LoadingCache
        .refreshAfterWrite(1, TimeUnit.SECONDS)
        .expireAfterWrite(1, TimeUnit.SECONDS)
        .expireAfterAccess(1, TimeUnit.SECONDS)
        .maximumSize(10)
        //开启记录缓存命中率等信息
        .recordStats()
        //根据key查询数据库里面的值
        .build(key -> {
            Thread.sleep(1000);
            return new Date().toString();
        });


cache.put("1", "shawn");
cache.get("1");

/*
 * hitCount :命中的次数
 * missCount:未命中次数
 * requestCount:请求次数
 * hitRate:命中率
 * missRate:丢失率
 * loadSuccessCount:成功加载新值的次数
 * loadExceptionCount:失败加载新值的次数
 * totalLoadCount:总条数
 * loadExceptionRate:失败加载新值的比率
 * totalLoadTime:全部加载时间
 * evictionCount:丢失的条数
 */
System.out.println(cache.stats());
上述一些策略在创建时都可以进行自由组合,一般情况下有两种方法
- 设置 maxSize、refreshAfterWrite,不设置 expireAfterWrite/expireAfterAccess
- 设置expireAfterWrite当缓存过期时会同步加锁获取缓存,所以设置expireAfterWrite时性能较好,但是某些时候会取旧数据,适合允许取到旧数据的场景
- 设置 maxSize、expireAfterWrite/expireAfterAccess,不设置 refreshAfterWrite 数据一致性好,不会获取到旧数据,但是性能没那么好(对比起来),适合获取数据时不耗时的场景
SpringBoot整合Caffeine
如果要使用@Cacheable注解,需要引入相关依赖,并在任一配置类文件上添加@EnableCaching注解
- @Cacheable:表示该方法支持缓存。当调用被注解的方法时,如果对应的键已经存在缓存,则不再执行方法体,而从缓存中直接返回。当方法返回null时,将不进行缓存操作
- @CachePut:表示执行该方法后,其值将作为最新结果更新到缓存中,每次都会执行该方法
- @CacheEvict:表示执行该方法后,将触发缓存清除操作
- @Caching:用于组合前三个注解,例如:
@Caching(cacheable = @Cacheable("CacheConstants.GET_USER"),
         evict = {@CacheEvict("CacheConstants.GET_DYNAMIC",allEntries = true)}
public User find(Integer id) {
    return null;
}
常用注解属性
- cacheNames/value:缓存组件的名字,即cacheManager中缓存的名称
- key:缓存数据时使用的key。默认使用方法参数值,也可以使用SpEL表达式进行编写
- keyGenerator:和key二选一使用
- cacheManager:指定使用的缓存管理器
- condition:在方法执行开始前检查,在符合condition的情况下,进行缓存
- unless:在方法执行完成后检查,在符合unless的情况下,不进行缓存
- sync:是否使用同步模式。若使用同步模式,在多个线程同时对一个key进行load时,其他线程将被阻塞
缓存同步模式:
sync开启或关闭,在Cache和LoadingCache中的表现是不一致的
- Cache中,sync表示是否需要所有线程同步等待
- LoadingCache中,sync表示在读取不存在/已驱逐的key时,是否执行被注解方法
一、依赖
<dependency>
    <groupId>org.springframework.boot</groupId>
    <artifactId>spring-boot-starter-cache</artifactId>
</dependency>
<dependency>
    <groupId>com.github.ben-manes.caffeine</groupId>
    <artifactId>caffeine</artifactId>
</dependency>
二、缓存常量CacheConstants
创建缓存常量类,把公共的常量提取一层复用,这里也可以通过配置文件加载这些数据,例如@ConfigurationProperties和@Value
public class CacheConstants{

	public static final int DEFAULT_EXPIRES = 3 * 60;//配置类中我使用的时间单位是秒,所以这里如 3*60 为3分钟
    public static final int EXPIRES_5_MIN = 5 * 60;
    public static final int EXPIRES_10_MIN = 10 * 60;

	public static final String GET_USER = "GET:USER";
    public static final String GET_DYNAMIC = "GET:DYNAMIC";
}
三、缓存配置类CacheConfig
@Configuration
@EnableCaching
public class CacheConfig{

	/**
     * Caffeine配置说明:
     * initialCapacity=[integer]: 初始的缓存空间大小
     * maximumSize=[long]: 缓存的最大条数
     * maximumWeight=[long]: 缓存的最大权重
     * expireAfterAccess=[duration]: 最后一次写入或访问后经过固定时间过期
     * expireAfterWrite=[duration]: 最后一次写入后经过固定时间过期
     * refreshAfterWrite=[duration]: 创建缓存或者最近一次更新缓存后经过固定的时间间隔,刷新缓存
     * weakKeys: 打开key的弱引用
     * weakValues:打开value的弱引用
     * softValues:打开value的软引用
     * recordStats:开发统计功能
     * 注意:
     * expireAfterWrite和expireAfterAccess同事存在时,以expireAfterWrite为准。
     * maximumSize和maximumWeight不可以同时使用
     * weakValues和softValues不可以同时使用
     */
     @Bean
    public CacheManager cacheManager() {
        SimpleCacheManager cacheManager = new SimpleCacheManager();
        List<CaffeineCache> list = new ArrayList<>();
        //循环添加枚举类中自定义的缓存,可以自定义
        for (CacheEnum cacheEnum : CacheEnum.values()) {
            list.add(new CaffeineCache(cacheEnum.getName(),
                    Caffeine.newBuilder()
                            .initialCapacity(50)
                            .maximumSize(1000)
                            .expireAfterAccess(cacheEnum.getExpires(), TimeUnit.SECONDS)
                            .build()));
        }
        cacheManager.setCaches(list);
        return cacheManager;
    }
}
四、调用缓存
/**
 * value:缓存key的前缀。
 * key:缓存key的后缀。
 * sync:设置如果缓存过期是不是只放一个请求去请求数据库,其他请求阻塞,默认是false(根据个人需求)。
 * unless:不缓存空值,这里不使用,会报错
 * 查询用户信息类
 * 如果需要加自定义字符串,需要用单引号
 * 如果查询为null,也会被缓存
 */
@Cacheable(value = CacheConstants.GET_USER,key = "'user'+#userId",sync = true)
@CacheEvict
public UserEntity getUserByUserId(Integer userId){
    UserEntity userEntity = userMapper.findById(userId);
    System.out.println("查询了数据库");
    return userEntity;
}


 2694
2694


 被折叠的 条评论
为什么被折叠?
被折叠的 条评论
为什么被折叠?
 到【灌水乐园】发言


