


背景:最近公司新起的项目,由于工期、资源等原因,采用ruoyi框架快速实现开发,由于需要构建客户端,所以借助electron来实现。
electron 是使用javascript html css来构建跨平台的桌面应用程序。
官网地址:简介 | Electron
查了很多资料,好像后台管理做成客户端的很少很少,主要参考这篇文章:
ruoyi-vue | electron打包教程(超详细)_ruoyi 打包_七维大脑的博客-CSDN博客
加上自己的实践,在这里记录一下过程以及踩过的坑。
一、基础环境说明
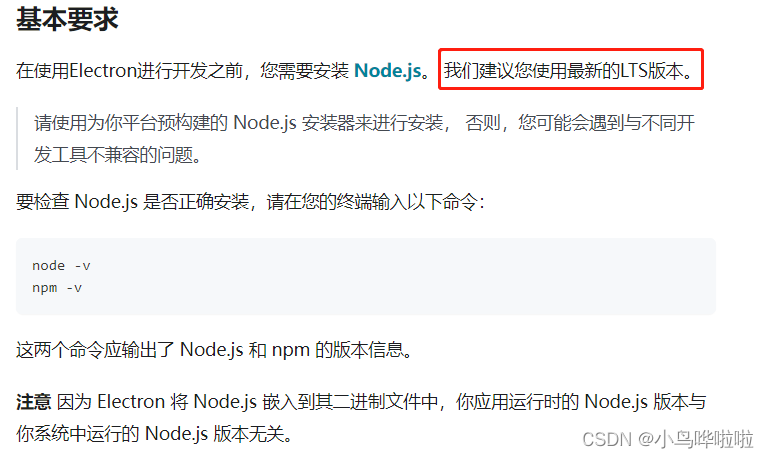
node:16.14.2 && 20.3.1 推荐nvm来管理切换

ruoyi-ui: 3.8.3

java:20

mysql:8.0经过个人实践,主要就是node的版本比较重要,其他的不管是ruoyi-ui 还是ruoyi-vue,后端的java及mysq版本就更是毫无关系了。
二、ruoyi前端工程的改造
1.依赖安装
# electron
npm install electron

# 在 Electron 应用程序中安装和管理开发者工具
npm install electron-devtools-installer

# 简单的持久化数据存储库
npm install electron-store

# 在 Vue CLI 项目中集成 Electron 打包和构建
npm install vue-cli-plugin-electron-builder
如果安装错误的话,可以改一下安装源 npm install --registry=https://registry.npmmirror.com
是不是发现报错了呢?
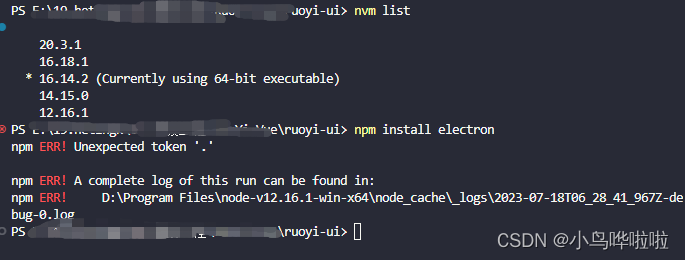
问题就出在,直接安装electron,没有指定版本,存在与node的兼容问题。官网可是说了
没问题,切换到最新的node版本, nvm use 20.3.1,成功安装,继续。。。
2.修改配置
.env.production 生产环境配置
# 若依管理系统/生产环境
VUE_APP_BASE_API = '/prod-api'


# 这里先改成后端服务地址:
VUE_APP_BASE_API = 'http://localhost:8080'
这里说明一下,生产环境涉及到打包部署,所以说
# 如果项目web前端没有部署改为线上后端地址:
VUE_APP_BASE_API = 'http://localhost:8080'


# 如果项目web前端已经部署可写改为:
VUE_APP_BASE_API = 'http://IP/prod-api'
clipboard
解决clipboard报错问题
老哥推荐,暴力注释全部代码:src/directive/module/clipboard.js
vue.config.js
# 修改静态资源路径
publicPath: './',

# 修改为实际接口地址
target: `http://localhost:8080`
module.exports中新增下面配置,与 devServer 同级
pluginOptions: {
electronBuilder: {
// preload: 'src/preload.js',
nodeIntegration: true,
contextIsolation: false,
enableRemoteModule: true,
publish: [{
"provider": "xxxx有限公司",
"url": "http://xxxxx/"
}],
"copyright": "Copyright © 2022",
builderOptions:{
appId: 'com.ruoyi',
productName: 'ruoyi',
nsis:{
"oneClick": false,
"guid": "idea",
"perMachine": true,
"allowElevation": true,
"allowToChangeInstallationDirectory": true,
"installerIcon": "build/app.ico",
"uninstallerIcon": "build/app.ico",
"installerHeaderIcon": "build/app.ico",
"createDesktopShortcut": true,
"createStartMenuShortcut": true,
"shortcutName": "若依管理系統"
},
win: {
"icon": "build/app.ico",
"target": [
{
"target": "nsis", //使用nsis打成安装包,"portable"打包成免安装版
"arch": [
"ia32", //32位
"x64" //64位
]
}
]
},
},
// preload: path.join(__dirname, "/dist_electron/preload.js"),
},
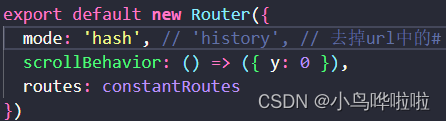
},路由文件 src/router/index.js,改为 hash 模式
解决菜单栏跳转404,部分无法跳转问题
全局修改
全局搜索Cookies.get并替换为localStorage.getItem

全局搜索Cookies.set并替换为localStorage.setItem

全局搜索Cookies.remove并替换为localStorage.removeItem


// src/views/login.vue 去掉过期时间
localStorage.setItem("username", this.loginForm.username);
localStorage.setItem("password", encrypt(this.loginForm.password));
localStorage.setItem('rememberMe', this.loginForm.rememberMe);
// 为了解决菜单栏跳转为404的问题
// electron中的路由跳转路径解析path.resolve结果与在浏览器中的web项目解析结果不一致
// path 模块的默认操作会因 Node.js 应用程序运行所在的操作系统而异。 具体来说,当在 Windows 操作系统上运行时, path模块会假定正被使用的是 Windows 风格的路径。
// path.posix 属性提供对 path 方法的 POSIX 特定实现的访问。(意思就是无视操作系统的不同,统一为 POSIX方式,这样可以确保在任何系统上结果保持一致)
全局修改path.resolve为path.posix.resolve但是要注意,使用path.posix.resolve,会造成npm run dev 的时候报错,记得切换修改
修复无法登出问题,也就是退出后的跳转页面
   async logout() {
      this.$confirm('确定注销并退出系统吗?', '提示', {
        confirmButtonText: '确定',
        cancelButtonText: '取消',
        type: 'warning'
      }).then(() => {
        this.$store.dispatch('LogOut').then(() => {
          this.$router.push('/login')
        })
      }).catch(() => {});
    }
3.新增electron的相关配置
src根目录下新建background.js文件
'use strict'

import { app, protocol, BrowserWindow, ipcMain } from 'electron'
import { createProtocol } from 'vue-cli-plugin-electron-builder/lib'
import installExtension, { VUEJS_DEVTOOLS } from 'electron-devtools-installer'
const isDevelopment = process.env.NODE_ENV !== 'production'
const Store = require('electron-store');

// Scheme must be registered before the app is ready
protocol.registerSchemesAsPrivileged([
  { scheme: 'app', privileges: { secure: true, standard: true } }
])

async function createWindow() {
  // Create the browser window.
  const win = new BrowserWindow({
    width: 800,
    height: 600,
    webPreferences: {
      // Use pluginOptions.nodeIntegration, leave this alone
      // See nklayman.github.io/vue-cli-plugin-electron-builder/guide/security.html#node-integration for more info
      contextIsolation:false,     //上下文隔离
      enableRemoteModule: true,   //启用远程模块
      nodeIntegration: true, //开启自带node环境
      webviewTag: true,     //开启webview
      webSecurity: false,
      allowDisplayingInsecureContent: true,
      allowRunningInsecureContent: true
    }
  })
  win.maximize()
  win.show()
  win.webContents.openDevTools()
  ipcMain.on('getPrinterList', (event) => {
    //主线程获取打印机列表
    win.webContents.getPrintersAsync().then(data=>{
      win.webContents.send('getPrinterList', data);
    });
    //通过webContents发送事件到渲染线程,同时将打印机列表也传过去

  });

  if (process.env.WEBPACK_DEV_SERVER_URL) {
    // Load the url of the dev server if in development mode
    await win.loadURL(process.env.WEBPACK_DEV_SERVER_URL)
    if (!process.env.IS_TEST) win.webContents.openDevTools()
  } else {
    createProtocol('app')
    // Load the index.html when not in development
    win.loadURL('app://./index.html')


  }
}

// Quit when all windows are closed.
app.on('window-all-closed', () => {
  // On macOS it is common for applications and their menu bar
  // to stay active until the user quits explicitly with Cmd + Q
  if (process.platform !== 'darwin') {
    app.quit()
  }
})

app.on('activate', () => {
  // On macOS it's common to re-create a window in the app when the
  // dock icon is clicked and there are no other windows open.
  if (BrowserWindow.getAllWindows().length === 0) createWindow()
})

// This method will be called when Electron has finished
// initialization and is ready to create browser windows.
// Some APIs can only be used after this event occurs.
app.on('ready', async () => {
  Store.initRenderer();
  if (isDevelopment && !process.env.IS_TEST) {
    // Install Vue Devtools
    try {
      await installExtension(VUEJS_DEVTOOLS)
    } catch (e) {
      console.error('Vue Devtools failed to install:', e.toString())
    }
  }
  createWindow()
})

// Exit cleanly on request from parent process in development mode.
if (isDevelopment) {

  if (process.platform === 'win32') {
    process.on('message', (data) => {
      if (data === 'graceful-exit') {
        app.quit()
      }
    })
  } else {
    process.on('SIGTERM', () => {
      app.quit()
    })
  }
}
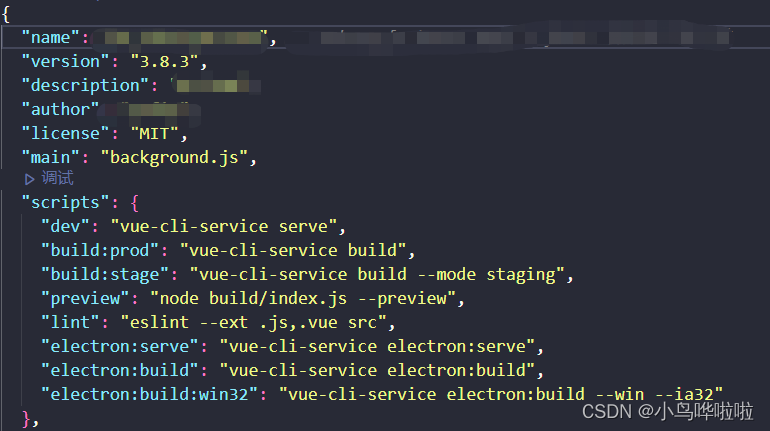
package.json中新增指令、引入electron配置文件
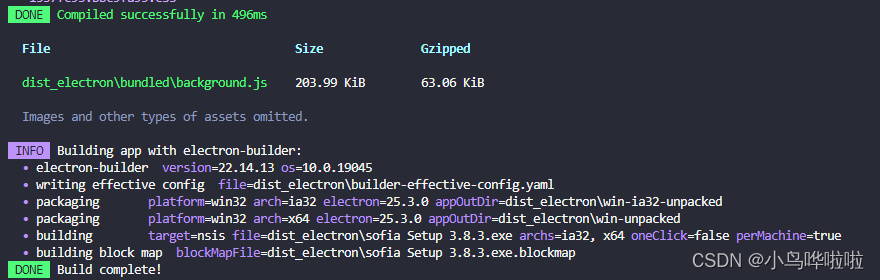
4.测试打包
npm run electron:build![]()
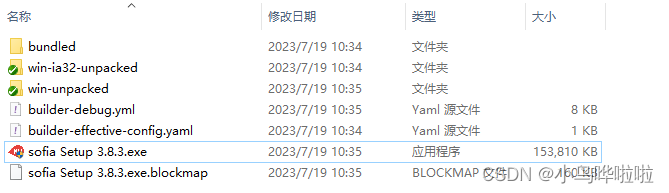
项目会新增文件夹,dist_electron,先把它加入.gitignore中,进入文件夹:

exe文件就是应用程序,收工...
补一张最后的成果图
接下来,会继续单开一篇文章,学习记录一下electron的打包配置,bye~


 6596
6596


 被折叠的 条评论
为什么被折叠?
被折叠的 条评论
为什么被折叠?
 到【灌水乐园】发言


