


原文链接:http://cyrilmottier.com/2013/05/24/pushing-the-actionbar-to-the-next-level/
英文好直接戳原文哈。
先上效果图:


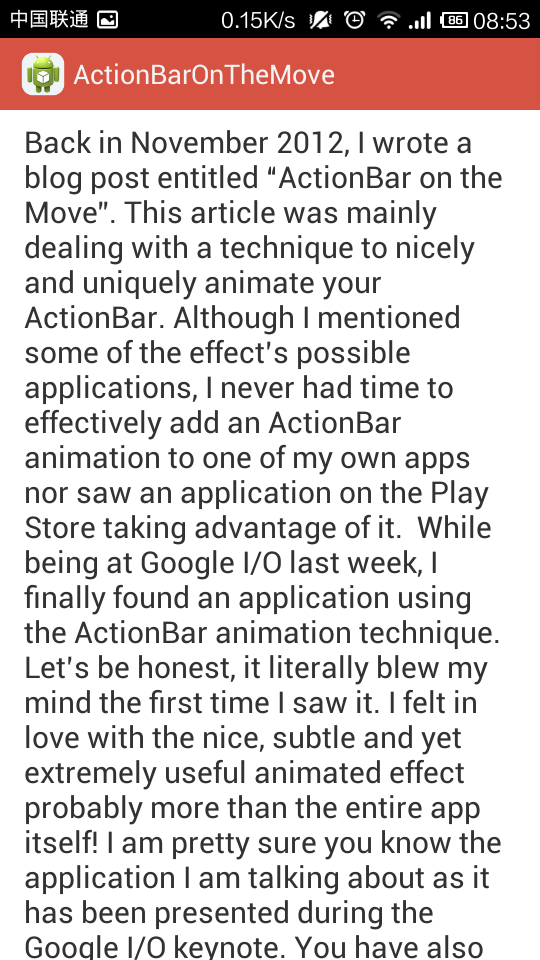
ActionBar开始是完全透明的,然后随着页面往下,开始逐渐变红,当图片完全不可见的时候,ActionBar变得完全不透明。
为ActionBar提供动画有这么两个好处:
1.为你的UI添加一些生气与活力:ActionBar的动画是跟用户的操作同步的,这往往会更吸引用户,因为这让用户觉得更自然,更像是在跟自己交互。在这一点上这个颜色渐变的动画完胜只预先加载一次的动画。
2.充分发挥屏幕的优势:这个效果让用户去注意内容而不是操作。
下面我们详细讲解一下如何实现这个炫酷的效果,源码放这了,就是这么任性!!!
链接: http://pan.baidu.com/s/1sjQACCd 密码: w6cm
主题样式的配置
在res/values下新建一个资源文件名为themes.xml,打开它,添加下面这些代码,不要粘贴答应我好吗:)
<?xml version="1.0" encoding="utf-8"?>
<resources>

    <style name="Theme.TranslucentActionBar" parent="android:Theme.Holo.Light.DarkActionBar">
        <item name="android:actionBarStyle">@style/Widget.ActionBar</item>
    </style>

    <style name="Theme.TranslucentActionBar.ActionBar"/>

    <style name="Theme.TranslucentActionBar.ActionBar.Overlay">
        <item name="android:actionBarStyle">@style/Widget.ActionBar.Transparent</item>
        <item name="android:windowActionBarOverlay">true</item>
    </style>

</resources>
接下来编辑styles.xml,添加下面的代码:
<?xml version="1.0" encoding="utf-8"?>
<resources>
    <style name="Widget.ActionBar" parent="@android:style/Widget.Holo.Light.ActionBar.Solid.Inverse">
        <item name="android:background">@drawable/ab_background</item>
    </style>

    <style name="Widget.ActionBar.Transparent">
        <item name="android:background">@android:color/transparent</item>
    </style>
</resources>
ab_background就是一张纯色背景图而已,你也可以在源码包里找到。transparent,透明咯。配置actionBar的style一定记得添加parent属性。
样式文件妥妥哒,现在我们就去配置一下AndroidManifest.xml
<?xml version="1.0" encoding="utf-8"?>
<manifest xmlns:android="http://schemas.android.com/apk/res/android"
    package="com.zhuhean.actionbaronthemove" >

    <application
        android:allowBackup="true"
        android:icon="@drawable/ic_launcher"
        android:label="@string/app_name"
        android:theme="@style/Theme.TranslucentActionBar" >
        <activity
            android:name=".MainActivity"
            android:label="@string/app_name"
            android:theme="@style/Theme.TranslucentActionBar.ActionBar.Overlay">
            <intent-filter>
                <action android:name="android.intent.action.MAIN" />

                <category android:name="android.intent.category.LAUNCHER" />
            </intent-filter>
        </activity>
    </application>

</manifest>
要修改的其实就俩处,把application里的theme设成Theme.TranslucentActionBar,把activity的theme配置成Theme.TranslucentActionBar.ActionBar.Overlay。
定制自己的ScrollView
既然是滑动改变效果肯定要有一个可以滑动的容器咯,你第一个想到的肯定是ScrollView,但ScrollView有一个该死的缺点,你并不能为它注册监听滑动状态的监听器。怎么办,天啦撸我的生涯一片无悔,到底该怎么办。于是你哭了很久最后决定自己继承ScrollView来实现。
在你的java文件所在的那个包,新建一个文件,起个霸气的名字,比如说,XuanKuWuBiDeScrollView.java,不过我这里的名字叫NotifyingScrollView.java辣,然后添加下面这些代码,再复制粘贴打手了啊。
import android.content.Context;
import android.util.AttributeSet;
import android.widget.ScrollView;

public class NotifyingScrollView extends ScrollView {

    public interface OnScrollChangedListener{
        void OnScrollChanged(ScrollView who,int l,int t,int oldl,int oldt);
    }

    private OnScrollChangedListener onScrollChangedListener;

    public NotifyingScrollView(Context context) {
        super(context);
    }

    public NotifyingScrollView(Context context,AttributeSet attributeSet){
        super(context,attributeSet);
    }

    public NotifyingScrollView(Context context,AttributeSet attributeSet,int defStyle){
        super(context,attributeSet,defStyle);
    }

    @Override
    protected void onScrollChanged(int l, int t, int oldl, int oldt) {
        super.onScrollChanged(l, t, oldl, oldt);
        if(onScrollChangedListener!=null){
            onScrollChangedListener.OnScrollChanged(this,l,t,oldl,oldt);
        }
    }

    public void setOnScrollChangedListener(OnScrollChangedListener onScrollChangedListener){
        this.onScrollChangedListener=onScrollChangedListener;
    }
}
很简单对不对,定义了一个内部的接口,几个构造函数,重写了ScrollView得onScrollChanged()方法,最后添加了一个用来给ScrollView注册滑动监听器的方法setOnScrollChangedListener()。
然后就可以愉快的在xml文件中使用自己定义的ScrollView了,打开activity_main.xml,添加下面的代码:
<com.zhuhean.actionbaronthemove.NotifyingScrollView xmlns:android="http://schemas.android.com/apk/res/android"
    android:layout_width="match_parent"
    android:layout_height="match_parent"
    android:id="@+id/scroll_view">

    <LinearLayout
        android:layout_width="match_parent"
        android:layout_height="wrap_content"
        android:orientation="vertical">

        <ImageView
            android:layout_width="match_parent"
            android:layout_height="350dp"
            android:scaleType="centerCrop"
            android:background="@drawable/bg"
            android:id="@+id/images"/>

        <TextView
            android:layout_width="match_parent"
            android:layout_height="wrap_content"
            android:padding="16dp"
            android:textSize="20sp"
            android:background="#fff"
            android:text="@string/text"/>

    </LinearLayout>

</com.zhuhean.actionbaronthemove.NotifyingScrollView>
顺便提一下xmlns:android="http://schemas.android.com/apk/res/android",xmlns在XML文件中代表声明了一个命名空间, http://schemas.android.com/apk/res/android表示一个URI( Uniform Resource Identifier ),就相当于java中的包名一样,用来标志文件的独一无二,还可以用来给XML解析器提供信息。
ActionBar动画的具体实现
这已经是最后一步了。实现ActionBar动画效果的算法其实很简单的,只是根据当前ScrollView的滑动状态不断地计算alpha的值,但注意有效的动画发生区间必须设置在[0,图片高度与ActionBar高度之差],避免由于我们自定义了ScrollView而产生些奇怪的值。
打开MainActivity.java,添加下列代码:
import android.app.Activity;
import android.graphics.drawable.Drawable;
import android.os.Bundle;
import android.widget.ScrollView;


public class MainActivity extends Activity {
    private Drawable actionBarbackgroundDrawable;

    @Override
    protected void onCreate(Bundle savedInstanceState) {
        super.onCreate(savedInstanceState);
        setContentView(R.layout.activity_main);
        actionBarbackgroundDrawable=getResources().getDrawable(R.drawable.ab_background);
        actionBarbackgroundDrawable.setAlpha(0);

        getActionBar().setBackgroundDrawable(actionBarbackgroundDrawable);
        ((NotifyingScrollView)findViewById(R.id.scroll_view)).setOnScrollChangedListener(onScrollChangedListener);
    }

    private NotifyingScrollView.OnScrollChangedListener onScrollChangedListener=new NotifyingScrollView.OnScrollChangedListener(){
        @Override
        public void OnScrollChanged(ScrollView who, int l, int t, int oldl, int oldt) {
            final int headerHeight=findViewById(R.id.images).getHeight()-getActionBar().getHeight();
            final float ratio=(float) Math.min(Math.max(t, 0), headerHeight) / headerHeight;
            final int newAlpha=(int)(ratio*255);
            actionBarbackgroundDrawable.setAlpha(newAlpha);
        }
    };
}
动画的算法在OnScrollChanged()方法中实现。找到ScrollView为它设置一个OnScrollChangedListener()即可。
现在赶快运行一下试试。
小手一抖,可激动了,什么,不可以吗!!!??(如果成功了的就赶快截图发到朋友圈,如果没有成功的壮士请留下来继续。。。)
是不是你的minSDK在Jelly Bean之前,如果是的话,请按下面这样做:
在MainActivity.java中继续添加:
private Drawable.Callback mDrawableCallback = new Drawable.Callback() {
    @Override
    public void invalidateDrawable(Drawable who) {
        getActionBar().setBackgroundDrawable(who);
    }

    @Override
    public void scheduleDrawable(Drawable who, Runnable what, long when) {
    }

    @Override
    public void unscheduleDrawable(Drawable who, Runnable what) {
    }
};
onCreate()方法中:
if (Build.VERSION.SDK_INT < Build.VERSION_CODES.JELLY_BEAN_MR1) {
    actionBarBackgroundDrawable.setCallback(mDrawableCallback);
}
把一个CallBack注册给actionBarBackgroundDrawable,因为在那版本之前如果不注册一个回调机制ActionBar根本不能更新自己。
好了。有没有感觉自己萌萌打!!!


 377
377

 被折叠的 条评论
为什么被折叠?
被折叠的 条评论
为什么被折叠?
 到【灌水乐园】发言


