


一、目的:centos 新增磁盘空间
1. 查看磁盘空间
[root@localhost ~]# df -h
文件系统                 容量  已用  可用 已用% 挂载点
/dev/mapper/centos-root   17G   17G  152M  100% /
devtmpfs                 898M     0  898M    0% /dev
tmpfs                    910M     0  910M    0% /dev/shm
tmpfs                    910M  9.5M  901M    2% /run
tmpfs                    910M     0  910M    0% /sys/fs/cgroup
/dev/sda1               1014M  146M  869M   15% /boot
tmpfs                    182M     0  182M    0% /run/user/0

[root@localhost ~]# fdisk -l

磁盘 /dev/sda:21.5 GB, 21474836480 字节,41943040 个扇区
Units = 扇区 of 1 * 512 = 512 bytes
扇区大小(逻辑/物理):512 字节 / 512 字节
I/O 大小(最小/最佳):512 字节 / 512 字节
磁盘标签类型:dos
磁盘标识符:0x0009bfaa

   设备 Boot      Start         End      Blocks   Id  System
/dev/sda1   *        2048     2099199     1048576   83  Linux
/dev/sda2         2099200    41943039    19921920   8e  Linux LVM

磁盘 /dev/mapper/centos-root:18.2 GB, 18249416704 字节,35643392 个扇区
Units = 扇区 of 1 * 512 = 512 bytes
扇区大小(逻辑/物理):512 字节 / 512 字节
I/O 大小(最小/最佳):512 字节 / 512 字节


磁盘 /dev/mapper/centos-swap:2147 MB, 2147483648 字节,4194304 个扇区
Units = 扇区 of 1 * 512 = 512 bytes
扇区大小(逻辑/物理):512 字节 / 512 字节
I/O 大小(最小/最佳):512 字节 / 512 字节
/dev/mapper/centos-root 已用100%,我们的目的就是拓展它的磁盘空间
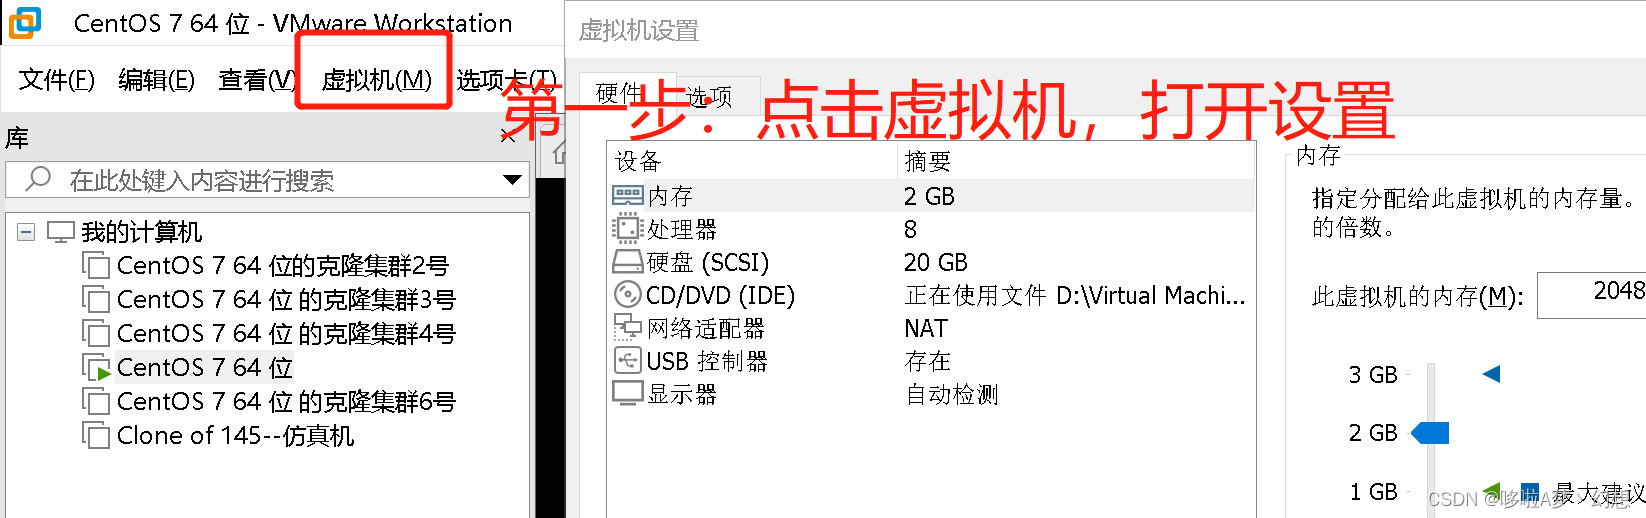
2. 给虚拟机新增磁盘
这会扩容会空间不足,所以要先新增磁盘
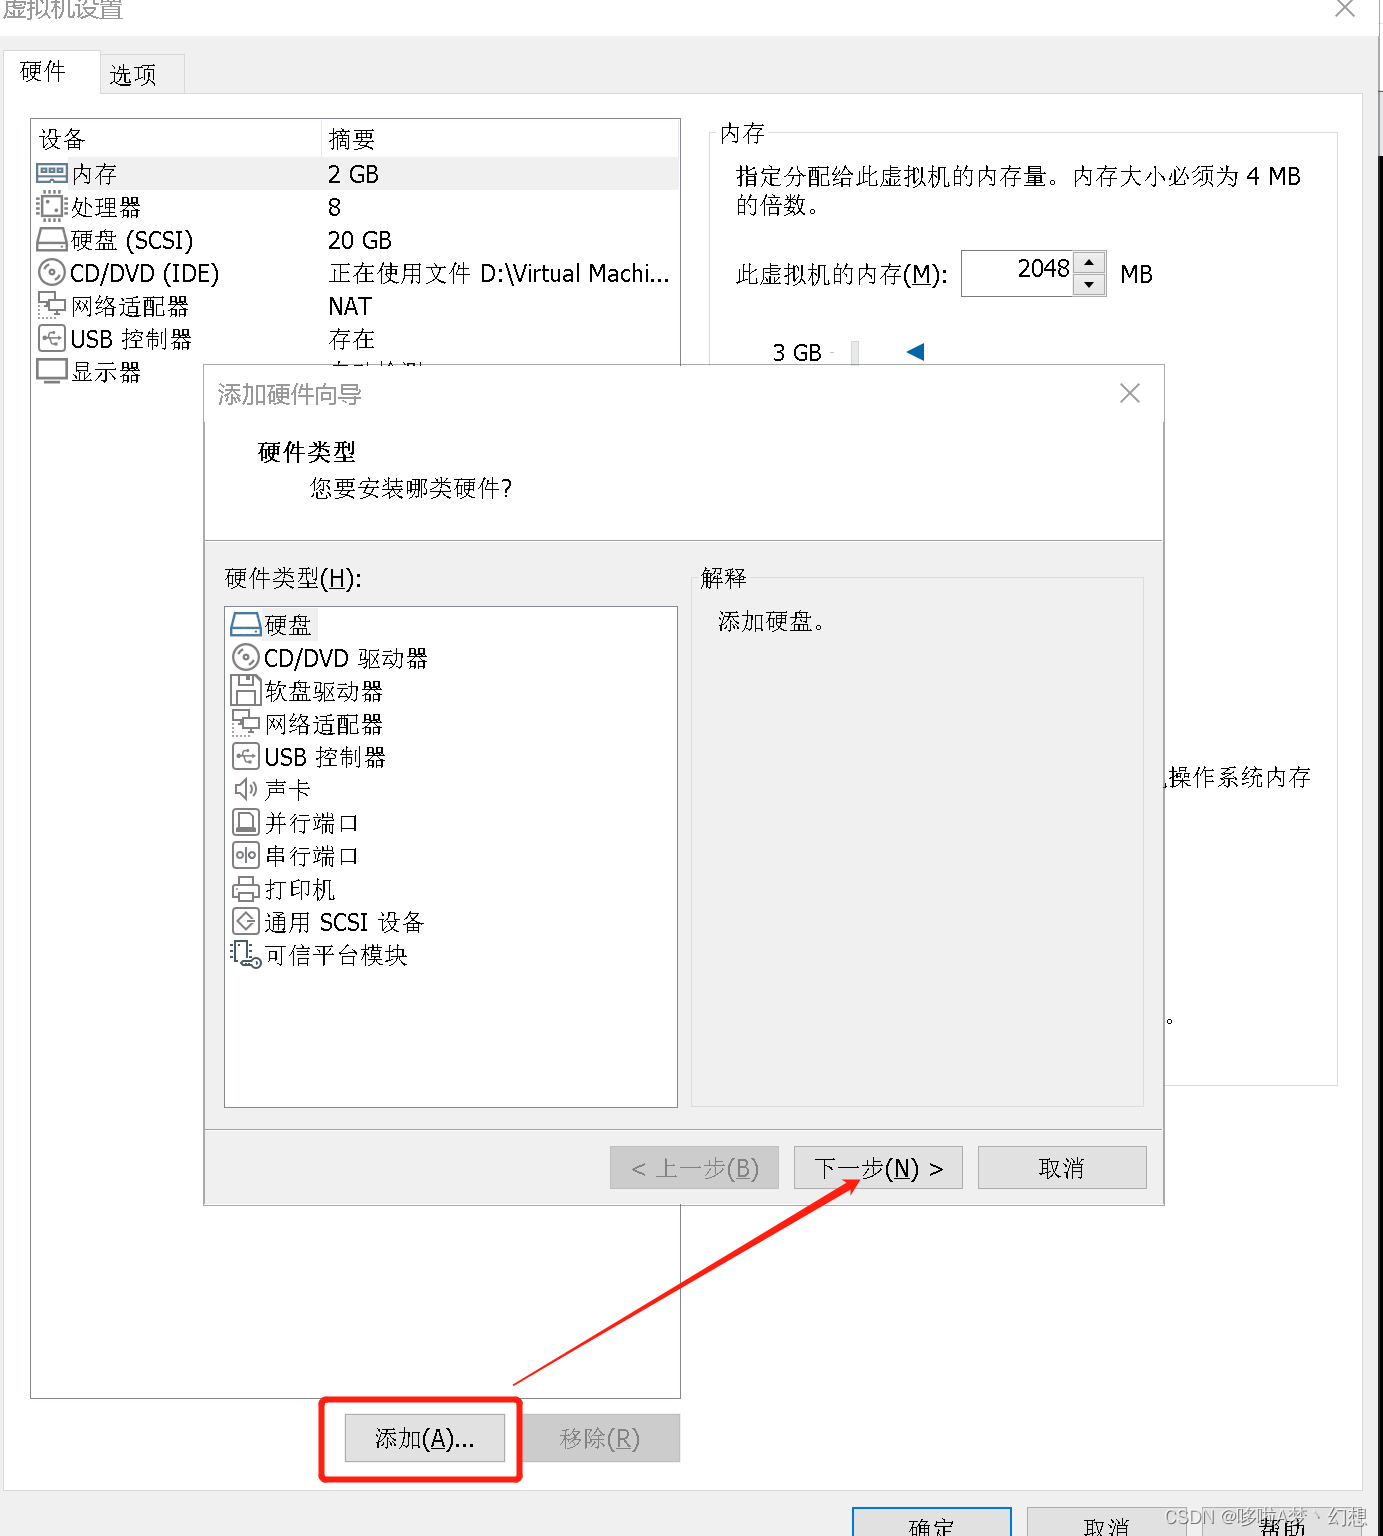
操作顺序是: 点击虚拟机,打开设置 >> 点击添加 >> 选择添加的硬件类型为:硬盘 >> 下一步 >> 选择磁盘类型: SCSI >> 下一步 >> 选择创建新虚拟磁盘 >> 设置磁盘大小 >> 下一步 >> 添加硬件向导 >> 完成 >> 确认
选择添加的硬件类型为:硬盘
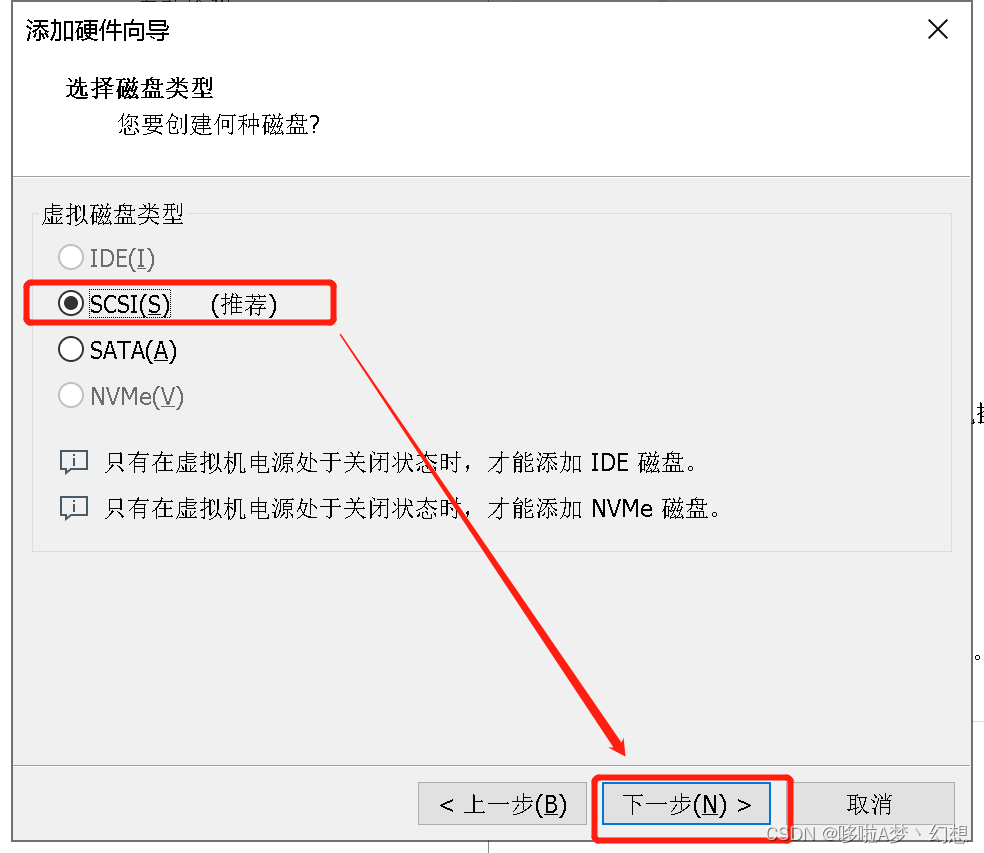
选择磁盘类型: SCSI
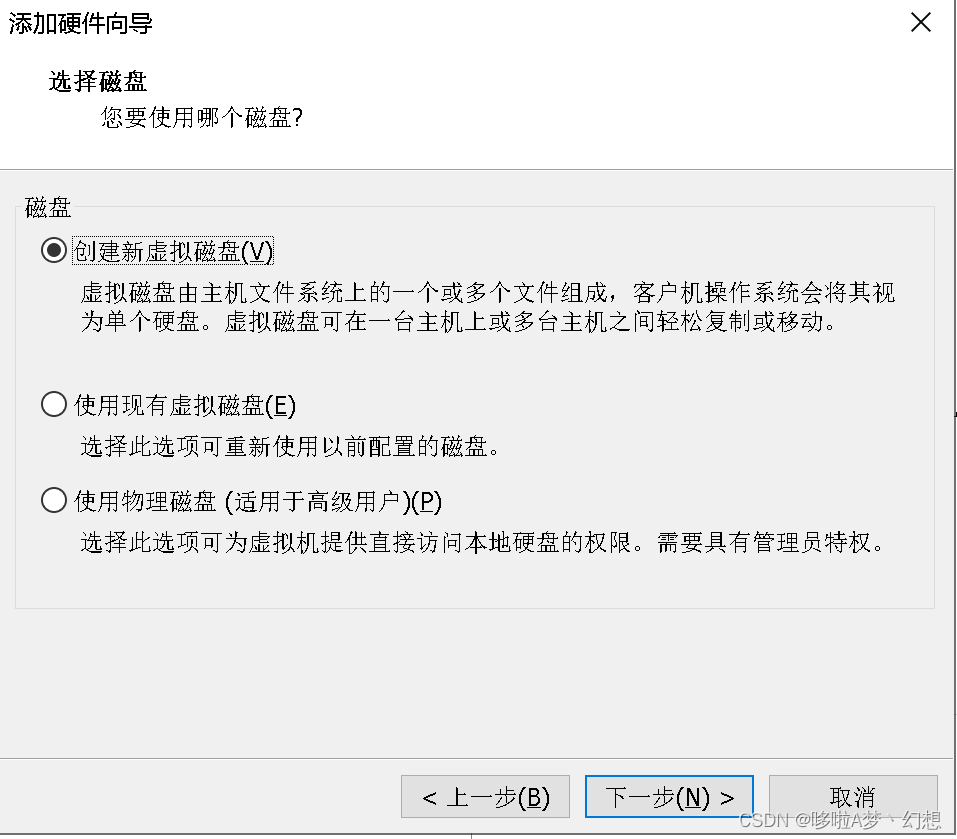
选择创建新虚拟磁盘
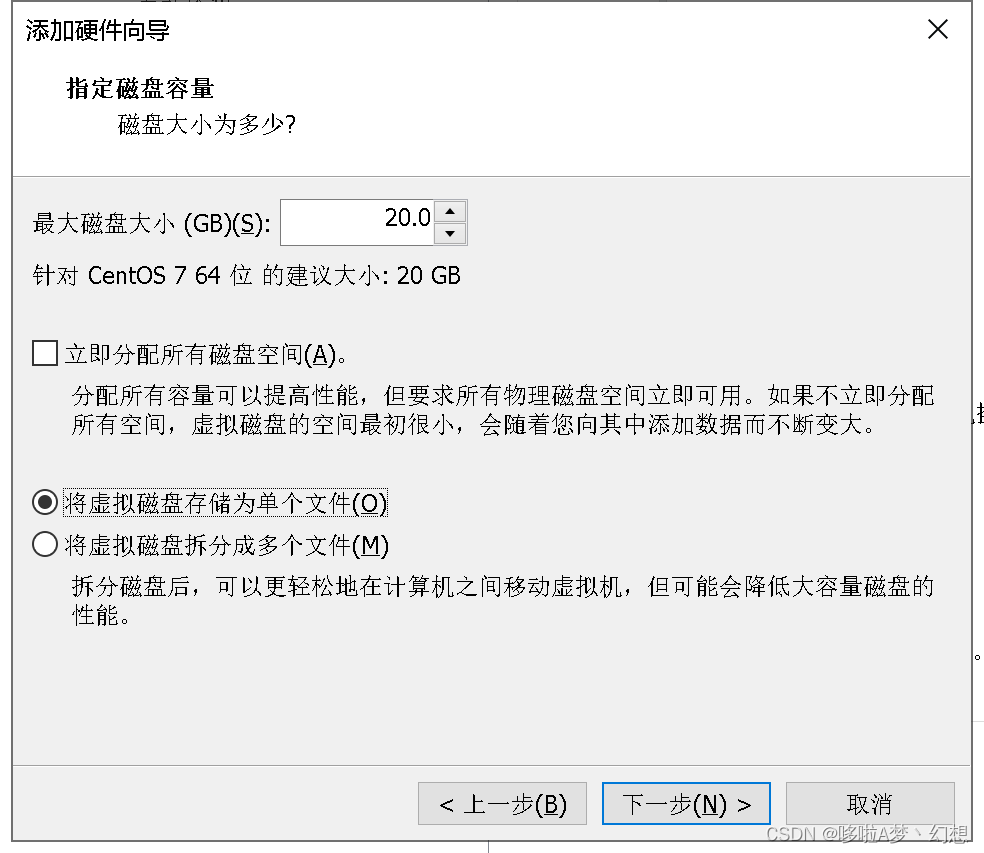
设置磁盘大小
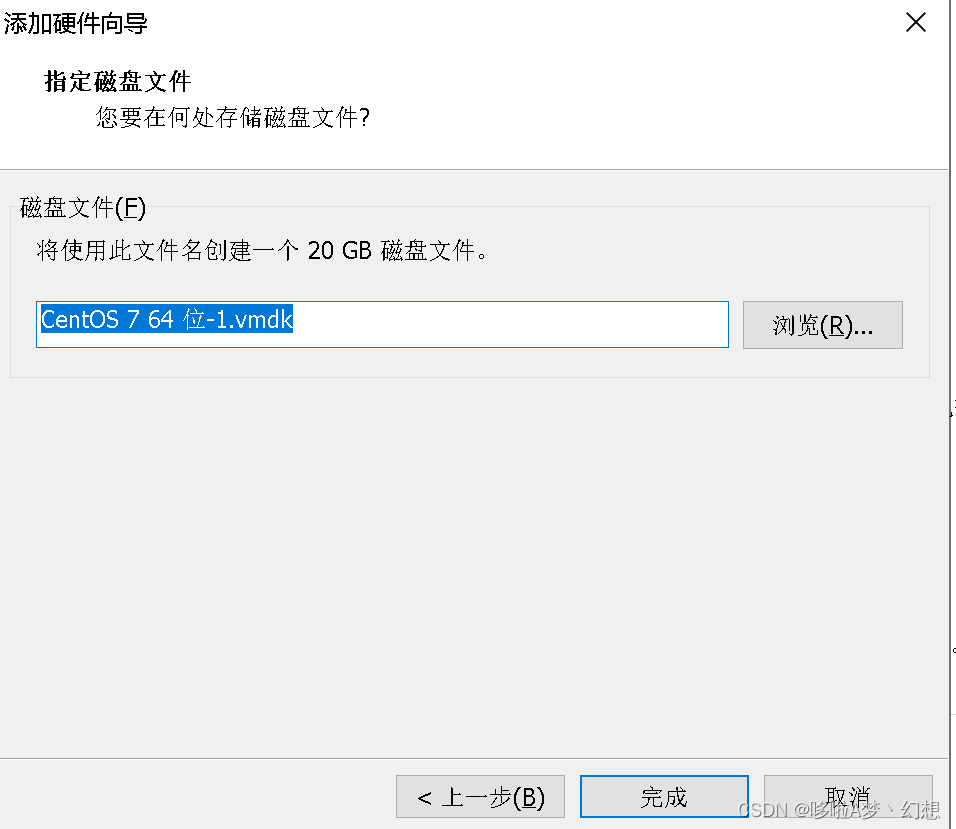
添加硬件导向:
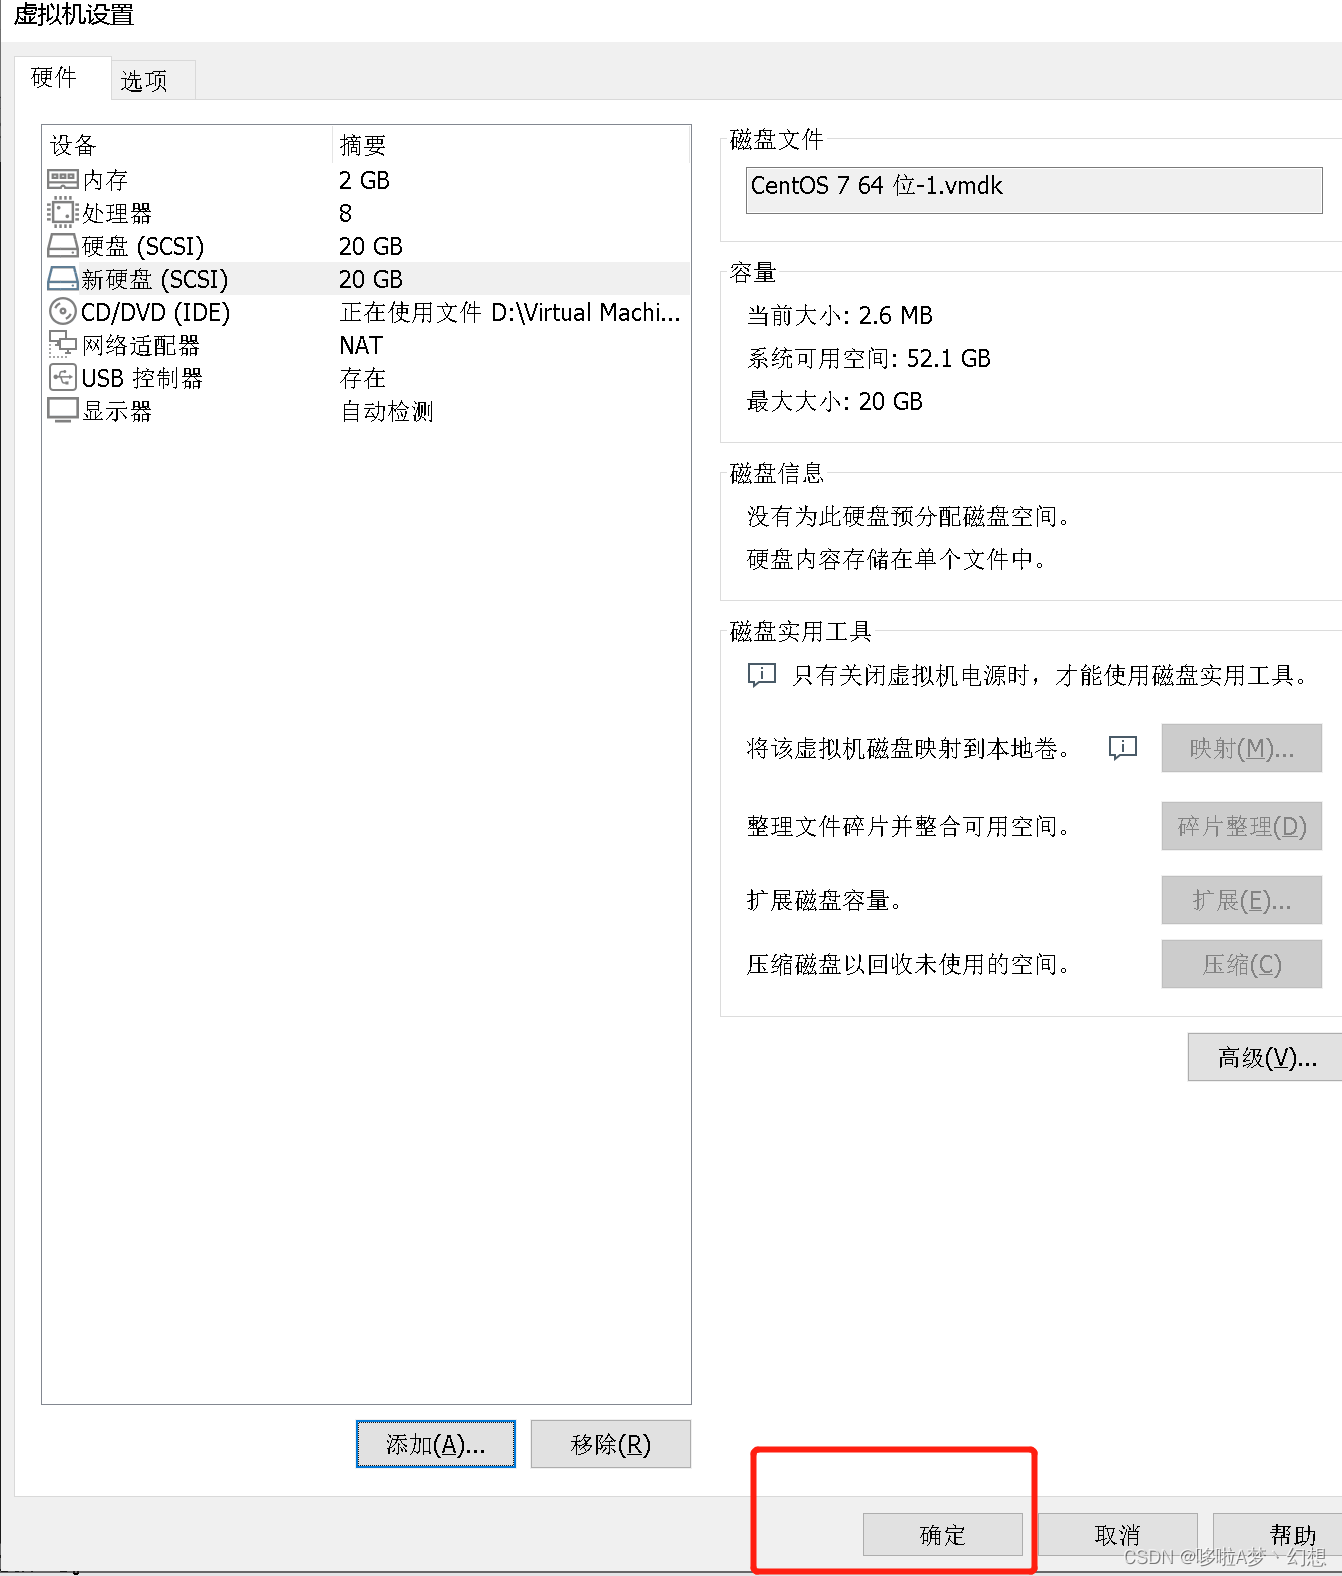
保存设置:
二、增加磁盘空间
1. 重新查看磁盘空间
[root@localhost ~]# df -h
文件系统                 容量  已用  可用 已用% 挂载点
/dev/mapper/centos-root   17G   17G  176M   99% /
devtmpfs                 898M     0  898M    0% /dev
tmpfs                    910M     0  910M    0% /dev/shm
tmpfs                    910M  9.6M  901M    2% /run
tmpfs                    910M     0  910M    0% /sys/fs/cgroup
/dev/sda1               1014M  146M  869M   15% /boot
tmpfs                    182M     0  182M    0% /run/user/0
[root@localhost ~]# fdisk -l

磁盘 /dev/sda:21.5 GB, 21474836480 字节,41943040 个扇区
Units = 扇区 of 1 * 512 = 512 bytes
扇区大小(逻辑/物理):512 字节 / 512 字节
I/O 大小(最小/最佳):512 字节 / 512 字节
磁盘标签类型:dos
磁盘标识符:0x0009bfaa

   设备 Boot      Start         End      Blocks   Id  System
/dev/sda1   *        2048     2099199     1048576   83  Linux
/dev/sda2         2099200    41943039    19921920   8e  Linux LVM

磁盘 /dev/sdb:21.5 GB, 21474836480 字节,41943040 个扇区
Units = 扇区 of 1 * 512 = 512 bytes
扇区大小(逻辑/物理):512 字节 / 512 字节
I/O 大小(最小/最佳):512 字节 / 512 字节


磁盘 /dev/mapper/centos-root:18.2 GB, 18249416704 字节,35643392 个扇区
Units = 扇区 of 1 * 512 = 512 bytes
扇区大小(逻辑/物理):512 字节 / 512 字节
I/O 大小(最小/最佳):512 字节 / 512 字节


磁盘 /dev/mapper/centos-swap:2147 MB, 2147483648 字节,4194304 个扇区
Units = 扇区 of 1 * 512 = 512 bytes
扇区大小(逻辑/物理):512 字节 / 512 字节
I/O 大小(最小/最佳):512 字节 / 512 字节
通过对比之前的,我们能得知/dev/sdb 是新增的磁盘空间,然后我们接下来的操作就是把/dev/sdb加入/dev/mapper/centos-root中
[root@localhost ~]# fdisk /dev/sdb
欢迎使用 fdisk (util-linux 2.23.2)。

更改将停留在内存中,直到您决定将更改写入磁盘。
使用写入命令前请三思。

Device does not contain a recognized partition table
使用磁盘标识符 0xf28190a4 创建新的 DOS 磁盘标签。

命令(输入 m 获取帮助):m # 查看操作的意思,类似于--help
命令操作
   a   toggle a bootable flag # 切换可引导标志
   b   edit bsd disklabel # 编辑 BSD 磁盘标签
   c   toggle the dos compatibility flag # 切换 DOS 兼容性标志
   d   delete a partition # 删除分区
   g   create a new empty GPT partition table #创建一个新的空 GPT 分区表
   G   create an IRIX (SGI) partition table # 创建 IRIX (SGI) 分区表列出已知的分区类型
   l   list known partition types # 列出已知的分区类型
   m   print this menu # 打印此菜单
   n   add a new partition # 添加新分区
   o   create a new empty DOS partition table # 创建一个新的空 DOS 分区表
   p   print the partition table # 打印分区表
   q   quit without saving changes # 退出而不保存更改
   s   create a new empty Sun disklabel # 创建一个新的空 Sun 磁盘标签
   t   change a partition's system id # 更改分区的系统 ID
   u   change display/entry units # 更改显示/输入单元
   v   verify the partition table # 验证分区表
   w   write table to disk and exit # 将表写入磁盘并退出
   x   extra functionality (experts only) #  额外功能(仅限专家)

命令(输入 m 获取帮助):n
Partition type:
   p   primary (0 primary, 0 extended, 4 free)
   e   extended
Select (default p): p
分区号 (1-4,默认 1):1
起始 扇区 (2048-41943039,默认为 2048):
将使用默认值 2048
Last 扇区, +扇区 or +size{K,M,G} (2048-41943039,默认为 41943039):
将使用默认值 41943039
分区 1 已设置为 Linux 类型,大小设为 20 GiB

命令(输入 m 获取帮助):t
已选择分区 1
Hex 代码(输入 L 列出所有代码):8e
已将分区“Linux”的类型更改为“Linux LVM”

命令(输入 m 获取帮助):w
The partition table has been altered!

Calling ioctl() to re-read partition table.
正在同步磁盘。
查看新增的分区
[root@localhost ~]# fdisk -l

磁盘 /dev/sda:21.5 GB, 21474836480 字节,41943040 个扇区
Units = 扇区 of 1 * 512 = 512 bytes
扇区大小(逻辑/物理):512 字节 / 512 字节
I/O 大小(最小/最佳):512 字节 / 512 字节
磁盘标签类型:dos
磁盘标识符:0x0009bfaa

   设备 Boot      Start         End      Blocks   Id  System
/dev/sda1   *        2048     2099199     1048576   83  Linux
/dev/sda2         2099200    41943039    19921920   8e  Linux LVM

磁盘 /dev/sdb:21.5 GB, 21474836480 字节,41943040 个扇区
Units = 扇区 of 1 * 512 = 512 bytes
扇区大小(逻辑/物理):512 字节 / 512 字节
I/O 大小(最小/最佳):512 字节 / 512 字节
磁盘标签类型:dos
磁盘标识符:0xf28190a4

   设备 Boot      Start         End      Blocks   Id  System
/dev/sdb1            2048    41943039    20970496   8e  Linux LVM

磁盘 /dev/mapper/centos-root:18.2 GB, 18249416704 字节,35643392 个扇区
Units = 扇区 of 1 * 512 = 512 bytes
扇区大小(逻辑/物理):512 字节 / 512 字节
I/O 大小(最小/最佳):512 字节 / 512 字节


磁盘 /dev/mapper/centos-swap:2147 MB, 2147483648 字节,4194304 个扇区
Units = 扇区 of 1 * 512 = 512 bytes
扇区大小(逻辑/物理):512 字节 / 512 字节
I/O 大小(最小/最佳):512 字节 / 512 字节
根据上面展示内容,我们可得知/dev/sdb1 是我们刚刚创建的新区,然后就是将其设置为物理卷
[root@localhost ~]# pvcreate /dev/sdb1
  Physical volume "/dev/sdb1" successfully created.
设置成功之后,查看我们要增加的逻辑卷名称
[root@localhost ~]# lvdisplay # 查看逻辑卷属性(左边是属性名,右边是属性值)
  --- Logical volume ---
  LV Path                /dev/centos/swap
  LV Name                swap
  VG Name                centos
  LV UUID                1KQ4eK-xiZt-9vzj-Xfyq-KVne-263q-EPo2dj
  LV Write Access        read/write
  LV Creation host, time localhost.localdomain, 2021-12-11 17:45:04 +0800
  LV Status              available
  # open                 2
  LV Size                2.00 GiB
  Current LE             512
  Segments               1
  Allocation             inherit
  Read ahead sectors     auto
  - currently set to     8192
  Block device           253:1

  --- Logical volume ---
  LV Path                /dev/centos/root
  LV Name                root
  VG Name                centos
  LV UUID                0w1131-wFNH-Ceqv-OuNv-ErPF-cFLl-Ta1x2l
  LV Write Access        read/write
  LV Creation host, time localhost.localdomain, 2021-12-11 17:45:04 +0800
  LV Status              available
  # open                 1
  LV Size                <17.00 GiB
  Current LE             4351
  Segments               1
  Allocation             inherit
  Read ahead sectors     auto
  - currently set to     8192
  Block device           253:0
然后将/dev/sdb1加入LV Name为centos的逻辑卷中
[root@localhost ~]# vgextend centos /dev/sdb1 # 扩展卷组设备
  Volume group "centos" successfully extended
[root@localhost ~]# lvextend /dev/centos/root /dev/sdb1 # 扩展逻辑卷设备
  Size of logical volume centos/root changed from <17.00 GiB (4351 extents) to 36.99 GiB (9470 extents).
  Logical volume centos/root successfully resized.
加入成功之后,查看文件系统类型,然后将其挂载到文件系统上
[root@localhost ~]# lsblk -f #查看文件类型
NAME            FSTYPE   LABEL    UUID                                   MOUNTPOINT
sda
├─sda1          xfs               e41d51c0-3c60-4772-9278-e58d02b5d713   /boot
└─sda2          LVM2_mem          z0Blr3-1jlB-o1e6-UdNe-hS5h-XY2n-3j9fT1
  ├─centos-root xfs               c3ad0c62-b504-486f-9a32-dc82c1890d93   /
  └─centos-swap swap              c6f5b7f7-6b11-40e9-8994-4cb3cb03bf2c   [SWAP]
sdb
└─sdb1          LVM2_mem          9Tj5vm-c1Vq-3d1K-UhqD-XfHs-hALT-va0OVC
  └─centos-root xfs               c3ad0c62-b504-486f-9a32-dc82c1890d93   /
sr0             iso9660  CentOS 7 x86_64
                                  2018-11-25-23-54-16-00
这里我们可以看到,我们要拓展的分区文件系统类型为xfs,接下来就是将其挂载到上面
[root@localhost ~]# xfs_growfs /dev/centos/root
meta-data=/dev/mapper/centos-root isize=512    agcount=4, agsize=1113856 blks
         =                       sectsz=512   attr=2, projid32bit=1
         =                       crc=1        finobt=0 spinodes=0
data     =                       bsize=4096   blocks=4455424, imaxpct=25
         =                       sunit=0      swidth=0 blks
naming   =version 2              bsize=4096   ascii-ci=0 ftype=1
log      =internal               bsize=4096   blocks=2560, version=2
         =                       sectsz=512   sunit=0 blks, lazy-count=1
realtime =none                   extsz=4096   blocks=0, rtextents=0
data blocks changed from 4455424 to 9697280

[root@localhost ~]# df -h # 查看是否扩容成功
文件系统                 容量  已用  可用 已用% 挂载点
/dev/mapper/centos-root   37G   17G   21G   46% /
devtmpfs                 898M     0  898M    0% /dev
tmpfs                    910M     0  910M    0% /dev/shm
tmpfs                    910M  9.6M  901M    2% /run
tmpfs                    910M     0  910M    0% /sys/fs/cgroup
/dev/sda1               1014M  146M  869M   15% /boot
tmpfs                    182M     0  182M    0% /run/user/0
ok,搞定


 6381
6381


 被折叠的 条评论
为什么被折叠?
被折叠的 条评论
为什么被折叠?
 到【灌水乐园】发言


